Texture Fit
Note: This plug-in is located in: Plugins -> Container plug-ins -> Tools
Compatibility: V3 Classic, V4 PBR Category: Tools
Overview

The Texture Fit plug-in provides advanced control over how textures (images) are displayed on a container. It automatically adjusts UV coordinates so that a texture maps correctly onto a container regardless of the container's dimensions or aspect ratio.
This is especially useful in adaptive / multi-format workflows where the same scene is rendered in different aspect ratios (e.g., 16:9 landscape and 9:16 portrait). Texture Fit ensures that images always look correct without manual UV adjustments.
Prerequisites
Texture Fit requires the following setup on the container:
Requirement | Why |
|---|---|
Box Transformation mode | Texture Fit reads the container's pixel-based width and height. It does not work with 3D Transformation. |
Flexbox plug-in | Flexbox computes the actual box layout dimensions that Texture Fit reads. Without Flexbox, the container has no calculated box size. |
Geometry (e.g., Rectangle) | A renderable geometry is needed to display the texture. |
Material with a Texture | A Phong or PBR material definition with an assigned texture (base color slot). Texture Fit modifies the UV scale/offset on this material. |
Setup Guide — Using Texture Fit with Box Transformation and Flexbox
Step 1: Enable Box Transformation
Select the container and switch from 3D Transformation to Box Transformation in the transformation panel. This gives the container pixel-based width and height properties instead of 3D position/rotation/scale.
Step 2: Add a Flexbox Plug-in
Add the Flexbox plug-in to the container (or a parent container). Flexbox calculates the layout box dimensions based on the container hierarchy. Texture Fit depends on these calculated dimensions to determine the container's aspect ratio.
Step 3: Add Geometry and Material
Assign a Rectangle geometry (or another suitable 2D geometry) to the container.
Add a Phong or PBR material definition.
Assign a texture (image) to the material's base color slot.
Step 4: Add Texture Fit
Add the Texture Fit plug-in to the container's function stack.
Important — Plug-in Order:Texture Fit must appearafterFlexbox in the function stack. Flexbox needs to compute the box dimensions first; Texture Fit then reads those dimensions to calculate the correct UV mapping. If the order is reversed, Texture Fit may read stale or zero-sized box values.
Step 5: Choose a Mapping Method
Select one of the three mapping methods depending on your use case:
Method | Best For | Behaviour | |
|---|---|---|---|
Contains | Showing the full image without cropping | The entire image is visible inside the container. Empty space (letterbox/pillarbox bars) may appear if the aspect ratios don't match. | 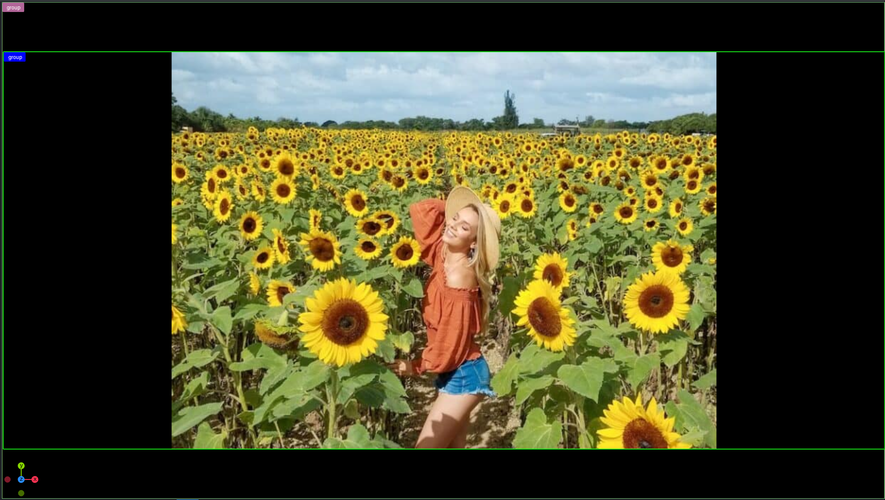 |
Cover | Filling the container completely | The image fills the entire container with no empty space. Parts of the image may be cropped if the aspect ratios differ. | 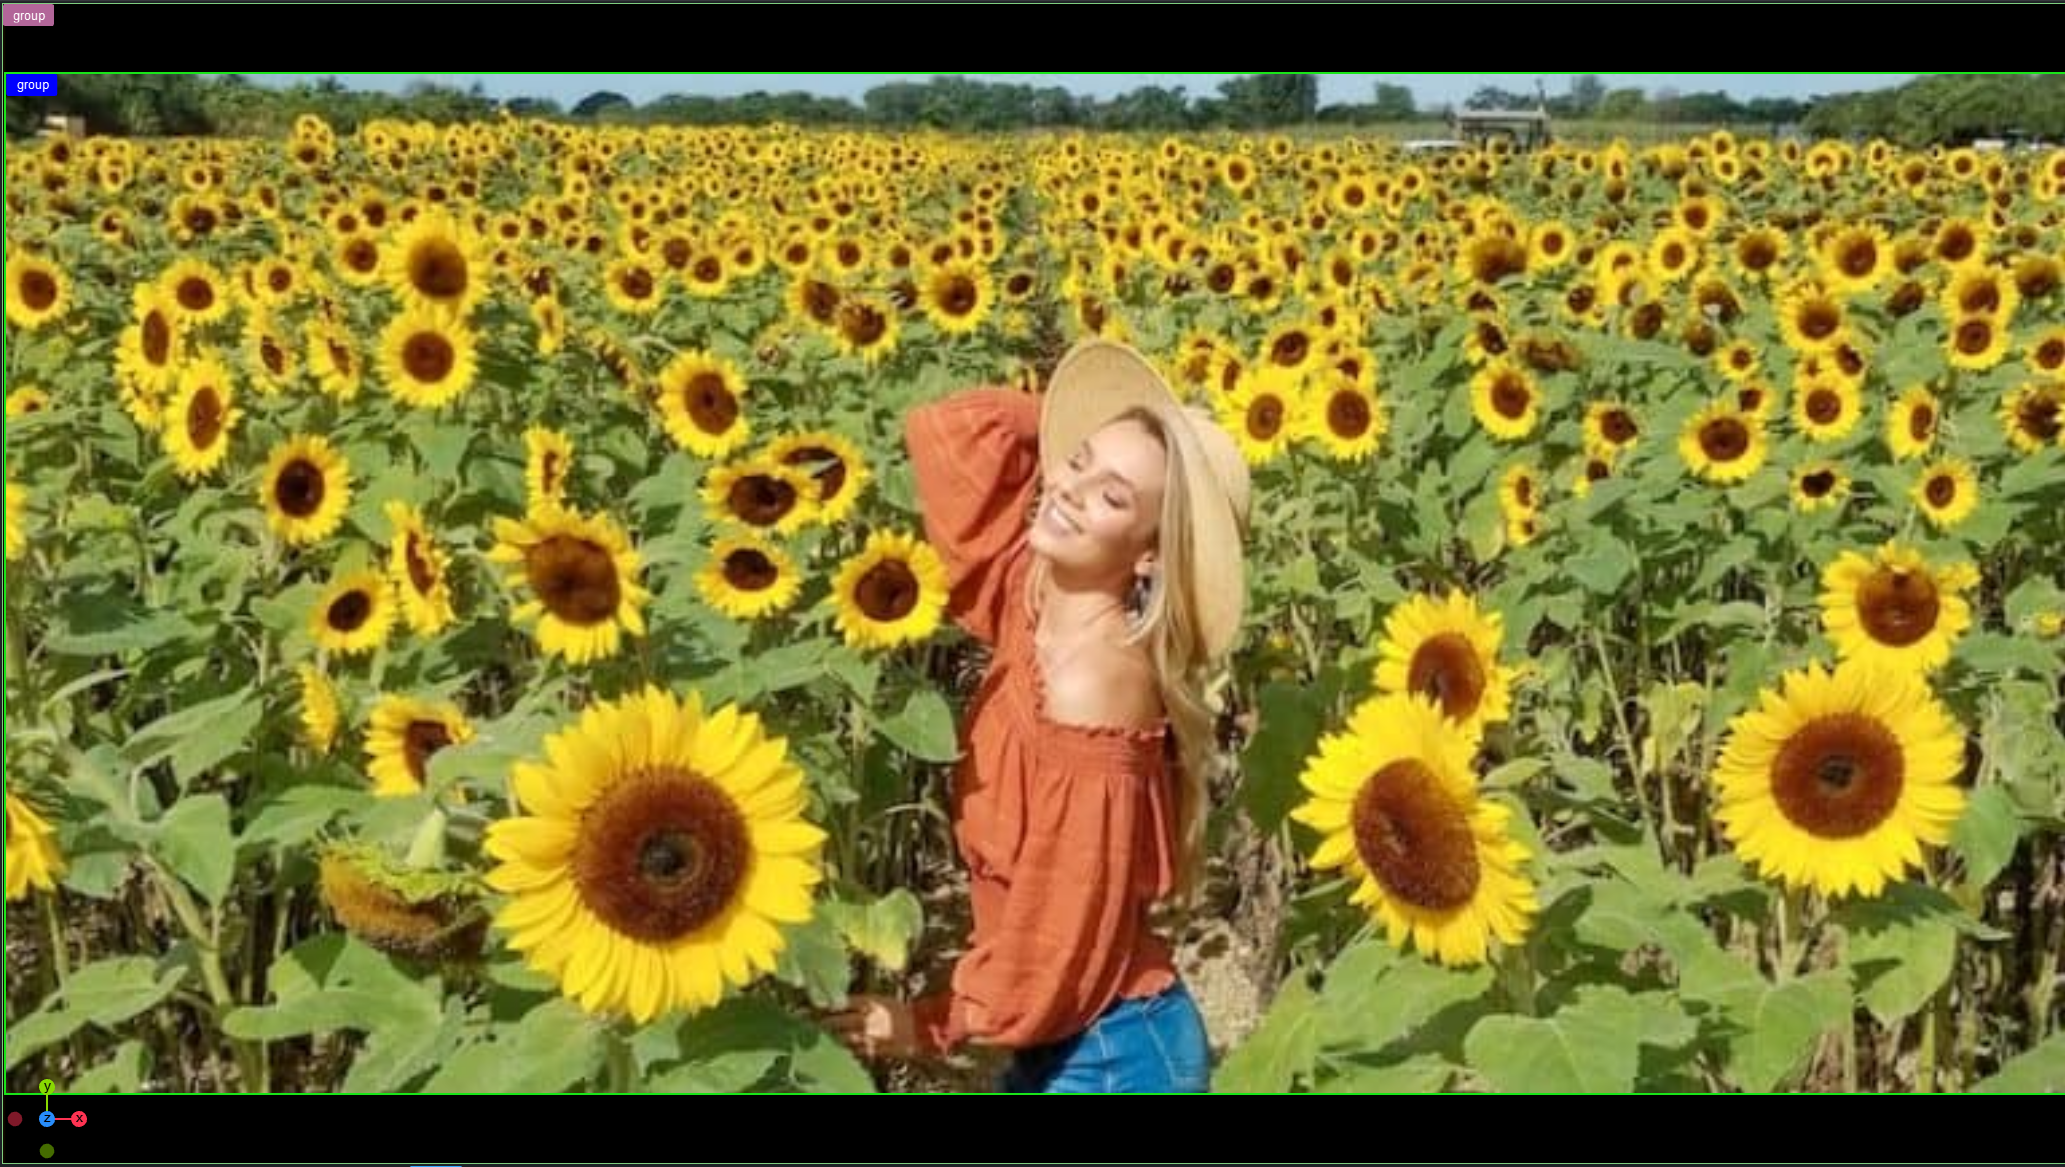 |
Region of Interest | Guaranteeing a specific area is always visible | A user-defined rectangle (normalized 0–1 coordinates) is always visible. Other parts of the image are cropped as needed when the container changes size. | 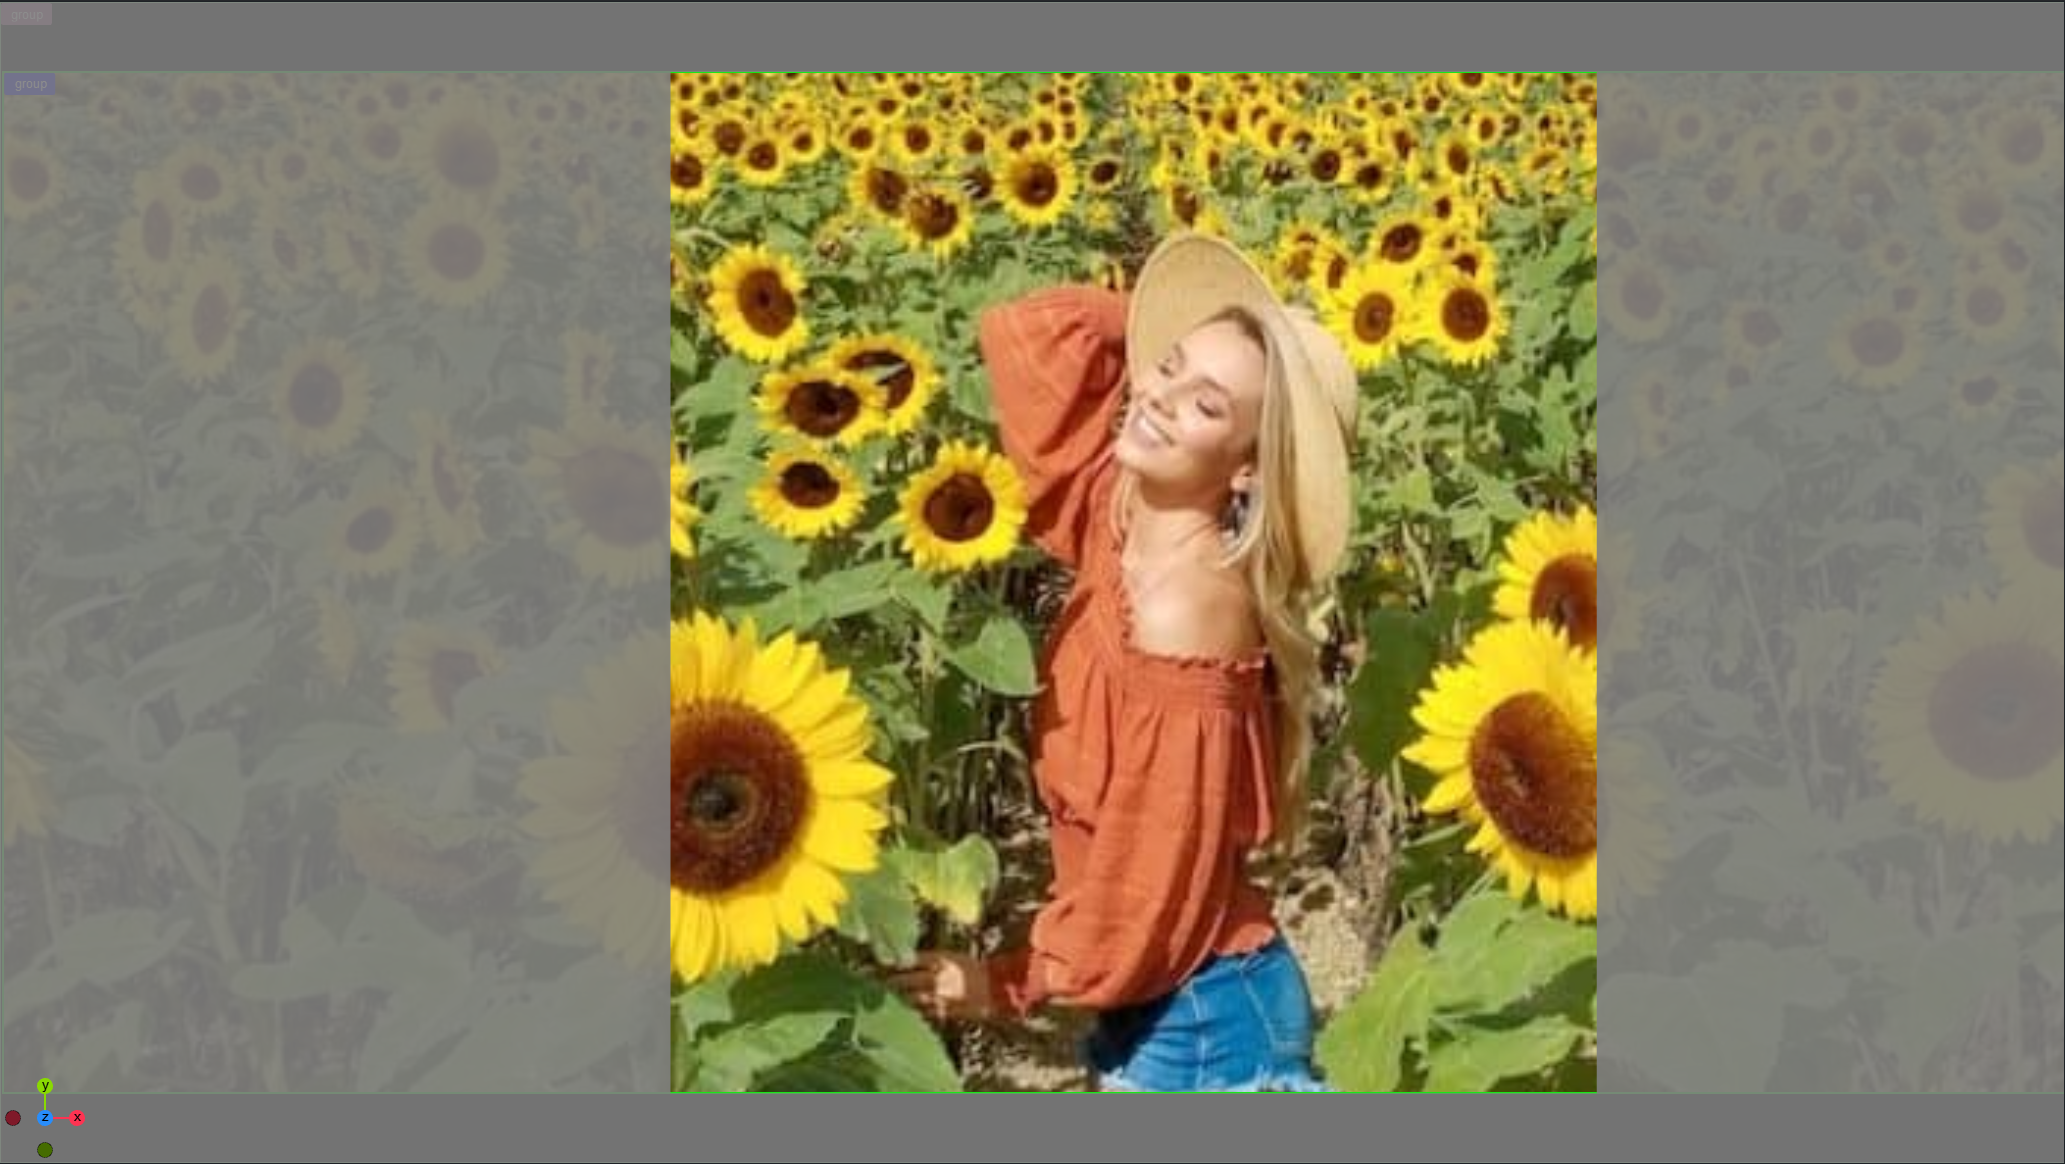 |
Parameters
Texture Size Mode
Value | Description |
|---|---|
auto (default) | Reads the texture dimensions automatically from the material's base color texture. |
manual | Lets you enter custom texture dimensions (useful when the texture is not yet assigned or when overriding). |
When set to manual, the Texture Width and Texture Height parameters become visible (default: 1920 × 1080).
Mapping Method Parameters
Contains
Offset U / Offset V — Shifts the image within the container (range: −1 to 1).
Scale Pivot U / Scale Pivot V — Sets the anchor point for scaling (range: −1 to 1).
Scale U/V are locked to 1.0 in this mode.
Cover
Scale U / Scale V — Scales the image (range: −1000 to 1000, default: 1.0).
Offset U / Offset V — Shifts the image within the container.
Scale Pivot U / Scale Pivot V — Sets the anchor point for scaling.
Region of Interest
X min / X max — Horizontal region bounds (0 = left, 1 = right).
Y min / Y max — Vertical region bounds (0 = top, 1 = bottom).
All scale/offset/pivot controls are hidden in this mode — the UV mapping is fully automatic based on the defined region.
Adaptive Multi-Format Example
A common use case is a lower-third graphic that must work in both 16:9 (landscape) and 9:16 (portrait) formats:
Create a container hierarchy with Flexbox managing the layout.
The image container uses Box Transformation so its width and height adapt to the available space.
Add Texture Fit with the Cover mapping method.
As the output format changes, Flexbox recalculates the container dimensions, and Texture Fit automatically adjusts the UV mapping so the image always fills the container — no manual intervention required.
For editorial images where a specific subject must always be visible (e.g., a person's face), use the Region of Interest method instead. Define the ROI rectangle around the subject, and Texture Fit ensures it remains visible regardless of the output format.
Technical Notes
Texture Fit sets the texture sampler wrap mode to clamp-to-border on both the base color and emissive texture slots.
In auto mode, the texture dimensions are read from the material's base color texture each frame. If no texture is assigned, the manual fallback values (1920 × 1080) are used.
The plug-in executes during the render callback (after layout), so it always uses the most up-to-date box dimensions from Flexbox.
Example
The image shown in a landscape and in a portrait situation:
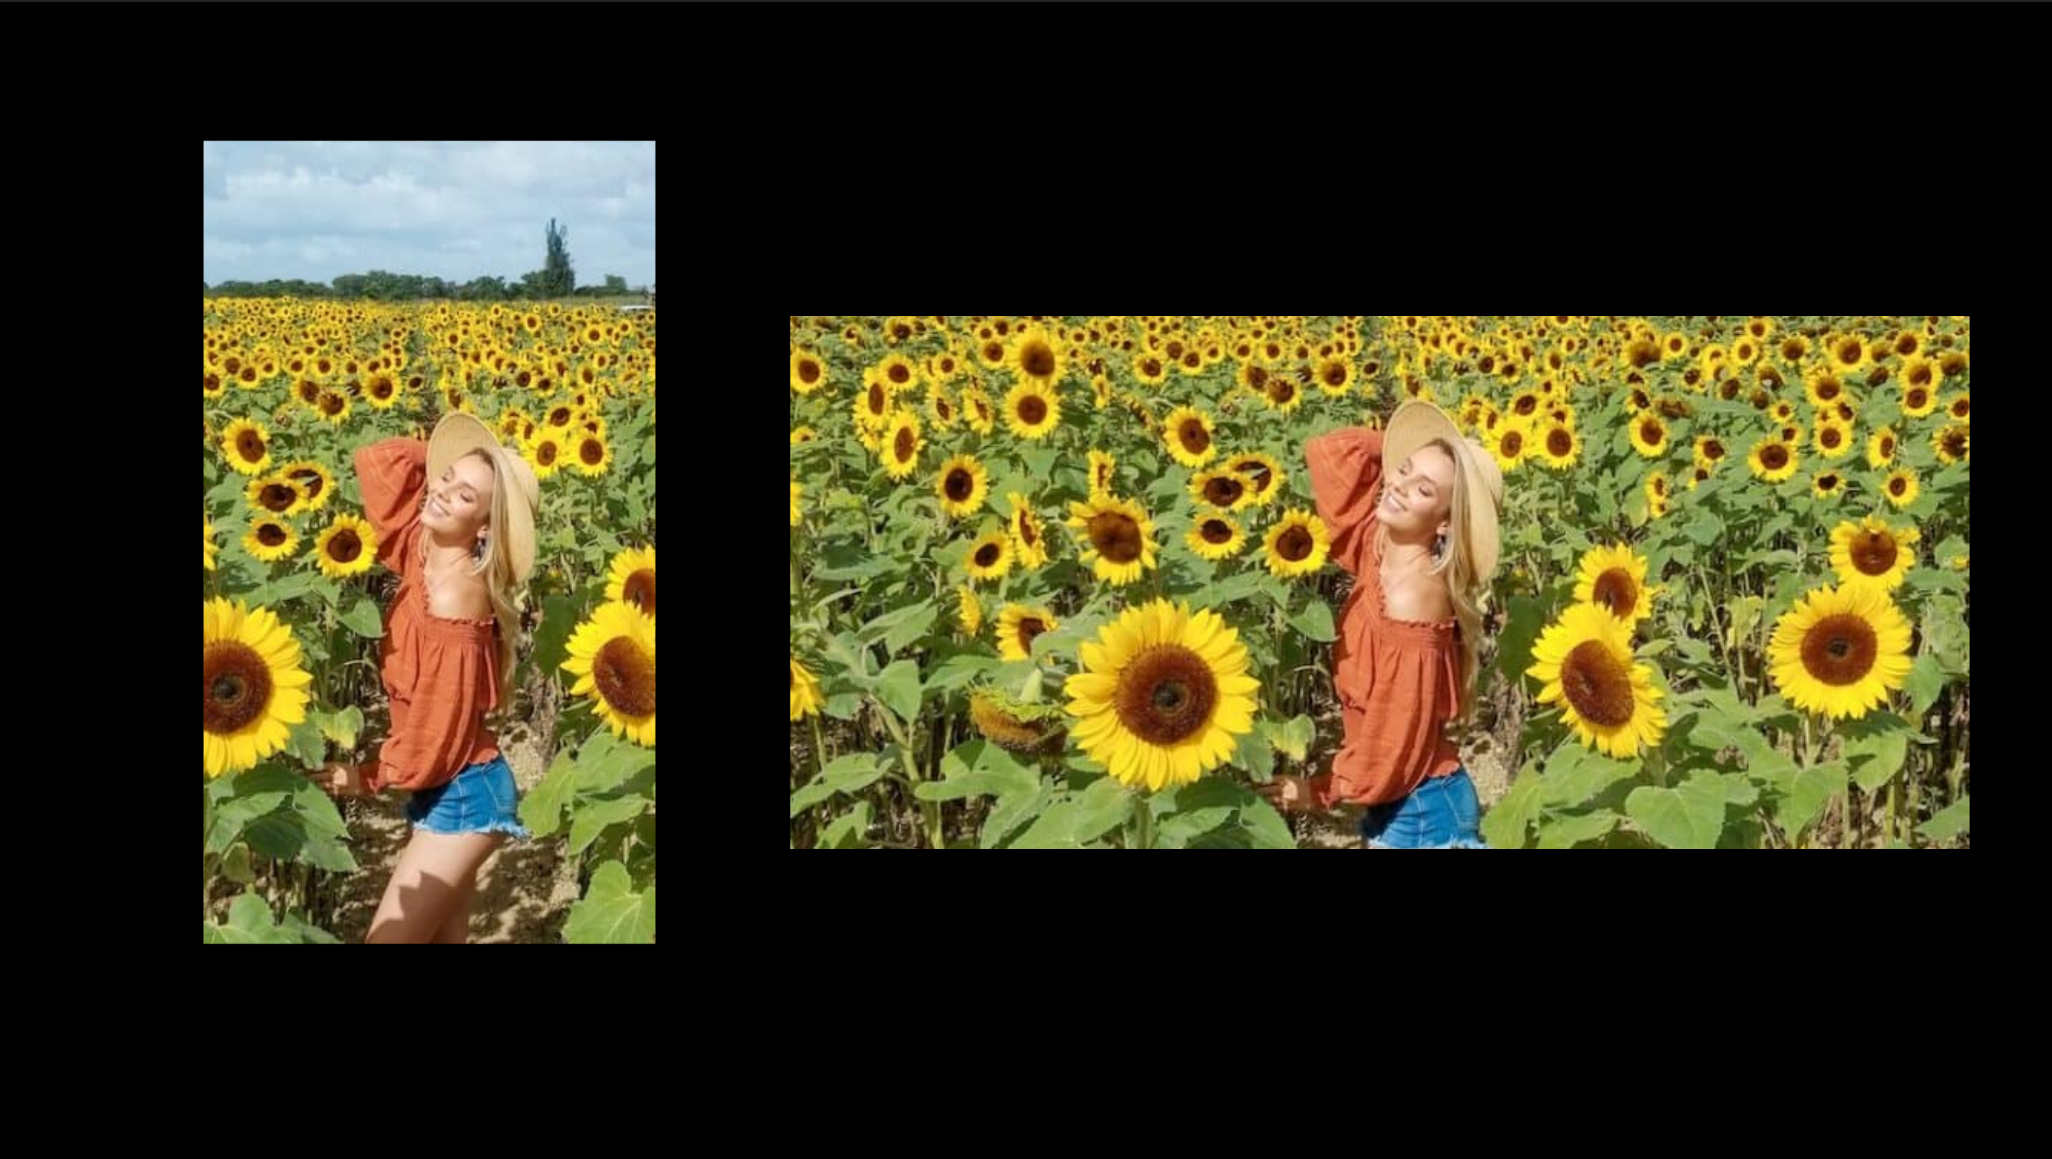
Image Credits: dezistyle.com