This section details how to work with CINEMA 4D and Viz Artist.
The CINEMA 4D and Viz Artist integration imports complete geometries, lights, and animations, from CINEMA 4D to Viz Artist. Viz Artist imports scenes from CINEMA 4D without the need for a local installation of CINEMA 4D on the Viz Artist workstation. 3D objects are imported either as their direct primitive object counterpart in Viz Artist, or as meshes.
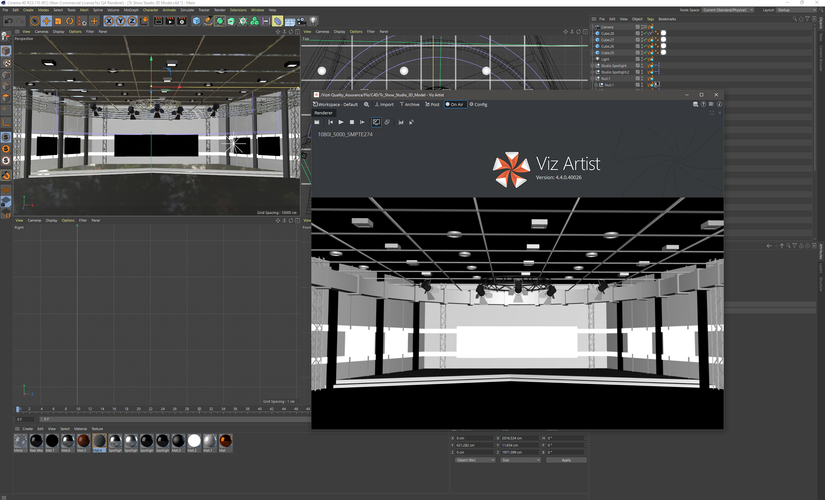
Viz Artist integrates a CINEMA 4D LiveLink tool that lets you make changes to a scene in CINEMA 4D. When Viz Artist is in On Air Mode, it updates live based on your changes. The CINEMA 4D LiveLink tool is able to update the position, rotation and scaling properties of all objects in a Scene.
IMPORTANT! The license required for the import of CINEMA 4D Scenes is issued by Vizrt.
This section contains the following topics:
System Requirements and Configuration
The following are the minimum requirements to import CINEMA 4D Scenes to Viz Artist:
Viz Artist
License: Maxon CINEMA 4D license
To Import:
Viz Artist: Version 3.7 or higher
License: CINEMA 4D import 1 license
Refer to the following version compatibility table:
Viz Artist | CINEMA 4D |
|---|---|
5.3 | |
5.2 | Version R23, R25.120 2023, R26 |
5.1 | Version R23, R25.120 2023, R26 |
5.0 (1) | Version R23, R25.120 2023 |
4.4 | Version R23 |
4.0, 4.1, 4.2, 4.3 | Version R20 |
3.12, 3.13, 3.14 | Version R19 |
3.10, 3.11 | Version R18 |
3.9.0, 3.8.3, 3.8.2, 3.8.1 | Version R17 |
3.8.0, 3.7.2, 3.7.1, 3.7.0 | Version R15 IMPORTANT! If the CINEMA 4D version is R15 <= SP2, do the procedure detailed in <viz install folder>\r15_sp2_fix after installation. |
(1) use R23 plugin directory for R25 and 2023 | |
To Enable Correct File Format
To make sure that CINEMA 4D saves all the information Viz Artist requires when importing from .c4d files, enable the following settings in CINEMA 4D’s preferences.
Cinema 4D R15-R20
Open CINEMA 4D.
Choose Edit > Preferences > Files.
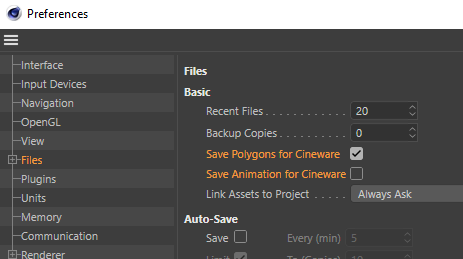
Check the Save Polygons for Melange checkbox. If required, check the Save Animation for Melange checkbox. This setting generates Key Frames for animations that CINEMA 4D’s MoGraph toolset produces, by baking the key frames into the timeline. This can have a performance impact when playing out the scene in Viz Artist.
Cinema 4D R21
Open CINEMA 4D.
Choose Edit > Preferences > Files.
Check the Save Polygons for Cineware checkbox. If required, check the Save Animation for Cineware checkbox. This setting generates Key Frames for animations that CINEMA 4D’s MoGraph toolset produces, by baking the key frames into the timeline. This can have a performance impact when playing out the scene in Viz Artist.
Cinema 4D R23 or Later
Open CINEMA 4D.
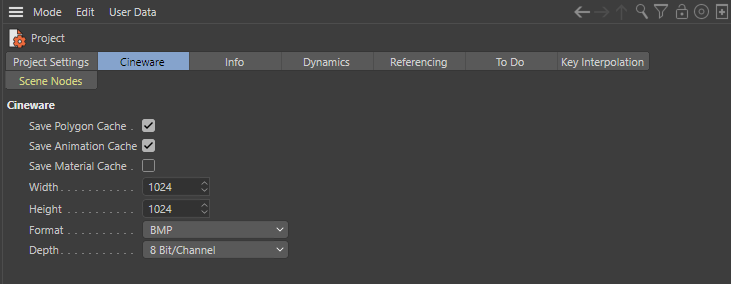
Choose Edit > Project Settings.
Switch to the Cineware Tab.
Check the Save Polygons Cache checkbox. If required, check the Save Animation Cache checkbox.
Cinema4D Substance FBX Workflow
Starting with Viz Engine version 5.0, Viz Engine is capable of importing FBX files with Substance surfaces and translates them to our PBR rendering. You can use all your existing Substances in your Cinema4D, export as an FBX file and import them afterwards as Scene in the Viz Engine Render Pipeline of Viz Engine 5 or later.
Create or load your Cinema4D project.
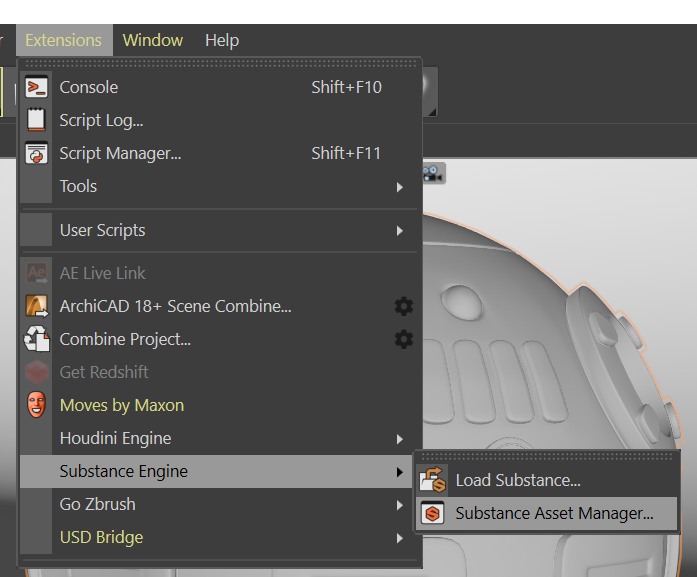
In Extensions > Substance Engine, load your SBAR file.
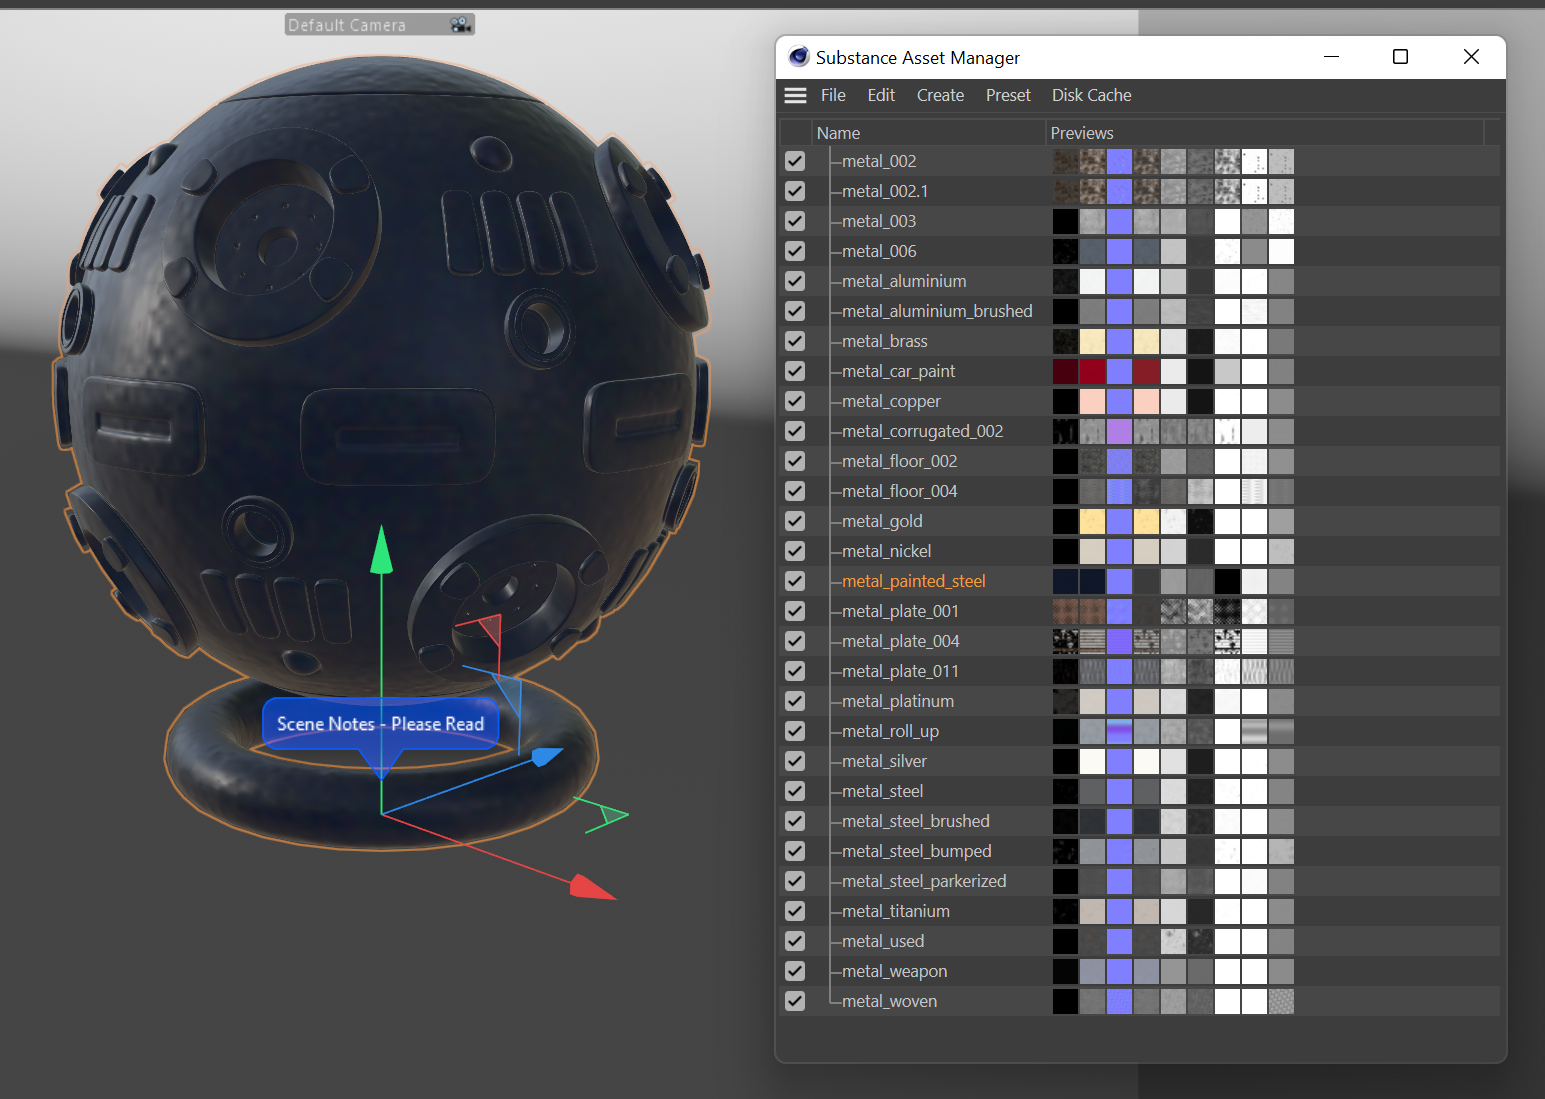
This imports your SBAR file(s):
All of these materials can now be used on your geometries by dragging and dropping them onto your meshes.
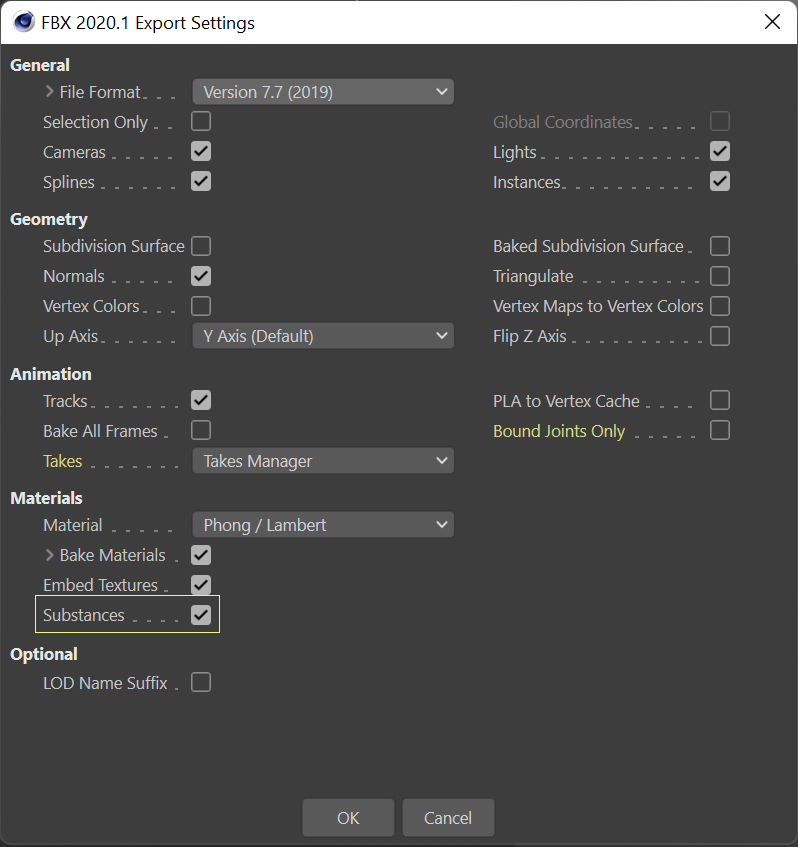
Select Export > FBX:
Make sure, that Substance is selected.
Save the file as FBX as seen in the screenshot above.
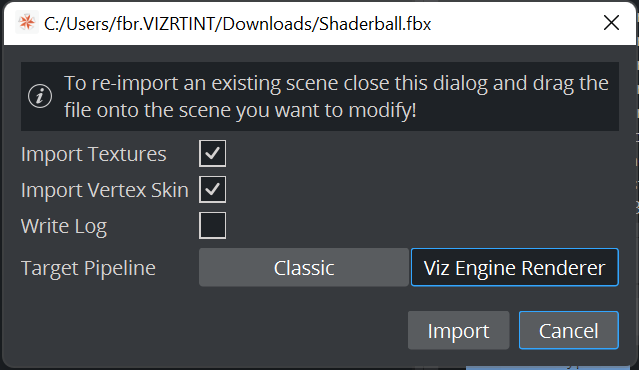
Switch to Viz Artist and go to Import and select Scenes. Your FBX is imported as a standalone scene.
When importing, make sure you select Viz Engine as target pipeline.
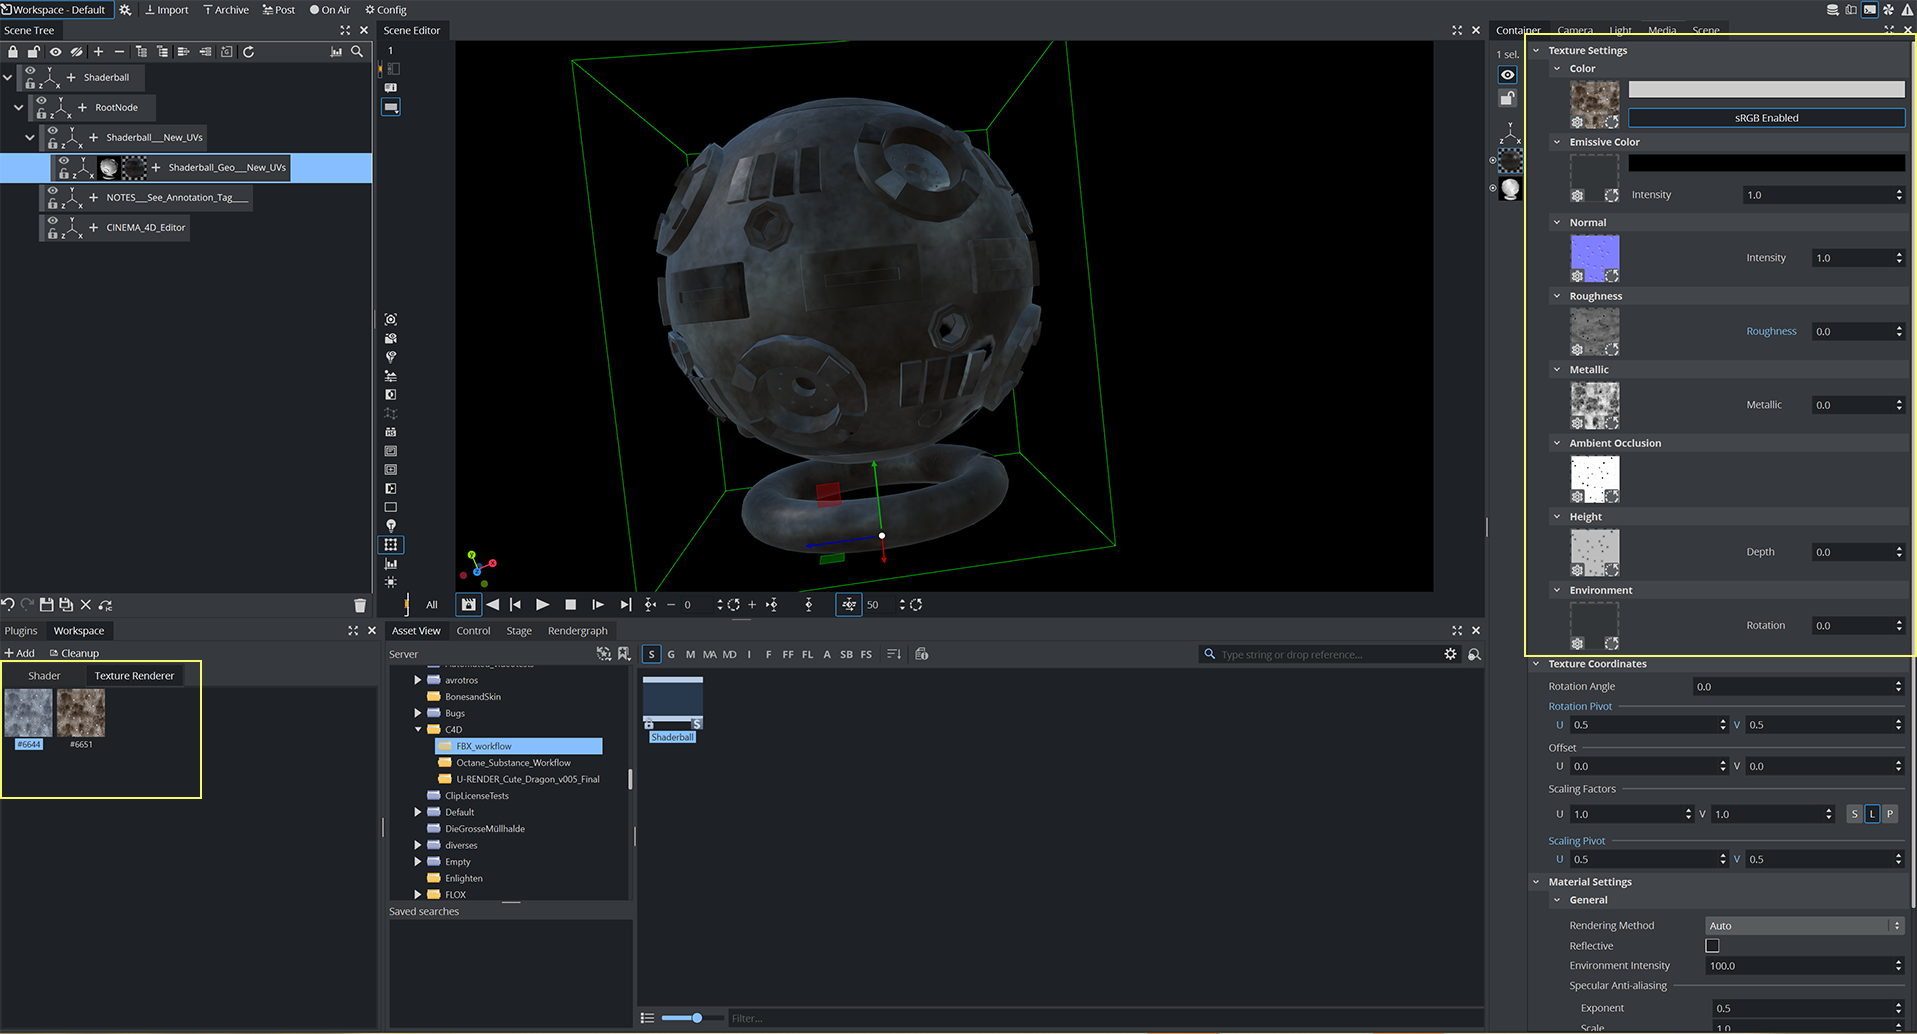
Once the import has finished, open the scene. Your substance textures have been mapped correctly to a newly created PBR material in Viz Engine, the textures are also added to Workspace area:
Modifying Substance Settings
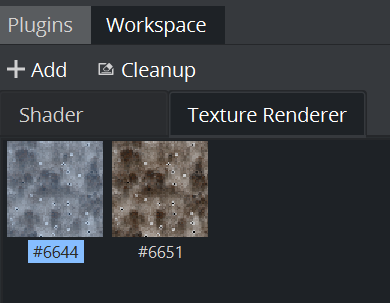
Once you imported your Substance files into Viz Engine, they show up in the Workspace Area:
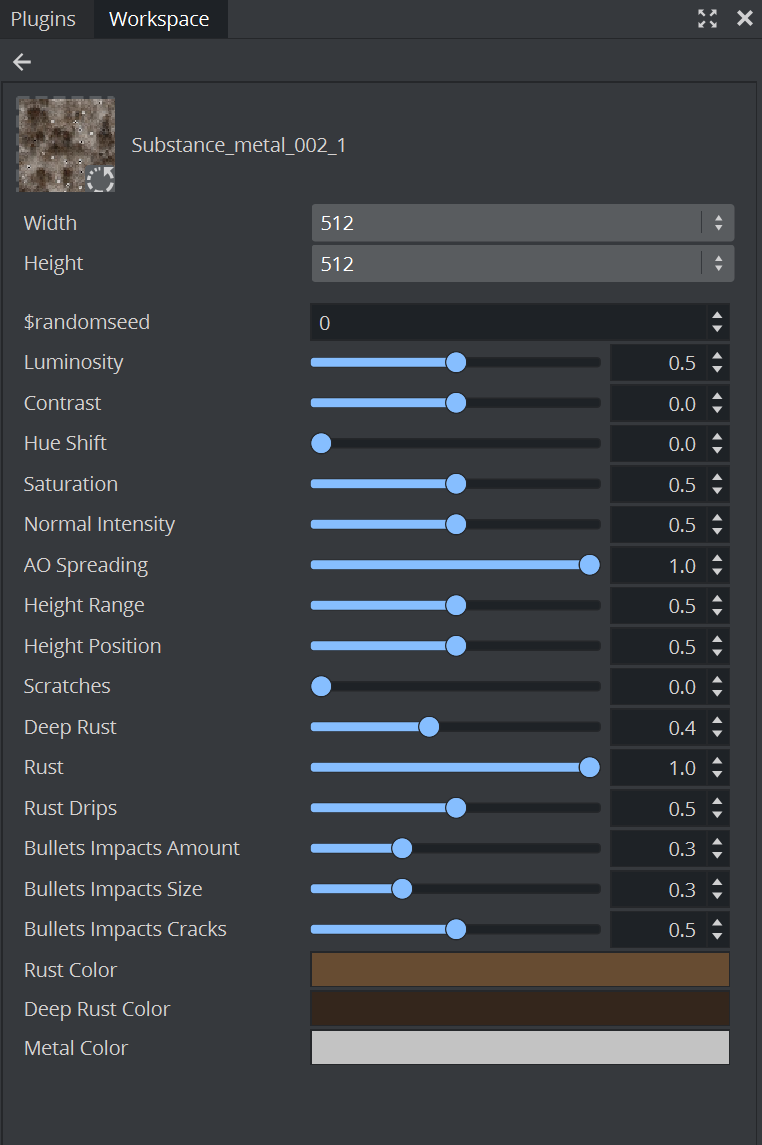
Double clicking on one of the Workspace items opens the exposed settings:
Cinema4D LiveLink
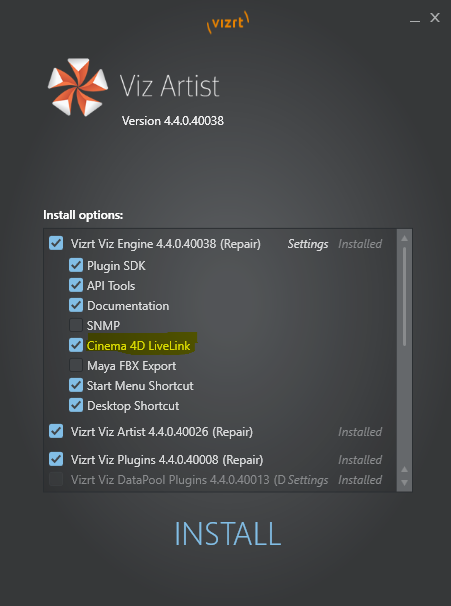
To install CINEMA 4D LiveLink, you must first install CINEMA 4D. The Viz Artist installation files include the CINEMA 4D LiveLink tool, but it is not selected for installation by default.
To Install CINEMA 4D LiveLink During Viz Artist Installation
For Cinema 4D R20 or newer.
Complete the Viz Engine Installation.
There is a prompt at the end of the installation reminding the user to manually add the plug-ins.
Install CIMEMA 4D.
For Cinema 4D R20 to R22, add the directory <viz install folder>\CINEMA 4D LiveLink\R17 as plugin directory in Cinema 4D (see https://www.plugins4d.com/installing).
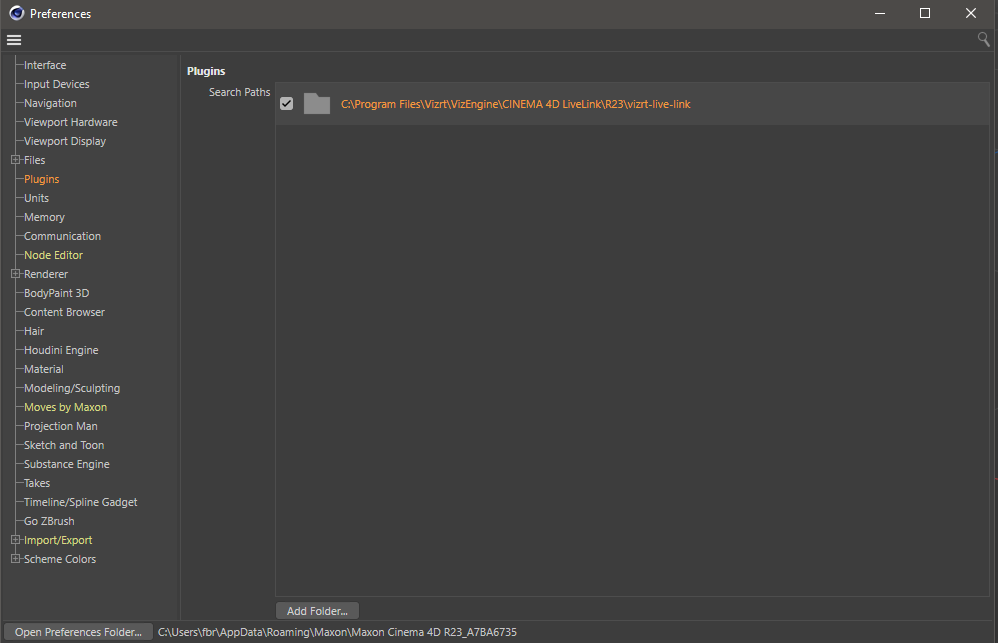
For Cinema 4D R23 or newer, add the directory <viz install folder>\CINEMA 4D LiveLink\R23 as plugin directory in Cinema 4D (see https://www.plugins4d.com/installing).
To Install CINEMA 4D LiveLink to an Existing Viz Artist Installation
Compatibility: These steps are only compatible for CINEMA 4D R20 or older. See https://www.plugins4d.com/installing
Install CINEMA 4D.
Start the Viz Artist installation in Repair Mode. The Viz Artist installer looks for the CINEMA 4D installation folder, and copies the LiveLink files to the CINEMA 4D plug-in folder.
Example: C:\Program Files\MAXON\CINEMA 4D R17\plugins\vizrt-live-link
After installing the LiveLink files, they remain in the CINEMA 4D installation folder even if you remove the LiveLink feature later on.
Troubleshooting CINEMA 4D LiveLink Installation
If the installation displays the CINEMA 4D LiveLink will not work warning, check the following possible solutions:
The Cinema 4D installation location is not the default folder.
Manually copy the LiveLink files to the Cinema 4D plug-in folder.
The LiveLink files are in the Viz Engine installation folder: <viz install folder>\CINEMA 4D LiveLink\[R15|R17|R23]\vizrt-live-link.
CINEMA 4D has not been installed prior to Viz Artist installation.
Complete the Viz Engine installation.
Install CINEMA 4D.
Start the Viz Artist installer again and select Repair mode. This makes a copy of the LiveLink files to the CINEMA 4D plug-in folder.
For Cinema 4D R20 or newer:
Complete the Viz Engine installation.
Install Cinema 4D.
For Cinema 4D R20 to R22, add the directory <viz install folder>\CINEMA 4D LiveLink\R17 as plugin directory in Cinema 4D (see https://www.plugins4d.com/installing).
For Cinema 4D R23 or newer, add the directory <viz install folder>\CINEMA 4D LiveLink\R23 as plugin directory in Cinema 4D (see https://www.plugins4d.com/installing).
To Open a LiveLink
IMPORTANT! Open the same files in Viz Artist and CINEMA 4D. Because Viz Artist and CINEMA 4D communicate using UUIDs, opening different file versions causes the live link to fail.
Open Viz Artist and CINEMA 4D.
Import the project in Viz Artist (Import, Import Scene).
Note: Cinema4D import works for the Classic Render Pipeline only.
Set Viz Artist to On Air Mode.
In CINEMA 4D:
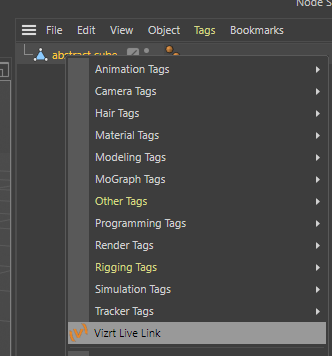
Click on any entry in the CINEMA 4D Scene Tree.
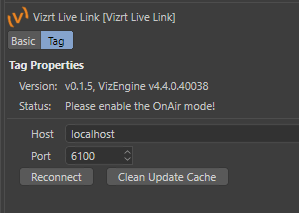
In the Basic Panel, click on Enable.
Enter the Viz Artist/Engine Host name.
Enter the Viz Artist/Engine Port number.
Click on Reconnect.
The Tag properties panel always shows the current connection status.
Icon | Status |
|---|---|
| Disabled |
| Enabled, but not connected |
| Enabled and connected |
Changes made to the scene in CINEMA 4D now reflects automatically in the scene in Viz Engine. The Live Link works only one way, from CINEMA 4D to Viz Artist. Moving objects in Viz Artist does not transfer back to CINEMA 4D.
CINEMA 4D Integration Limitations
The following limitations apply to the CINEMA 4D and Viz Artist integration when importing CINEMA 4D scenes:
LiveLink only updates changes in the position, rotation and scale of objects. It does not support changes in other parameters.
Cameras
Maximum number of cameras in the scene: 16, including the editor camera.
Lights
Maximum number of lights in the scene: Eight. There is no support for a scale value other than
1.0for X, Y, Z.Supported CINEMA 4D light types:
Omni
Spot
Distant
Unsupported CINEMA 4D light types:
Parallel
Rectangular Spot
Parallel Spot
Parallel Spot Rectangular
Photometric
Tube
There is no support for:
Light intensity parameter
Shadows
Near/far clipping
Noise
Caustics
Lens Effects
Reflection
Visible Light
Materials and Textures
Multi-texturing is not supported.
The texture that is imported into Viz Artist is only the one on the Color channel of the last texture tag of an object (the one which shows on the top layer).
Textures generated by a CINEMA 4D shader (and CINEMA 4D Shaders in general) are not supported.
There is no support for:
Polygon selections
Sides
Seamless or Repetitions settings
General Limitations
By default, Viz Engine does not render the backface of objects. To do this, add the Expert container plug-in.
Sky, Environment, Background, Foreground, and Physical Sky objects, are not supported.
The Floor Object is imported as a rectangle of the size 2000x2000, just as shown in the Editing mode in CINEMA 4D. After import, you can scale its size, as you require.
Acknowledgements
TV Studio model from c4ddownload.com.

