This page contains information on the following topics:
Viz Engine Shaders are a novel way to create custom materials for the Viz Engine Renderer. Only basic knowledge of how to write OpenGL Shaders is necessary to be able to integrate the material of your needs. Viz Engine provides multiple template Shaders, so that only the most important parts of a material need to be implemented. The common and repetitive steps are taken care of the by the template itself.
With the use of Viz Engine Shaders, designers can achieve outstanding effects. Viz Engine Shaders are executed purely on the GPU. They can be used to create photo realistic effects or you can use them as a backdrop on Videowall instead of utilizing Ultra HD clips.
Viz Engine Shaders can be developed either by using the Viz plug-in or within Viz Artist using the Shader Design Environment.
The following chapters shall give you a starting point on how to work with Viz Engine Shaders and inspire your creativity.
Introduction to Viz Engine Shaders
There are three types of Shaders available:
Fragment Shaders
Fragment and Vertex Shaders
Transition Shaders
While Fragment Shaders and transition shader modify pixel data only, Vertex Shaders can additionally modify vertex (geometry) data. A typical vertex shader is for example a bump mapping effect.
The following example explains how to create a simple fragment shader with some exposed parameters.
Let's say you've found some nice twirl shader on sites like shadertoy.com. We will now explain step by step how to create a Viz Engine Shader out of it.
The original code for this shader looks like this:
Minimal Fragment Shader
#define PI 3.14159void mainImage( out vec4 fragColor, in vec2 fragCoord ){ float effectRadius = .5; float effectAngle = 1. * PI; vec2 center = iMouse.xy / iResolution.xy; center = center == vec2(0., 0.) ? vec2(.5, .5) : center; vec2 uv = fragCoord.xy / iResolution.xy - center; float len = length(uv * vec2(iResolution.x / iResolution.y, 1.)); float angle = atan(uv.y, uv.x) + effectAngle * smoothstep(effectRadius, 0., len); float radius = length(uv); fragColor = texture(iChannel0, vec2(radius * cos(angle), radius * sin(angle)) + center);}Create a new scene and add a rectangle to it.
Next step is to switch to the Scripting Workspace. In the workspace, select +Add and Fragment Viz Engine Shader. A new Shader appears as Fragment Shader.
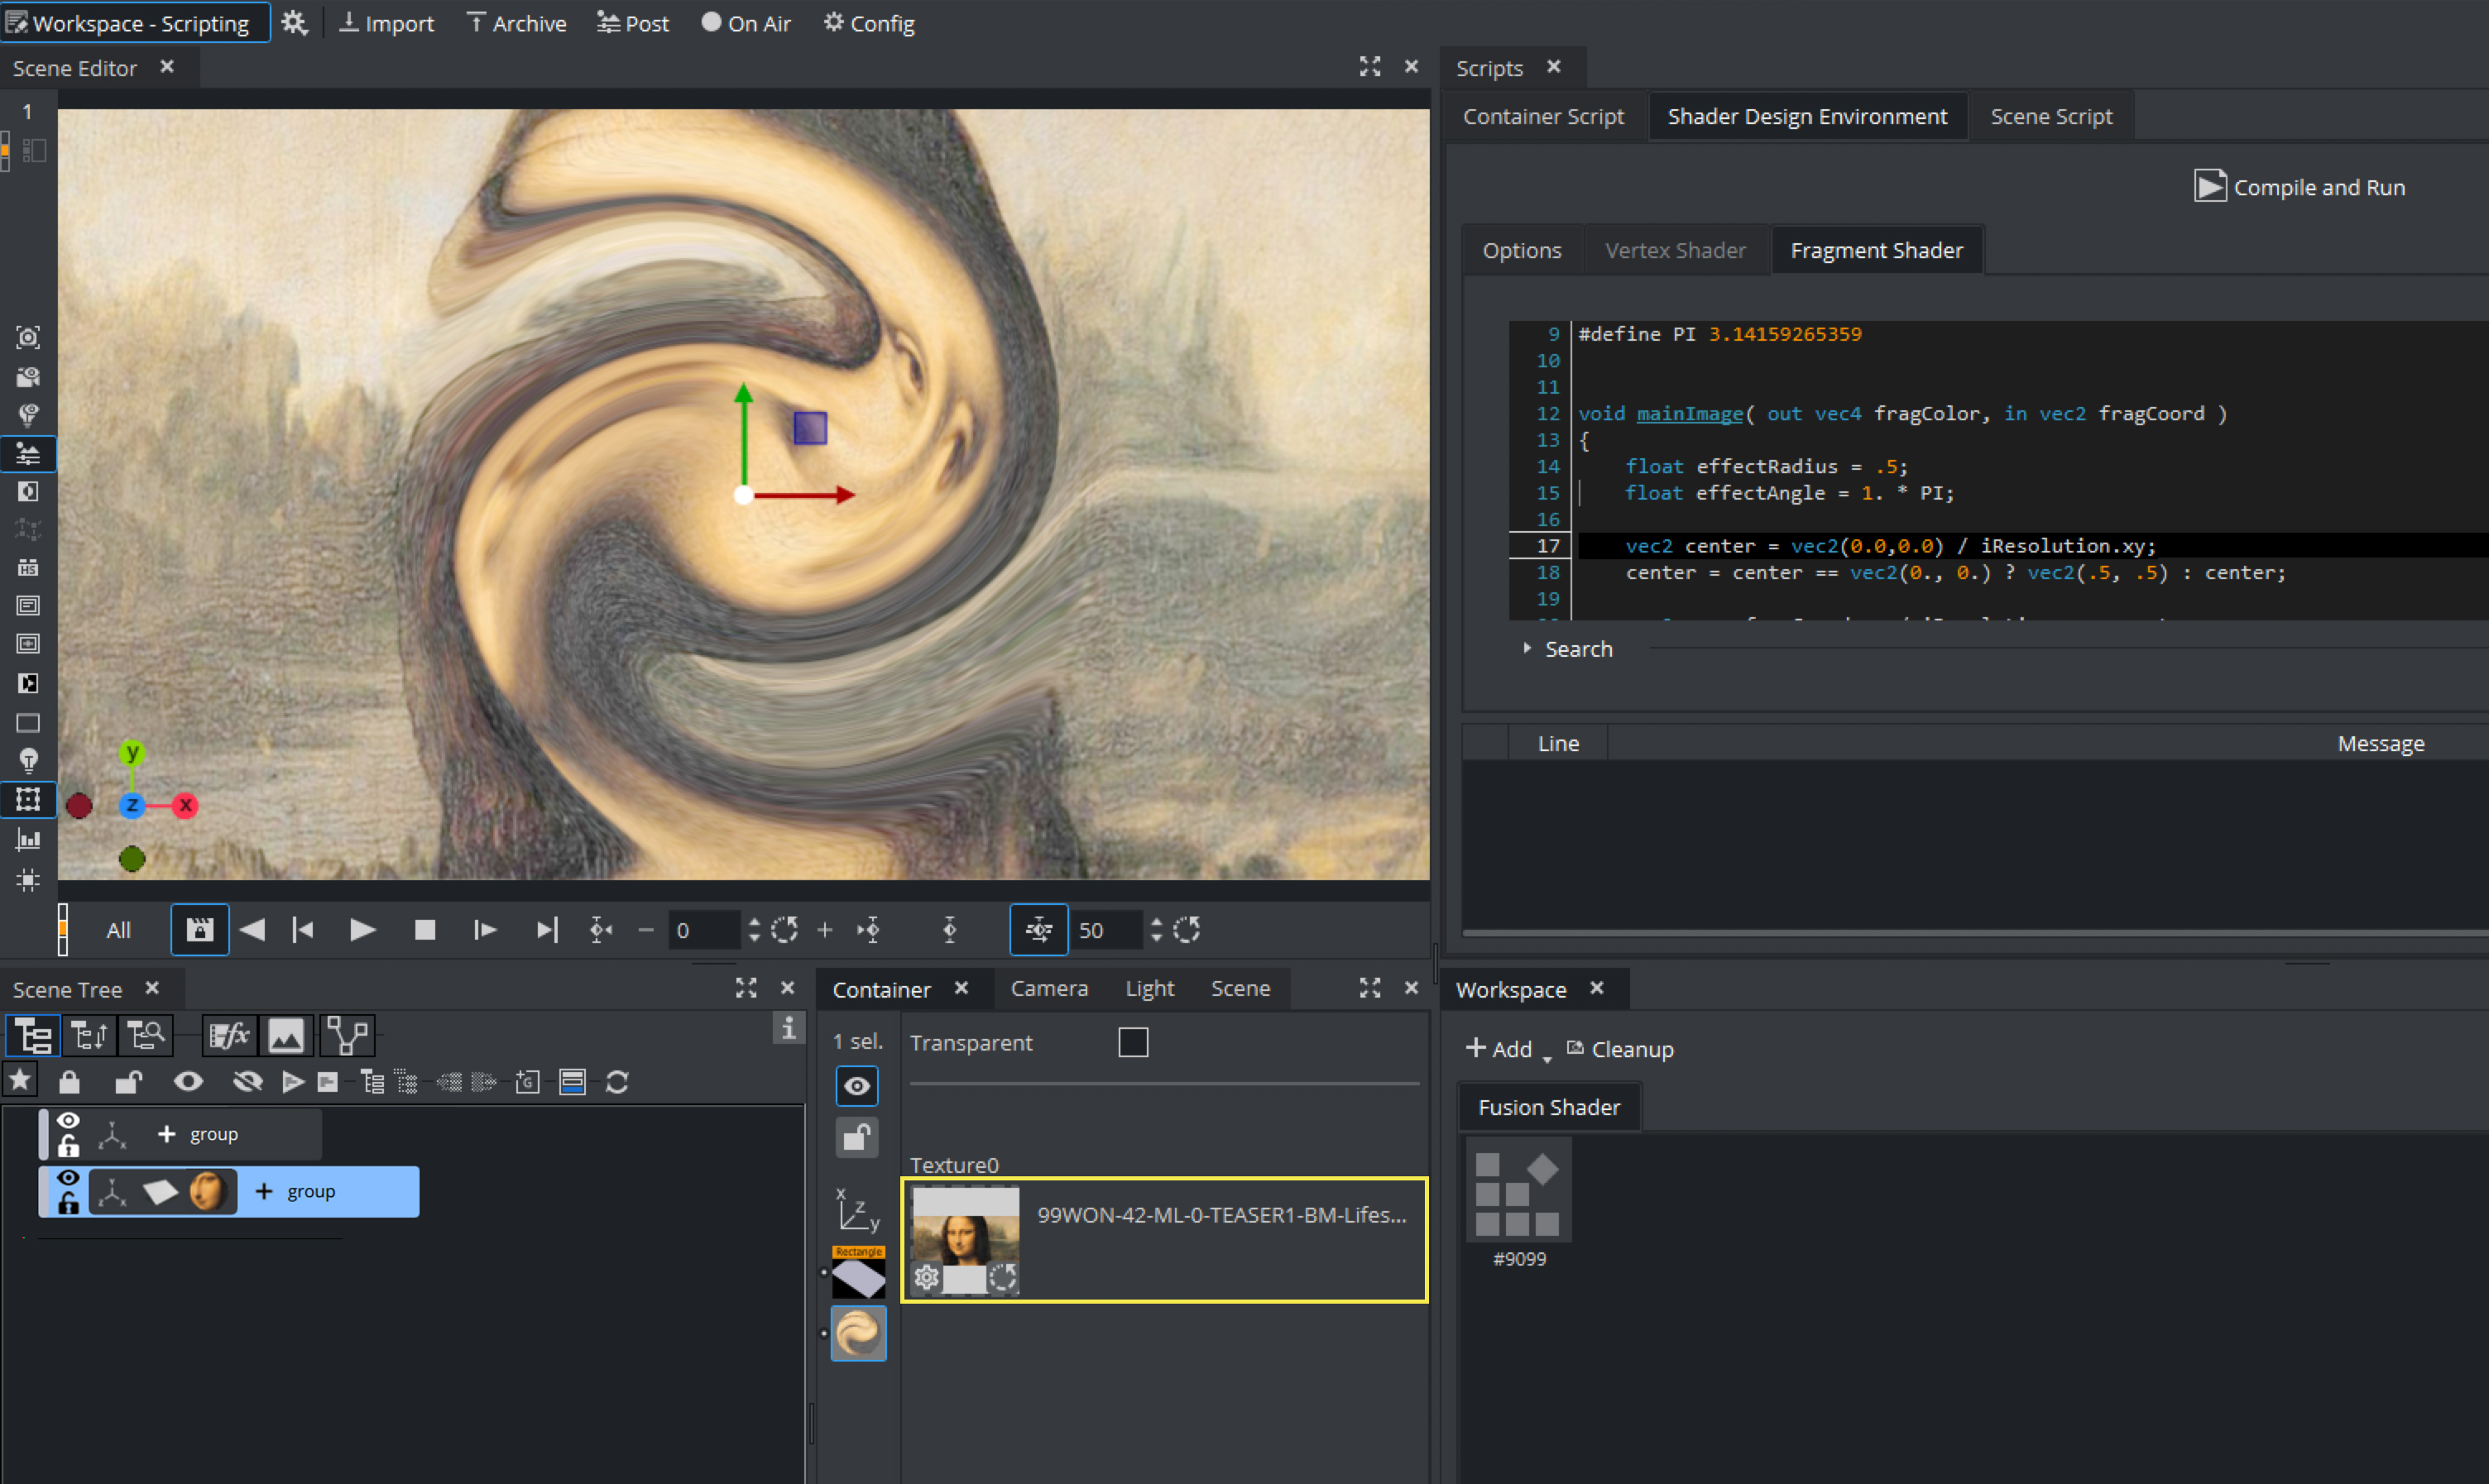
Drag the Shader to the container. the Shader Design Environment is activated. As we are creating a Fragment Shader only, only this tab gets activated. A Vertex Fragment Viz Engine Shader would activate both tabs, Fragment and Vertex Shader.
Now copy and paste the shader code into the Script Editor. As we need to link some properties between the Shader and Viz Engine, some adjustments are needed for our code. Viz Engine calls fragmentMain() on a Fragment shader, therefore we call the existing mainImage code from within this function.
Fragment Shader
#define iResolution vec2(1920,1080)#define PI 3.14159265359void mainImage( out vec4 fragColor, in vec2 fragCoord ){ float effectRadius = .5; float effectAngle = 1. * PI; vec2 center = iMouse.xy / iResolution.xy; center = center == vec2(0., 0.) ? vec2(.5, .5) : center; vec2 uv = fragCoord.xy / iResolution.xy - center; float len = length(uv * vec2(iResolution.x / iResolution.y, 1.)); float angle = atan(uv.y, uv.x) + effectAngle * smoothstep(effectRadius, 0., len); float radius = length(uv); fragColor = texture(iChannel0, vec2(radius * cos(angle), radius * sin(angle)) + center);}void fragmentMain(){ vec4 fragColor = vec4(0); vec2 fragCoord = viz_getTexCoord() * iResolution; mainImage(fragColor, fragCoord); vec3 col = fragColor.xyz; viz_setFragment(vec4(col, 1.0));}Hitting the Compile and Run function still gives some errors. We need to replace the iMouse variable with a static variable. vec2(0.0,0.0) as we do not want to interact with the user.
Finally the texture, defined in the original code iChannel0, needs to be replaced by a function that provides a Viz Engine texture. Expose this as a property the user can change:
Fragment Shader
@registerParametersBegin@registerParameterSampler2D(iChannel0, "Texture0")@registerParametersEndThis overrides the iChannel0 with a userParameter. After a Compile and Run, we now have a property available to the user. Drag and drop a texture on it and you'll already see some effects:
Now if you change some parameters like the effectRadius or effectAngle and click on the Compile and Run button, the shader behaves differently.
float effectRadius = .5;
float effectAngle = 1. * PI;
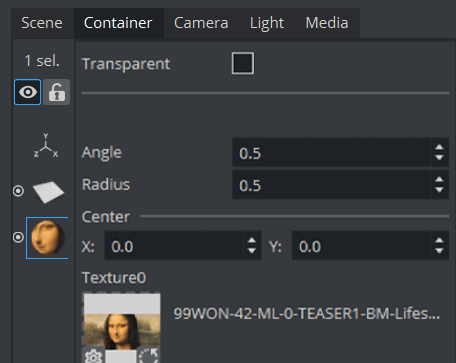
It would be nice, if we can also expose those settings to the user. We extend our code so that we use more parameters to set our variables. Finally, to access the values of this parameters, the lines where those variables are used need to be slightly changed to read the actual values.
Our final code looks like this:
Fragment Shader
@registerParametersBegin@registerParameterSampler2D(iChannel0, "Texture0")@registerParameterFloat(effectAngle, "Angle", 0.5f, -5.f, 15.f)@registerParameterFloat(effectRadius, "Radius", 0.5f, -5.f, 15.f)@registerParameterVec2(myCenter, "Center", 0.0, 0.0)@registerParametersEnd#define iResolution vec2(1920,1080)#define PI 3.14159265359void mainImage( out vec4 fragColor, in vec2 fragCoord ){ vec2 center = vec2(0.0,0.0) / iResolution.xy; center = center == vec2(0., 0.) ? vec2(.5, .5) : center; vec2 uv = fragCoord.xy / iResolution.xy - center; float len = length(uv * vec2(iResolution.x / iResolution.y, 1.)); float angle = atan(uv.y, uv.x) + userParametersFS.effectAngle* PI * smoothstep(userParametersFS.effectRadius, 0., len); float radius = length(uv); fragColor = texture(iChannel0, vec2(radius * cos(angle), radius * sin(angle)) + center);}void fragmentMain(){ vec4 fragColor = vec4(0); vec2 fragCoord = viz_getTexCoord() * iResolution; mainImage(fragColor, fragCoord); vec3 col = fragColor.xyz; viz_setFragment(vec4(col, 1.0));}The UI now has been extended to show these values:
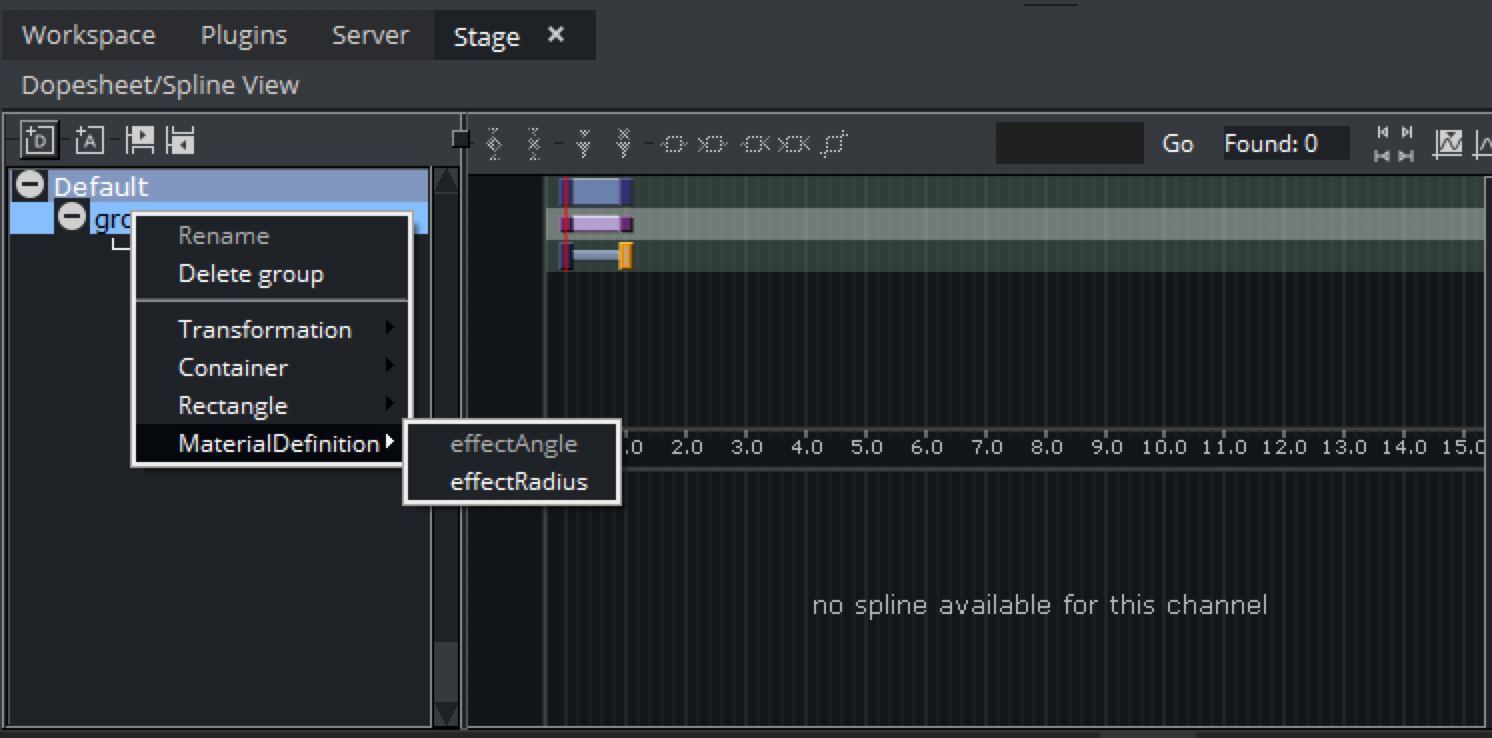
Changing these values immediately changes the way how the shader affects our image. Instead of an image, you can also apply this effect to any Media Asset like Live Sources or Clip Surfaces. These values are also fully animatable.
Tip: Viz Engine Shaders can be saved into Graphic Hub. Drag and drop them from the Workspace window into the Graphic Hub Server view.
Properties for Viz Engine Shaders
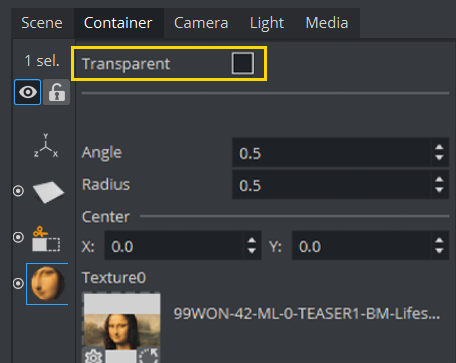
Viz Engine Shaders can integrate into Viz Engine design workflows by exposing some parameters to the user. This enables certain built-in render features inside the Viz Engine Shader. These properties can be found in the Options tab.
Transparency is part of the Viz Engine Shaders User Interface:
Viz Engine Fragment Shader
The Viz Engine Fragment Shader allows it to write a fragment shader only, without the need to write a vertex shader. The vertex shader is provided by Viz Engine and provides the fragment shader API with all standard information available.
The main function for the Viz Engine Fragment Shader needs to be called fragmentMain. To set the color of a fragment, viz_setFragment needs to be called.
Minimal Fragment Shader
void fragmentMain(){ viz_setFragment(vec4(1,0,0,1));}Fragment Shader API
The template shader provides an additional API to get access to the properties of Viz Engine, lights, geometry, etc..
Geometry API Functions
Function Name | Description |
|---|---|
viz_getPosition | Returns the current worldspace position as |
viz_getPositionCS | Returns the current clipspace position as |
viz_getNormal | Returns the current worldspace normal as |
viz_getTangent | Returns the current worldspace tangent as |
viz_getBinormal | Returns the current worldspace binormal as |
viz_getTexCoord | Returns the texture coordinates as |
viz_getColor | Returns the color as |
viz_getGlyphAlpha | Returns the glyph alpha for razor text as |
Environment Map API Functions
Function Name | Description |
|---|---|
viz_getEnvironmentMapRotation | Returns the scenes environment map rotation as |
viz_getEnvironmentMapIntensity | Returns the scenes environment map intensity as |
Rendering Globals API Functions
Function Name | Description |
|---|---|
viz_getAlpha | Returns the current alpha value as |
viz_getRetraceCounter | Returns the current retrace counter value as |
viz_getTime | Returns the current time in seconds as |
viz_getCameraPosition | Returns the worldspace position of the current camera as |
viz_getViewDirection | Returns the normalized view vector as |
Container Lights API Functions
Function Name | Description | Supported Lights |
|---|---|---|
viz_getPointLightCount | Returns the number of pointlights as | |
viz_getPointLightIndex | Returns the global light index of a pointlight as | |
viz_getDirectionalLightCount | Returns the number of directional lights as | |
viz_getDirectionalLightIndex | Returns the global light index of a directional light as | |
viz_getSpotLightCount | Returns the number of spot lights as | |
viz_getSpotLightIndex | Returns the global light index of a spotlight as | |
viz_getAreaLightCount | Returns the number of area lights as | |
viz_getAreaLightIndex | Returns the global light index of an area light | |
viz_getLightPosition | Returns the worldspace position of a light as | Point, Spot, Area |
viz_getLightDirection | Returns the normalized worldspace direction of a light as | Directional, Spot, Area |
viz_getLightUp | Returns the normalized worlspace up-vector of a light as | Area |
viz_getLightRight | Returns the normalized right vector of a light as | Area |
viz_getLightColor | Returns the color of a light as | All |
viz_getLightIntensity | Returns the intensity scale factor of a light as | All |
viz_getLightDiffuseIntensity | Returns the diffuse intensity scale factor of a light as | All |
viz_getLightSpecularIntensity | Returns the specular intensity scale factor of a light as | All |
viz_getLightRadius | Returns the radius of a light as | Point, Spot |
viz_getLightInnerConeAngle | Returns the inner cone angle in radians of a light as | Spot |
viz_getLightOuterConeAngle | Returns the outer cone angle in radians of a light as | Spot |
viz_getLightWidth | Returns the width of a light as | Area |
viz_getLightHeight | Returns the height of a light as | Area |
To access light properties, a global light index is needed. So a loop over all available point lights would look like:
Light Iteration Example
int pointLightCount = viz_getPointLightCount();for (int i=0; i<pointLightCount; ++i){ int lightIndex = viz_getPointLightIndex(i); vec3 lightColor = viz_getLightColor(lightIndex);}Global Illumination FX API Functions
Function Name | Description |
|---|---|
viz_getGlobalIlluminationIrradiance | Returns the irradiance color as |
viz_getGlobalIlluminationAmbientOcclusion | Returns the ambient occlusion factor as |
viz_getGlobalIlluminationBakeLight | Returns the color of the baked lights as |
Viz Engine Vertex and Fragment Shader
The Viz Engine Vertex/Fragment Shader allows it to write both the vertex and the fragment shader. In addition to the fragment shader API from above, the vertex shader template gives access to geometry vertex data and allows to override vertex positions, normals, etc..
The main function for the Vertex Shader needs to be called vertexMain. Multiple vertex attributes are available to be set by the vertex shader via API functions, the most important one is viz_setVertex.
Minimal Vertex Shader
void vertexMain(){ vec3 pos = viz_getVertex(); viz_setVertex(pos);}Vertex Shader API
Geometry API Functions
Function Name | Description |
|---|---|
viz_getVertex | Returns the current vertex as |
viz_getNormal | Returns the current normal as |
viz_getTangent | Returns the current tangent as |
viz_getBinormal | Returns the current binormal as |
viz_getTexCoord | Returns the current texture coordinate as |
viz_getColor | Returns the current color as |
viz_setVertex | Sets the current vertex as |
viz_setNormal | Sets the current normal as |
viz_setNormals | Sets the three normals (normal, tangent, binormal) as |
viz_setNormals | Sets the normal and tangent, binormal is calculated automatically as |
viz_setTexCoord | Sets the texture coordinates as |
viz_setColor | Sets the color as |
All viz_get functions return their values as they are provided by the geometry, they are not altered. All viz_set functions assume the values are passed in the same space, too. Afterwards, the values are multiplied by the geometry's world space matrix and passed to the fragment shader. The vertex position itself gets multiplied by the model-view-projection matrix and passed as gl_Position.
In the case of vertex skinning, the vertex and normals get the skinning transformation applied before being passed to the fragment shader and gl_Position.
Rendering Globals API Functions
Function Name | Description |
|---|---|
viz_getAlpha | Returns the current alpha value as |
viz_getRetraceCounter | Returns the current retrace counter value as |
viz_getTime | Returns the current time in seconds as |
Environment Map API
Function Name | Description |
|---|---|
viz_getEnvironmentMapRotation | Returns the scenes environment map rotation as |
viz_getEnvironmentMapIntensity | Returns the scenes environment map intensity as |
Passing Values from Vertex to Fragment Shader
Passing data between different shader stages is also supported. In GLSL, out and in need to be used, but to ensure that the data passed by the user does not conflict with the data passed by the template shader, new keywords were added: varying_out and varying_in.
Viz GLSL Extension
Viz Keyword | Description |
|---|---|
| Declares an |
| Declares an |
Example
Vertex Shader
@varying_out(0) vec4 vColor;void vertexMain(){ vColor = vec4(1,1,0,0);}Fragment Shader
@varying_in(0) vec4 vColor;void fragmentMain(){ viz_setFragment(vColor);}User Parameters
In GLSL, shader parameters are usually passed using uniforms or uniform buffers, textures most of the time as sampler2d. For a better Command Map and Artist integration and forward compatibility, new keywords were added, though. Each shader can have its own, but only one set of user parameters. All parameters need to be declared within a block that starts with @registerParametersBegin and end with @registerParametersEnd.
Viz GLSL Extensions
Viz Keyword | Description | Arguments |
|---|---|---|
| Marks the start of the user parameters block. | |
| Marks the end of the user parameters block. | |
| Register an |
|
| Register a |
|
| Register a |
|
| Register a |
|
| Register a |
|
| Register a |
|
| Register a |
|
All parameters except sampler2d are managed by a single uniform buffer for each shader stage. To access them, the uniform buffer name inside the vertex shader is userParametersVS and in the fragment shader userParametersFS.
Examples
Vertex Shader with Parameter Block
@registerParametersBegin@registerParameterInt(paramInt, "Int Label", 1, -1, 1)@registerParameterFloat(paramFloat, "Float Label", 1.0, -1.0, 1.0)@registerParameterVec2(paramVec2, "Vec2 Label", -1.2, 2.2)@registerParameterVec3(paramVec3, "Vec3 Label", 1.3, -2.3, 3.3)@registerParameterVec4(paramVec4, "Vec4 Label", 1.4, 2.4, -2.4, 3.4)@registerParameterColor(paramColor, "Color Label", 0, 0, 0, 255)@registerParametersEndvoid vertexMain(){ int intValue = userParametersVS.paramInt; float floatValue = userParametersVS.paramFloat; vec2 vec2Value = userParametersVS.paramVec2; vec3 vec3Value = userParametersVS.paramVec3; vec4 vec4Value = userParametersVS.paramVec4; vec4 colorValue = userParametersVS.paramColor; viz_setColor(colorValue);}Fragment Shader with Parameter Block
@registerParametersBegin@registerParameterFloat(intensity, "Intensity", 1.0, 0.0, 1.0)@registerParameterSampler2D(inputTexture,"Texture Label")@registerParametersEndvoid fragmentMain(){ vec4 textureColor = texture(inputTexture, viz_getTexCoord()); vec4 vertexColor = viz_getColor(); vec4 finalColor = textureColor * vertexColor * userParametersFS.intensity; viz_setFragment(finalColor);}Environment Map
It's possible to gain automatic access to a scenes global environment map by declaring a two dimensional texture sampler named EnvironmentMap or environmentMap.
@registerParameterSampler2D(EnvironmentMap, "Environment Map")Transition Shaders
Transition Shaders are utilized by Super Channels to allow special transitions from Asset A to B. Whereas classical Super Channel transitions could only animate a subchannels position, scale and alpha value, Transition Shaders can be used to create very complex pixel based transitions from a source image (A) to a destination image (B). Transition Shaders can also be parameterized.
Example
As a transition example we will create a Ripple effect with parameters:
First add a Super Channel to your scene and add two images as a source into the Sub Channel A and Sub Channel B slot (these can be also other scenes, live sources, etc..). These textures are available in the Transition Shader as
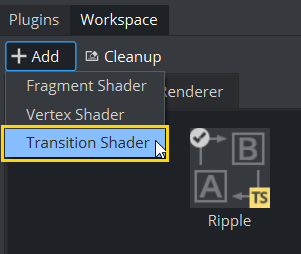
viz_textureA()andviz_textureB()functions.Open the workspace panel and create a new Transition Shader, give it a unique name:
Double click on the Shader to open the scripting window (if the window does not open, make sure it is selected in the Available Docks menu).
The Transition Shader code:
@registerParametersBegin@registerParameterFloat(amplitude, "Amplitude", 100.f, 0.f, 500.f)@registerParameterFloat(speed, "Speed", 50.f, 0.f, 1000.f)@registerParametersEndfloat amplitude = userParametersFS.amplitude;float speed = userParametersFS.speed;const float PI = 3.141592653589793;float progress = viz_getTransitionTime();vec4 getFromColor(vec2 op) {return viz_textureA(op);}vec4 getToColor(vec2 op) {return viz_textureB(op);}vec4 transition (vec2 uv) {vec2 dir = uv - vec2(.5);float dist = length(dir);vec2 offset = dir * (sin(progress * dist * amplitude - progress * speed) + .5) / 30.;return mix(getFromColor(uv + offset),getToColor(uv),smoothstep(0.2, 1.0, progress));}void fragmentMain() {vec2 op = viz_getTexCoord();vec4 result = transition(op);viz_setFragment(result);}4. Copy paste the code above into the editor and hit Compile and Run.
Important Parts of the Code
The first 4 lines define parameters exposed into the User Interface to manipulate the look of our transition.
The time is used by calling
viz_getTransitionTime();
The duration/speed of the transition can be changed inside the stage:The calculation is done in the
transition()function.getFromandgetToColorare wrappers used to read the pixels from the source and destination image, usingviz_textureAandviz_textureB
To Use the Transition Shader
Click on Media, your Super Channel and choose Super Channel > Content.
Drag your new Shader from the Workspace to the Dropfield in the Transition Area.
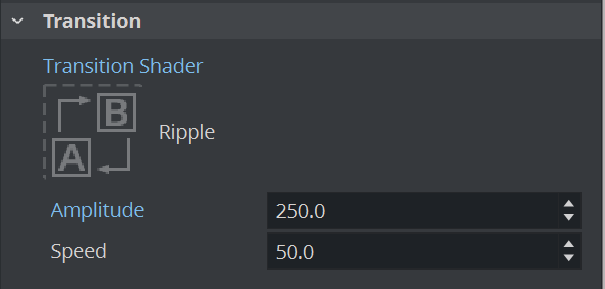
Note: The two additional fields Amplitude and Speed, are the exposed parameters defined in the beginning of our script.
Once the shader is assigned to the Super Channel as a transition shader, a new director with the name SUPERCHANNEL_i_TRANSITION_TIME (where i is the Super Channel index) is automatically created to animate the transition time.
Now Click on A or B to see the Transition Shader in Action.
Note: The shader can always be updated in the scripting window. Compile and Run should be clicked afterwards to update the transition as well.
Transition Shader API
Like Fragment Shaders, the main function for the Viz Engine Transition Shader is fragmentMain, and the fragment color is set by viz_setFragment.
Transition Shaders inherit some of the Fragment Shaders geometry functions. These are:
Geometry API Functions
Function Name | Description |
|---|---|
viz_getPosition | Returns the current worldspace position as |
viz_getPositionCS | Returns the current clipspace position as |
viz_getTexCoord | Returns the texture coordinates as |
viz_getColor | Returns the color as |
In addition, Transition Shaders have three more functions for transition.
Transition API Functions
Function Name | Description |
|---|---|
viz_textureA | Returns the color sample in texture A (at specific texture coordinates) as |
viz_textureB | Returns the color sample in texture B (at specific texture coordinates) as |
viz_getTransitionTime | Returns the current transition time as |
Shader Samples Library
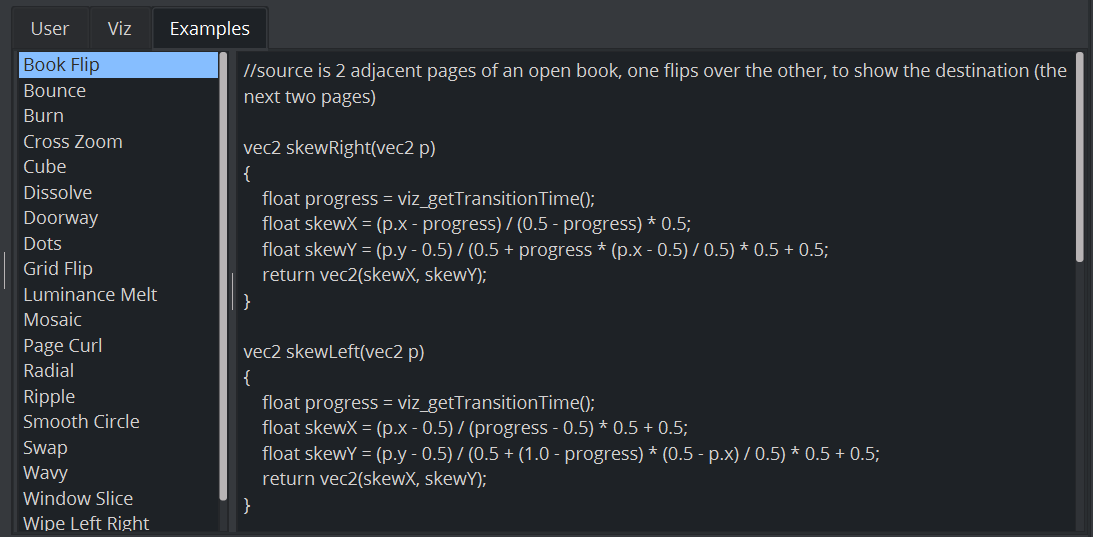
As a starting point, Viz Engine provides some examples for beginners. You can explore them in the Shader Design Environment > Examples, or Transition Shader > Examples tab, depending on the shader type. The following figure shows the transition shader samples:
Copy and paste the sample code into the editor window.
Built-in Features
All Viz Engine Shader templates have built-in features that can be enabled separately. Enabling a feature generates multiple variants of the shader and the best fitting one is selected to render. Keep in mind that the more features enabled, the more combinations of Shaders need to be generated and compiled. This can drastically increase the load time of a scene and the performance impact of a material. Only the features that are really necessary should be enabled.
Clipping
Enables support for the scenes Clipper objects. The template shader takes care of discarding the elements that are clipped.
Note: This feature makes use of the discard keyword, which can have a negative impact on performance.
Global Illumination FX
Enables support for Global Illumination FX. The Global Illumination FX API functions should be used to retrieve the computed GI values.
Parameters and Samplers Naming Convention
The Global Illumination system needs material colors and textures to be able to generate realistic indirect lighting. Therefor parameters should be named according the following convention:
Name | Example | Description |
|---|---|---|
AlbedoMap |
| GI takes the albedo color from this texture. Also called base color sometimes. If no AlbedoMap is defined, it's assumed to be full white as in vec4(1,1,1,1) |
AlbedoColor |
| GI takes the albedo color as a plain color. It's multiplied with the color from the texture. If no AlbedoColor is defined, it's assumed to be full white as in |
EmissiveMap |
| GI takes the emissive color from this texture, alpha value is ignored. If no EmissiveMap is defined, it's assumed to be full black as in |
EmissiveColor |
| GI takes the emissive color as a plain color and adds it to the color from the texture, alpha value is ignored. If no EmissiveColor is defined, it's assumed to be full black as in |
EmissiveIntensity |
| Scale factor on the sum of both emissive texture and color values. If no EmissiveIntensity is defined, it's assumed to be |
Example
Fragment Shader with GI Support
@registerParametersBegin@registerParameterColor(AlbedoColor, "Albedo Color", 255, 255, 255, 255)@registerParameterSampler2D(AlbedoMap, "Albedo Texture")@registerParameterColor(EmissiveColor, "Emissive Color", 0, 0, 0, 0)@registerParameterFloat(EmissiveIntensity, "Emissive Intensity", 1.f, 1.f, 100.f)@registerParameterSampler2D(EmissiveMap, "Emissive Texture")@registerParametersEndvoid fragmentMain(){ vec4 albedoColor = texture(AlbedoMap, viz_getTexCoord()) * userParametersFS.AlbedoColor; vec3 emissiveColor = (texture(EmissiveMap, viz_getTexCoord()).rgb + userParametersFS.EmissiveColor.rgb) * userParametersFS.EmissiveIntensity; vec3 color = albedoColor.rgb + emissiveColor; float alpha = albedoColor.a * viz_getAlpha(); color += viz_getGlobalIlluminationIrradiance(viz_getNormal(), albedoColor.rgb); color *= viz_getGlobalIlluminationAmbientOcclusion(); viz_setFragment(vec4(color, alpha));}Razor Font Rendering
Enables support for Razor Font rendering. Use viz_getGlyphAlpha to get the alpha channel value for the font.
Example
Fragment Shader with Razor Font Support
@registerParametersBegin@registerParameterColor(textColor,"Text Color", 255, 255, 255, 255)@registerParametersEndvoid fragmentMain(){ float glyphAlpha = viz_getGlyphAlpha(); float alpha = viz_getAlpha(); vec4 textColor = userParametersFS.textColor; textColor.a *= alpha; textColor.a *= glyphAlpha; viz_setFragment(textColor);}Skinning
Enables support for Vertex Skinning. There's nothing that needs to be done, the vertex shader template takes care of transforming the necessary vertex attributes.
Vertex Colors
Enables support for Vertex Colors. If Vertex Colors are enabled viz_getColor returns the vertex color, full white otherwise.


