Geometries are stored in the Graphic Hub database and are available through the Asset View.
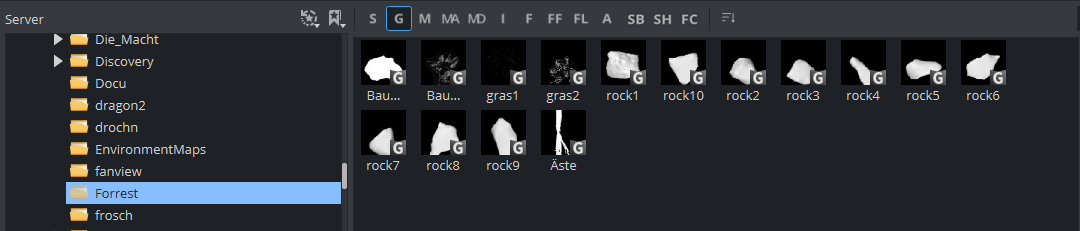
There are two ways to generate geometries:
A geometry can either be imported from an external modeling program (See Import of Files and Archives).
A part of the scene can be merged as geometry and saved to Graphic Hub.
To Merge Scene Trees as Geometries
A part of the scene tree can be merged and saved as geometry. This can be used for example to copy parts of a scene to a new scene.
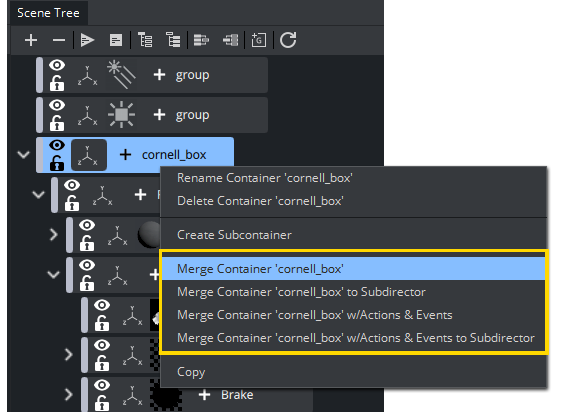
Right click on the part of the scene tree that needs to be merged. From the context menu, select Merge Container... which type you need:
Merge Container: Merges the selected Container and all its Sub-Containers into one compound object, or extracts an already merged object.
Merge Container to Sub Container: Merges the selected Container(s) and all the respective Sub-Containers into one compound object and creates a new sub director for the merged animation.
Merge Container w/ Actions & Events to Sub Director: Merges the selected Container(s) and all the respective Sub-Containers into one compound object, including actions and events and creates a new sub director for the merged animation.
This merges anything underneath the selected container into a single geometry. This geometry can be dragged and saved to Graphic Hub.
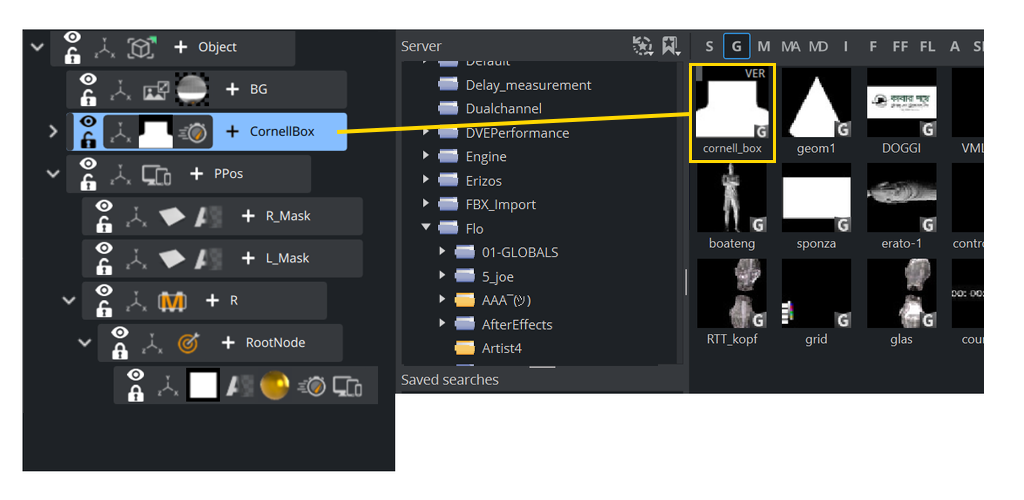
The geometry can be used in another scene by dragging into the scene tree and splitting it up again.
Info: To differentiate if a geometry has been created from a Classic Render Pipeline Scene (CLASSIC) or the modern Viz Engine Render Pipeline (VER), a label indicates the Render Pipeline used.
A note on TextureRenderer and Runtime Shaders:
TextureRenderes and Runtime Shaders need to be exported alongside merged geometries / subscenes to be able to restore their state properly when importing again. The location where they will be placed along the merged geometry can be set in the configuration file.DependencyLocationMode = SUBFOLDER/SAMEFOLDER/RELATIVEPATH
This will place TextureRenderers and Runtime Shaders in the chosen default location.
Limitations
Merged geometries can be generated automatically for Transition Logic scenes if the flag AutoExportTransitionLogicGeometries = 1 is enabled. The new subscene workflow is recommended instead.
Referenced and InScene geometries
An imported or merged geometry in Viz can either stay referenced, linked to a single geometry object in Graphic Hub, or be deactivated (local), which turns it into its own copy stored inside the scene. This only applies to Graphic Hub geometries such as imports and merges. A built-in plugin like Rectangle or Cube has no reference to manage.
Referenced (active link to Graphic Hub)
The scene stores only a pointer, by UUID, to the geometry object. Changes to that object reach every scene that uses it (source).
Pro | Con |
|---|---|
One source for many scenes: fix a mesh once (for example the NFL helmet, a logo or a stadium) and every template picks up the change. | Changes spread everywhere: an edit to the Graphic Hub object hits every scene that uses it, including on-air ones you didn't mean to touch. |
Lighter scene files: the mesh data isn't duplicated in each scene. | Depends on Graphic Hub: the scene needs that geometry UUID to be present and resolvable. If you move scenes between Graphic Hubs without their dependencies, you get missing geometry. |
Reusable library: a merged compound can be dragged into Graphic Hub and reused anywhere (source). | Limited editing: Face Orientation and Shading can only be edited once the geometry is deactivated (source). |
See also: Working with Geometry Items
InScene (copy inside the scene)
Deactivating creates a unique copy for that scene and breaks the link to the database (source).
Pro | Con |
|---|---|
Isolated: later changes in Graphic Hub can't break or change this scene, which is safer for a locked show package. | Duplicated data: each scene carries its own copy, so files are bigger. That matters with heavy meshes like a scan of about 280k faces. |
Fully editable: you can flip normals and adjust shading. This is often needed on imported FBX or glTF meshes. | Drift: copies in different scenes slowly diverge, and a fix has to be repeated in every scene. |
Self-contained: fewer external geometry dependencies to carry along when deploying. | Splitting deactivates for you: splitting a merged geometry automatically breaks the reference. You have to merge it again before you can use Re-establish or Update (source). |
Viz Artist now will ask if one drags a Geometry from Graphic Hub into the scene tree or scene editor.
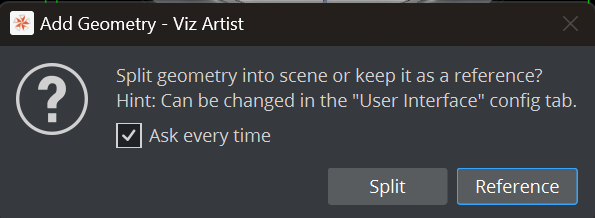
This behavior can be changed in the Configuration/user Interface/Geometry Drop Mode
Geometry Editor Properties
Geometries can be modified by clicking on the Geometry editor:
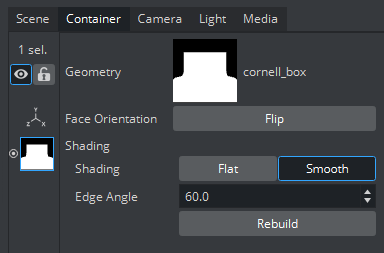
Geometry: Shows a thumbnail of the Geometry, and also its name. Click the thumbnail to select the Geometry in the database.
Note: This can only be done when the reference to the database is active.
Face Orientation: After importing Geometries that have been created by external 3D programs, it might happen that the polygons face orientation is wrong. By clicking the Flip button, the polygons are set correctly.
Correct Face Orientation | Incorrect Faces |
|---|---|
 |  |
Try to use the Expert plug-in and Back Face and Twosided Lighting if there are still rendering issues.
Tip: In the Classic Render Pipeline, you can show the vertices orientation  to visualize the orientation.
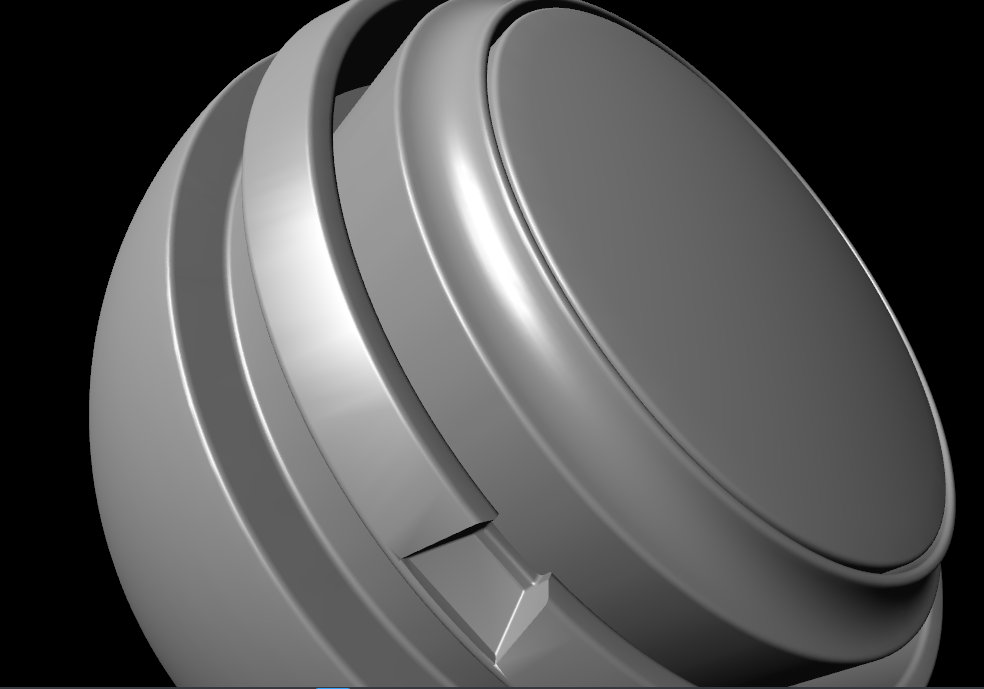
Shading: Imported polygon Geometries normally use shading for creating a smooth surface on the object, which is set together by a planar polygon mesh. The shading value in the Geometry editor sets a threshold between which edges are to be smoothed by shading and which are to be kept as sharp edges. All edges with an angle smaller than the defined value are smoothed by shading. Shading in Viz Artist is performed in the following way: A shade value is produced at each vertex of the polygonal mesh representing the surface of the object. This is done by creating a surface normal on each polygonal facet. The surface normal at each vertex is created by averaging the surface normals for the surrounding facets. The shade at each vertex can then be calculated. Once the shade at the vertices of the polygonal mesh are known, the shade at points interior to the polygonal facets are interpolated from the values at the vertices. This technique makes curved surfaces look shaded smoothly even though based on a representation of planar facets. The interpolation of shade values is incorporated into the polygon scan conversion routine. Hence, an increase in realism is obtained at far less performance cost than carrying out a pixel-by-pixel shading calculation over the whole original surface. Shading may be set to Flat, which means that all shading is disabled, or Smooth, which enables the Edge Angle option. After adjusting the Edge Angle, make sure to click the Rebuild button for the changes to take effect.
Flat Shading | Smooth Shading |
|---|---|
 |  |
Note: Face Orientation and Shading are only applicable if the reference is deactivated.
Working with Referenced Geometries
If Geometries stored in Graphic Hub are used in other Scenes, they still keep their reference. This means, if the Geometry on Graphic Hub is modified, it also affects all scenes using this Geometry. To break the reference, click on the Geometry and choose Deactivate. The geometry is then part of the scene and is stored within the scene.
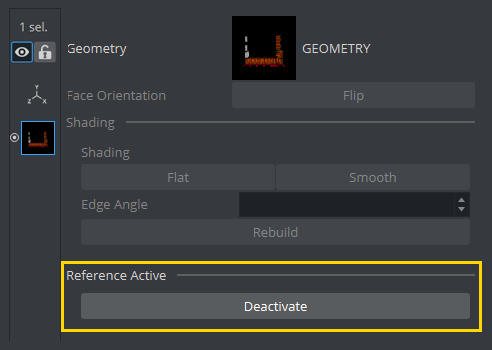
Reference: If using an imported or compound object in a Scene, there is a reference between the object in the Scene and the object in the database. If changes are applied to the object in the Scene, the object in the database including any Scenes where this object is used with an established reference, it reflects those changes, as it is the same object.
Deactivate: Creates a unique copy of the object for the Scene. The reference link must be deactivated. Changes that are applied to a deactivated object do not lead to changes in the original object in the database.
Re-establish: Reactivates the reference and overwrites the object in the Scene with the object in the database. An active reference is practical when creating a set of Scenes with the same object. If for instance, all the Scenes should have the same background and the background item is created as an object with active references, changes can easily be applied to all the Scenes that use that object.
Update: Reactivates the reference and overwrites the object in the database with the object in the Scene.
Status: Shows the current status of the reference.
Note: The reference is automatically deactivated if splitting the object. If the object is split, it must first be merged before the Re-establish and Update operations can be performed.