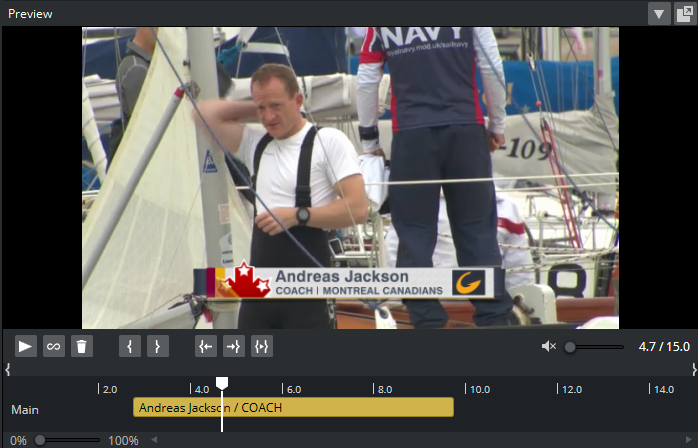
Add graphics to a video timeline with the Timeline Editor.
Note: Creating video timelines is only supported for clips in a playlist, not the page list.
Search for a video using the Search Media editor and open it in the Timeline editor.
Drag a clip into a playlist.
Open the clip.
Drag graphics pages or playlist elements onto the timeline of the clip. The video preview displays snapshots of the graphics as overlays (fetched from Preview Server), and can be manually adjusted on the timeline.
Remember to Save the video timeline.
A story item containing clip and graphics references from the Timeline editor appears as a video composite group in the playlist. Issuing a
Takecommand on the group triggers the video clip and timed graphics.
This section covers the following topics:
Timeline Editor Functions
Editor Control Bar Functions
The Timeline editor is divided in two, a control bar and a preview window.
Timeline Editor Functions
Function | Description |
|---|---|
| Play or Pause the clip. |
Adjust the local volume of the clip. This does not affect the volume when taken on the program engine. | |
| Delete the currently selected graphics from the timeline. |
| If on, a clip loops between the clip in and out times. Looping affects the clip only in the playout mode. |
Scrub marker (cursor). Drag to scrub the clip. | |
| Set the mark-in our mark-out point to the current position of the cursor. |
| Jump the cursor to the mark-in point. |
| Play only the area between the mark-in and mark-out points. |
Drag the Zoom control to increase or decrease the time scale shown on the timeline. |
Multiple Tracks in the Timeline Editor
The Timeline editor supports multiple tracks for transition logic scenes. This allows graphics to overlap and play out correctly, but requires that all data elements are based on the same transition logic set.
The tracks reflect the layers in the transition logic scene. A track is displayed in the Timeline editor if an element using that layer has been added.
Graphics from the same layer should not be overlapped, and the Timeline editor indicates a possible conflict by coloring the graphics placeholders red.
Timeline Editor Keyboard Shortcuts
Key | Description |
|---|---|
Mouse wheel | Zoom In/Out |
CTRL + ‘+’ | Zoom In |
CTRL + ‘-’ | Zoom Out |
CTRL + 0 | Reset Zoom |
DELETE | Remove currently selected graphics from the timeline. |
SPACE | Play/Pause |
SHIFT + SPACE | Play only the area between the mark-in and mark-out points. |
CTRL + ARROW | Move graphics in small steps back and forth on the timeline. |
CTRL + SHIFT + ARROW | Move graphics in big steps back and forth on the timeline. |
CTRL + ALT + ARROW | Increase or decrease duration by a small amount. |
CTRL + ALT + SHIFT + ARROW | Increase or decrease duration by a large amount. |
CTRL + L | Move the selected graphics next to the one to the left. |
CTRL + R | Move the selected graphics next to the one to the right. |
CTRL + ALT + L | Stretch the selected graphics next to the one to the left. |
CTRL + ALT + R | Stretch the selected graphics next to the one to the right. |
CTRL + H | Sets the video position to the start of the clip. |
CTRL + E | Sets the video position to the end of the clip. |
T | Sets a video to loop. (Note that this shortcut only works if the cursor is first placed in the timeline editor.) |
Note: Media keyboard shortcuts for play, pause and mute should also work.
Inline TimeCode Monitor
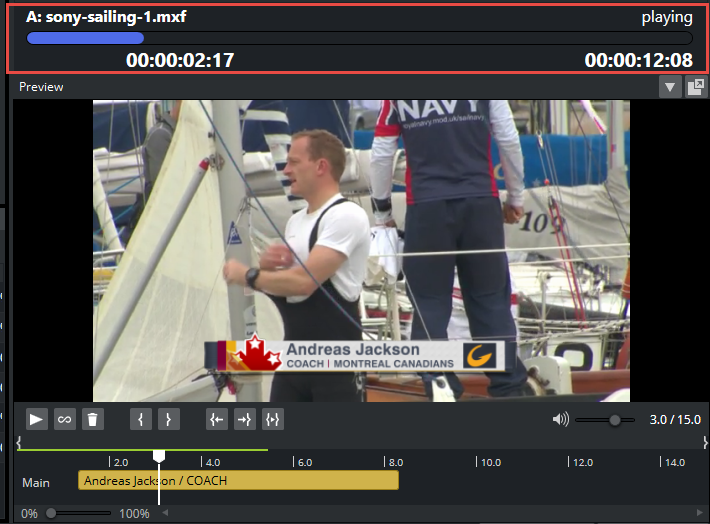
In addition to the basic TC Monitor that opens in a separate window, an inline TimeCode Monitor becomes available above the local Preview panel in Viz Trio when playing a video. It displays the channel associated with the video and the video’s name in this format: <channel-name>: <clip-name>.
It also displays a progress bar showing how much of the video has played. The progress bar is green when the video is playing, yellow when it is paused and red when 10 seconds remain in the video.
Working with the Timeline Editor
Adding Graphics to a Video Clip Timeline
Drag a video from the Search Media editor to a playlist.
Note: The video must be dragged to a playlist in order to add graphics and create a composite element. Graphics cannot be added to videos that are dragged to a page list.
Double-click the video item.
The item opens in the Timeline editor.
If the video does not appear in the Timeline editor as expected, see Troubleshooting and Known Limitations.
To add graphics, drag an item from the page list to the timeline. A graphics placeholder appears on the timeline.
Use the mark-in/mark-out points to adjust the duration of the animation.
Optional: Repeat steps 3 and 4 to add more graphics.
Note: Although graphics may be overlaid on the timeline, graphics that use the same layer (front, middle, back or transition logic layer) do not play out correctly.
Click Save to create a new composite element, consisting of both the video and graphics.
The composite element is presented in the playlist with the video element as parent, and the graphics items as children.
Editing a Composite Element
First, create a composite element, consisting of both video and one or more graphics items, see To add graphics to a video clip timeline.
Double-click the composite element in the playlist.
The item opens in the Timeline editor.
Drag graphics to the timeline.
Click Save as in the upper right corner to update the composite element.
Setting the Mark-in and Mark-out point
In the Timeline editor, scrub the cursor to the desired frame.
Click the Set Mark-in or Set Mark-out button.
Click Jump to Mark-in or Jump to Mark-out to view the points.
Troubleshooting and Known Limitations
Known Limitations
Video timeline elements are only supported in playlists, not the page list.
Although graphics may be overlaid on the timeline, graphics that use the same layer (front, middle, back or transition logic layer) do not play out correctly. The Timeline editor always indicates a possible conflict by coloring the graphics placeholders red. To use overlapping graphics based on transition logic scenes, see Multiple Tracks in the Timeline Editor.
Current limitations on Media Sequencer cause the following behavior:
If you issue a
Takeon a timed group (1), and while that group is being played out issue aTakeon graphics in another layer (2), Media Sequencer takes out the last taken element (2) when issuing the timedTake Outcommand (for the timed graphics).Hence, it is currently not recommended to take other data elements on-air while a timed group is being played out.
The Timeline editor may behave unexpectedly in some virtual machine or remote desktop environments.


