
Viz Pilot Edge User Guide
Version 1.6 | Published May 07, 2021 ©
Find Media
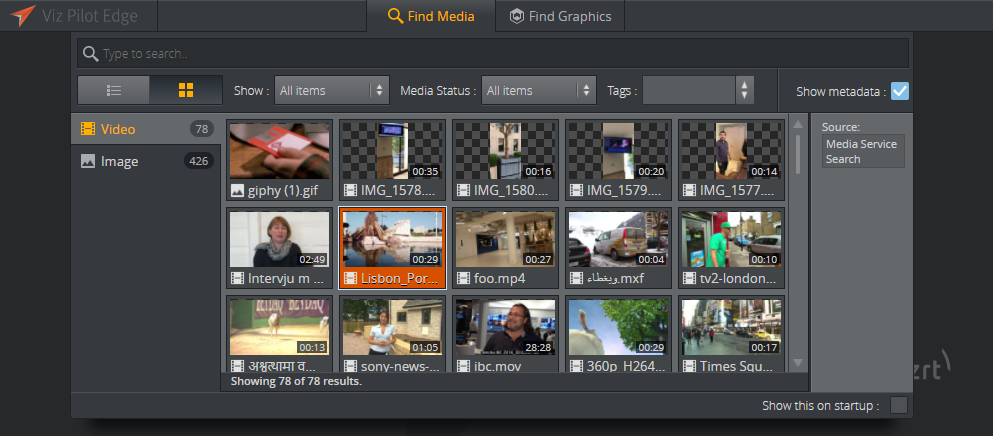
Select Find Media on the welcome page to search for available media assets. Enter search terms and filter searches based on the time of publish, media status and tags.
A preview of the media asset is available by right-clicking it and selecting Preview.
Double-click a media asset to open it.
The selected media will open in a new window where it can be dragged directly to the newsroom system as is, using the Drag item to Newsroom button  .
.
You can add and edit graphics on the timeline and do basic edits of the video.
Media Status
The media status filter lets you filter out invalid media items. The filter is only available if search providers support this filtering. A warning appears if only one of several search providers supports this filtering.
Adding Graphics to Videos
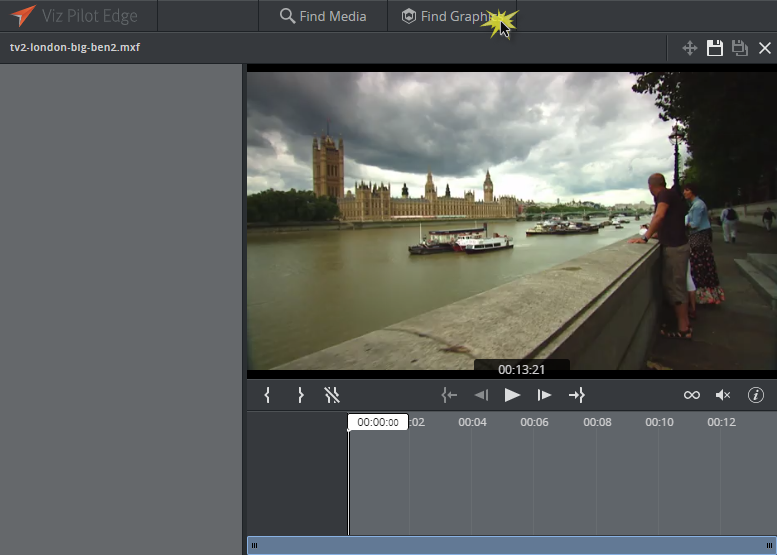
Double-clicking a video from the Find Media tab will open it in a new window consisting of three main parts: the Fill In Form on the left, the Preview Window on the right and the Timeline Editor located below the Preview Window in the application. The Timeline Editor offers basic functionality for video editing and managing graphics.
Note: Clicking on the vertical split-bar that separates the two windows will collapse the Fill In Form to make more space for the timeline and Preview Window. Clicking on the sidebar again restores the view.
Adding a Graphic to the Timeline Editor
-
Click the Find Graphics tab while keeping the video open.
-
Find the desired graphic and drag-and-drop it into the Timeline Editor. Repeat the same procedure to add more items.
WARNING: If there are no unsaved changes, double-clicking the graphic will replace the video view with the graphic view. A warning dialog will appear if there are unsaved changes.
In the example below, a lower third graphic is added to the Timeline Editor from the Find Graphics tab. Each of the graphics types has its own graphics track. To edit the content of a specific graphic click it and edit the content in the Fill In Form.

Info: Viz Pilot Edge provides basic support for Transition Logic scenes.
Graphics Shortcut Menu
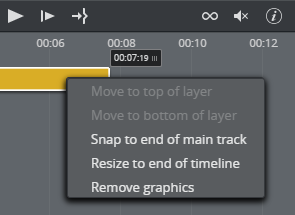
The graphics shortcut menu (accessed by right-clicking a graphic in the timeline) contains the following options:
-
Move to top/bottom of layer: If graphics are overlapping, move one graphic behind or in front of other graphics on the timeline. Graphics moved to the top will not be obstructed by other graphics, while moving to the bottom will place a graphic behind other graphics that could block it entirely or partially.
-
Snap to end of main track: Move the graphic to the end of the main track without changing its duration.
-
Resize to end of timeline: Move the graphic’s out point to the end of the timeline. The graphic’s in point remains the same. The feature is disabled if an item already matches the end of the timeline.
-
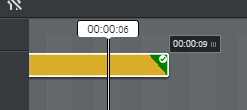
Load animation: Click to view any graphic animations. A green check mark indicates that the animation is loaded:
-
Remove graphic: Delete a graphic from the timeline.
Note: Pressing the DELETE key after selecting a graphic also removes it from the timeline.
Timeline Editor Functions
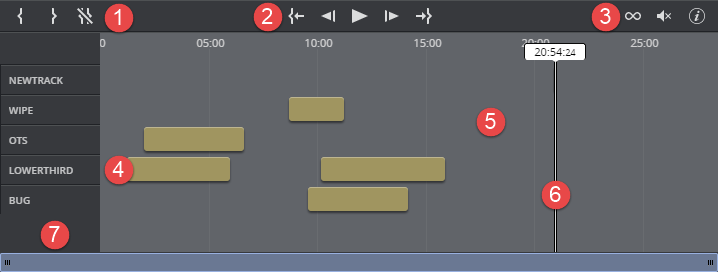
Located below the Preview Window, the Timeline Editor lets you make basic edits and provides an overview of graphics added to a video.
Tip: Hover your cursor over the Timeline Editor buttons to display shortcuts.
The main timeline editor feature are listed below:
-
Adjust in and out point positions in the timeline.
-
Play/move frames.
-
Loop video, mute and information about keyboard shortcuts.
-
Graphic track: Move graphics to the desired position and adjust the timing of the graphic. Click the graphics track to add/edit content in the Fill In Form.
-
Area containing graphic tracks. Use the mouse wheel to zoom in and out. Right-click for shortcut menu.
-
Playhead: Drag to scrub the clip.
-
List of the names of the different graphic tracks.
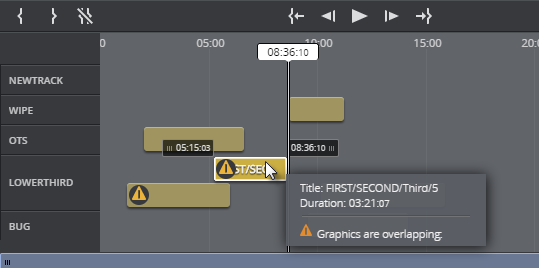
The Timeline Editor supports several layers of graphics. This allows graphics to overlap and be played out correctly, as long as they are in separate layers or the correct layer. The Timeline Editor will indicate a conflict by displaying a warning icon and a message in the graphic track.
In the example below, two lower third graphics are overlapping:
Timeline Shortcut Menu
The timeline shortcut menu (accessed by right-clicking an empty area in the timeline) contains the following options:
-
Clear timeline: Removes all overlay graphics from the timeline.
-
Always show labels: The titles of the overlay graphics will always be displayed when enabled. Hover your cursor over the graphics element to display the title when disabled.
Save
After opening a video, it can be dragged into the newsroom as-is using the Drag item to Newsroom button
.
If one or several templates are added to the video, the element must be saved  before it can be dragged to the newsroom. This saves the video together with the graphics. If the graphics element is a previously saved element, any changes made to it are saved.
Note: The save as functionality,  , is not an option for video with graphics since Viz One does not support saving multiple timelines for the same video.