Packages are the unit of installation in VAM. Everything you can add, configure, upgrade, or remove is a package.
The Packages View
The default landing page after sign-in lists every package known to the installation, grouped by category (Applications first). Each package is shown as a card.
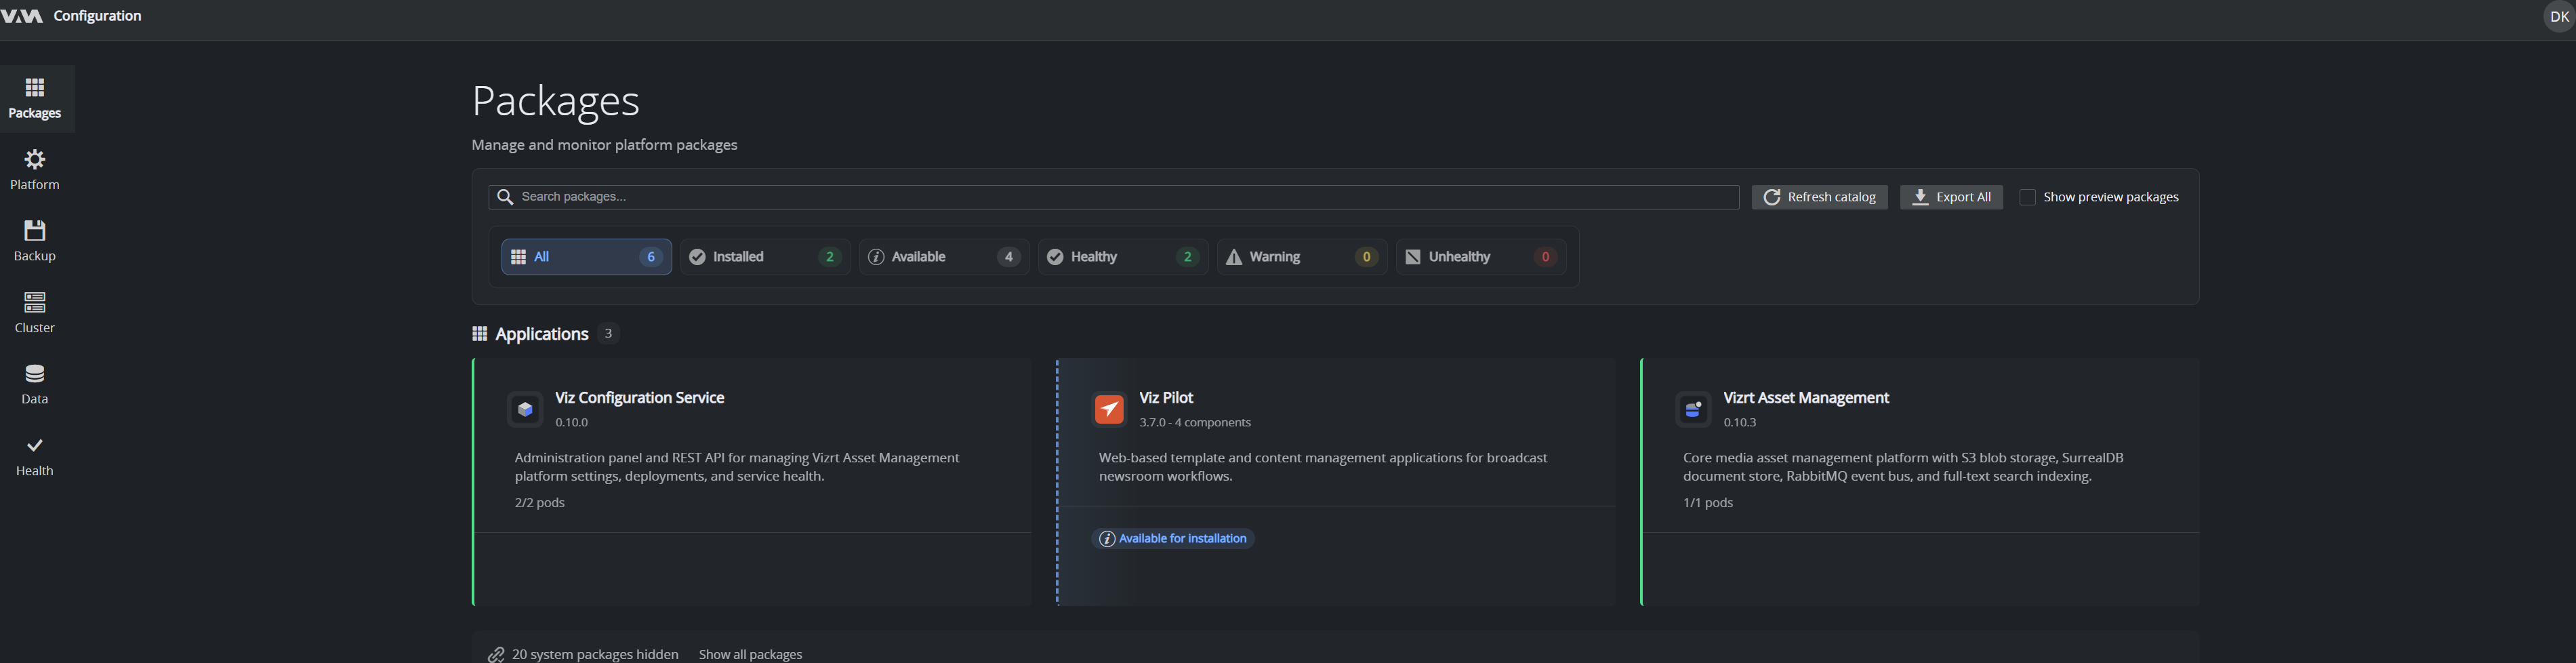
Across the top you have:
- Search: filter the list by name.
- The filter chips
All,Installed,Available,Healthy,Warning,Unhealthy(each with a count) to narrow what's shown. - Refresh catalog: re-pull the catalog from the registry so newly published packages / versions appear (no redeploy needed).
- Export All and Show preview packages for advanced use.
Each card shows the package's name, installed version, a short description, its pod count (for example, 2/2 pods) and badges such as Update available. Infrastructure/system packages are hidden by default. Use Show all packages to reveal them.
Click a card to open the package detail view.
Package Detail View
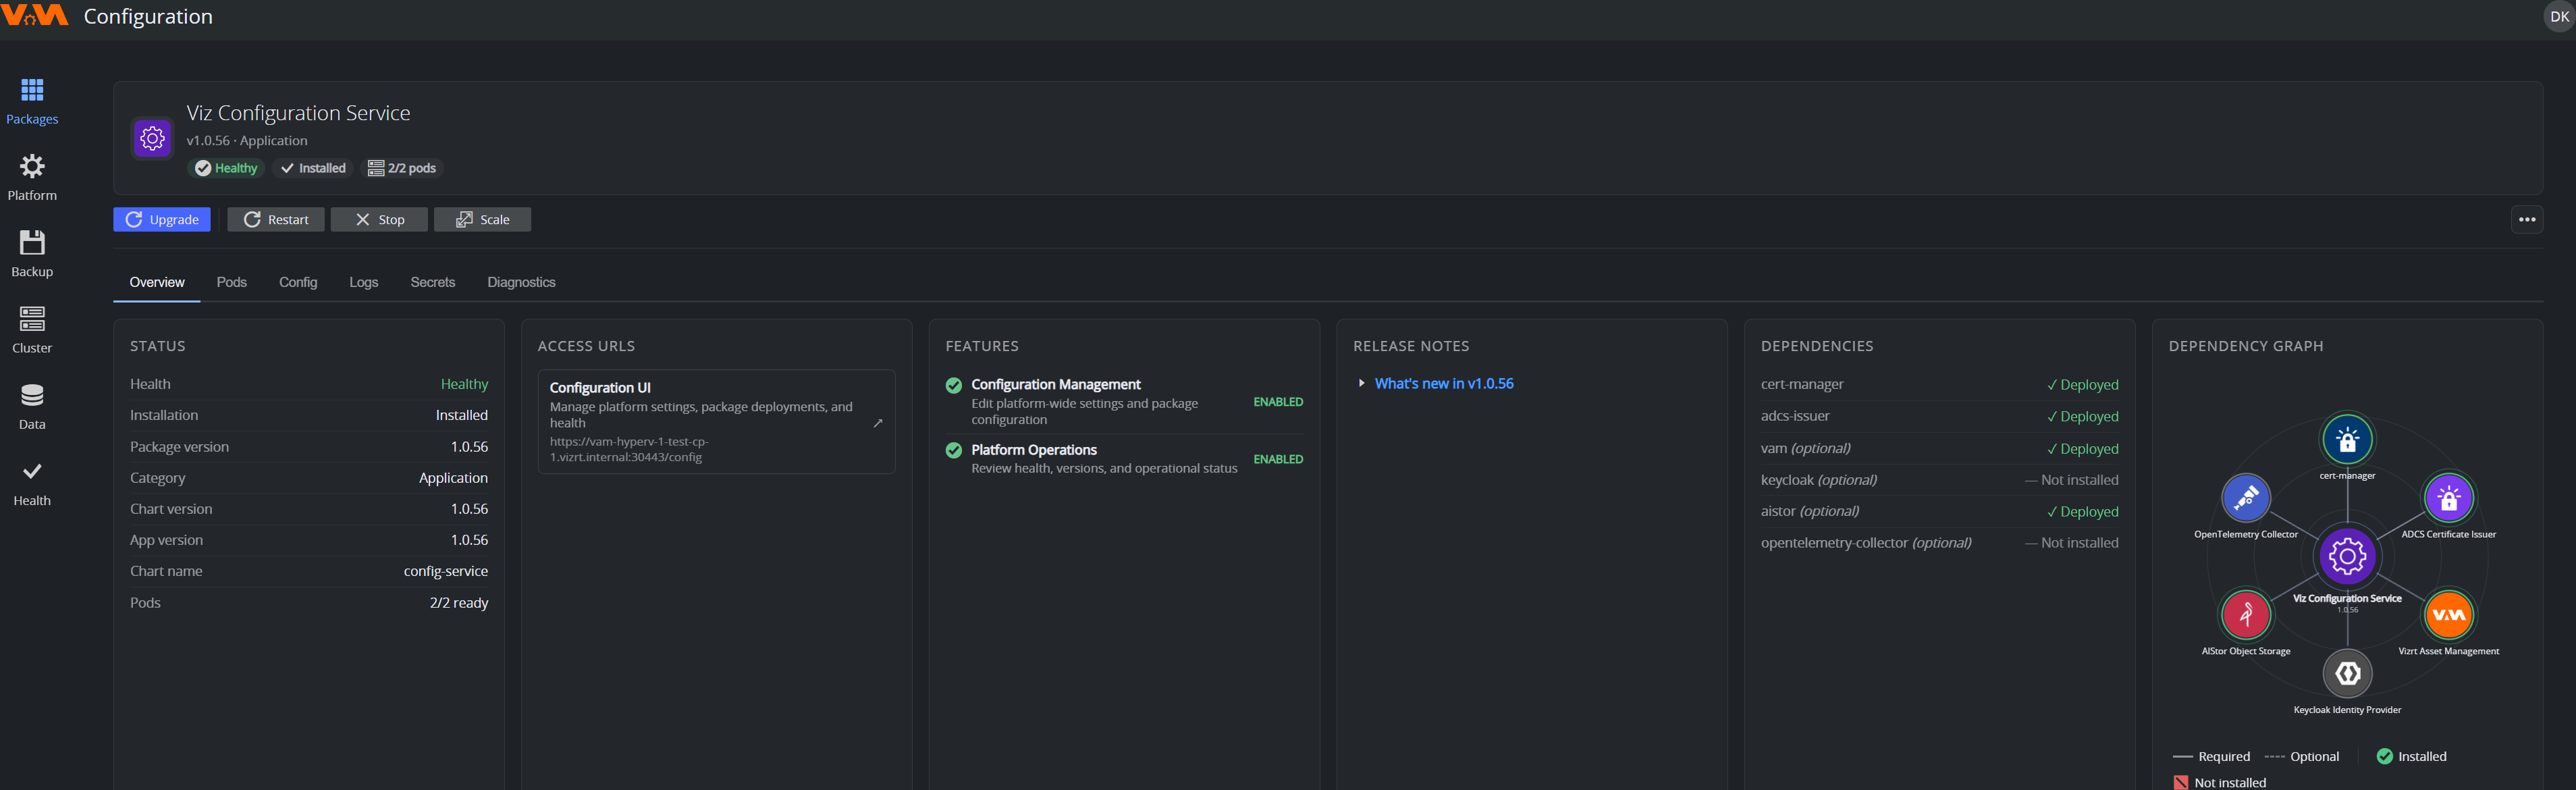
The package detail view is where you do everything for a single package. Lifecycle actions live in the button row at the top: Upgrade, Restart, Stop, Scale and an ... overflow menu (Uninstall lives here when the package allows it). Below that is a set of tabs:
- Overview: status (health, installed version, chart/app version, pod readiness), access URLs, the package's enabled features, release notes (the "What's new" changelog), its dependencies and a visual dependency graph.
- Pods: the package's running pods and their status.
- Config: the package's settings, as a form generated from the package's published config schema (schema-validated).
- Logs: recent log output from the package's pods.
- Secrets: the secrets the package consumes (values are never shown).
- Diagnostics: additional detail for support/debugging.
Installing a New Package
- On the Packages view, filter by Available (or use Refresh catalog first if you just published something).
- Click the package card to open its detail view.
- Read the description and check the Dependencies section / dependency graph. Any missing required dependencies are listed. The UI installs them in the right order if you accept.
- Click Install.
- Fill in the configuration form. Required fields are marked. The form does not let you submit until they are filled and valid. Some packages add gates here (for example a GPU check).
- Click Install to start.
- Live progress is shown step-by-step. On success, the package appears as Installed with status Healthy.
If the install fails, expand the failed step to read the diagnosis. Most failures are configuration problems. Fix the values, then retry from the package detail page.
Configuring an Installed Package
- Open the package's detail view.
- Click the Config tab.
- Edit values. As you change a field, the UI validates against the package's schema and shows inline errors if a value is out of range, the wrong type, etc.
- Save:
- Save & Apply (restart now) saves the values and restarts the package, so the change takes effect immediately.
- Save without restarting saves the values. They take effect at the next restart or upgrade. For a package that is not installed, this button is Save Configuration.
- Reset to Saved discards your unsaved edits.
Some configuration values (database passwords, OIDC client secrets) are sealed secrets: the UI shows •••••••• for the current value and lets you replace it, never read it back.
Upgrading a Package
- The package card / detail page shows an Update available badge when the catalog has a newer version. (Use Refresh catalog to pick up newly published versions.)
- Click Update.
- A dialog shows what changes from vX to vY: the release notes / changelog for the new version and the configuration to review.
- Click Update to start. Live step-by-step progress is shown.
If an upgrade fails, it is automatically rolled back to the last known-good version and the dialog explains what happened, so a bad upgrade does not leave the package broken.
The Configuration Service can upgrade itself through this same flow. When it does, it briefly restarts and reconnects automatically, and a dedicated progress dialog tracks the steps. The core VAM platform is still upgraded with the vamctl installer.
Uninstalling a Package
- Open the package's detail view.
- Open the ... menu and click Uninstall.
- Read the warning: This will remove the package from the cluster. This action cannot be undone.
- The dialog lists the dependencies that no other installed package uses, each with a check box. Clear the check box of each one you want to keep.
- Click Uninstall.
If another installed package depends on this one, the uninstall fails and the message names that package. Uninstall it first.
Some packages cannot be uninstalled here at all. For a package the platform requires, Uninstall is unavailable and its tooltip explains why. Removing one would break the installation. For some of these packages the tooltip refers you to the deployment console. That is the vamctl installer. It has no uninstall workflow and removes packages as part of a deployment. See Uninstalling.
Reading Package Logs
Open the Logs tab on the package detail view. It loads the recent log lines of the package's pods. To see a single pod, pick it in the pod list, which shows All Pods by default. Refresh loads the lines again. Export Logs downloads the logs of all the package's pods as a text file.
For long-term log analysis beyond what this tab shows, use your own monitoring system. You provide and maintain its OTLP endpoint yourself, see Prerequisites > Monitoring and Log Storage.