This panel contains parameters and settings for Media Assets. There are different settings for all kinds of various Media assets like Clip Channels, Graphic Channels, Image Channels, Live Input Channels and Super Channels.
The individual settings are described in the following sub chapters:
Transformation Settings
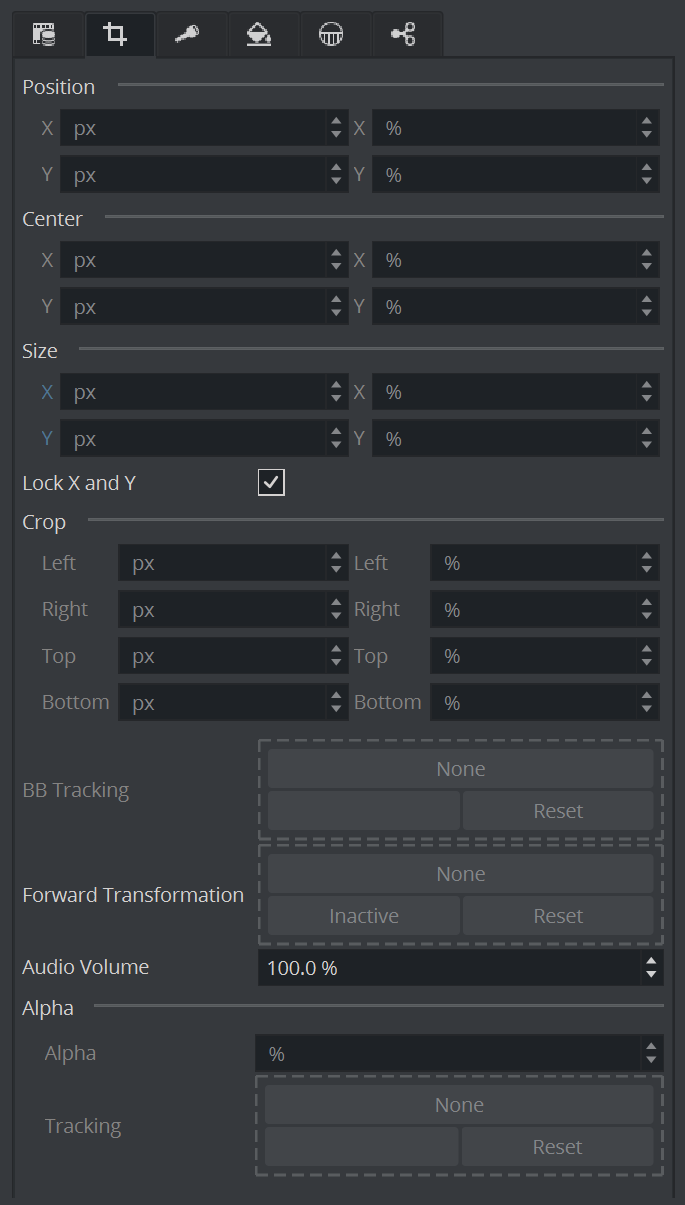
Position: The position controls are used to set the X and Y coordinates for the Media Asset. The coordinates are relative to the configured output format (see the Configuring Viz section of the Viz Engine Administrator Guide).
Center: Uses the Center X and Y values to define the center position of the Media Asset. As for the Size control, the Center position is relative to the configured channel resolution.
Size: Sets the X and Y values to define the size of the Media Asset. The size is based on the channel resolution as defined in the Video Input section of Configuring Viz (see the Viz Engine Administrator Guide), which may be different than the configured output resolution.
Crop: Media Assets can also be cropped. The crop values are relative to the size as defined using this editor.
Tracking options: There are several options available to either follow your Media Asset or to position your Media Asset. according other objects. This can be done by selecting either "DVE follows object" (The position and size of the DVE follows any other object) or by "Object follows DVE" to align any other to this Media Assets size an position. In addition the transparency of your Media Asset can also be bound to the alpha of any other object. (Alpha Tracking)
Absolute / Relative Position Controls: Controls to adjust the Position, Size, Center position, and Crop. The values can be provided either as Absolute pixel values, or as Relative percentage values. The corresponding value is displayed next to the input value field. If provided with values that exceed the logical limit, the last value is adjusted automatically to the maximum value. For example, if setting the Left crop value to 51 %, and then the Right crop value to 75 %, the Right crop value is set to 49 %. Applies to DVE only.
Note: By default, the center position for DVE transformations is defined as the top left corner of the DVE placeholder. Setting the DVE Center X and Y positions to 50 % defines the center for the transformations as in the middle of the DVE placeholder. This behavior deviates from that of transforming Containers, as they have their transformation center in the middle.
Media Asset Keying Settings
In addition to the common Media Asset properties, Keying has these properties.
Note: A Chroma Keyer License is required!
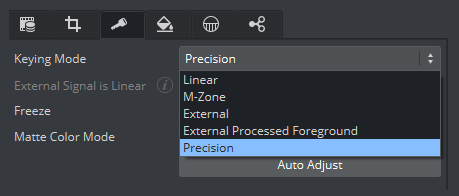
Keying Mode (Texture only: see Keying Mode):
Linear: No chroma keying.
M-Zone: Uses the multi-zone Keyer.
External: To be used with Arena/Libero.
External Processed Foreground: Reads processed foreground and matte from an external signal and applies the postprocessing steps of the Precision Keyer.
Precision: Switches to the Precision Keyer.
External Signal is Linear: Whether Viz Engine should skip color space conversion as the external signal is already linear. Only available with External Processed Foreground keying mode.
Freeze: Stops the incoming live signal from any movement (freezing). This is used during finetuning your chroma key.
Matte Color Mode: Selects which kind of matte is used. It can be a Greenscreen, a Bluescreen or the matte can be sent from external.
Auto Adjust: Automatically adjusts the main parameters of the Precision Keyer.
Tip: It is recommended to use an external application like Viz Arc to set your Keyer properties.
Color Correction
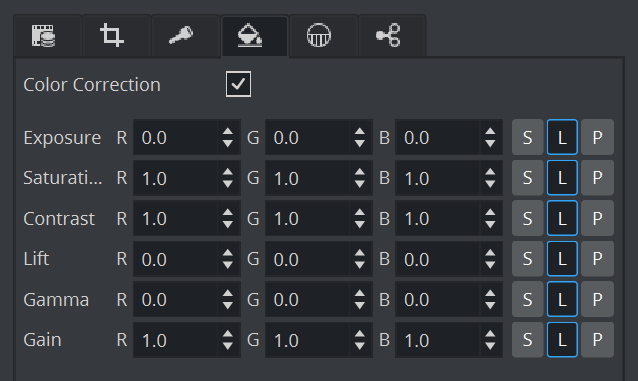
This panel allows modification of the rendered output of any Media Asset. It can be used to modify (for example, clips) or to finetune the content on videowalls.
The following options are available:
Exposure
Saturation
Contrast
Lift
Gamma
Gain
Talent Reflection
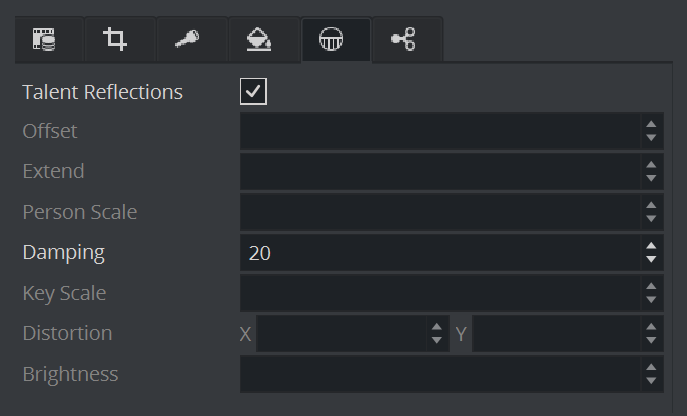
Talent Reflection: Sets Talent Reflection On or Off (use with Viz Virtual Studio):
Damping: Sets how many previous fields are to be used to calculate the current Y position. The larger the number the higher the damping, but the Y coordinate is less responsive to quick movements. The setting is a compromise between a stable and a non-responsive Y coordinate for the reflection (Default:
2, Minimum:2, Maximum:100).
The following options are available in the Classic Render Pipeline only.
Offset: Sets the offset of the talents lowest body part from where the reflection starts (pixels (Default:
0, Minimum:0, Maximum:1000)).Extend: Sets the extend of the total reflection (pixels). The reflection eases out with distances (Default:
300, Minimum:0, Maximum:1000).Person Scale: Sets a global scale which applies to the talent (Default:
1, Minimum:0.2, Maximum:10).Key Scale: Sets the scale applied to the alpha of the reflection, on top of the parameters set in Offset (Default:
0.5, Minimum:0.1, Maximum:10).Distortion X / Y: Parameter X defines by how much x axis is affected by the sinus distortion which goes vertically down the screen (Default:
1, Minimum:1, Maximum:10). Parameter Y defines how much the sinus waveform is stretched vertically down the reflection (Default:0, Minimum:0.001, Maximum:1).Brightness: Sets the brightness for video going through the Chroma Keyer (Default:
0, Minimum:0, Maximum:10).
Shared Memory (SHM) Aux
Defines if the content of this Media Asset should be send as Shared Memory. This is needed for Integration with third party render engines. For integration with Unreal Engine, please select the respective setting.
Texture: Defines what kind of texture should be send through the Shared Memory output.
Undistort: Performs an undistortion action before the texture is being sent.


