In this section you can find short examples of how to use the scripting functionality.
Script Unit with Click Handler
The following example demonstrates how to use a script unit to add individual click handlers for buttons in HTML fragments. The exported method onClick replaces the usual pattern with something simpler and modular.
vizrt.onClick = (name) => { switch (name) { case "BtnA": ... case "BtnB": ... }}This method allows you to register individual click handlers by name, without writing a large switch block. Each call to onClick(name, callback) stores a callback in a map and installs a global vizrt.onClick dispatcher that forwards the event to the correct callback. It also returns a dispose function so you can unregister the handler.
The unit and the usage of this module may look like this in the template:
const onClickMap: Record<string, () => void> = {}/** * A better vizrt.onClick to avoid switch statements... * It returns a dispose function when it's no longer needed * @param name the vizrt-click-name to register * @param callback The callback to call when clicked * @returns a dispose function to stop updating */export const onClick = (name: string, callback: () => void) => { onClickMap[name] = callback vizrt.onClick = (name) => onClickMap[name]?.() //console.log("from onClick") return () => delete onClickMap[name]}First add a new HTML fragment to the template and create a button with a click name:
<button vizrt-click-name="my-button">MY BUTTON</button>Then, in scripting, the handler for this button is expressed as follows:
import { onClick } from "@unit/global-onclick"const dispose = onClick("my-button", () => { app.notify("info", "The button was clicked!");});You can later call the dispose() method if you need to disconnect the click handler.
Accessing Tables
The following example shows how to populate a list or table of Formula 1 drivers when the user clicks a button named "fetch".
// Drivers list, usually fetched from an external resourceconst drivers = [ { name: "Lewis Hamilton", wins: "105" }, { name: "Michael Schumacher", wins: "91" }, { name: "Max Verstappen", wins: "68" }, { name: "Sebastian Vettel", wins: "53" }, { name: "Alain Prost", wins: "51" }, { name: "Ayrton Senna", wins: "41" }, { name: "Fernando Alonso", wins: "32" }];// Helper: extract last name, lowercase, and add .jpgfunction getImageFileName(name: string): string { const parts = name.trim().split(" "); const lastName = parts[parts.length - 1].toLowerCase(); return `${lastName}.jpg`;}vizrt.onClick = (name: string) => { if (name === "fetch") { // Reference to the list/table field in the payload const list = vizrt.fields.$list.value; // Base path for image assets const baseUrl = "http://myserver.com/imageshare/"; // Iterate and populate the rows drivers.forEach((driver, i) => { if (!list[i]) return; // Safety if fewer rows exist const imageFile = getImageFileName(driver.name); list[i].$name.value = driver.name; list[i].$number.value = driver.wins; list[i].$image.value = createImageAsset(baseUrl + imageFile); }); }};Automatically Clear Title Field
This example demonstrates the following features:
Script that executes on template load.
Reacting to user changes to the fields.
Modifying fields from the script.
Create a new template based on this in Template Builder, by choosing Create a new template and adding your newly created scene via Add Scene.
Go to the Fill-in form tab.
In the scripting tab, you can verify that the template fields are available by typing
vizrt.fieldsand looking at the autocompletion.Enter the following in the upper right script panel:
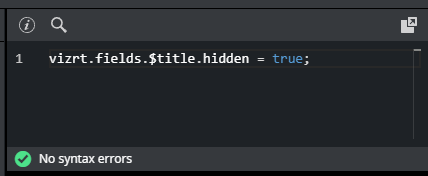
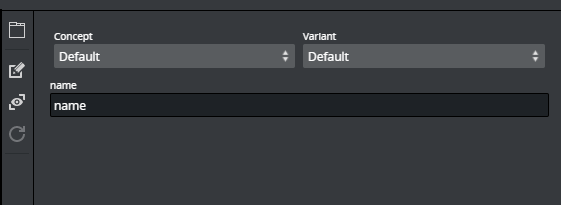
This script causes the template to hide the title field when the template loads. You should see this change applied immediately in the payload editor preview:
The script is now extended to react to changes made in name. When name is empty, title should be hidden and empty, but not otherwise:
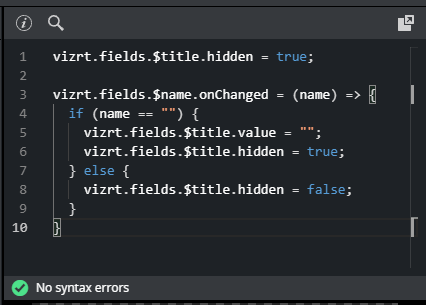
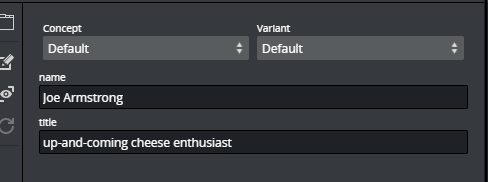
The title field is now hidden and cleared when name is cleared, and reappears when text is entered into name.
Save the template and observe this action in the Viz Pilot Edge client.
Note: Fields with dashes in their name, cannot be used in TypeScript with dot syntax. Instead, use vizrt.fields["$01-week"] to access such fields.
When creating a new scene, use camel case or underscore (for example, 01thisIsMyField or 01_week), to access the field with dot syntax.
Fetch Title from REST Service
In this example, the script automatically fills the title field by fetching it from a REST endpoint.
This illustrates more advanced features:
Using the standard browser fetch API.
Changing field values based on responses from other services.
Using the same template as the example above, or creating a new one from the same scene, delete anything in the script tab and write the following:

Replace HOSTNAME with your own PDS host name. If everything is working correctly, you should see an autogenerated title appear when you set or change the name field.
In this case, a specially provided test endpoint was used on the Pilot Data Server, but you can point to any other REST resource. You are not limited to the fetch API used. All standard JavaScript network mechanisms can be used.