Viz Multiplay User Guide
Version 3.1 | Published July 20, 2023 ©
Profiles
Profiles are used to create different playout channel setups. Each playout channel represents one or more Viz Engines.
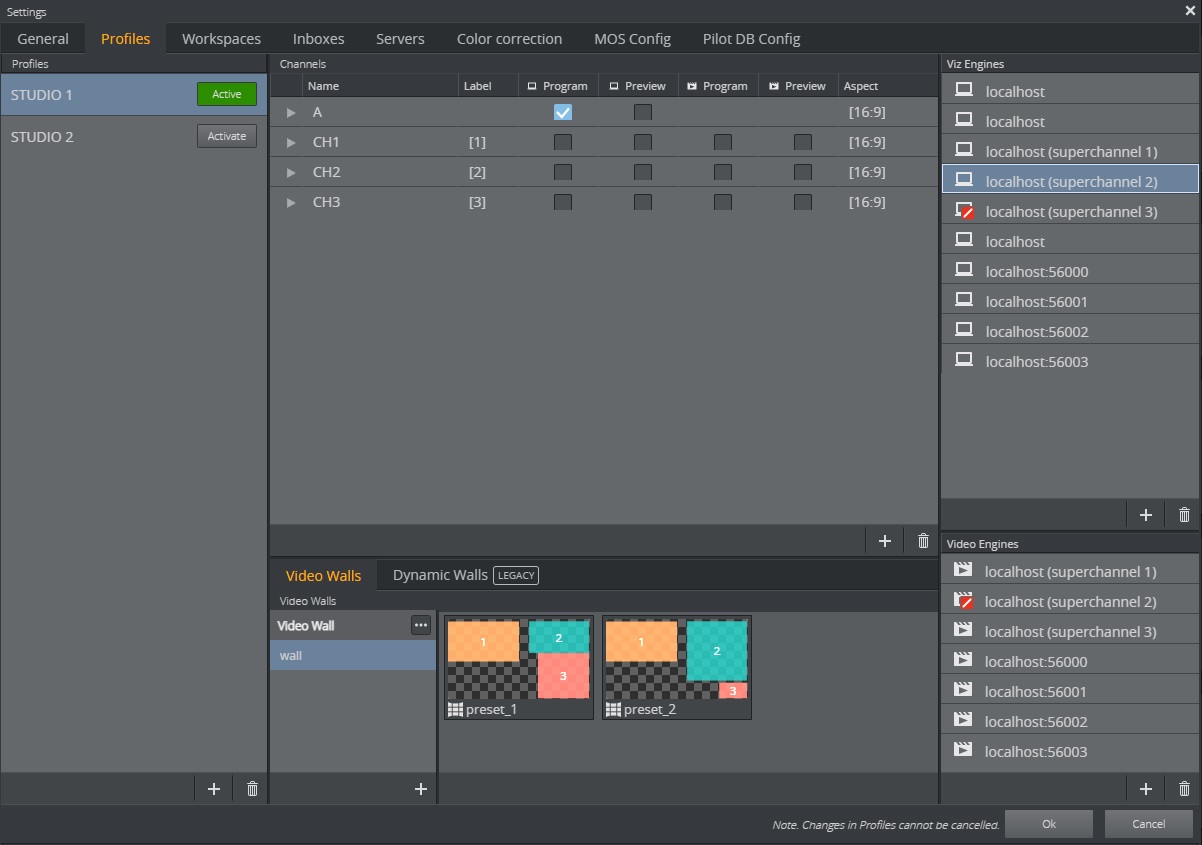
Use the Profiles tab under Settings to individually configure Profiles, Channels, Viz Engine handlers and Viz Video handlers, and to configure video walls.
Note: The Profiles tab is similar to profile configuration in Viz Trio and Viz Pilot. It uses the same data as Viz Trio, so changes made via either application are reflected in both.
Note: Profile changes cannot be canceled.
Activate/Deactivate profiles using buttons in the Profiles list:

Note: Always set the Active Profile for a show in Viz Multiplay. If a show is activated by a Viz Trio client, then it will be deactivated if that Viz Trio client shuts down and Viz Multiplay will lose its active profile.
Note: Renaming an active profile (from Viz Trio or Viz Multiplay) automatically deactivates the profile. Go back to Settings > Profiles Tab and click the Activate button for the profile again.
Configuring Channels
Content can be played out on multiple channels, with as many outputs as desired. Typically, each channel has multiple outputs and each output is a single Viz Engine. In a typical video wall setup, Viz Multiplay creates one main channel with one Viz Engine output to the default Viz Engine port (6100) and a number of channels with one Viz Engine output for graphics and one Viz Engine output for video. Port configuration for these handlers depends on the video wall type: port numbers by default start from 55000 on legacy configuration with GFX channels, and from 56000 on Superchannel video walls. In the new Arm and Fire setup all handlers address the main channel port (6100).
Note: When elements are added to the channels in the Media Pane, the channel name is reflected in the Viz Trio page list. However, in Viz Trio you can also specifically assign elements to channels. If an element is assigned to a channel name that is not present in the active profile, then that element will not be visible in Viz Multiplay. The element will also not be visible if the element's channel is hidden in the active workspace.
Elements that are assigned to the [PROGRAM] channel will be displayed in the channel set to viz/video program in the active profile in Viz Multiplay, regardless of the channel’s name.
Note: Main channel refers to the main channel of a video wall, while [PROGRAM] refers to the program channel of the profile.
Note: Adding videos to a graphics-only channel or graphics to a video-only channel will result in the element not being played out correctly. Composite elements will only work on channels that support both graphics and video.
Handlers
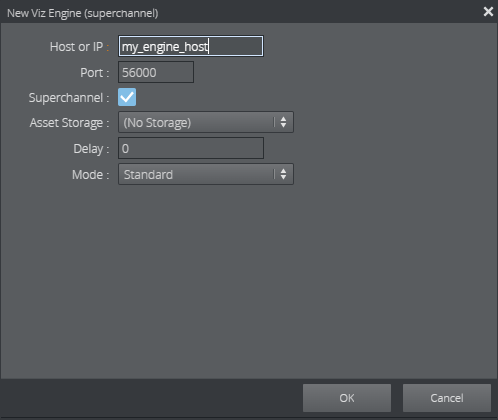
Each Viz and Video handler represents one Viz Engine with graphics or video capabilities. When creating a video wall in Viz Multiplay, all handlers are auto generated. It is also possible to explicitly create a viz or video handler:
-
Click the plus button in the list of viz or video handlers.
-
Fill in host and port.
-
Check the Superchannel checkbox if this handler represents a Superchannel.
-
Select and asset storage publishing point for transfer of Viz One clips to the given viz engine host. These storage points are read from the Viz One server specified in Settings > Servers.
-
Set the Delay to globally delay playout on this handler by a number of seconds, including fractions, ie. 1.5. All playout commands on this Viz Engine is then delayed by the given duration. This mechanism will not be frame accurate.
Note: The delay applies all attempts to play out elements in the channel from both Viz Multiplay, and other applications like Viz Trio or Director.
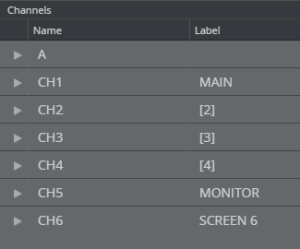
Adding Custom Labels to Video Wall Channels
When adding a video wall to a profile, the different areas of the video wall are represented as channels. These are prefixed CH or GFX, for instance CH1, CH2, CH3 etc. In the different parts of the GUI, these channels are equivalent to their numbers, for instance in a video wall preset, the channel CH1 is just shown as the number 1 in the thumbnail where it appears. Though, it is possible to assign custom labels to the different video wall channels. When filling in content into the presets, it may be easier for the operator to identify the channels by names instead of number:

To assign labels to different video wall channels, go to Settings > Profiles, click a profile and modify the labels in the Channels column: