The table lists the scenes that live in the master's folder, with a thumbnail and the columns Name, Layer and State. Rows are sorted by name with numbers in numeric order.
By default only those scens which belong to a certain layer will be shown. See image below, it only shows the Scenes attached to the “Fullscreen” layer.
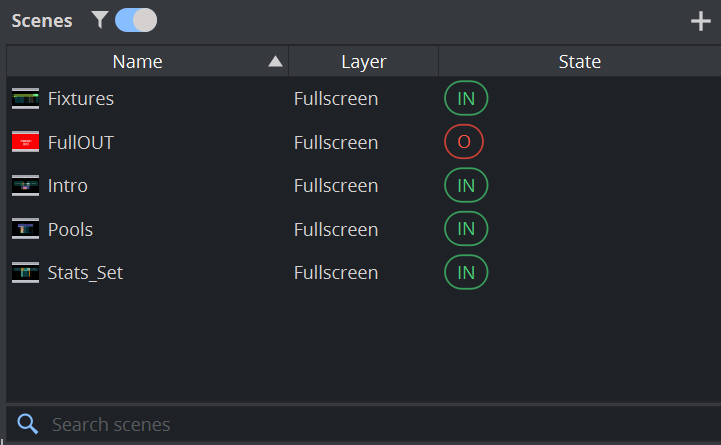

Use the switch on the top to toggle between the filtered view (only selected layer) or to see all scenes inside the current Graphic Hub folder.
Also see Scenes Pane
Logicmaker needs to query all scenes in a folder first to query its information.
Action | How |
|---|---|
Take a scene in the master | Click the row. |
Create a scene | The + in the header, or right-click and choose Insert new Scene. |
Rename a scene | Double-click the name, or press F2. |
Delete a scene | Right-click and choose Delete, or press Delete. |
Search | Type in the Search scenes field at the bottom. |
Filter by layer | The funnel switch in the header. |
Taking a scene
Clicking a row does what a control application does: it loads the scene's content into its layer in the master and animates the layer to the scene's state. The layer is selected, its state highlighted and the transition arrow plays; with the filter switch of the Control Objects panel on, the panel switches to the scene's fields. Use it to preview a page in the context of the master.
A master scene cannot be loaded into a layer.
Creating a scene
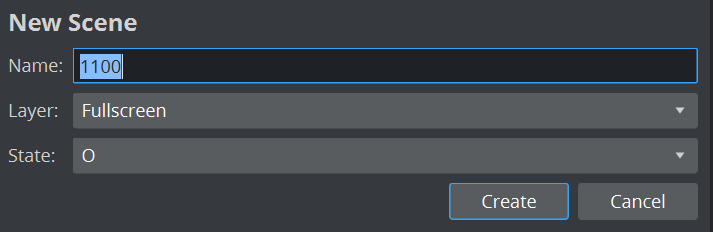
The New Scene form has Name (the next free page number such as 1000, 1100, ... is proposed), Layer and State. Create is enabled when the name is valid, unique in the folder and a state is selected.
The scene is created and saved in the master's folder, appears in the list and is selected. It needs a saved master (Background scene has not been saved. otherwise).
To create an Out page by hand, choose the layer, the state O and a name such as Lower_OUT.
Renaming and deleting
Renaming a scene renames it in the Graphic Hub; a name that already exists in the folder is rejected.
Be careful, when deleting the scene from the Graphic Hub; this cannot be undone from the Logicmaker.
The layer filter
The funnel switch starts on: only the scenes of the selected layer are shown. Switch it off to see all scenes of the folder. With the filter off the table also shows entries that are not ordinary pages:
Shown as | Meaning |
|---|---|
| The scene's ControlObject names a layer, state or master that does not exist. See health check Scenes pointing at a wrong master, layer or state. |
| The scene has no ControlObject; it is not a page of Transition Logic. |
Layer column | A master scene (it contains Toggle layers), possibly this one. |
Layer column | A scene of the legacy combined format. |
Layer column | Still being examined. |
What a page needs
A page is an ordinary scene with the container object and its ControlObject. Build the graphics inside object and add Control plugins (for example ControlText for text, ControlImage for logos) for the fields operators fill in. The ControlObject's layer, state and background entries link the page to the master; keep them intact.
Subscenes and merged geometries
By default the page is referenced as a subscene, which is the standard workflow. If the legacy configuration flag TransitionLogicUseMergedGeometries is active, the Logicmaker shows once per master the notice Legacy merged-geometries workflow is active (TransitionLogicUseMergedGeometries). and adds the check Merged geometries for all scenes to the health check.