
GeoNavigator turns a list of places into a camera flight over your map. You mark the stops you want to visit, choose how the camera should travel between them, and it builds a real animation on a director — one you can play, scrub and trigger like any other.
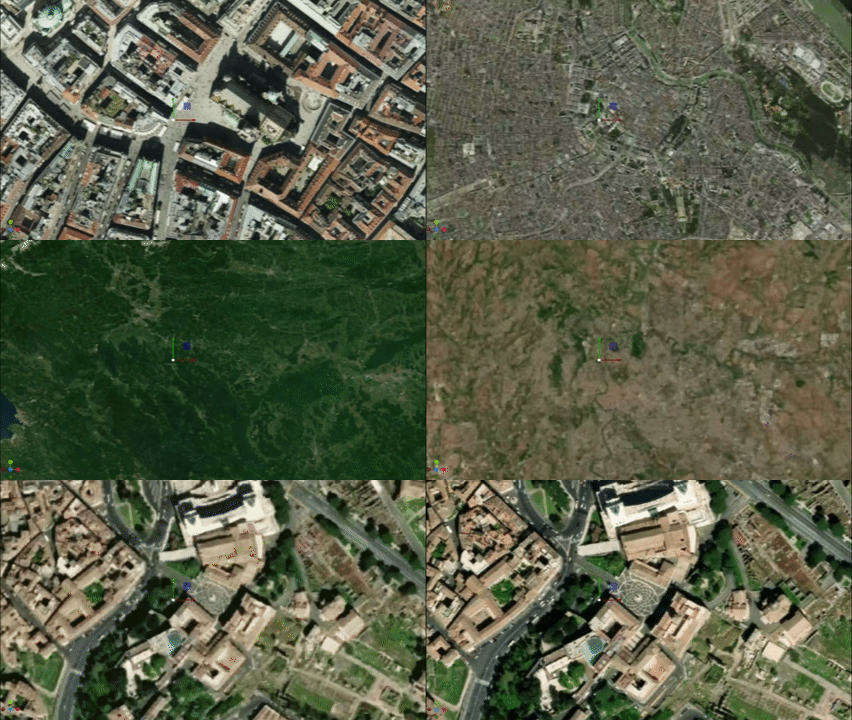
Moving a map camera by hand is tricky. You can animate longitude, latitude, zoom, bearing and pitch separately, but getting them to peak together in the middle of a move — so the camera pulls back, travels, and settles again — means hand-tuning five curves that all have to match.
GeoNavigator does that for you. You give it an ordered list of places, called hops, and it figures out the whole camera move between them: the path across the globe, the pull-back in the middle, the easing at each end. Then it writes the result onto a director as a normal animation.
How a flight is built
Three things make up a flight, and it is worth keeping them apart in your head, because each one is edited in a different place.
The hops
Where you stop
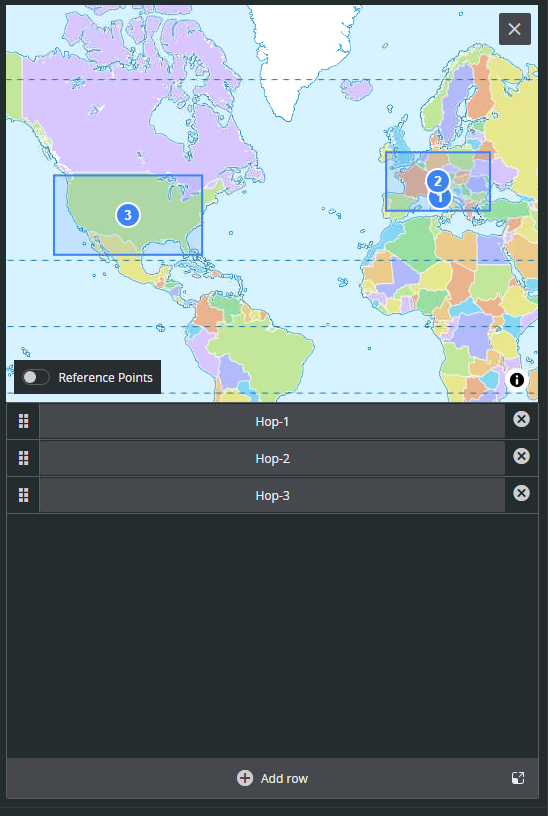
An ordered list of places. Each hop is a box on the map, not a pin — a minimum and maximum longitude and latitude. The camera frames that box when it arrives, so the size of the box is what decides how close in you end up.
The flight settings
How you travel
How long the move takes, how the camera eases, how high it climbs on the way, and which way round the globe it goes. Set once for the whole flight — and overridable on any individual hop when one leg needs to behave differently.
The director
Where it ends up
The stage director the finished animation is written to. GeoNavigator creates the keyframes on it. Nothing is animated until you ask for the build, and building again replaces what was there.
Example
Let's create a quick flight from Vienna to Rome.
Create a basic Map using GeoCanvas and GeoCamera,
Put the plugin on the map
Drag the GeoNavigator plugin onto the container that carries your map — the same one holding the GeoCanvas and the geographic camera.
Look at the first place
Type Vienna into Search Location and select it. The Navigator will navigate our view to Austria, Vienna. (Do not press the Add button yet).
The map flies straight there, so you can see what you are about to capture. Nothing has joined the flight yet — searching only moves the camera. Think of it as scouting.
Frame the shot, then capture it
Use the GeoCamera or press the “M” and use the Geo Controls to zoom, pan and rotate until the map looks the way you want it to look when the flight arrives. Then press Add Hop from current camera.
That adds a row to the hop list holding exactly what you are looking at. This is the heart of the workflow: you compose the shot by eye and hand it over, rather than describing it as four numbers.
Do the same for Rome
Search for Rome, then frame it and press the Add Hop from current camera button. You now have two rows — the flight will run from the first to the second, in list order.
Say how long it should take
Set Duration to 4 seconds, and put a name in Director — GeoNav will do. Name a director of your own rather than accepting whatever is already there. It keeps the flight separate from the rest of your scene's animation, and makes it easy to find on the stage afterwards.
Build it
Press Rebuild Animation.
This is the step people forget. Until you press it there is no animation, and every change you make afterwards needs another press — a new row, a different duration, a different motion. Nothing you change takes effect on its own.
Fly
Inside the Stage, there is now a GeoNavigator Channel with a progress animation. Start the animation and the camera flies from Hop 1 to Hop 2, using the flight you just built.
The settings in detail
These live in the plugin editor and apply to the whole flight. Any of them can be overridden on a single row — see Working with Animations — but start here.
Defaults | |
|---|---|
Director | The name of the stage director the flight is built on. Name your own — a flight built onto a director you already use for something else will overwrite it the next time you build. |
Hop Prefix | The naming stem for new rows, so they come out as Hop1, Hop2 and so on. Worth changing when a scene carries more than one flight and you need to tell their stops apart at a glance. |
Motion | How the camera travels between two stops. This is the single setting that most changes how a flight feels, so it is worth trying all four on a real leg.
|
Zoom Lift | How far the camera pulls back as it passes the midpoint — the height of the arc in the diagram above. 0 keeps the flight flat, at the zoom level of the two stops; larger values climb higher and show more of the world on the way. 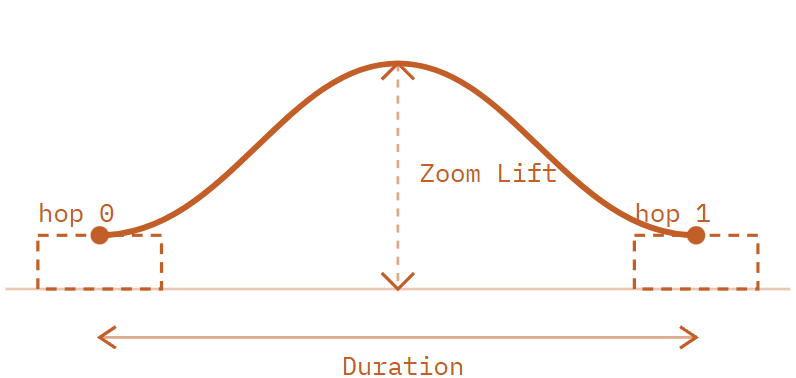 It does nothing while Motion is set to Van Wijk, which is how the plugin arrives. If you drag Zoom Lift around and the flight does not change, this is why — switch Motion to Linear or Sine first. |
Duration | How long the flight lasts. This sets the length of the animation on the director, so if the move has to fit a specific slot, set it here rather than time-stretching afterwards. Under Auto timing this becomes a starting point rather than a promise — see Timing Mode below. |
Direction | Which way round the globe the camera travels. It only makes a visible difference near the date line in the Pacific — but there it makes an enormous one. 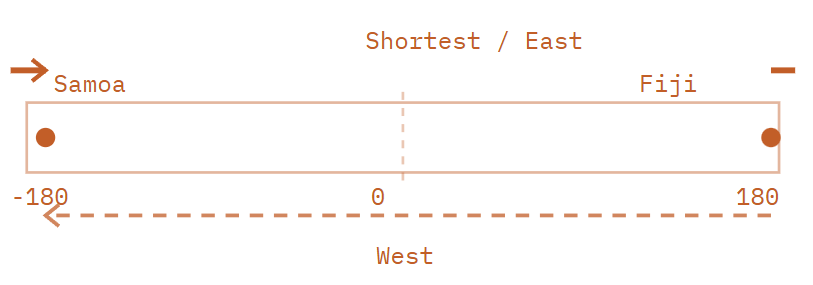 |
Timing Mode | Authored means the durations you set are the durations you get. Use it whenever the flight has to fit a known slot — a voiceover, a fixed break, a hand-off. Auto lets GeoNavigator share the time out itself, so legs are paced against how far they actually travel instead of every stop getting an equal slice. On a tour that mixes a hop across a city with a hop across an ocean, Auto stops the short one crawling and the long one racing. |
Progress | This is the base for the animation. travels from 0 to 1. |
Prefetch Step (frames) | Defines how many tiles will be preloaded ahead. |
Per-hop overrides
Every shaping setting above can also be set on a single row, where it applies to that stop alone. A row you leave alone simply follows the flight-level setting. This is how you build a tour that mostly behaves one way but slows down, turns, or pauses at one particular stop.
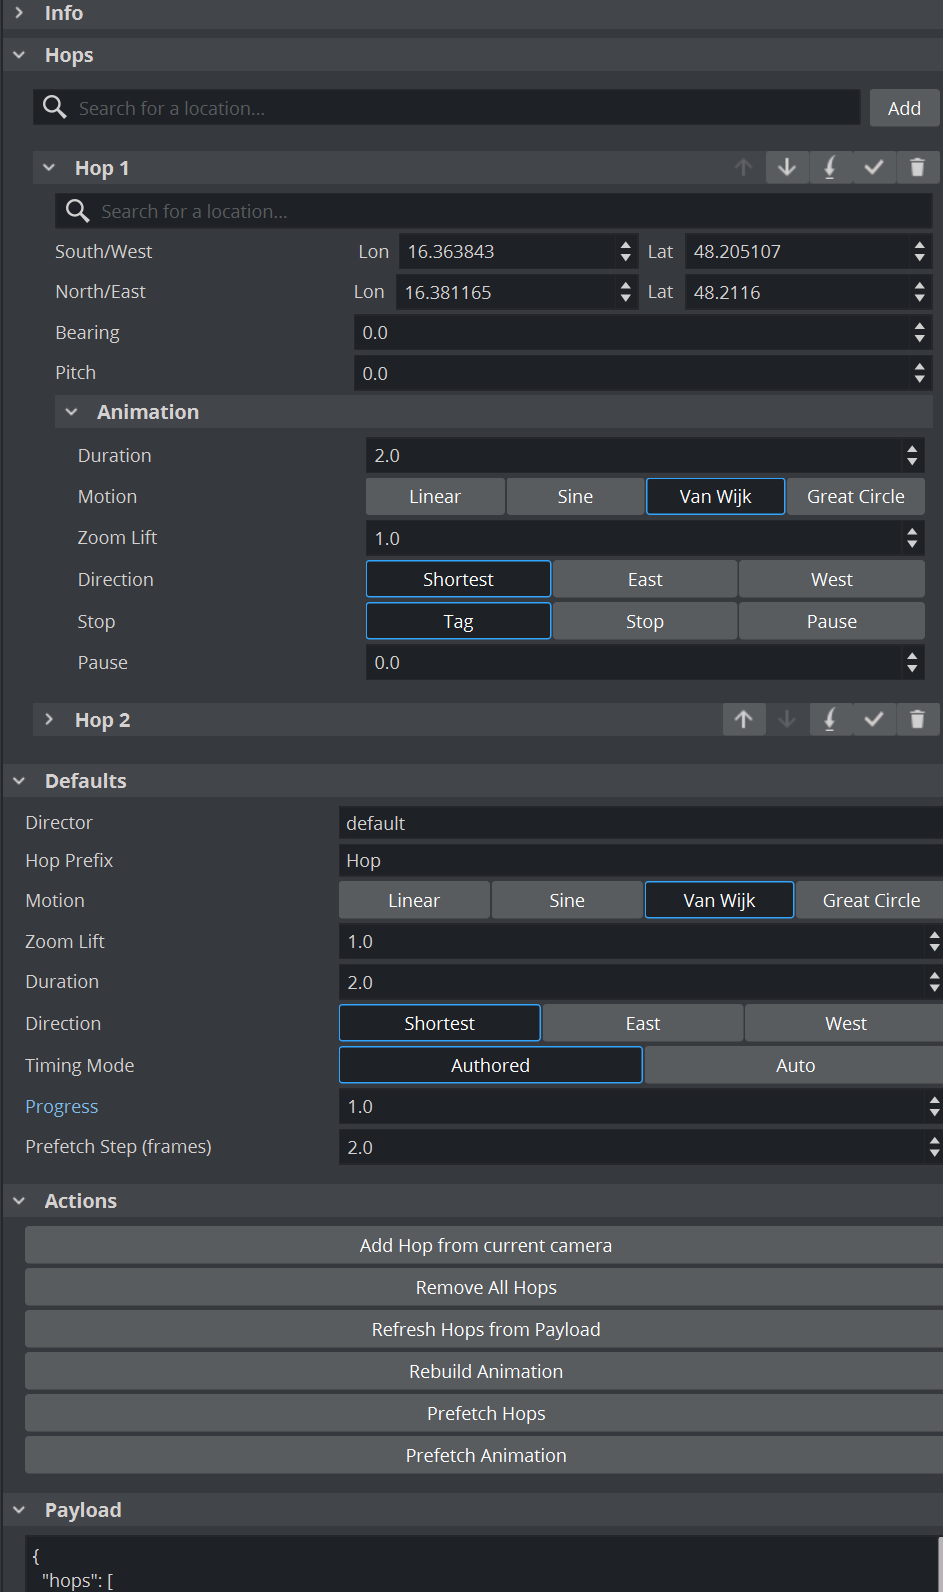
Within the Hops Accordions, some buttons help you to quickly apply your actions:

The arrow buttons allow you to reorder your animation. Either move a hop up or down to change the order. The trashcan button removes the hop from the hop list.
Replace Hop with current camera: Frame your destination using the GeoCamera or the M shortcut to quickly replace the Hops data with your new view.
Remember to press the “Rebuild Animation” Button to update the flight.
Set camera to hop: Replaces your current view to the stored Hop data. Use this to quickly jump to a hop without the need to play the animation.
Hops Settings | |
|---|---|
Bounds | The box the camera frames on arrival. A tight box arrives close in, a wide box arrives pulled back. There is no zoom setting on a stop — the framing comes from the box. |
Bearing | Which way is up when the camera arrives. Rotating the map between two stops is a cheap way to make an arrival feel deliberate |
Pitch | How far the camera tilts towards the horizon on arrival. Flat overhead at 0, increasingly oblique above that |
Animation | |
Duration | See Default Settings |
Motion | See Default Settings |
Zoom Lift | See Default Settings |
Direction | See Default Settings |
Stop | What happens on arrival — carry straight on into the next leg, or come to a stop here |
Pause | How long to wait on a hop, if Pause mode is used. |
Actions | |
|---|---|
Add Hop from current Camera | Creates a new Hop using the current GeoCamera settings |
Remove All Hops | Removes all current Hops |
Refresh Hops from Payload | Reads the Payload Json again, All current settings will be overwritten by these data. |
Prefetch Hops | Loads all Tiles required on the certain hop points. |
Prefetch Animation | Loads all tiles required for the whole animation |
The Payload
This is actually the storage with all information needed for the GeoNavigator. The JSON data is exposed, so it can be used by a control application to build a whole animation with one single command instead of creating it step by step.
Driving it from a template

A second plugin, ControlGeoNavigator, hands the flight to a control application so an operator can change it without ever opening the scene. Drop it onto the same container as GeoNavigator.
Give it a Field Id — the name the control application uses to find this flight — and then tick which settings an operator is allowed to touch. Each Expose checkbox adds or removes one field from what the template shows:
Expose…
Bearing, Duration, Flight Direction, Motion, Pause Duration, Pitch, Stop Type, Timing Mode, Zoom Lift and User Data are ticked to start with. Bounds As Text is not.
Untick everything the operator has no business changing. An exposed field is one more thing to get wrong on air, and a template offering three meaningful choices is easier to use than one offering eleven.
The operator then sees one set of these fields per stop, and edits them row by row exactly as you would in the scene — the values land straight on the flight. They still need the flight rebuilt afterwards, so if your template lets an operator change timing or motion, give them a button that rebuilds too.
Tips and troubleshooting
Nothing moved - Rebuild after every change.
Hops, duration, motion — none of it reaches the animation until update_animation runs again. This is the most common reason a flight looks stale.
zoomLift does nothing - You are on Van Wijk.
The default motion computes its own zoom curve and ignores the manual value. Switch motion to Linear or Sine to take control of the arc yourself.
The flight will not play - Check which director it landed on. If the director you named is empty, look at the scene's default director before assuming the build failed — the flight may have been written somewhere you were not looking.
It went the wrong way round the world - That is the antimeridian.
Put flightDirection back to Shortest. Any leg between the eastern and western Pacific will do this if a direction is forced.
Arriving too close or too wide - Resize the hop's box.
There is no zoom on a hop — the framing comes from the size of bounds. Grow the box to arrive further out, shrink it to arrive closer in.
Editing a captured hop - Write a fresh box.
A hop captured from the camera may not expose a bounds object you can edit in place. Building the box yourself and writing it back through payload always works.
Legs feel unevenly paced - Try Auto timing.
On a tour mixing short and long legs, timingMode 1 shares the time out by distance instead of giving every hop an equal slice.
Authoring by eye - Fly first, capture second.
Position the camera by hand until the shot is right, then use the add_current. Composing a shot as four numbers is much harder than recognizing a good one.