Viz Channel Branding User Guide
Version 5.1 | Published October 26, 2023 ©
ADC-100 by Harris Broadcast
This section describes how to configure the Automated Content Management and Distribution system (ADC-100) by Harris Broadcast for Viz Channel Branding. It describes the setup on the ADC side and contains information on the following topics:
General Information and Setup
An ADC-100 system can trigger Viz Channel Branding (by sending commands to Media Sequencer) through VDCP or Universal Sercom Device (USD) using either TCP/IP or VDCP.
Note: Both version 11 and 12 of the LST format are supported.
The advantages of VDCP are that it is:
-
Standard
-
Proved to work for many customers
The advantages of USD are that it:
-
Can be used over TCP/IP thus saving serial ports and additional cabling.
This section contains information on the following topics:
Triggering
Triggering should be Primary/Secondary Events selected.
Primary Event Defaults should be Triggered (Ext) selected. The ADC-100 system reads playlist data via files in LST format (binary files).
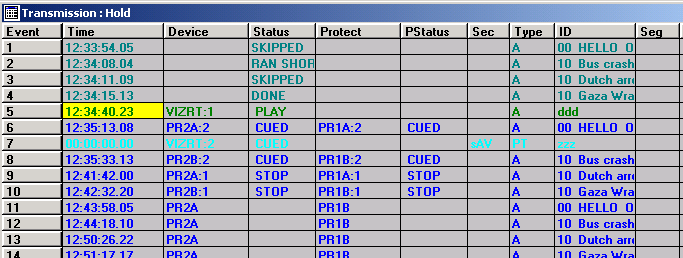
Reconcile field value in the LST is read into the Event ID field in Viz Channel Branding and must be set in order to receive playlist updates. An empty or corrupted Reconcile value may omit that event from the update procedure.
Limitations
The LST format only allows for 32 character titles and misses other necessary fields such as local language titles.
Allow replay – Media Sequencer virtually removes played events from its exposable list, so Vizrt events will be marked as MISSED on ADC-100 side although played successfully.
Triggering with VDCP
The standard configuration of triggering by a serial connection is using Video Disk Control Protocol (VDCP).
Connections
Use an RS422 board on the machine with Media Sequencer, for example: Blue Heat/PCI of Connect Tech Inc. The following custom cables are required to connect Media Sequencer to the ADC-100 system.
ADC-100 to Media Sequencer: Connections
|
ADC-100 |
Media Sequencer Machine |
|
2 (Rx -) |
2 (Tx -) |
|
3 (Tx +) |
3 (Rx +) |
|
7 (Rx +) |
7 (Tx +) |
|
8 (Tx -) |
8 (Rx -) |
Device Configuration
To configure the software
-
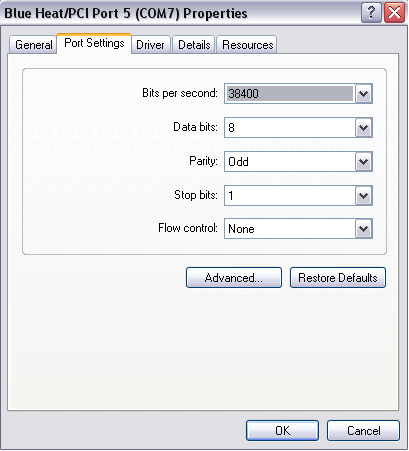
Make sure the COM port used has the following suggested parameters under Windows Configuration on the Media Sequencer machine:
-
Bits per second: 38400
-
Data bits: 8
-
Parity: Odd
-
Stop bits: 1
-
Flow control: None
-
-
Enable the VDCP device channel settings and ensure configured properly with the correct port.
To configure the Viz driver
-
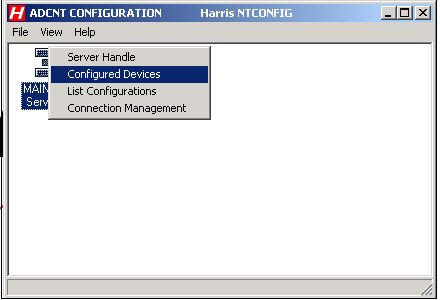
Launch the ADC-100 Configuration Utility and locate the icon that represents your Device Server.
-
Right-click the icon, and select Configured Devices.
-
In the Available column on the left, locate the Standard Video Disk driver under the Video Disk category. Click and drag the driver to one of the channels on the Configured column that reads NO DEVICE.
-
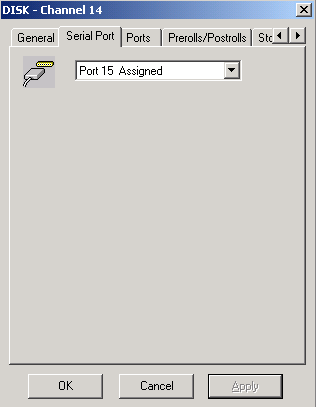
Double-click on the Disk device that was just created. From the resulting dialog select the* Serial Port* tab.
-
Select the physical port the Media Sequencer is connected to. The Harris Device Server is now configured properly to communicate with Media Sequencer.
-
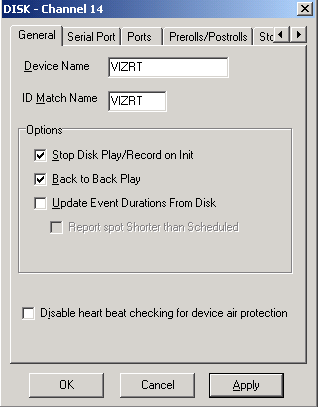
Configure the following parameters on the General tab:
-
Device Name will appear in the Device Status and configuration windows on the client applications. The default name may be used, but it is recommended to use unique names to ease later identification.
-
ID Match Name will be used in the Transmission List’s *ID Field *to let the system know that the event is intended for the Vizrt device.
-
Stop Disk Play can be selected as required.
-
Back to Back Play can be selected as required.
-
Update Event Duration from Disk must remain unchecked.
-
-
The Vizrt Standard Video Disk must also be assigned to a Transmission List to be scheduled to air.
Note: The Standard Video Disk driver cannot be used if you are using Extended IDs. In addition, Media Sequencer does not contain the notion of duration, so the parameter Update Duration from Disk must be unchecked to avoid excessive error messages when ADC driver asks for the IDs list.
Operation
Secondary A/V or Secondary Backtimed events can be used to execute the pre-loading and playout of media.
Triggering with USD
When configuring triggering by a Universal Sercom Device (USD) driver you can either configure it to use TCP or Serial Communication.
USD Device Configuration
To configure the Vizrt driver
-
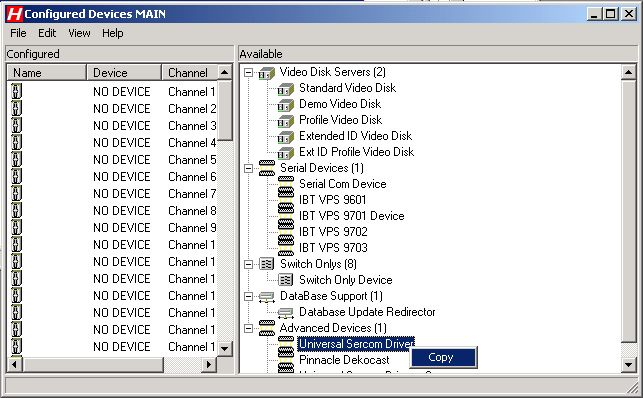
Launch the ADC-100 Configuration Utility and locate the icon that represents your Device Server.
-
Right-click the icon, and select Configured Devices.

-
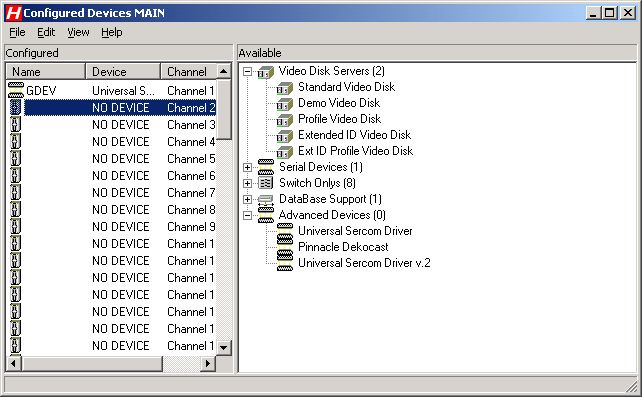
In the Available column on the right, under the Advanced Devices category, locate the Universal Sercom Driver. Click and drag the driver to one of the channels in the Configured column that reads NO DEVICE.
-
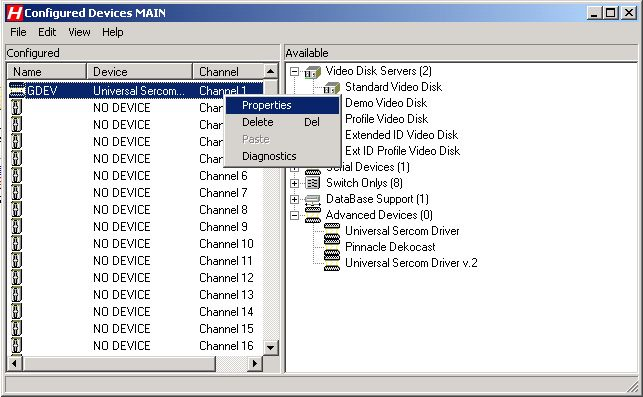
A new device will appear in the left pane of the Configured Devices main window.
-
Right-click the new device and select Properties.
-
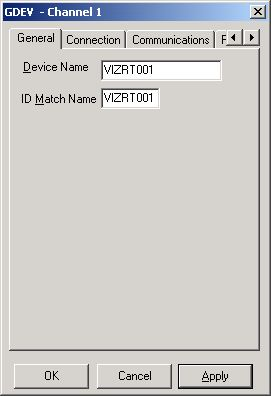
In the General tab replace default name and ID with VIZRT001 and click Apply.
-
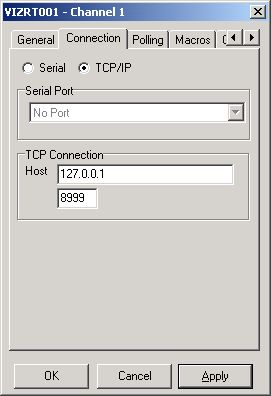
In the Connection tab, insert Media Sequencer machine’s IP/Host or Serial value and the Port (for TCP) as configured in channel settings for TCP or VDCP device settings.
-
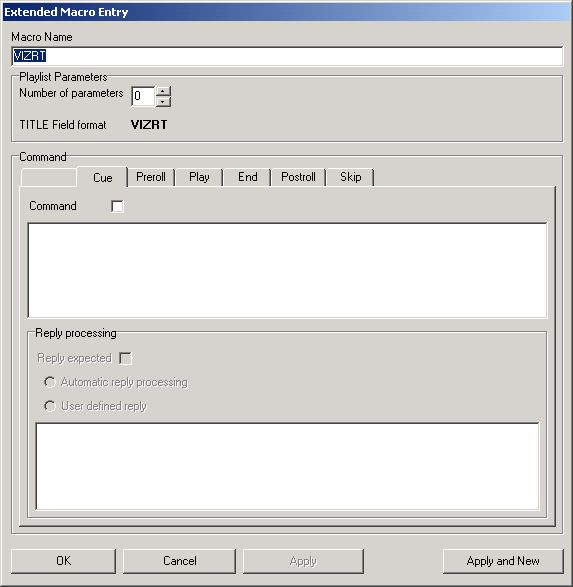
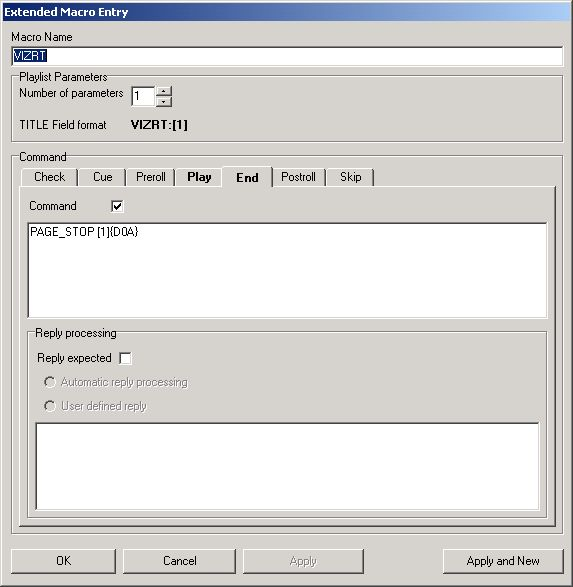
In Macros tab click the Add button to create a new macro.
The Extended Macro Entry dialog box is displayed.
-
In the Cue tab set the Macro Name to VIZRT.
-
Set the Number of Parameters to 1.
-
Check the Command check box.
-
In the Command field, enter the command to be used.
-
-
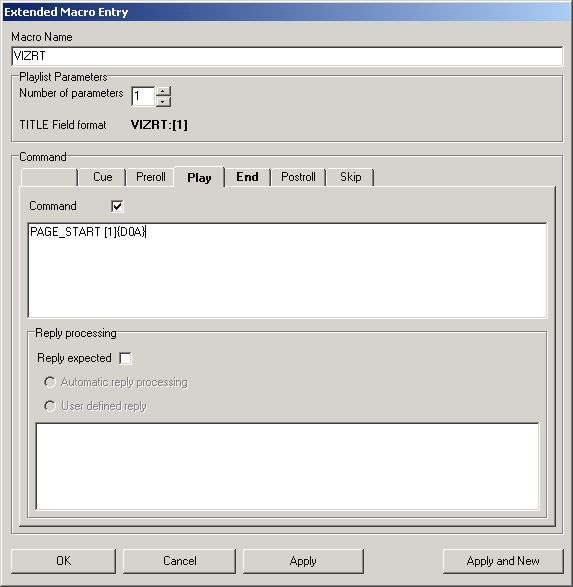
To edit the graphics stopping macro string, click the End tab.
-
Check the Command check box.
-
Set the Number of Parameters to 1.
Play will be triggered when an event starts. End will be triggered when an event ends.
Notes
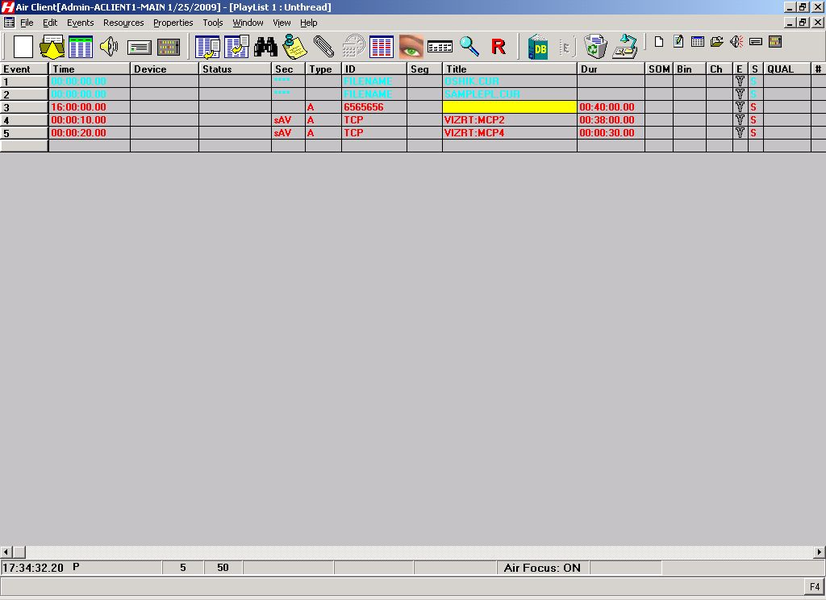
When an event is triggered (primary or secondary), the command take id is sent where id is the Trigger ID value in Viz Channel Branding and ID field value in ADC-100.
-
Harris playlist (.LST) USD format:*
-
TITLE field: macro_name:trigger_id (Media ID). For example: VIZRT:MCP2
-
ID field: USD_NAME (device) name
-
Reconcile Key field: Template name
-
-
Harris macro format: trigger_command [1]{D0A}. For example: PAGE_START [1] {D0A}. {D0A} is the char symbol for Enter.
Operation
Viz uses A/V, Secondary A/V to execute the pre-loading and playout of media.
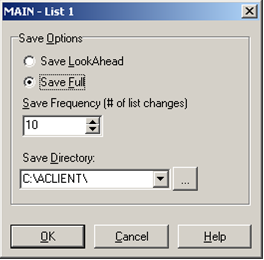
Automatic Playlist Updates Using RCV Files
Auto List Save allows automatic list savings based on the number of list changes that occur on an active on-air transmission list.
Number of changes value indicates how often the list is automatically saved to an RCV file.
To enable auto list save
-
From the main menu select Properties > Auto List Save. The Auto List Save dialog box is displayed.
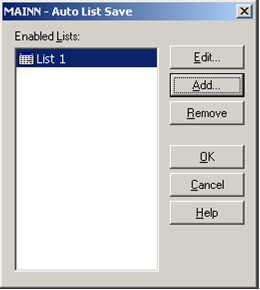
-
Click the Add button. The Choose List dialog box is displayed.
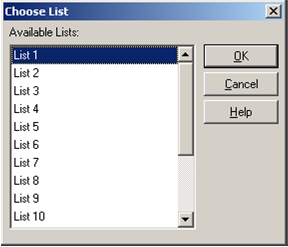
-
Select a list from the Available Lists pane and click OK. The Save Options dialog box is displayed.
-
Save LookAhead: (Default: enabled) Check to enable save of the LookAhead list only.
-
Save Full: Check to enable save of the full list.
-
Save Frequency: (Default: 10) Specify the number of changes required before a list save is initiated. This is the value of how many events go by, NOT how many edits are performed.
-
Save Directory: Specify the save directory for the saved list. Click ’…’ to browse for a location. The import/update process will scan the specified folder for new RCV file updates.
-
Click OK. The list is added to the Enabled Lists pane.