
Mosart Web Applications Guide
Version 1.7 | Published March 11, 2024 ©
Working with the Timing Display
Key Features
-
Supports a variety of devices (for example an iPad or networked phone).
-
A 24 x 24 editing grid enables rich flexibility for timer layouts.
-
Each timer has a consistent and readable appearance. Available space is optimized with proportionate fonts.
-
Rapid drag and drop of timer elements, from an intuitive list.
-
Rich text formatting: Color picker + Bold + Alignment + Show label.
Operating Modes
For daily operations, the Timing Display runs in View Mode. Use Edit Mode to create or adjust the display.
View Mode
Browse-anywhere timing information in your web browser.
In View mode you can:
-
Mouse-over a timing detail for an explanation.

-
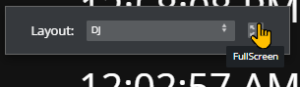
Display as full screen.
-
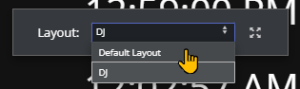
Select any other defined view of the display.
To display a Timing Display in View mode
-
View Mode is the result of Distributing a Timing Display.
-
You can also browse a Timing Display in View Mode, by clicking the View button in the menu bar.

The View Mode opens in a new tab.
Edit Mode
To create and modify a Timing Display
You can reconfigure or create a new Timing Display with details relevant to your operation.
-
If no Timing Display editor is running in your web browser
-
From the desktop shortcut or Programs menu, start the Viz Mosart Web Applications Configuration Tool.
-
In the Timing Display panel, click Open.
A Timing Display editing web page opens.
-
-
Configure the display. For example:
-
From the Timers panel to the left, drag any highlighted timing detail into the display area.
-
From the display area, click on any timing detail and edit/delete.
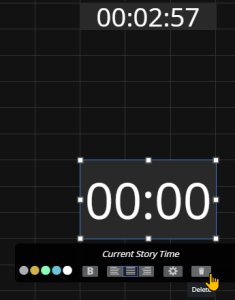
Note: The action Delete simply returns the selected timing detail back to the Timers selection panel on the left.
-
-
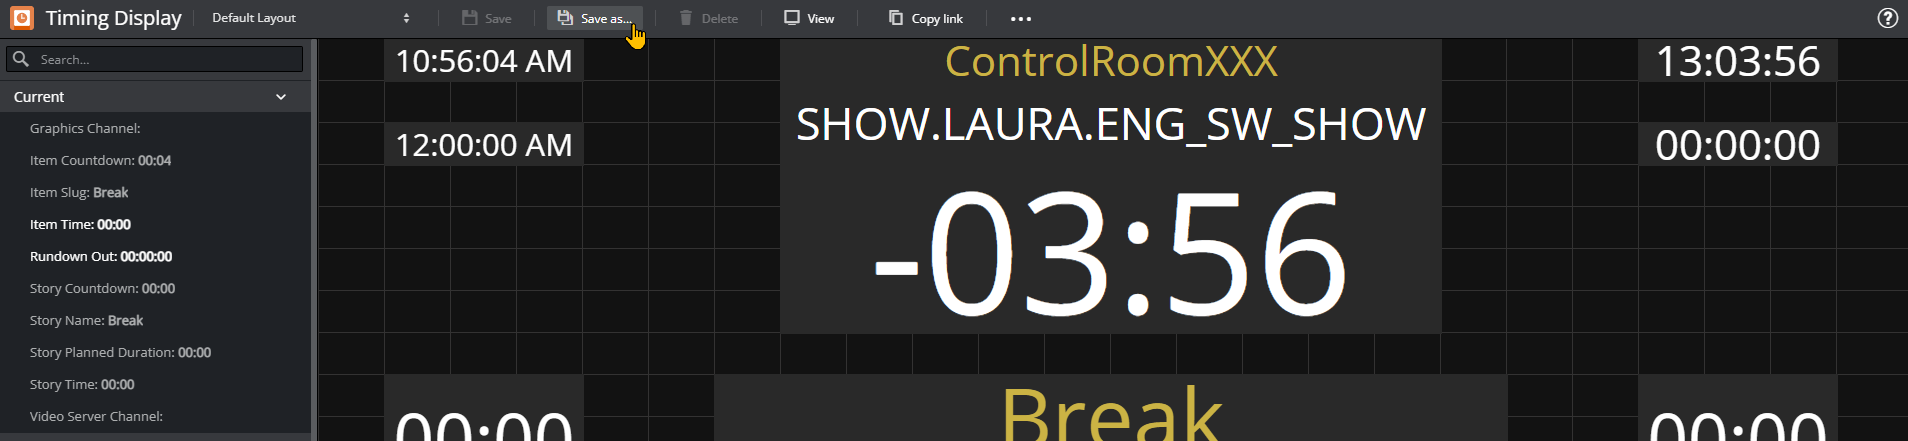
From the menu bar, click Save as and enter a unique, meaningful name for the display.
Audio Countdown
Prerequisites
Timing Display plays its audio files located in the C:/MosartAudio folder of the host machine for Timing Display.
Each audio file that you wish to use must be placed here.
The range of supported audio file formats is dependent on the web browser you use for the Timing Display, This external article lists audio formats supported per browser
To activate audio countdown in a Timing Display
-
Open Timing Display in Edit Mode.
-
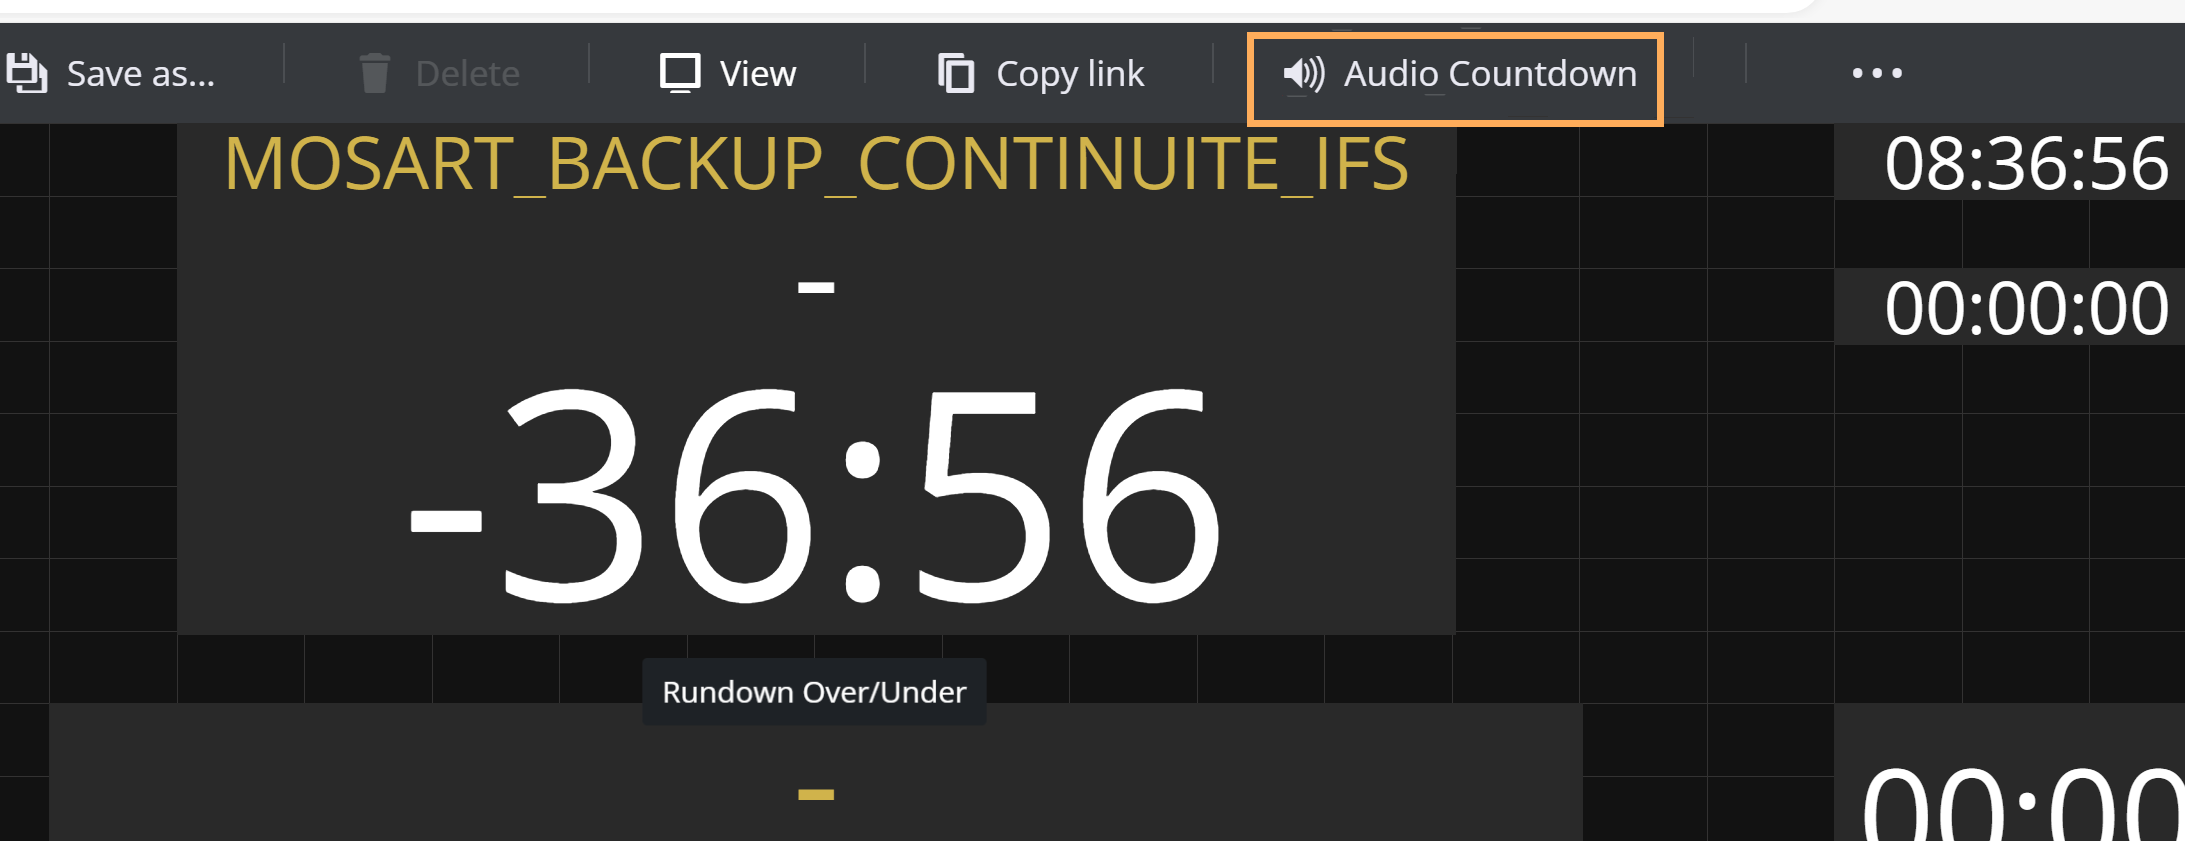
In the menu bar at the top of the page, click Audio Countdown.
-
From the dialog window that appears, click Add Audio File.
-
In the drop-down menu Filename, select the audio file to add.
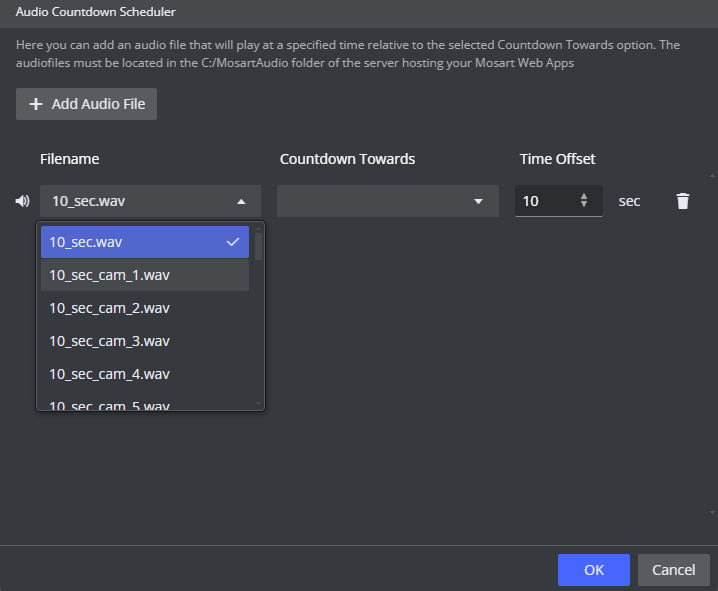
The selections are audio files added to C:/MosartAudio (on the machine where the Mosart Web Apps are installed).
You can also test the selected audio file by clicking on the Sound icon to the left of the dropdown menu. -
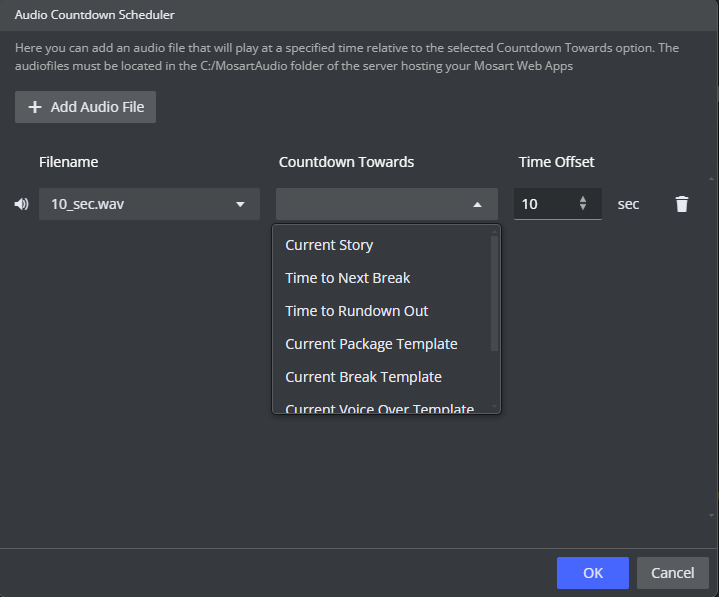
In the drop-down menu Countdown Towards, select what you want the audio file to countdown towards.
Choose from:
- Current Story: Counts down to the end of the current story.
- Time to Next Break: Counts down to the next planned break.
- Time to Rundown Out: Counts down to the planned end of the rundown.
- Current Package Template: Counts down to the end of a current Package template.
- Current Break Template: Counts down to the end of a current Break template.
- Current Voice Over Template: Counts down to the end of a current Voice Over template.
- Current Float Template: Counts down to the end of a current Float template.
- Current Item: Counts down to the end of each respective Story item.
-
Set Time Offset a number of seconds relative to when the Timing Display's Current Item Countdown reaches 0.
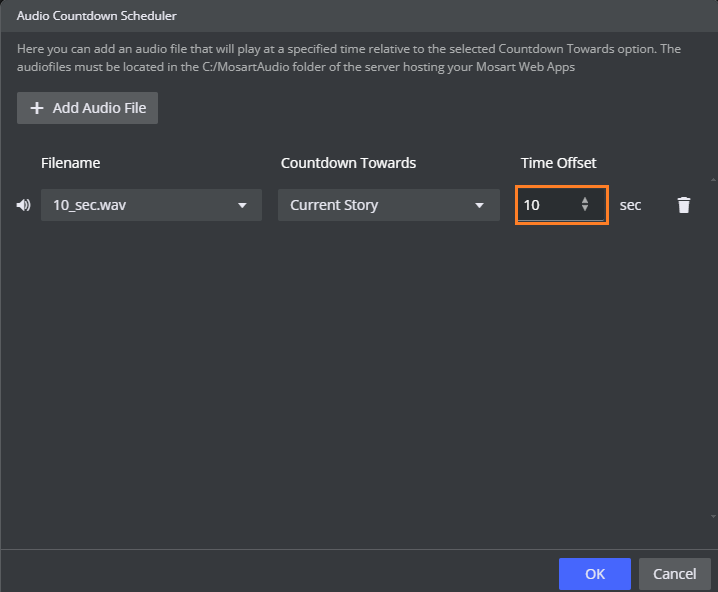
For example, to play the audio 5 seconds before Audio Countdown reaches zero, set Time Offset to 5.
(Negative values will delay playing when Audio Countdown reaches zero, by the number of seconds in Time Offset). -
Repeat steps 3 to 6 for all required audio files.
-
Click OK
To verify, start a rundown and listen that the correct audio files plays at the specified time.
Note: If you refresh the Timing Display, you must again perform some activity on the web page before any audio can be played.
Simplest is just clicking on the page or pressing any keyboard key while the web page has focus. This is standard web browser behavior.
Distributing a Timing Display
Once you have created or modified a Timing Display, you can share it with other users on the same network.
To distribute a Timing Display
-
Create/modify the Timing Display as described in Creating and modifying a Timing Display above.
-
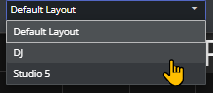
From the drop-down menu, select the required display.
-
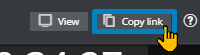
From the menu bar top-right, select Copy link.
-
Share the URL with your users.
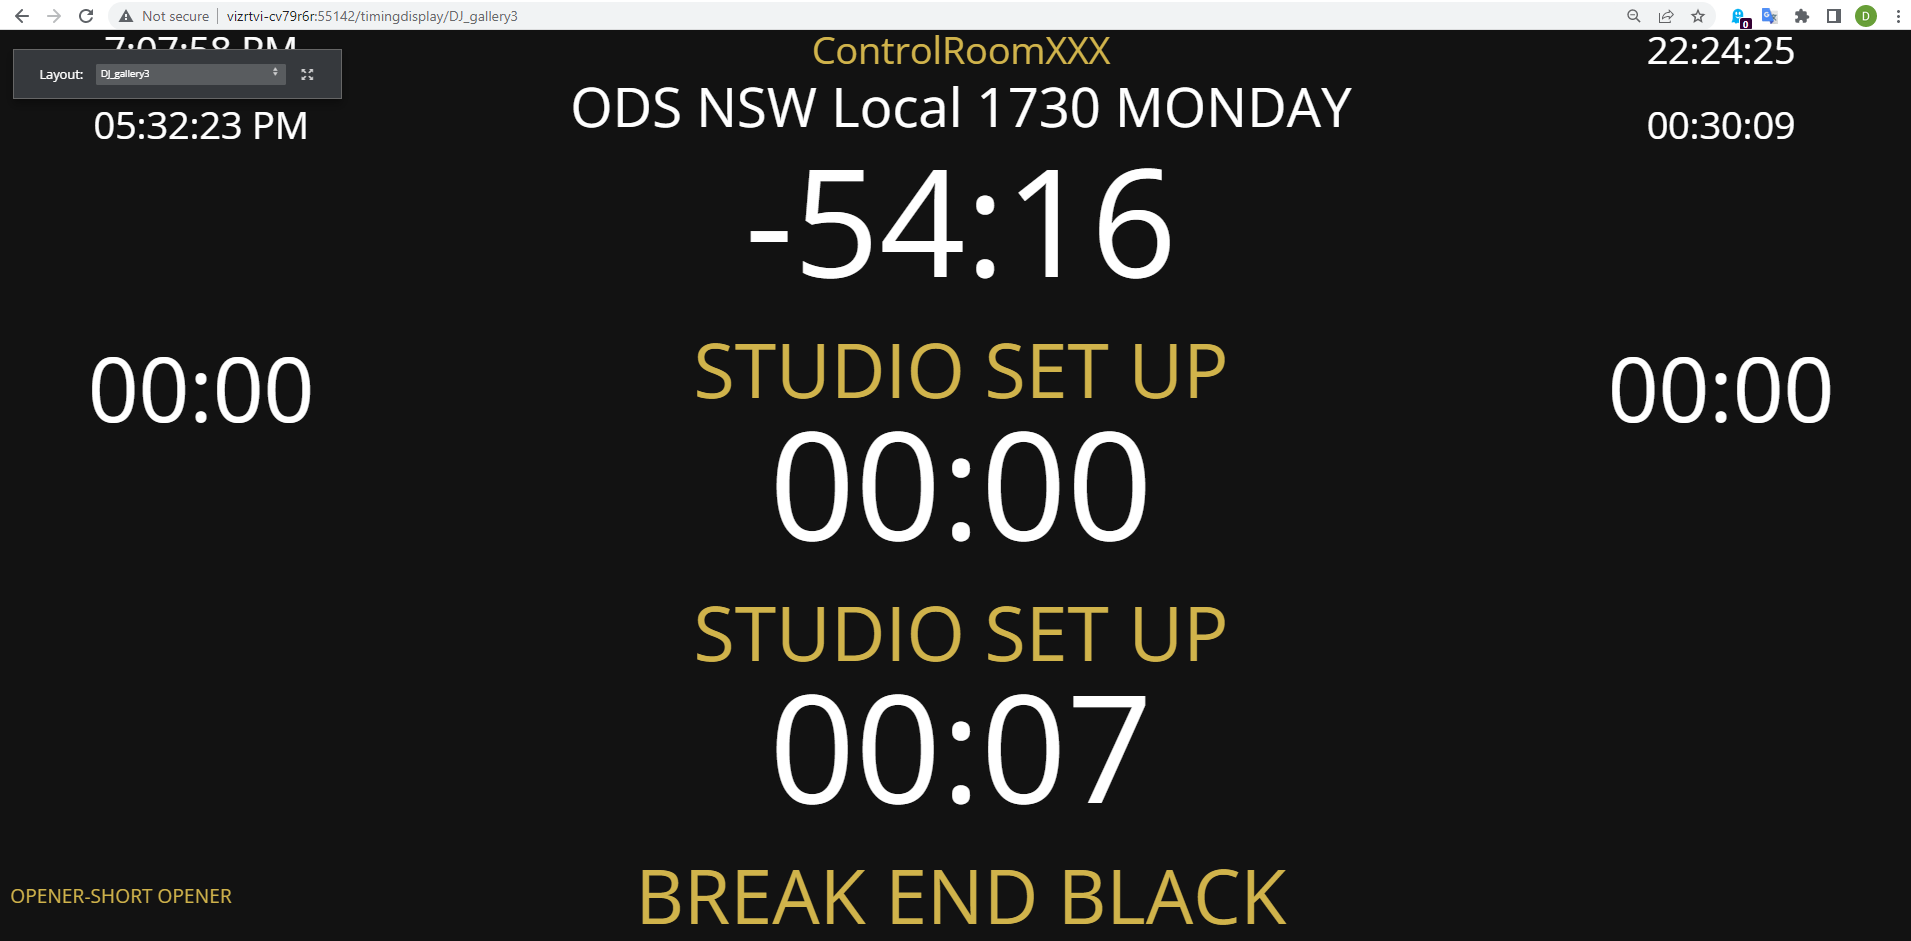
Note: The original Viz Mosart Timing Display, with explanation of the elements, is described in the Timing Display section of the Viz Mosart User Guide.
Tip:
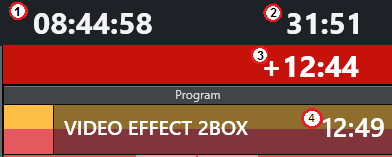
Appearance of timing information in the Viz Mosart UI
-
Counts the downtime to the next break.
-
Counts how much the rundown is over/under.
-
Counts down the remaining time for the current On Air template.
-
Shows the duration of the current On Air template.