
Tracking Hub
Version 1.1 | Published December 03, 2018 ©
Post System
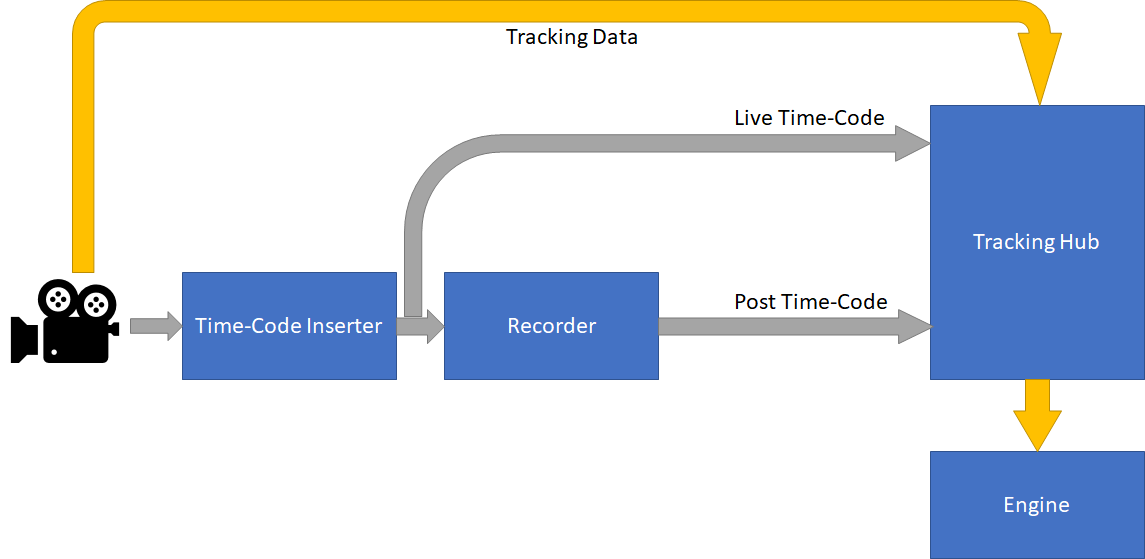
The Tracking Hub Post system lets you record tracking data and play the data back at a later time. To use this feature, every field in the video and every tracking data must be stamped with a time-code. The time code is read by Plura time-code reader card (PCLPCIe 3G).
While the Live Time-Code can be LTC based, the Post Time Code must be field based (ATC VITC). If a frame based time code is used for live, the tracking hub increases the field count on every field change. This is not possible for post, as the video can be shuttled back and forward, and therefore the direction is not given for sure.
Creating a Post Session
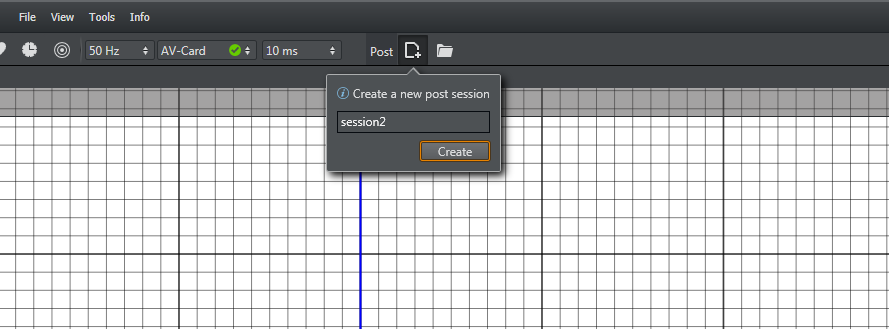
Click the New Session button to create a new session. Enter the session name in the pane that opens, then click Create.
Load a Post Session
To load a previously stored session, click the Load button in the Post section of the window. A pane with a list of previously recorded sessions appears. Select one of the sessions and click Load Session. 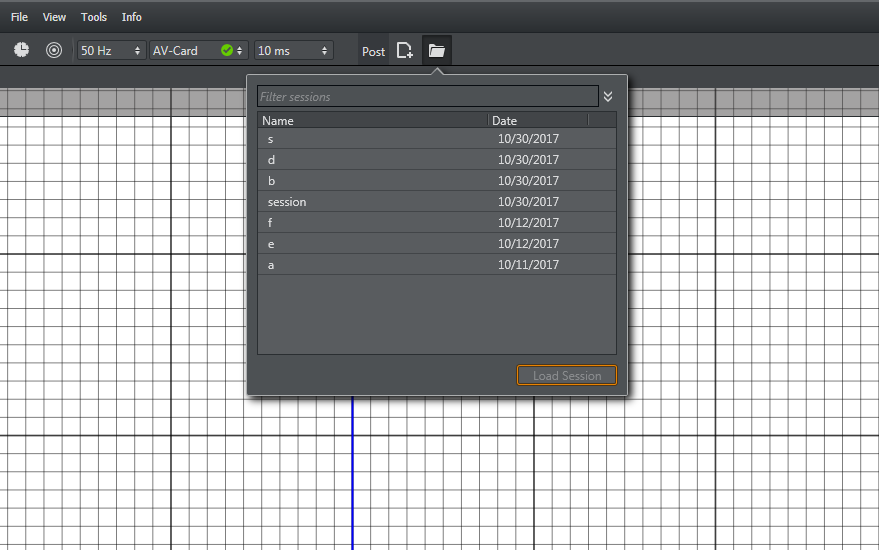
Configure a Post Session
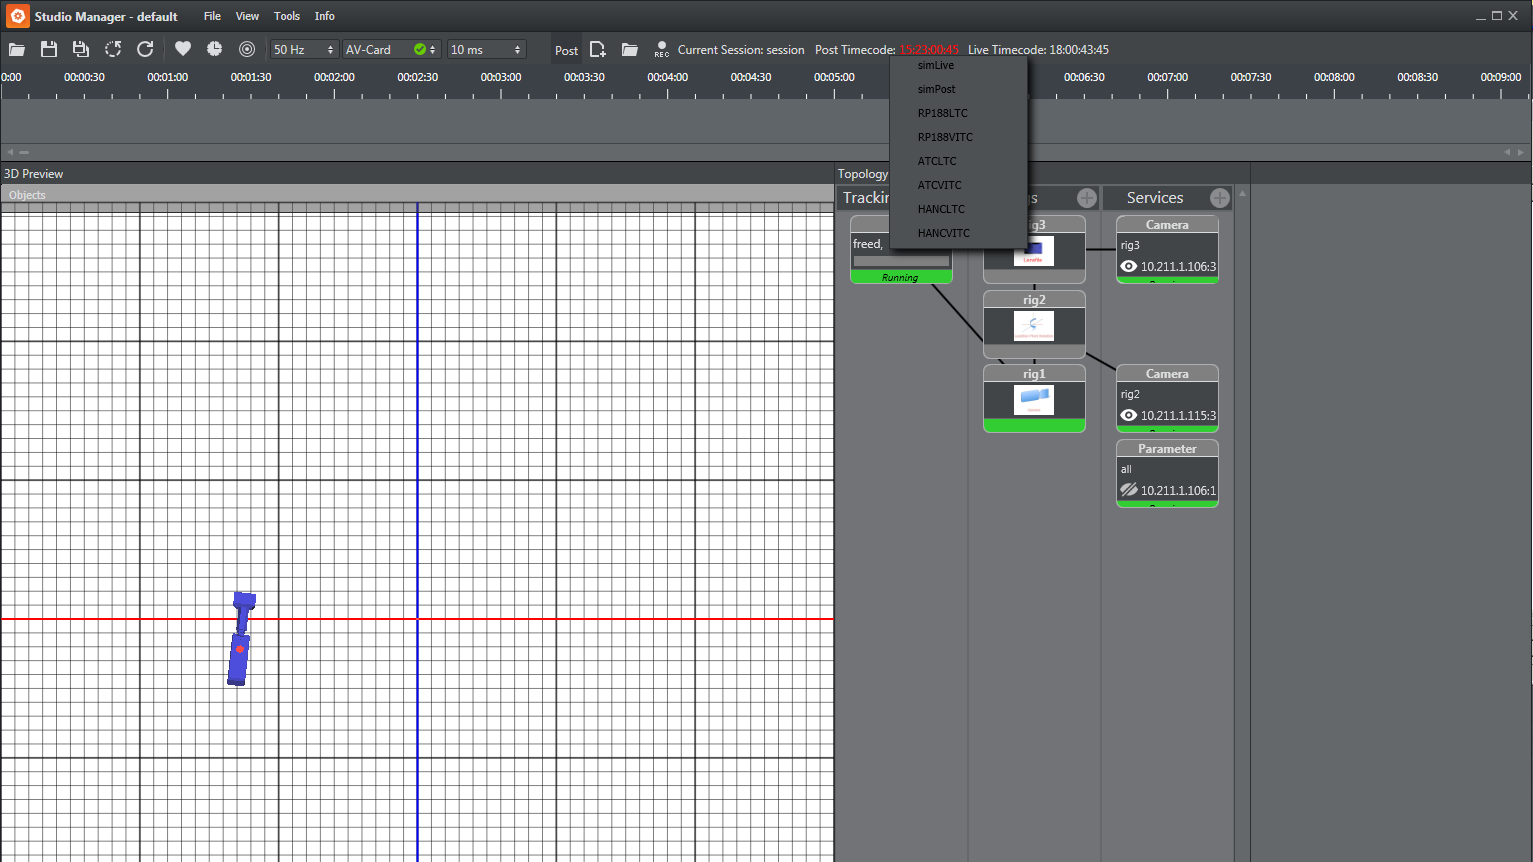
After creating or loading a session, the timeline and time code labels are visible. A green bar in the time line display indicates time spans where tracking data was recorded and is in memory. The red time code arrow shows the actual post time code. The white arrow shows the live time code.
Hold Ctrl and scroll the mouse wheel to modify the timeline scale.
You can change the position of the timeline using the scroll bar at the bottom.
Hover the mouse over the Post Timecode or Live Timecode labels to display a tooltip that shows the Post Timecode source or the Live Timecode source.
You can automatically load a saved session after the Tracking Hub restarts. Activate the Auto load switch to enable this feature.

Right click the Live or Post Timecode labels to select the actual timecode source. A small window appears, which shows the available timecode sources of the Tracking Hub.
The tracking hub must be run in AV-Card mode to recognize the installed Plura Timecode card. Otherwise, the timecode sources will not be displayed.
SimLive and SimPost are used to record tracking data without timecode reader card. This is for analysis purposes only and should never be used for production recording!
Selecting the recording and replay sources
The Tracking Hub can record two sources of data. The parameters coming from the tracking system can be recorded separately, and is sent to the rig during replay. This makes it possible to correct wrong offsets and rig setup after the data was recorded.
The second source is the finally baked camera matrix, which will be recorded after the rig calculations has taken place. Therefore, this data can not be modified.
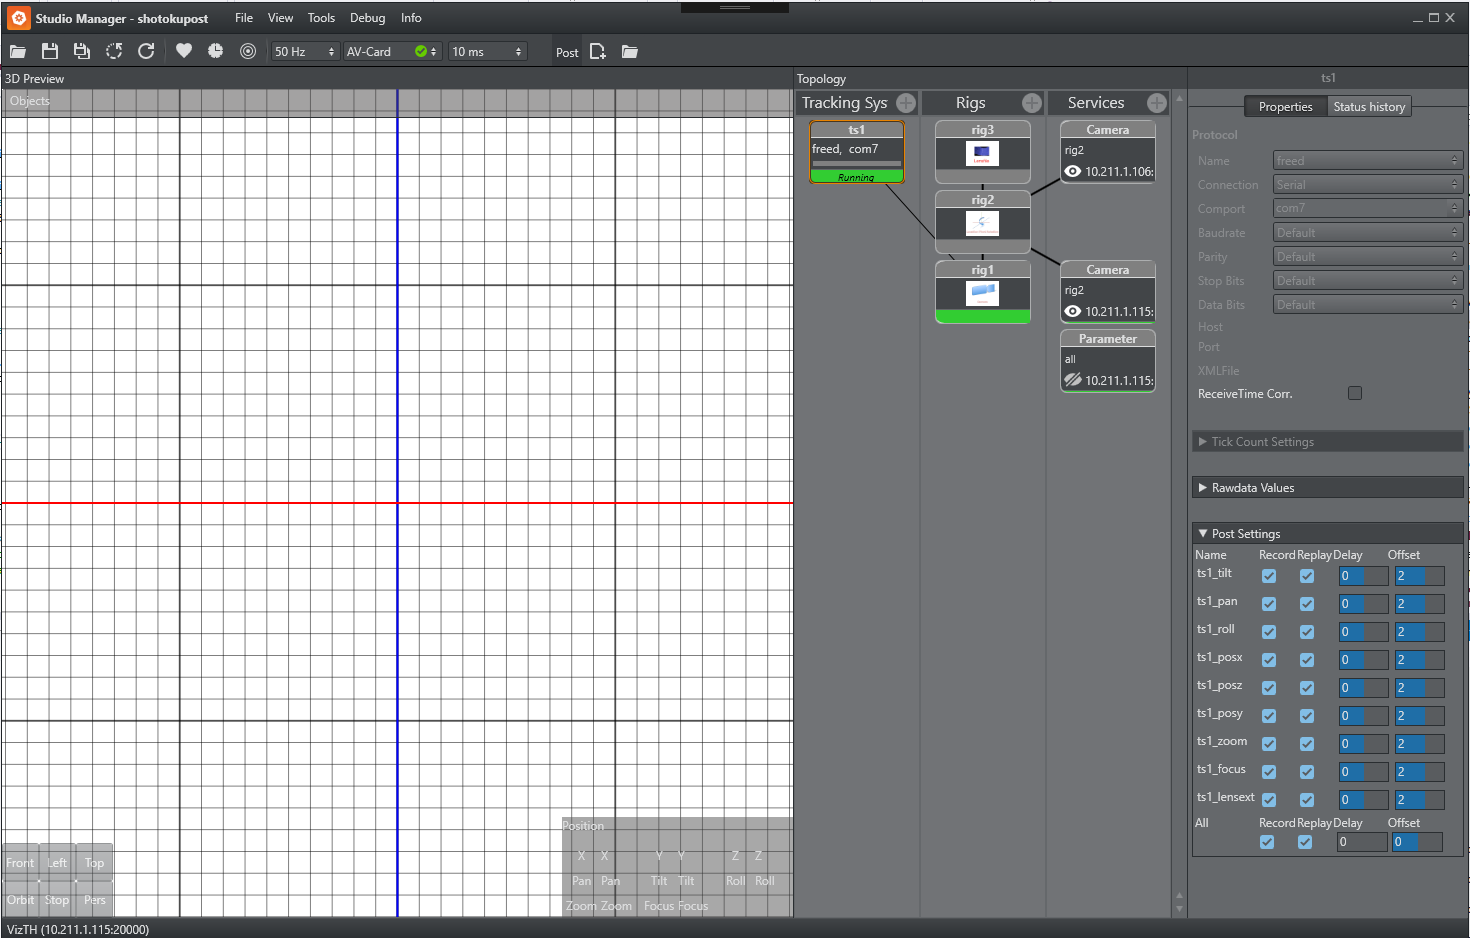
The following screenshot shows the parameter selection for a tracking system. For every parameter, recording and replay can be checked in a check box. An individual delay can be given for every parameter. Replay for a parameter is activated when replay is checked and the post time code differs by more than five fields from the live time code.
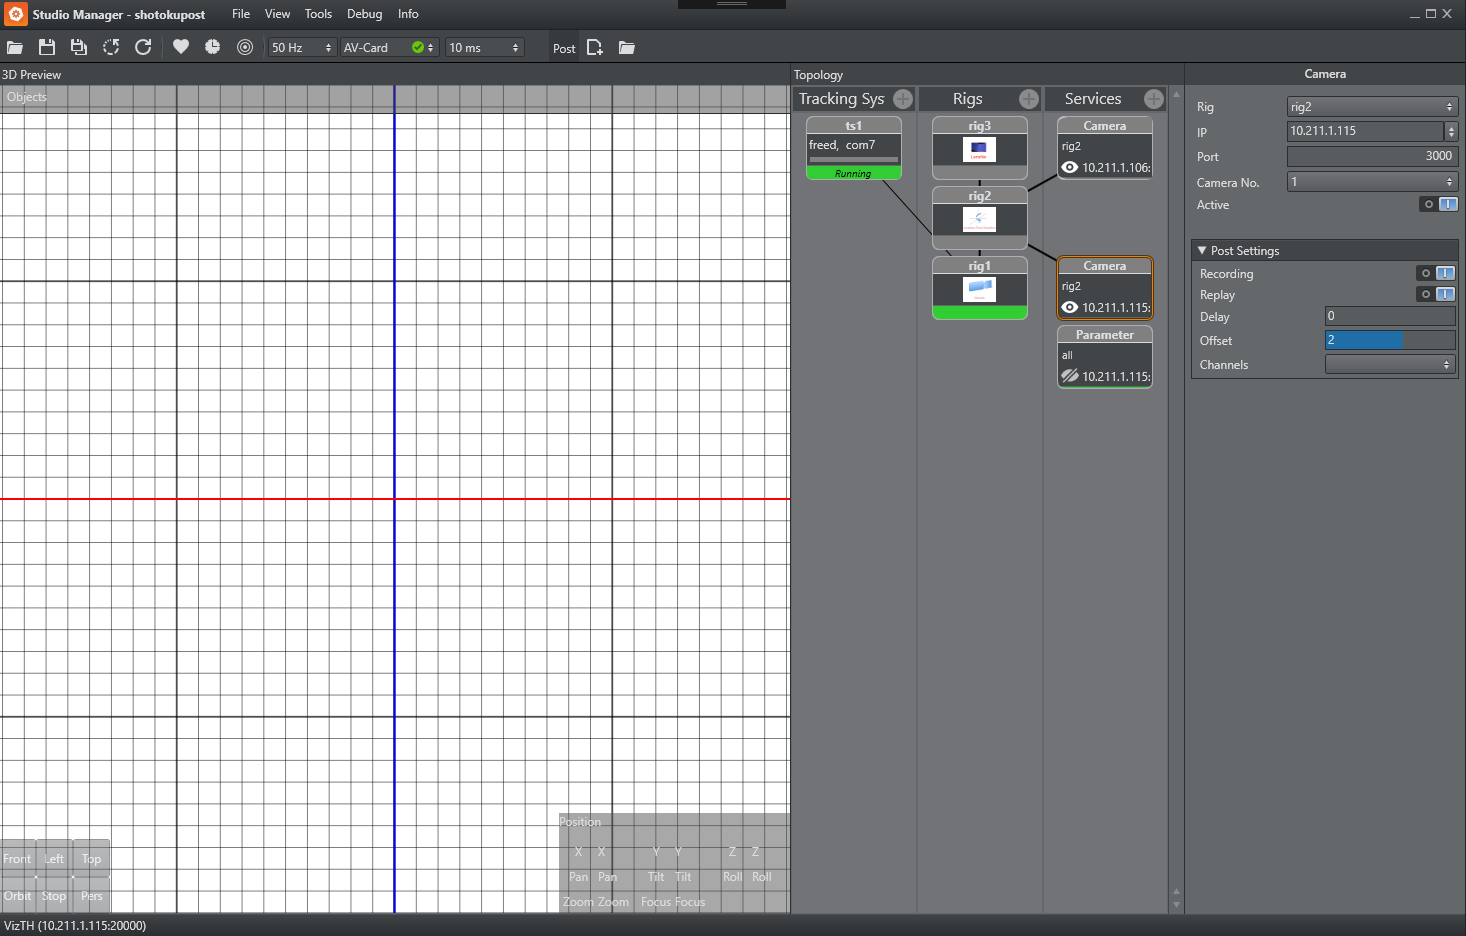
You can activate recording and replay of the camera matrix in the Camera Service settings. There is also an option for the camera delay.
Camera Channels
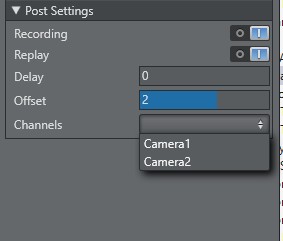
When loading a session that has more than one camera, the camera channels are named by the number in creation order of the service. You can assign any channel that has been loaded from a former session to any camera service. To assign a channel to a service, choose one of the available channels from the drop down menu. If nothing is selected, the channel with the number of the camera service is used.
Post Offset and Delay
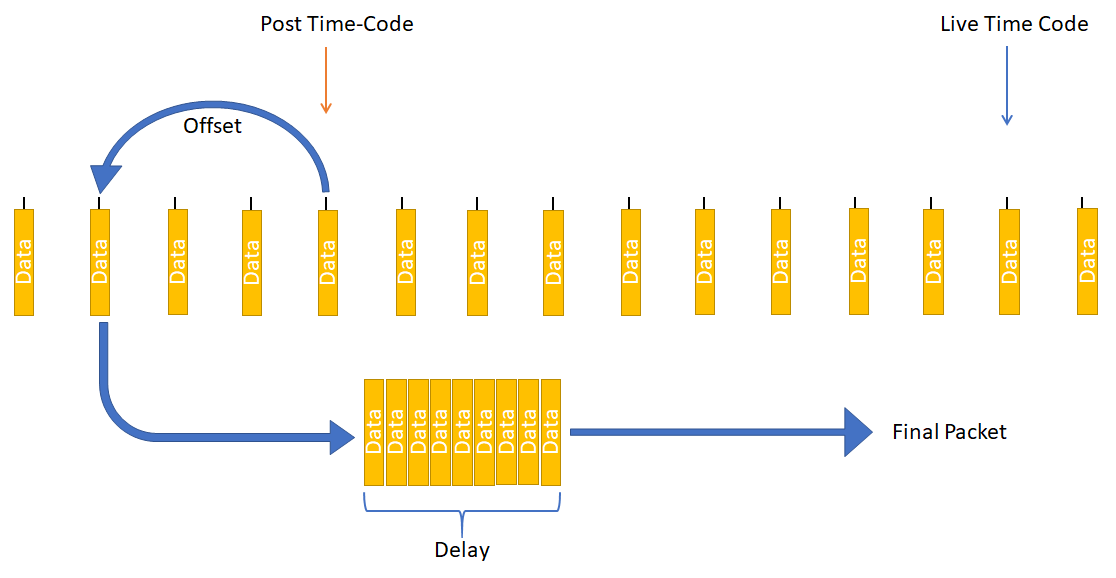
The Tracking Hub offers two types of delay. One is an offset that is added or subtracted (depending on the sign) from the actual Post Time-Code. The typical offset for Parameter recording is -2 fields, and for a camera matrix recording it is usually two fields.
The second delay setting is a ring buffer. This is useful in configurations where shutteling back and forward is used.
Post data Storage
The post data is written to file immediately after being received. The Tracking Hub itself contains about 4h of data in memory.
-
The storage location is C:\ProgramData\vizrt\VizTH\Post.
-
The ring buffer size of the post channels can be changed in the BaseConfig.xml.
-
PostBufferSize is the number of packages stored before the oldest is deleted.
-
PostFileCutTime is the time when Tracking Hub creates a new save file for the PostData. The PostFileCutTime gives the Time in minutes.
Example
PostBufferSize="1000000" PostFileCutTime="0"