
Tracking Hub Administrator Guide
Version 1.7 | Published January 16, 2024 ©
Troubleshooting and Best Practices
This section lists some common pitfalls and how to solve them, as well as providing guidance on optimizing your virtual studio workflow.
General
-
Depending on your tracking system, a zero point is required. This marks a special location in your studio defining the start- or reference point. The design of your set (Viz Scene) and the calibration relays on this location; therefore, clearly mark it.
-
Make sure you use correct units during your set design. This makes it much more easier to match your set later on.
-
The Studio Manager is mainly used to configure and setup your virtual set. During production this application is not needed and should be closed. Only Tracking Hub needs to be running.
Syncing
-
As a general rule: Every single component in your setup needs to be synced correctly. This includes any router, camera, Viz Engine, keyer etc.
Tracking
Tracking Networks
-
It is recommended to use a dedicated network to transport your tracking data.
-
Make sure no firewalls, load balancers or similar can have any negative impact on the transport of your tracking data.
Lenses
-
Every Lensfile is unique. It is highly recommended to calibrate each lens on the mounted final camera rig. Even if you have an existing lens file available, it might not be sufficient to use this one for another lens of the same type.
Delay
-
To get a precise match between real live video and the Engine rendering, the tracking data has to be delayed properly to react within the same field. This can be done for each parameter individually or, in most cases, is handled with the Overall Delay on the camera rig node.
-
Adjusting the delay can be easily achived by making quick changes in camera movement to see if the tracked graphic starts before the video signal or if its stops after it. Best practice here is to start with a high delay and decrease it slowly until both layers match perfectly while paning the camera left and right. Once this fits, check the other parameters. In some cases zoom and focus need a different delay which will be added / substracted from the overall delay by adjusting the specific delay of these parameters seperately.
NDI
Requirements and Limitations
-
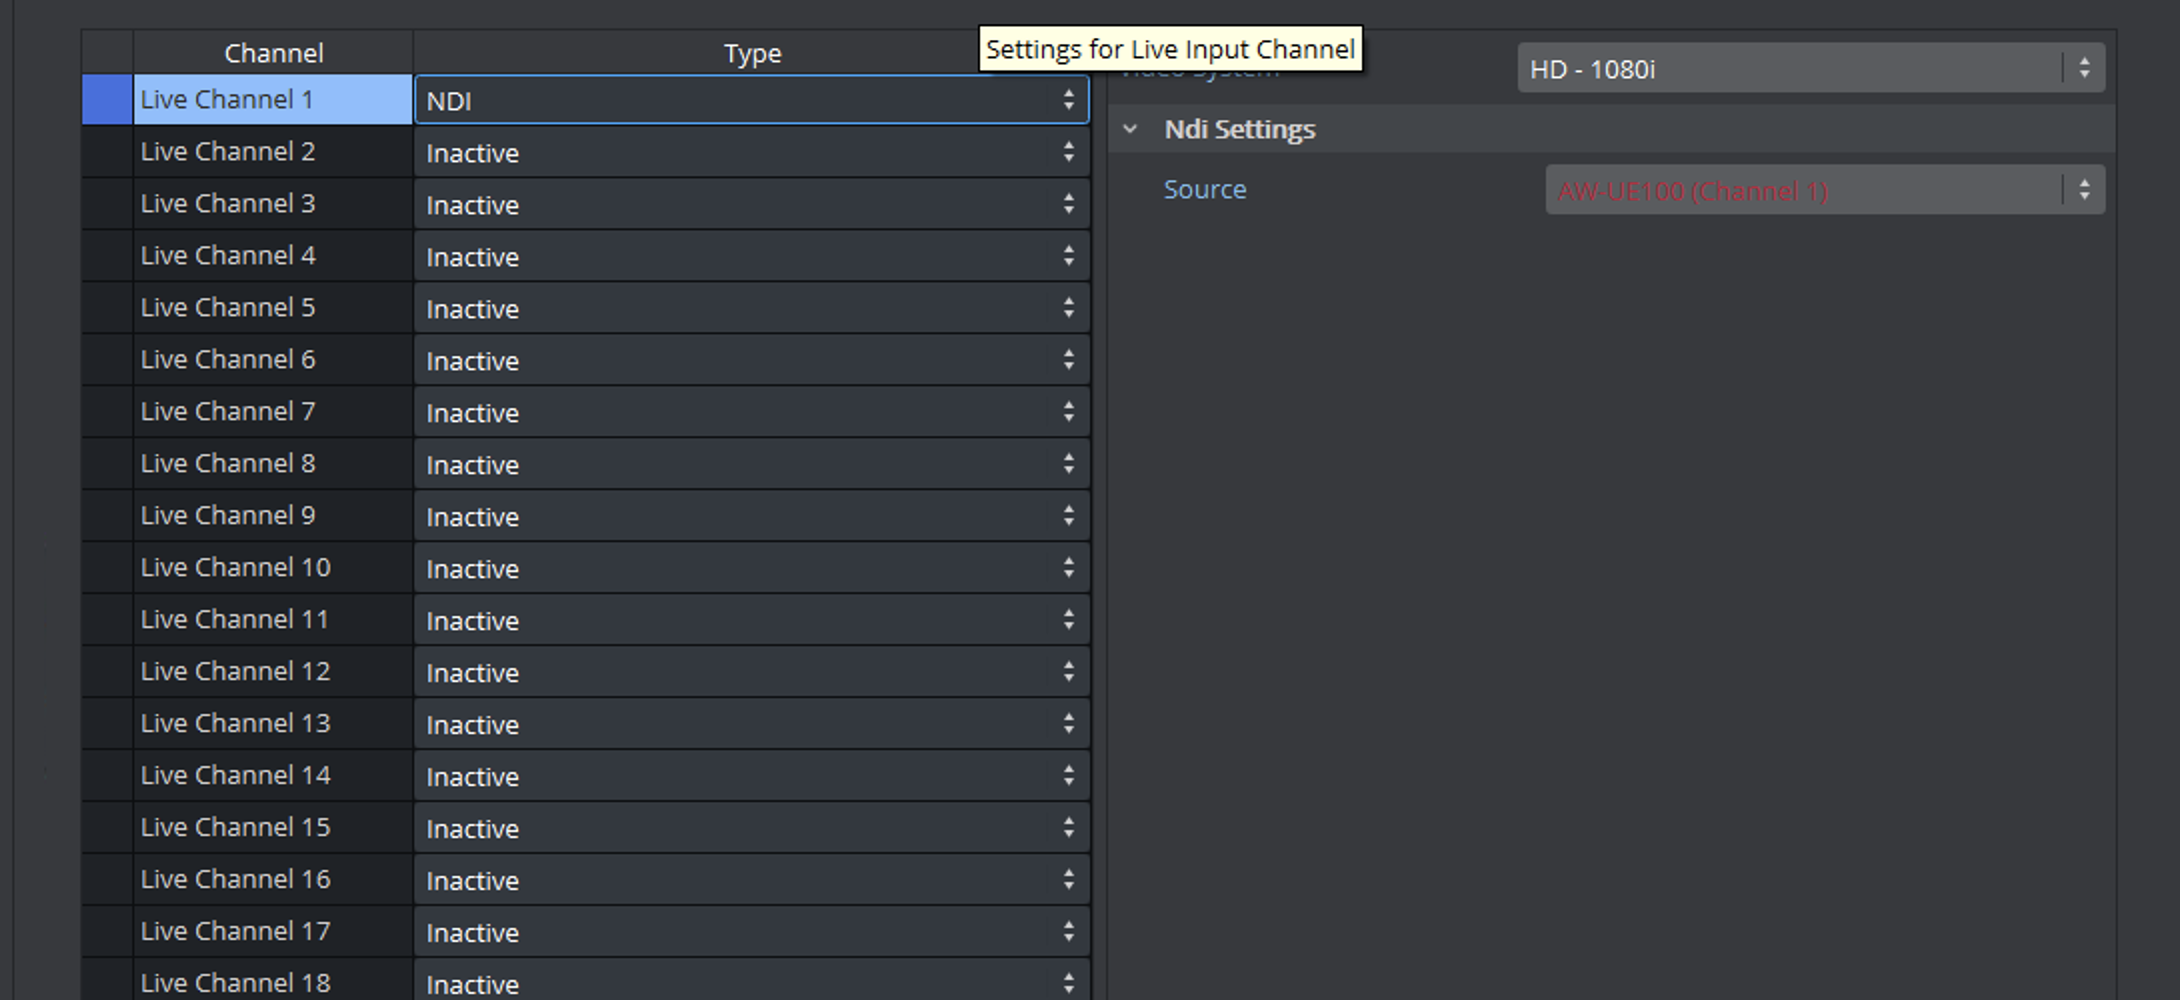
Only one NDI input source is supported.
-
The network bandwidth needs to fit your needs. It is highly recommended to use a dedicated network for the NDI transport.
-
Only tested and certified PTZ cameras are supported. See Supported NDI Cameras.
-
Make sure no other applications connect to your NDI source. This also includes NDI Studio Monitor, for example.
To use NDI in your virtual studio, make sure the following conditions are fulfilled:
-
In the Engine Settings, all video boards must be deactivated and NDI must be selected.
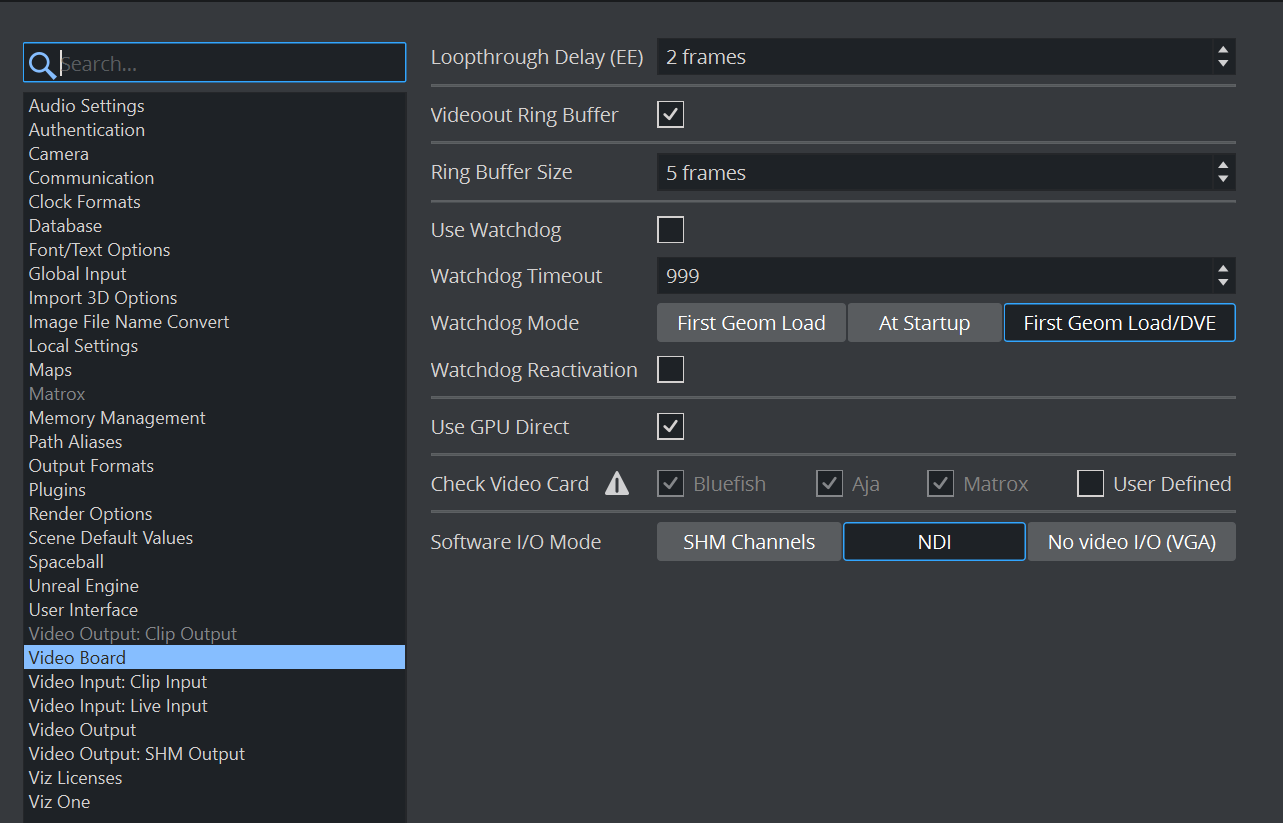
-
As the Sync source settings are not available after switching to NDI, check the following setting in the config file:
Section Genlock: The Genlock must be set to 2.
Chroma Keying
Make sure your lighting conditions are the best ones you can achieve. Optimal chroma keying results depend strongly on the good quality of both cyc and homogeneous light.