Graphics Plugin User Guide
Version 2.3 | Published September 14, 2023 ©
Using Graphics Plugin with Adobe Premiere Pro
This section explains the required steps on how to add Vizrt graphics to the timeline in Adobe Premiere Pro, and how to use stop points.
Adding Graphics Plugin
-
Create a new project or open an existing project in Adobe Premiere Pro.
-
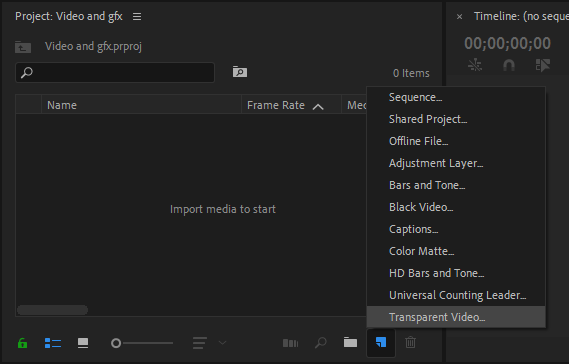
Add a Transparent Video clip to the project:
-
In the Project panel, make sure that the Project tab is selected, and click the New Item button in the lower right corner.
-
In the menu that appears, click Transparent Video...
-
In the New Transparent Video dialog box that opens, select your Video Settings and click OK.
-
Drag the new transparent video clip to the Timeline.
-
-
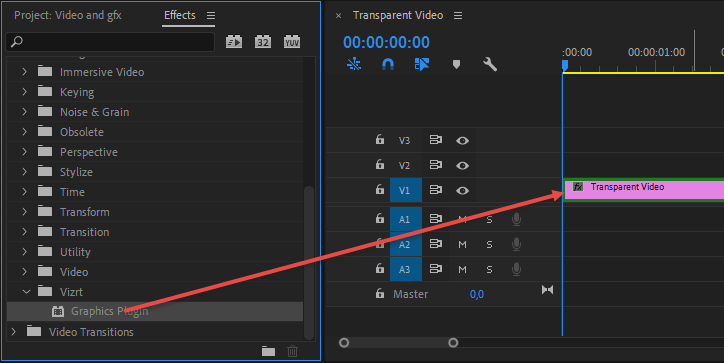
Add Graphics Plugin to the project:
-
In the Project panel, click the Effects tab. (If the tab is not visible, select it from the Window drop-down menu bar).
-
Navigate to Video Effects > Vizrt > Graphics Plugin.
-
Drag the plugin onto the transparent video clip in the Timeline.
-
-
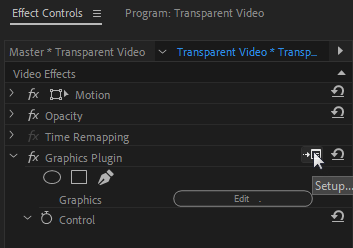
Select the transparent video clip that holds the plugin.
-
Click the Effect Controls tab. (If the tab is not visible, select it from the Window drop-down menu bar).
-
Expand the Graphics Plugin option in the Video Effects list.
-
Click the Edit button to access the specified (done in the Configuration Tool) Graphics Plugin User Interface (Viz Trio, Viz Pilot Edge, Viz Pilot or Graphics Plugin Editor (Mac)) and to use Vizrt graphics.
-
Click the Setup... button (see image below) to access the Configuration Tool where you can, among many things, select your preferred Graphics Plugin User Interface. Go to the Configuration Tool section for more details.
Note: The NLE application will freeze when the Configuration Tool or the User Interface is open.
-
Back in Adobe Premiere Pro, a graphics element has now been added to the transparent video clip.
-
Create another Transparent Video with graphics plugin and drag it to the timeline to have multiple graphics.
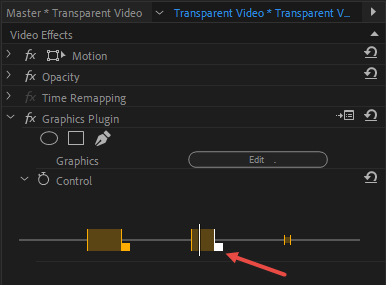
Stop Points
Stop points are added to a graphics scene to control the playout of the animation.
Adding a graphic using the Graphics Plugin there is a stop point editor that allows you to adjust the length of the stop points.
The stop point editor is located in the Effect Controls tab > Graphics Plugin > Control:
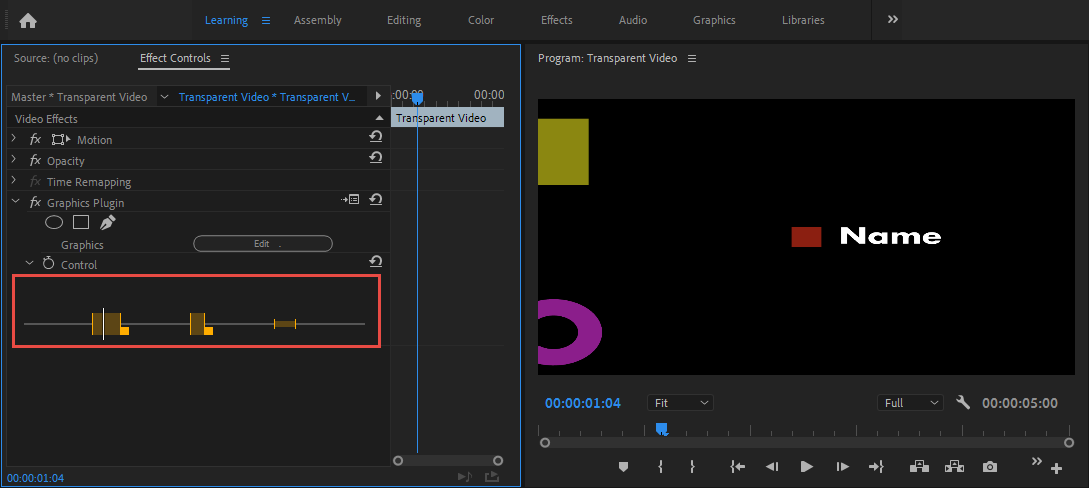
Click and drag the small square next to the stop point you want to adjust: