
Viz Pilot User Guide
Version 8.5 | Published December 16, 2019 ©
Using Crop Tool
This section contains the following topics:
Images
Depending on the design of the template, Crop Tool can make use of images from Object Store, any local computer file location, or the Windows Clipboard.
Note: A cropped image can only be used once - a user cannot re-crop or search for an already cropped image. To create a new cropped image, the user must find the original image and add it to the Windows Clipboard again.
Crop tool is also used in Object Store; however, images are not saved to the Object Store database when used in Viz Pilot News. Even if an image from Object Store is used, the original image in Object Store will therefore not be affected.
Note: Crop Tool images differ from Object Store and Viz One images in that it is not possible to fully control what images are used. Policies must therefore be clear on such issues as using copyrighted images.
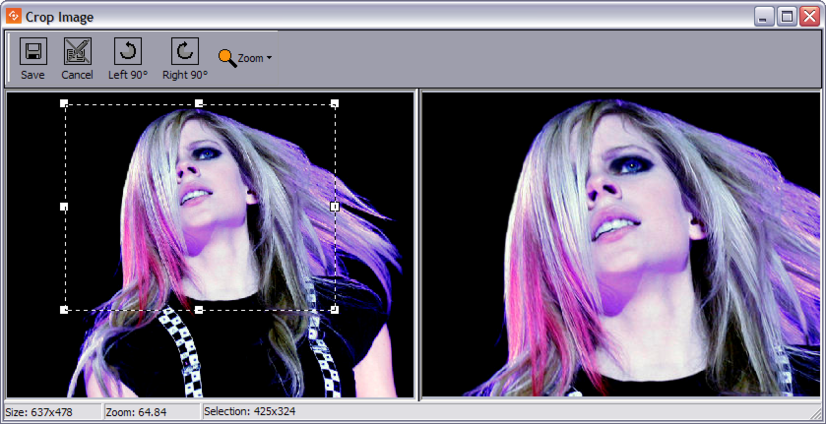
Crop Tool Functions
Crop Tool is divided into three areas: a menu bar, an edit area (left), and a preview area (right).
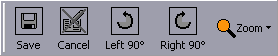
The menu bar contains the following functions:
-
Save: Saves the image to the image directory set in the crop tool save path.
-
Cancel: Resets editing and closes the Crop Tool window.
-
Left 90: Rotates the image 90 degrees to the left.
-
Right 90: Rotates the image 90 degrees to the right.
-
Zoom: Zoom the editable version of the image to a size of; 500%, 200%, 150%, 100%, 75%, 50%, 25% and 10% of the original image size. In addition there is an option to Fit the image to the available space. Zoom can also be performed by using the mouse wheel. Zoom does not resize the saved image.
Crop an image with Crop Tool
-
Open a template or a data element.
-
Click the image placeholder.
-
Search for a stored image.
-
Drag the image to the placeholder.
-
Adjust the anchored frame and/or rotation of the image, and click Save (CTRL+S) on the tool bar.
Use an image from the clipboard
![]()
Note: This procedure requires that the template’s image component uses the ImageSources.isPaste parameter.
-
Open a template or a data element.
-
Search for and copy an image (for example web-based systems or file shares).
-
Right-click the image icon and select Paste.
-
Adjust the anchored frame and/or rotation of the image, and click Save (CTRL+S) on the tool bar.
See Also
-
General Preferences preferences - Crop Tool Save Path
Images Edited with Crop Tool
All edited images are saved as Portable Network Graphics (PNG), which is a bit-mapped image format that employs lossless data compression.
An edited image is saved with the same image and person information as the original image. The new file is given a default prefix “Crop”. The image Description field is also updated by adding the following text: “_Crop of: Description” where the phrase Description represents the image description from the original image. Images with key are also preserved.
Scene and Template Design
Calling Crop Tool from a Template
A scene can be designed to use an image of a specific aspect ratio. This is done in Template Wizard, by using the Image Component and its parameters DestWidth and DestHeight to set the width and height.
If an image is selected that does not match the parameters, Crop Tool will be automatically opened, forcing the user to edit the image according to the pre-configured parameters.
Crop and Scale Image
If the crop uses the DestWidth/Height ratio, the cropped image will be rescaled to fit the DestWidth/Height values.
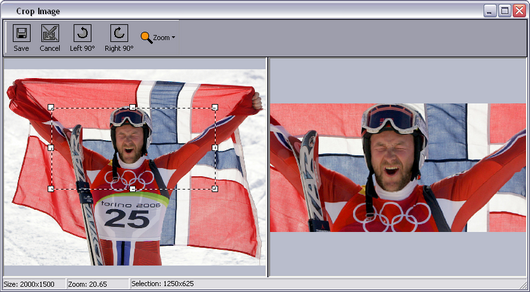
Example - Setting Image Size
For example, if the template designer has set the DestWidth and DestHeight to 200 x 100 pixels (aspect 2:1) to set the aspect ratio and image size, and we have an original image of 2000 x 1500 pixels (4:3), then:
-
If the template user selects an area of 1250 x 625 pixels (2:1), the image will be cropped and scaled down to 200 x 100 pixels.
-
If the template user selects an area of 200 x 100 pixels (2:1), the image will be cropped to 200 x 100 pixels.
-
If the template user selects an area of 100 x 50 pixels (2:1), the image will be cropped and scaled up to 200 x 100 pixels.
Note: A warning appears if this occurs, but the image can still be used. The image will be scaled up and may look pixelated on air.
Example - Setting Aspect Ratio
If the DestWidth x _DestHeight _result in a value less than 10,000, then the Crop Tool will use the aspect ratio of the width/height values, but the image will not be resized.
For example, a template designer may set the DestWidth and DestHeight to 16 and 9 to force an aspect ratio of 16:9. Instead of resizing the cropped image to a size of 16x9 pixels, Crop Tool will use the size of the selection. For example, if we have the original image of 2000 x 1500 pixels, then:
-
If the template user selects an area of 800 x 450 pixels (16:9), the image will be cropped to 800 x 450 pixels. No resizing will occur.