
Viz Pilot Edge User Guide
Version 3.0 | Published January 26, 2024 ©
Graphics
This section covers the following topics:
Browse for Graphics
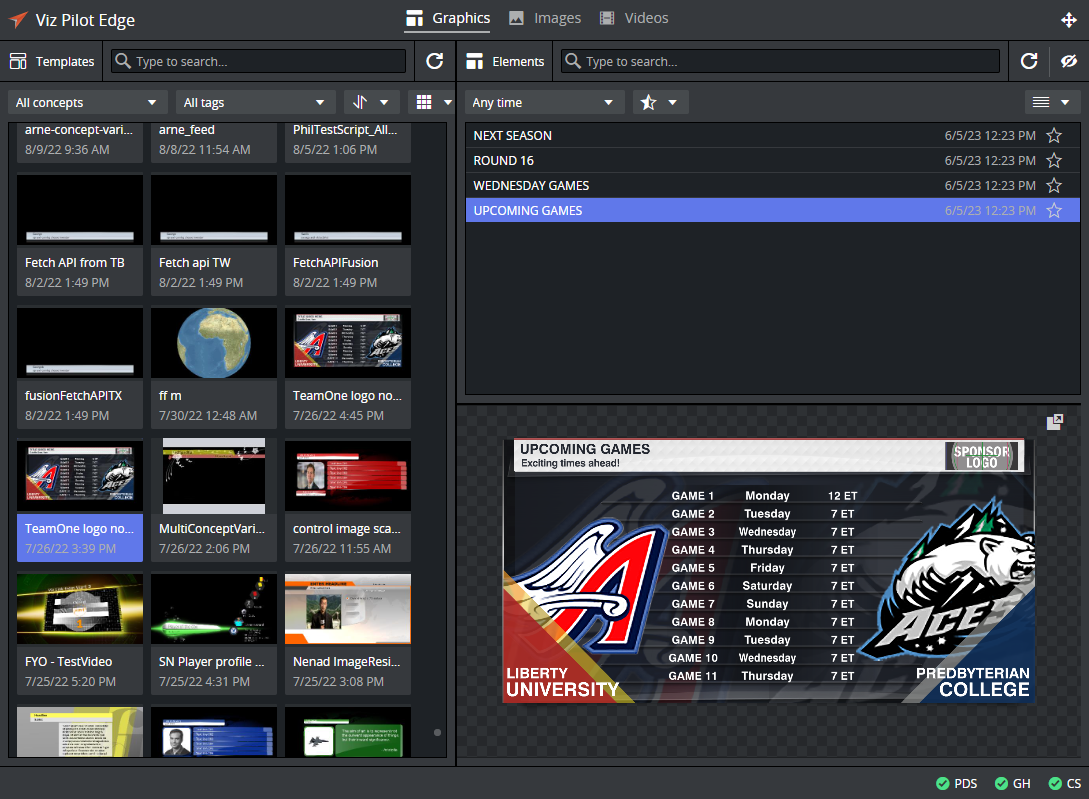
Click  on the top toolbar to search for available templates and saved data elements. Viz Pilot Edge will now open in Browse mode. Double clicking any item in this mode will open the item in Edit mode.
Templates

The Templates pane to the left shows available Pilot templates based on the Concept and Tag selected and/or search terms entered. When typing in the search field, all templates containing the given search string in the template description are displayed.
The list of templates can be sorted by description or modified date ![]() and displayed with large thumbnails, medium, small or as a list
and displayed with large thumbnails, medium, small or as a list ![]() .
.
The template thumbnail shows a snapshot of the scene at the time of saving in Viz Artist. When clicking a Template thumbnail, a preview is generated by Preview Server. This preview jumps to the default preview point in the scene, and may differ from the thumbnail.
Double-click a template to open it in a new window, where you can add edit the fill-in fields and save it as a data element.
Elements

When clicking a Template, the list of data elements is updated. Data elements are previously saved templates (instances of templates) available in Pilot Data Server. When searching, the list displays all data elements containing the search string. It can be filtered on last updated time (Any time, Last hour, day, week or month).
Double-click a data element to open it in a new window, where you can edit the fill-in fields and save it as a new element or modify the existing one.
Click the eye-icon ![]() to turn on and off the preview window in browse mode. This will also affect the preview in Image mode.
to turn on and off the preview window in browse mode. This will also affect the preview in Image mode.
Click the Library icon ![]() to select whether the elements list should contain only library items, only non-library items, or all items. Data elements in the library are marked with a filled star:
to select whether the elements list should contain only library items, only non-library items, or all items. Data elements in the library are marked with a filled star:

Preview
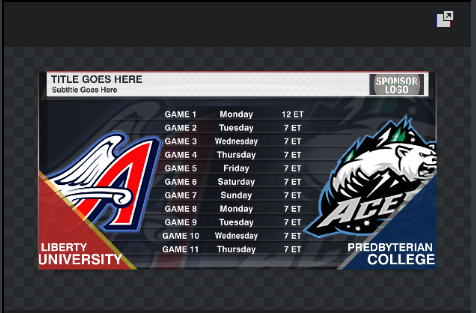
The Preview window contains a Preview Server generated snapshot of the selected template or data element:
Hovering the mouse over the image, a timeline with default preview point appears:

Click this timeline to generate a preview at a different point in time.
Click the detach-button ![]() to detach the preview window.
to detach the preview window.
Edit Templates or Elements
Double-clicking a template or data element will open it in Edit mode. This window contains two main parts, the Fill In Form (left) and the Preview Window (right), see the screenshot below. Content can be added and edited on the left, while a preview will load on the right every time you make a change.
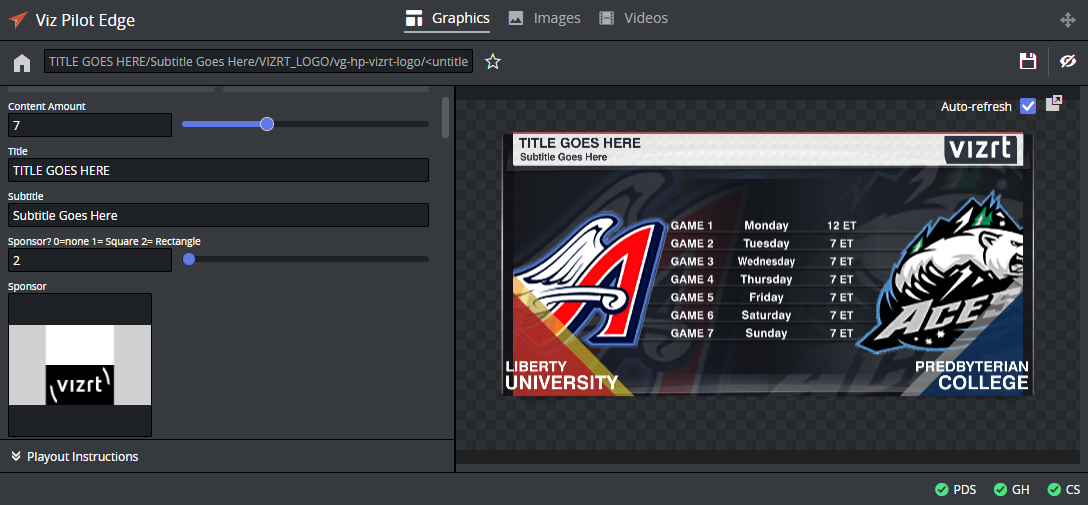
The Fill In Form
The window to the left is a Fill In Form for graphics. The form contains fields (exposed by the graphical designer in Viz Artist) where you can add content to the graphic, including text, options in a drop-down list or media assets. If Auto-refresh is enabled, the Preview Window will instantly display changes made in the Fill In Form.
Playout Instructions
Playout Instructions are located at the bottom of the Fill In Form. The In and Out fields specify the start and end time for the graphic relative to the rundown of which the element will be a part.

To instruct Viz Pilot Edge to add playout instructions to the element, check Enable.
This information is then added to the MOS XML attached to the data element when added to a newsroom rundown. More specifically, the MOS tags updated are <itemEdStart>, <itemEdDur> and <itemTrigger>. This information is used by Media Sequencer to time graphics when playing out data elements through Viz Multiplay, Viz Trio or Pilot Director. This timing information is not supported by Viz Mosart except when adding Viz Arc actions to a rundown.
Saving Data Elements
Click the Save button ![]() to save a template as a data element, or to modify a data element. Type in the name of the new data element in the dialog that appears or use the generated title.
to save a template as a data element, or to modify a data element. Type in the name of the new data element in the dialog that appears or use the generated title.
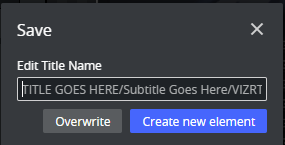
Create new element will create a new instance of the current data element or template.
Overwrite will overwrite the current data element.
The Overwrite button is disabled if one of the following conditions are met:
-
The editor contains a Template.
-
The Disable Overwrite (ax_disable_data_overwrite) setting in Pilot Data Server is enabled.
-
The current element has no modifications.
-
The opened element was a library item and the library item status was removed. This is not allowed in the graphics editor.
WARNING: If the data element title is too long, it will be reduced to 128 characters in the MOS XML file, which will in turn affect how the the element title is displayed in the newsroom system.
Using the Element in the Newsroom Computer System
Once a data element is saved or reopened, use the Drag to newsroom system button
![]() the element to NRCS. The element can also be dragged to Notepad or a text editor to inspect the MOS XML.
the element to NRCS. The element can also be dragged to Notepad or a text editor to inspect the MOS XML.
Some Newsroom systems do not allow dragging. In these cases, a Send to Newsroom system button
![]() can be used to send items to the rundown without having to drag and drop. A new rundown item is then created.
can be used to send items to the rundown without having to drag and drop. A new rundown item is then created.
If the element was opened from a rundown in the newsroom system, the send button turns into an update button. Any edit in the element will not update the MOS item from where it was opened. Opening another element in Viz Pilot Edge will turn the button back to a Send button again.
Library Elements
If a data element is frequently used, you want to prevent it from being changed or deleted during automated cleanup tasks, by adding it to the library.
-
Open the data element.
-
Click the Library button on the toolbar:

-
The Library icon will change to
 , to reflect the data element status.
To overwrite a library element, click Save and then explicitly check the Enable overwriting library item checkbox and click Overwrite.
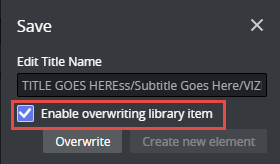
This is a safety mechanism that prevents accidental overwriting of library elements.
Note: If the Disable Overwrite (ax_disable_data_overwrite) setting in Pilot Data Server is enabled, the Overwrite button will be disabled in the Save dialog window and a new element will have to be created instead. The Library Status will have to be set after the element has been created.
The Preview Window
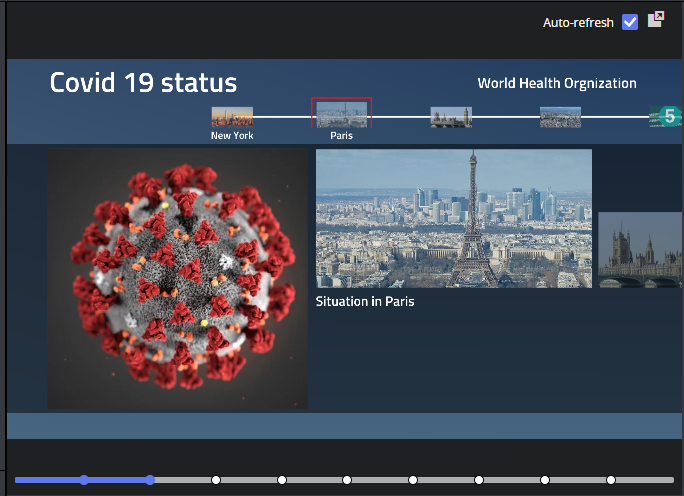
Continuous snapshots of the graphics provide an indication of how it will look when played out in the 3D renderer on a Viz Engine.
Hover the mouse over the preview image to reveal a timeline of the graphics.
The preview window has the following features:
-
Preview points: If the scene contains named preview points, such as stop points and/or tags in the Default director, these are shown as clickable circles along the timeline on the preview image. Selecting a preview point shows a preview of the scene at the given point, and the playhead jumps to the point in time where the preview point is set.
-
Click the timeline to move the playhead. If the scene does not have a director called Default, or the Default director does not have a duration, the timeline will be disabled.
-
Auto-refresh: Auto-refresh is located at the top of the Preview Window and is enabled by default.
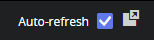 This means that the Preview Window updates once there are any changes in the Fill In Form.
Disable Auto-refresh to turn this functionality off. To refresh the Preview Window in this mode click the Refresh button to fetch a new snapshot.
 -
Click the detach button
 to detach the preview out in a new window.