
Tracking Hub Administrator Guide
Version 1.5 | Published April 05, 2022 ©
Replay Tool
The Replay Tool can be used to record time code stamped clips with the help of Service Host and a Channel Recorder plug-in. Any time code which is readable by Viz Engine can be used. Most cameras already insert at least one readable time code.
To use the tool, some prerequisites must be met and some configuration settings modified. In the following sections, a step-by-step description of the preparations are given.
Prerequisites
Software
The Replay Tool was tested with the following software versions:
-
Viz Engine 4.3
-
Viz Artist 4.3
-
Service Host 2.0
-
Tracking Hub 1.5
-
Studio Manager 1.5
Please install the packages above in any order. If older versions are already installed, uninstall them first.
Video Hardware
-
Matrox XMIO 3/5
-
Matrox DSXLE 4
Preparations
Viz Engine Configuration
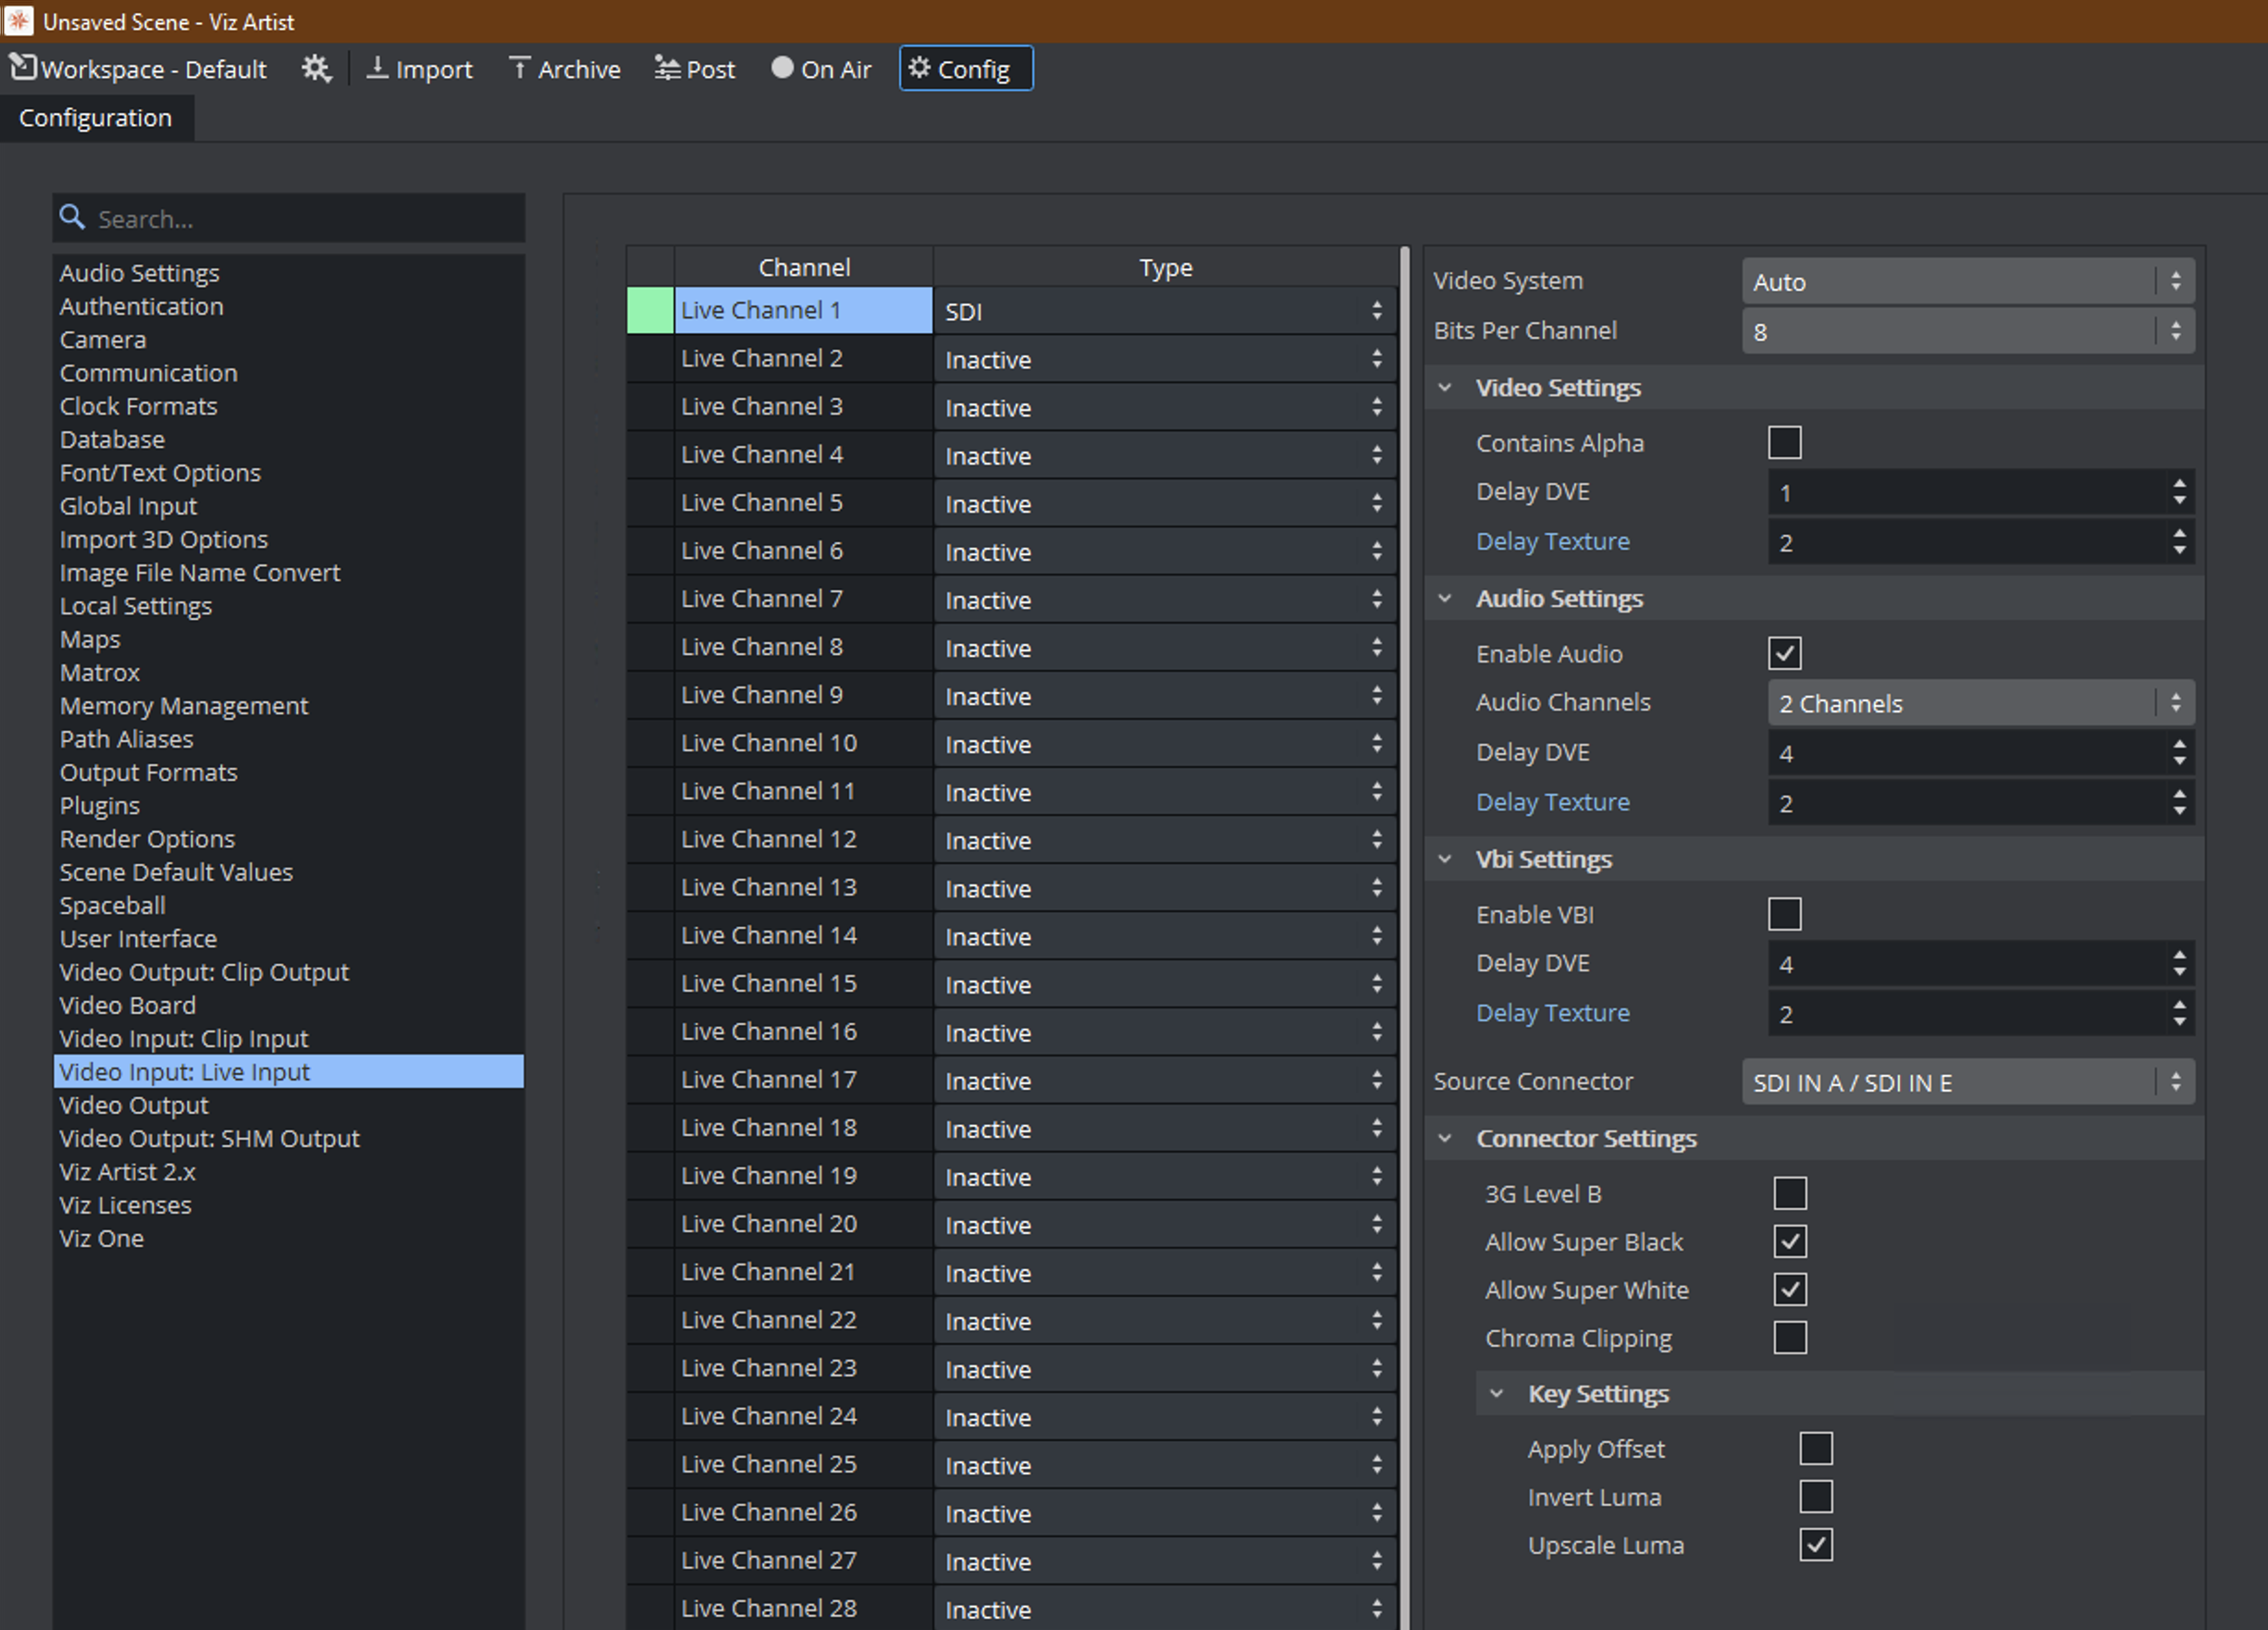
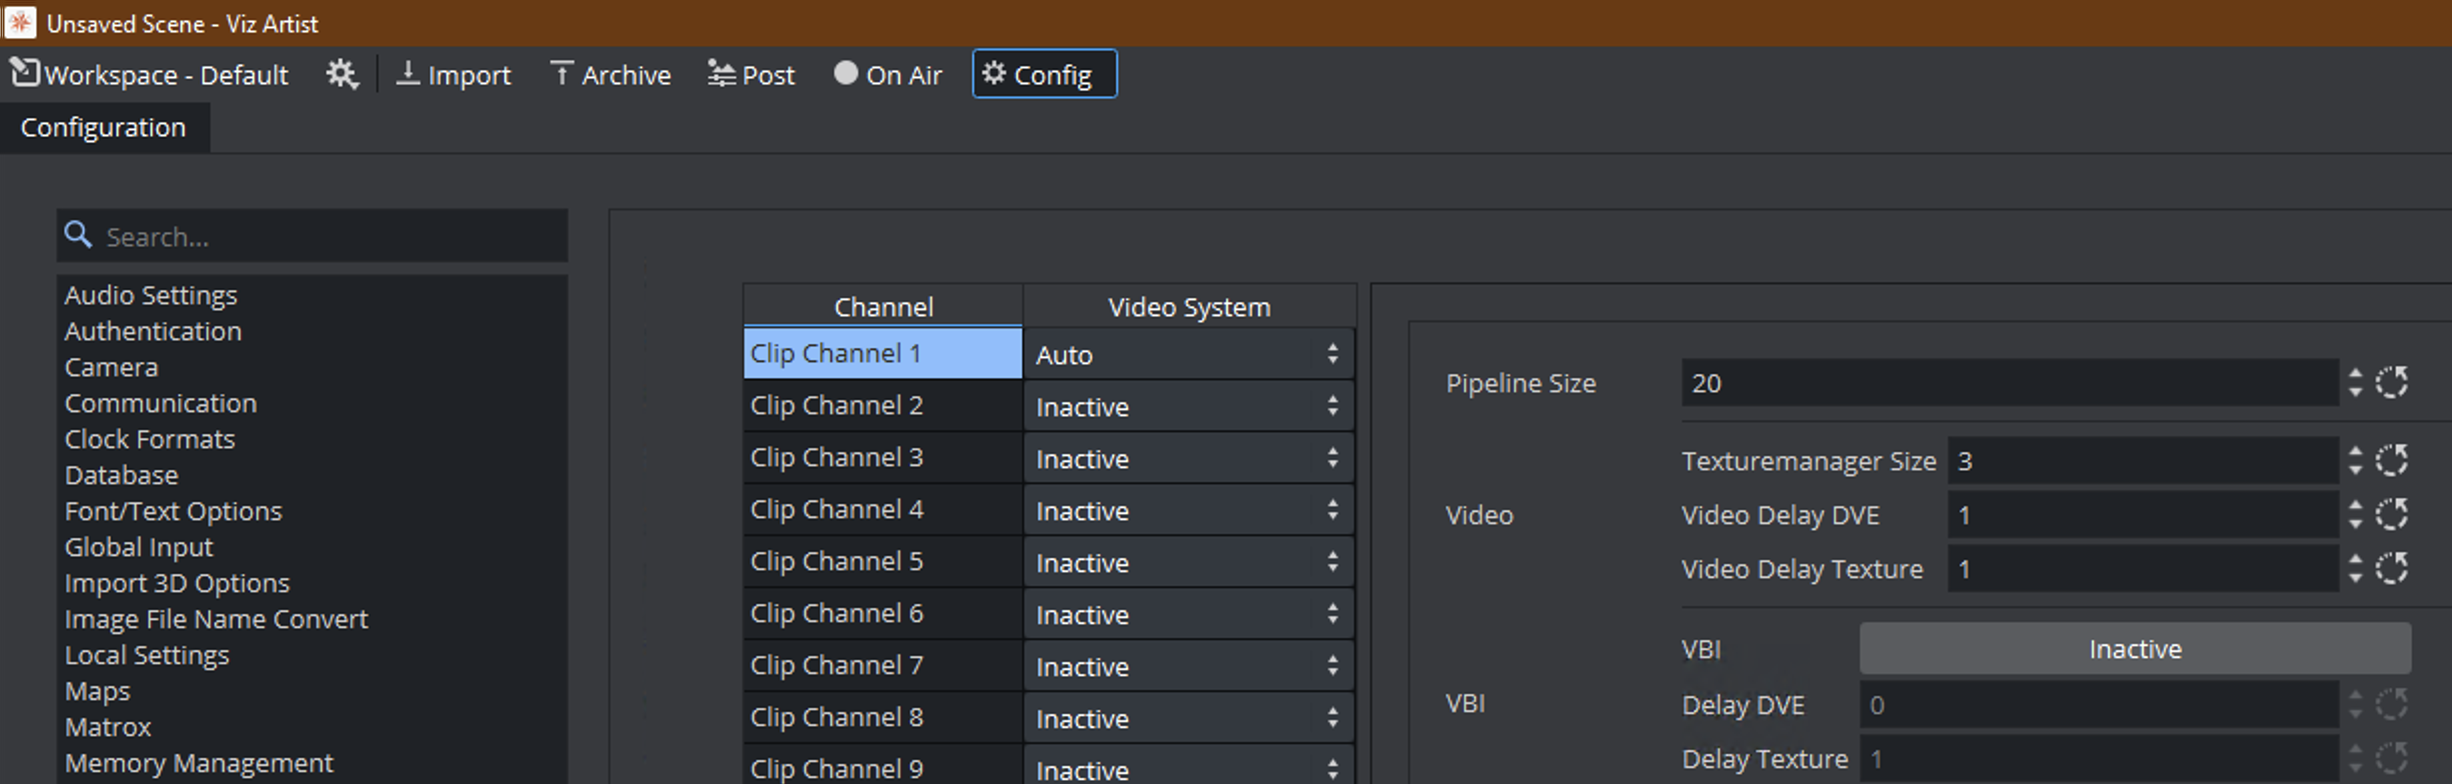
After initial installation of Viz Engine, launch the Viz Engine configuration and activate Clip Channel 1 and Live Video In 1.
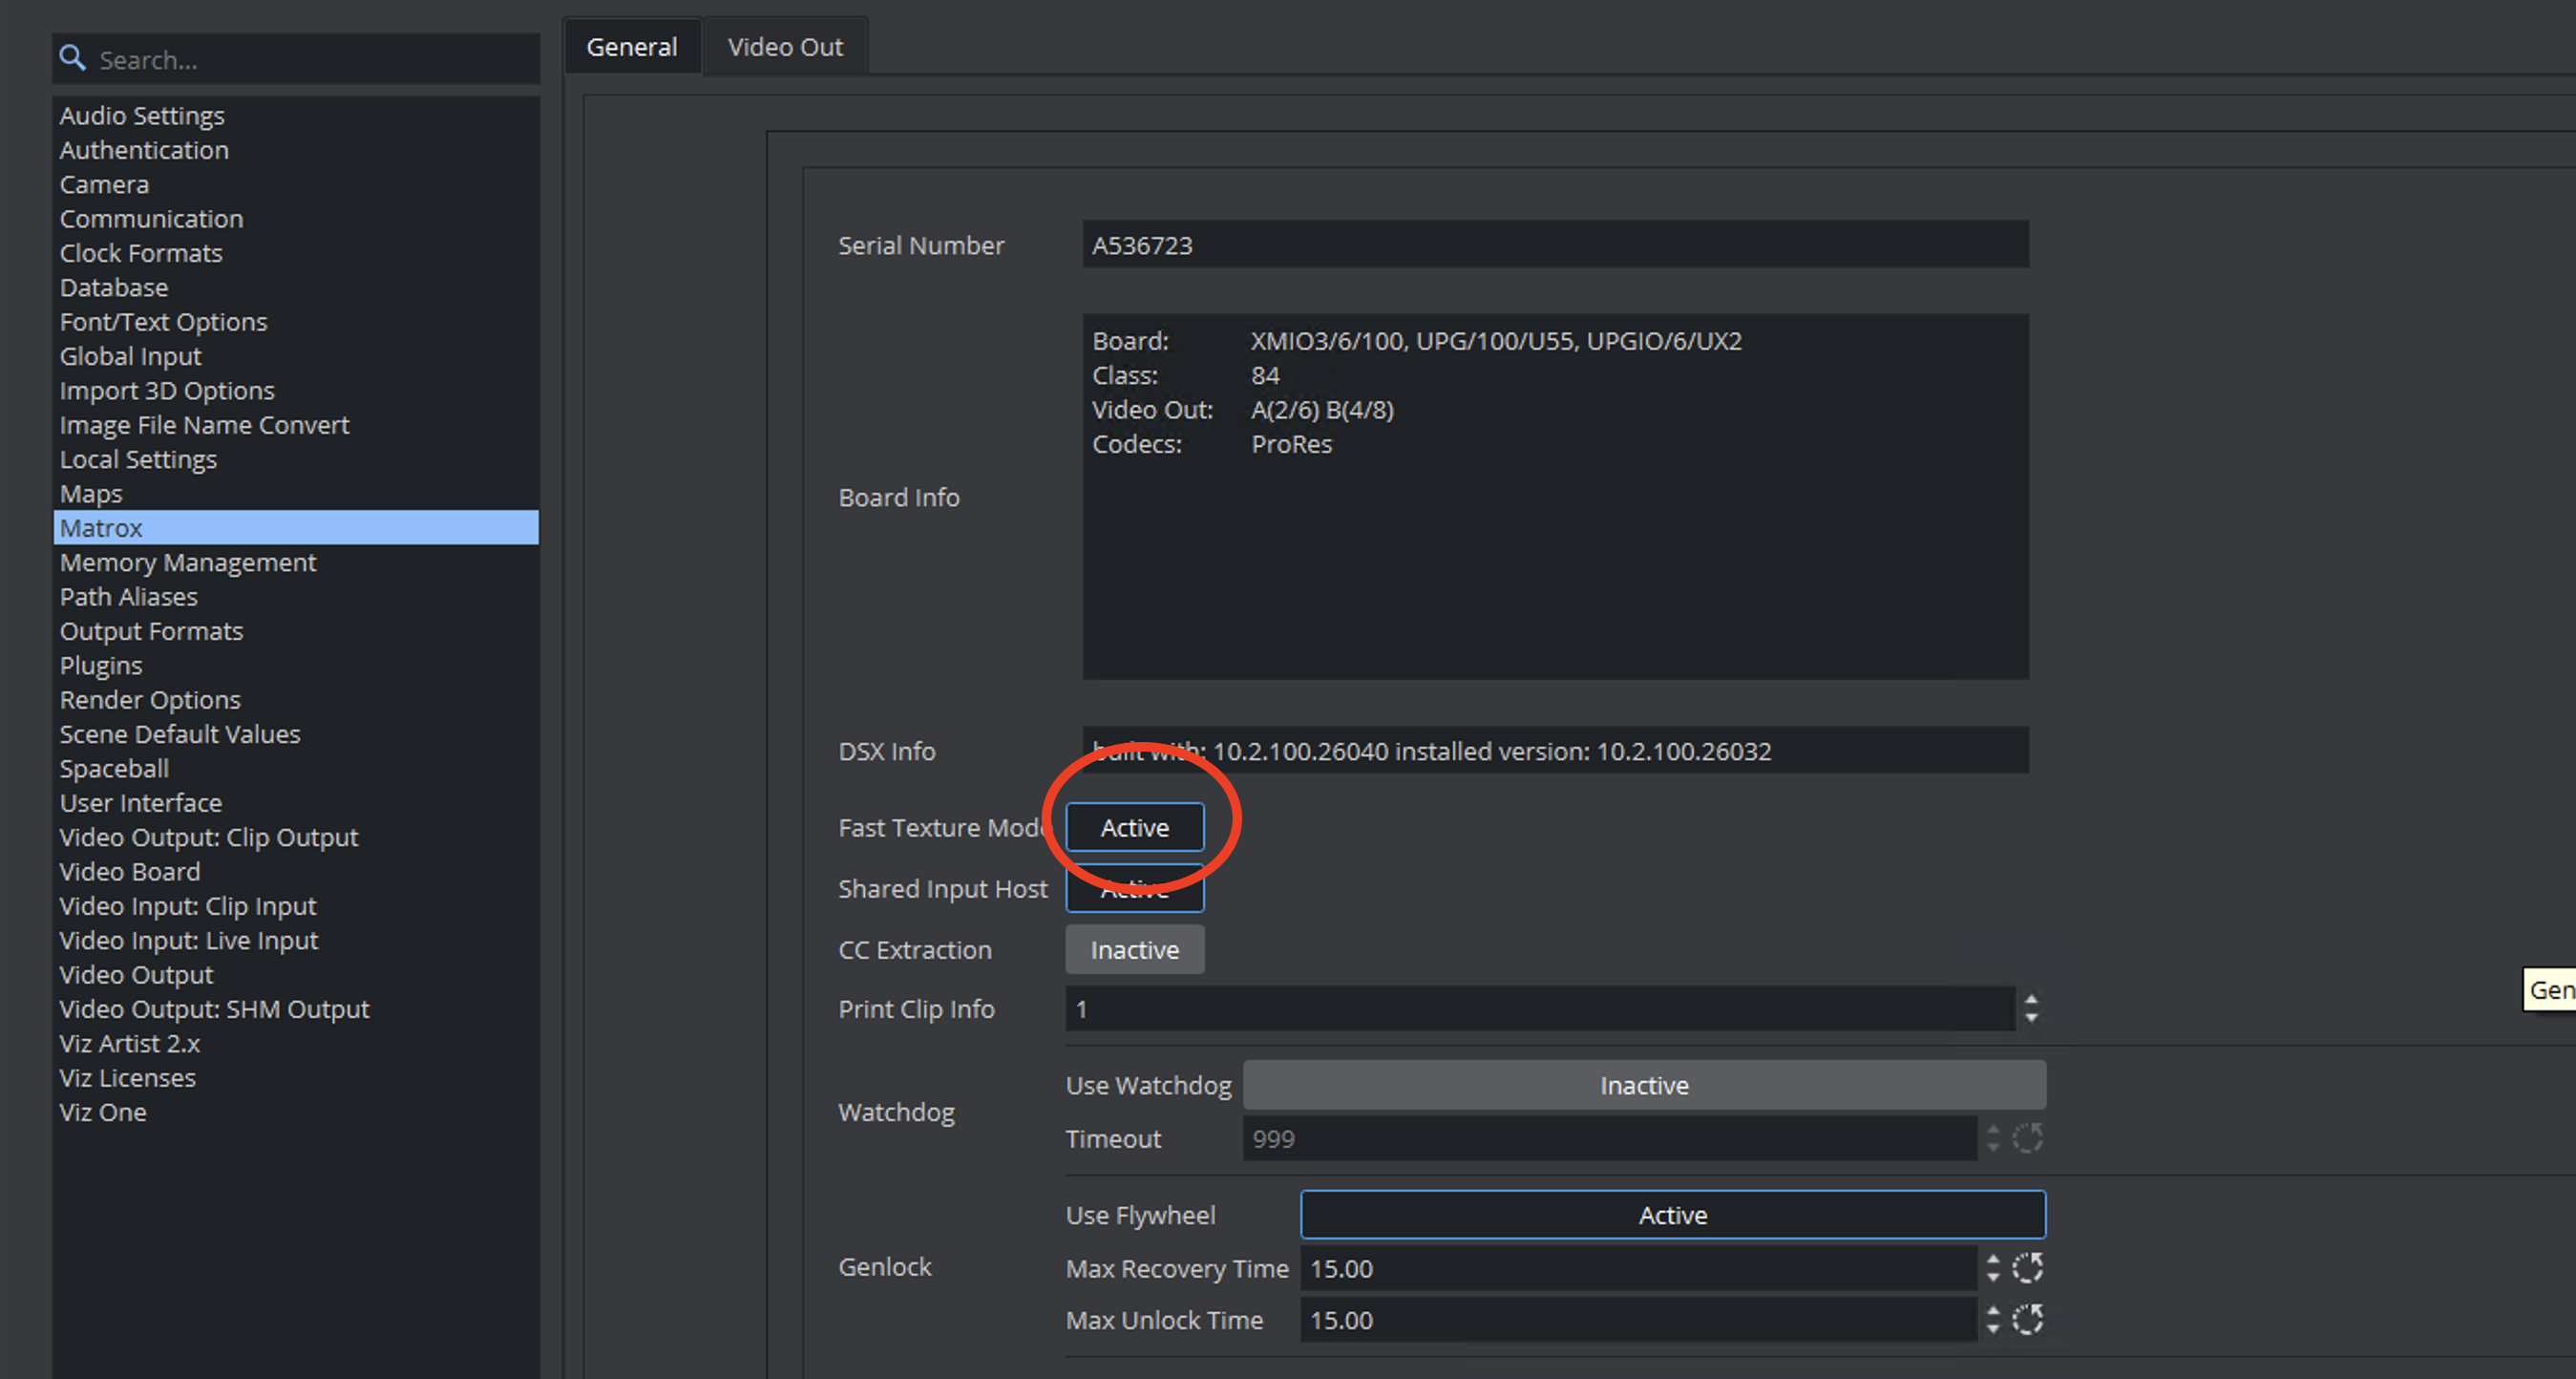
Make sure that in the Matrox section Fast Texture Mode is activated. This setting is mandatory for Virtual Set installations.
After these first steps close Viz and open the config file. Please make sure, that in the section "MATROX_CONFIG" Matrox.FastTextureMode is set to 1 and that Matrox.InputHost is set to 1.
############################SECTION MATROX_CONFIG################################ matrox devices common##Matrox.Devices = A536723## Enable fast texture input mode.## ATTENTION: in this mode DVE will not work.#* Matrox.FastTextureMode: Default=0Matrox.FastTextureMode = 1## Set this to true, if the physical inputs on this engine are to be used as shared resources in additional engine instances.#* Matrox.InputHost: Default=0Matrox.InputHost = 1After that, go to the Clip in channel: 1 section.
#### Clip in channel: 1##Make sure that the selected clip player is set to 0: Matrox. The VML clip player does not work with time code!
## Default clip player to be used for this channel. This is only relevant when Matrox board is used and io_mode is configured to V4. 0=Matrox 1=VML#* ClipIn1.Player: Default=0 Min=0 Max=1ClipIn1.Player = 0Service Host Configuration
If there is an older version of the Service Host installed, it must be uninstalled first. It is recommended to use the default connection settings for the installation, as the ports are preconfigured in the Replay Tool.
Please refer to the Service Host Administrator Guide for further information.
Channel Recorder Client
Channel Recorder is a plug-in for Service Host. It enables recording of video inputs at the same time as Viz is using it for rendering. A detailed documentation of all settings is given in the Service Host Administrator Guide. A brief example which is needed for the Replay Tool is provided in the following Section.
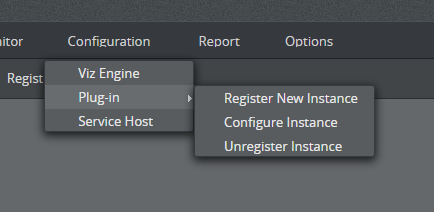
Open the Service Host UI in a web browser. Click on Configuration > Plugin > Register New Instance. Select ChannelRecorder and then click on Apply.
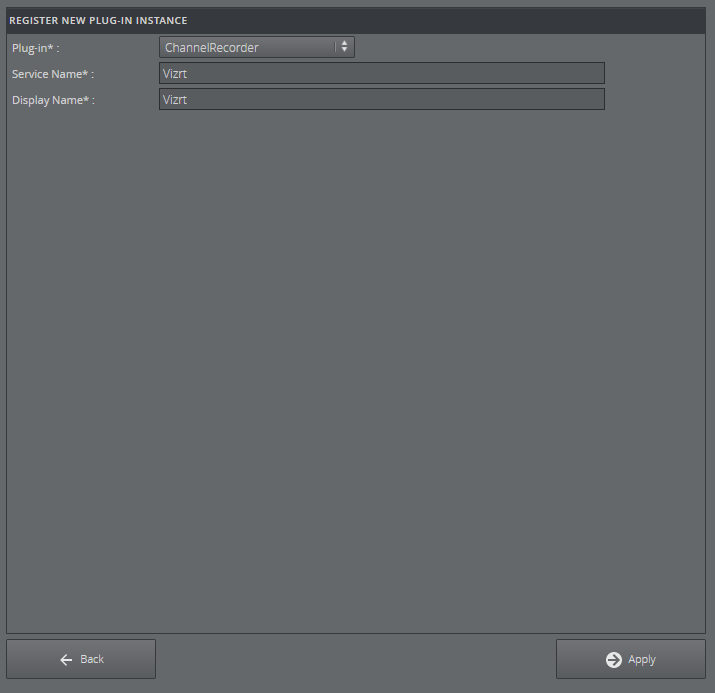
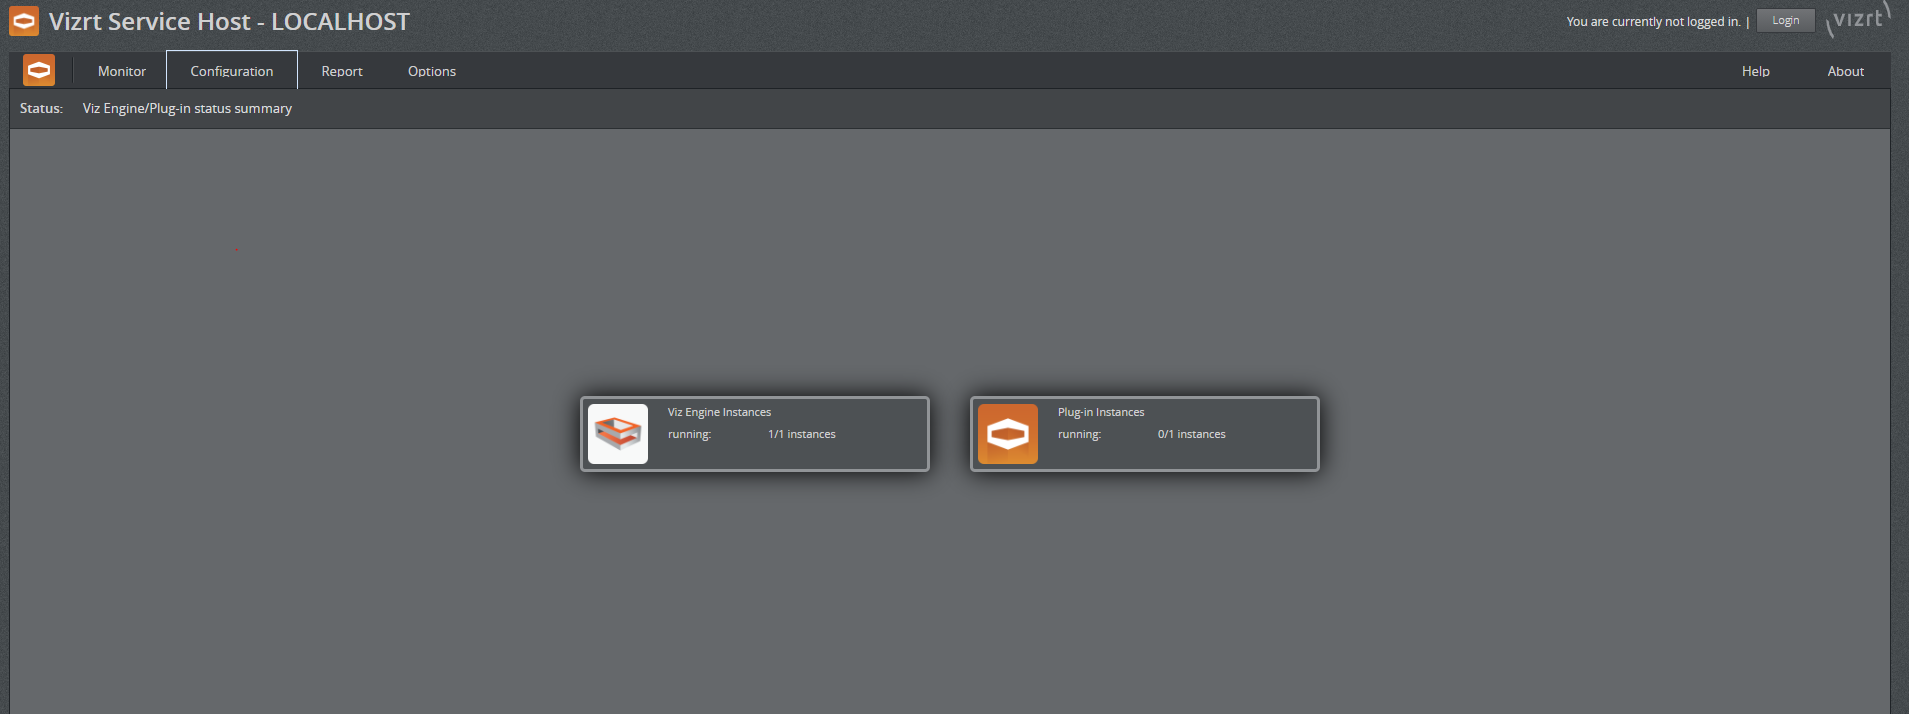
After this step, a new plug-in can be found within Service Host.
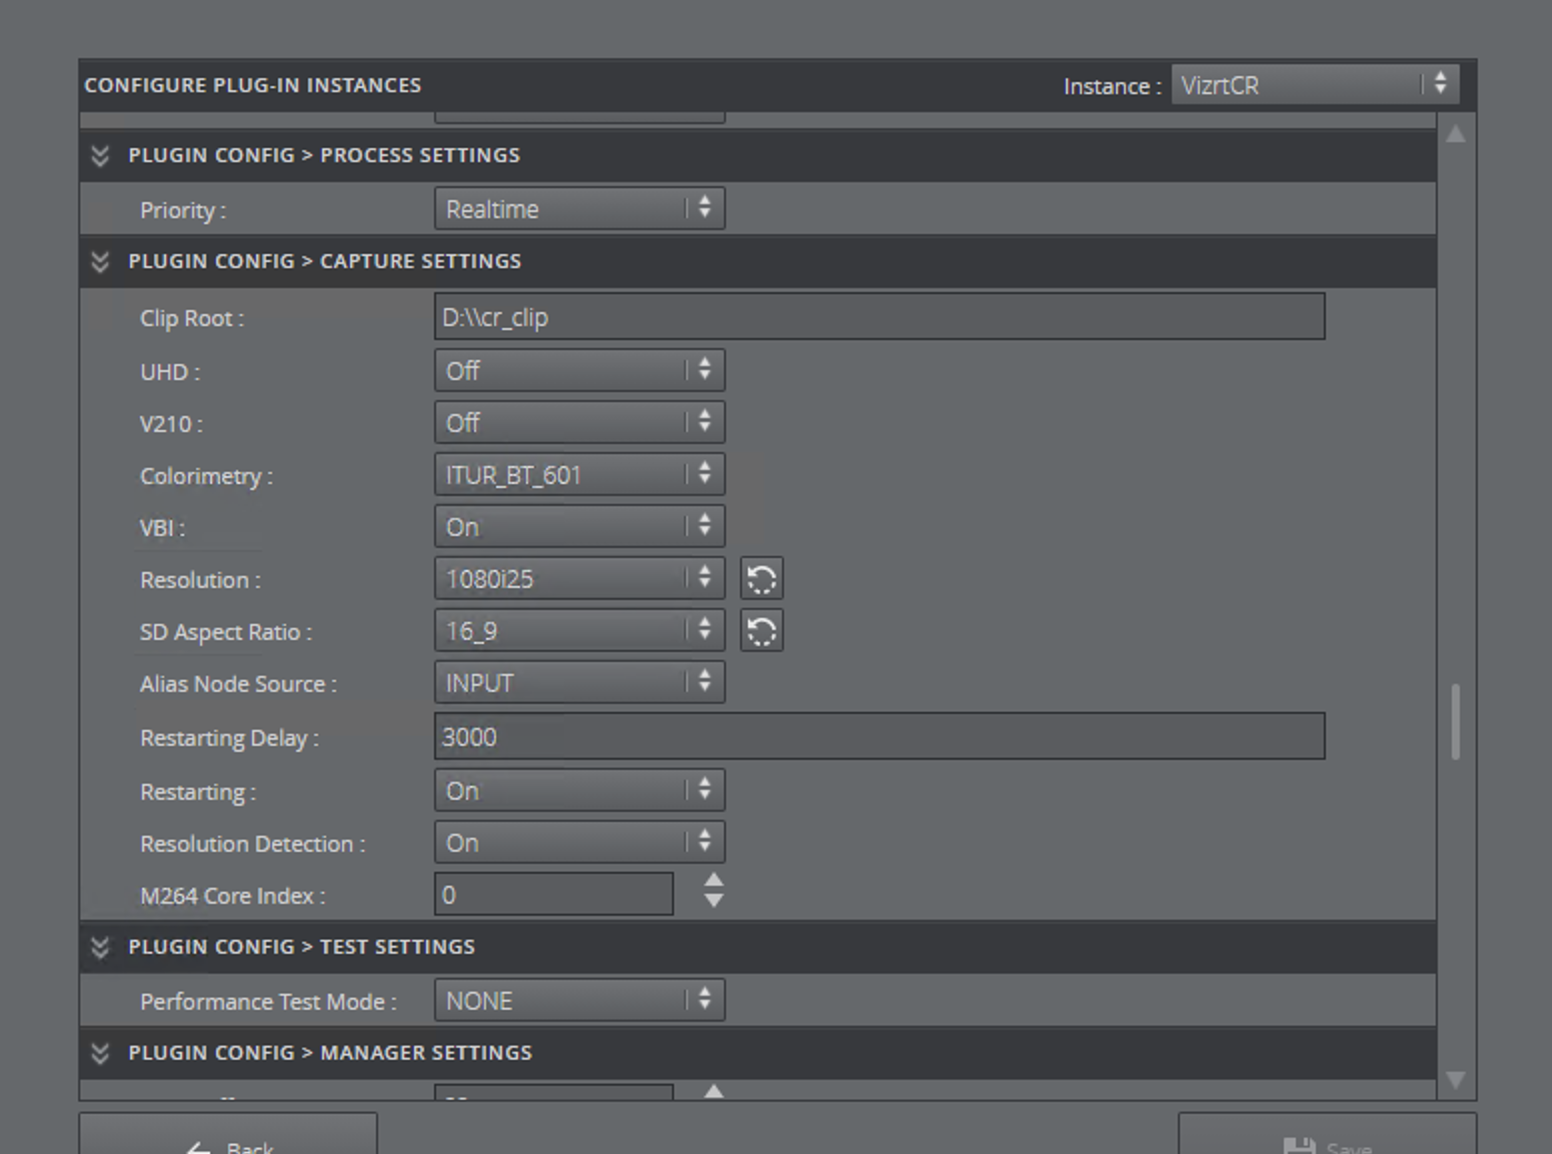
The next step is configuring the plug-in. In this example, Input connector A is used for recording. The clip folder is located at D:/cr_clip. The plug-in stores all recorded clips in this folder. Select the video resolution and aspect ratio needed for recording record.

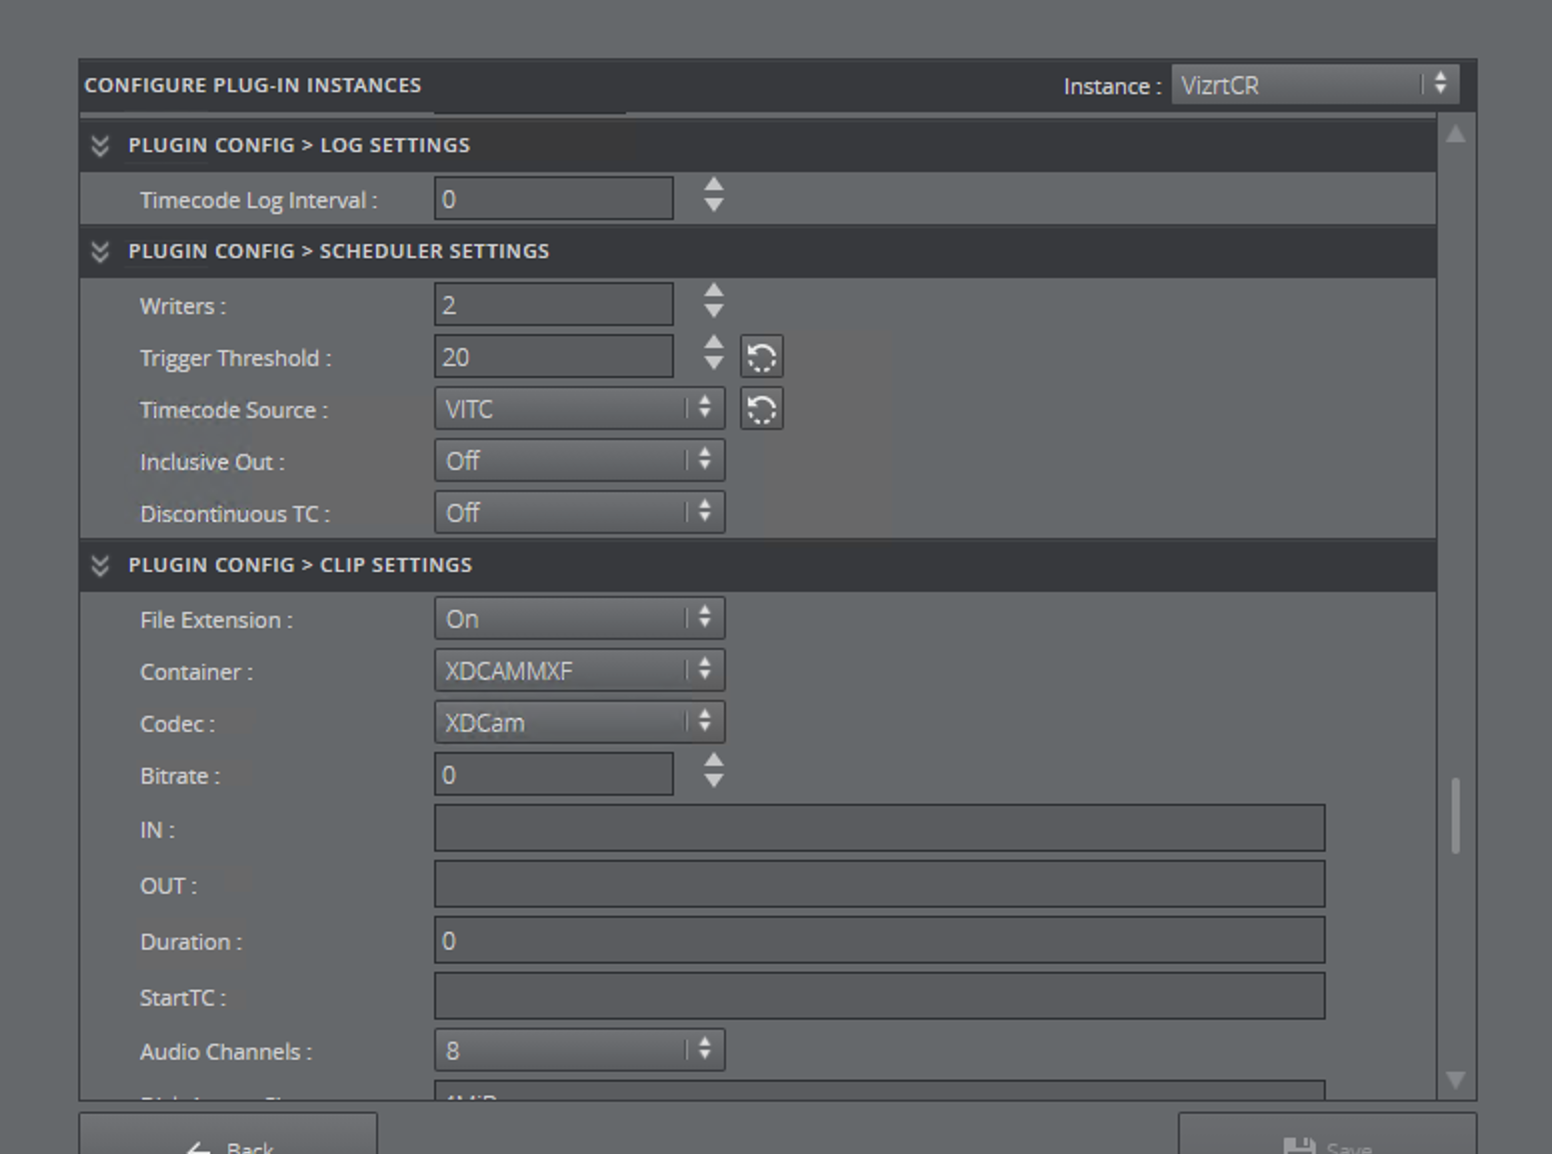
Scroll down to the Scheduler Settings and select VITC as Timecode Source. In the clip settings the codec and container can be selected. For more information on what codec and container is usable for the selected resolution in Viz Engine, please refer to Channel Recorder > References and Specifications > Supported Codecs in the Service Host Administrator Guide. If recording does not start, check the log file of the Channel recorder and follow the instructions there.
Make sure that Viz Engine is running before starting the instance. Otherwise, the service is not able to record properly and the recorded clip will be black.
Tracking Hub Configuration
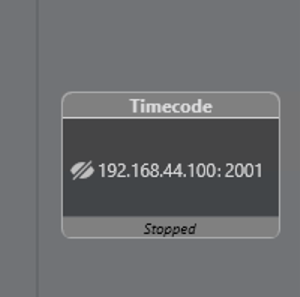
Please refer to the section Post System and configure the setup for recording. To receive time codes from the Engines, add a Timecode service and connect it to the Engine. Tracking Hub requests all time code sources from the Engine and adds them as sources in the post settings. The Engine must be On Air when the service is activated, otherwise the commands to receive the time code services fail.
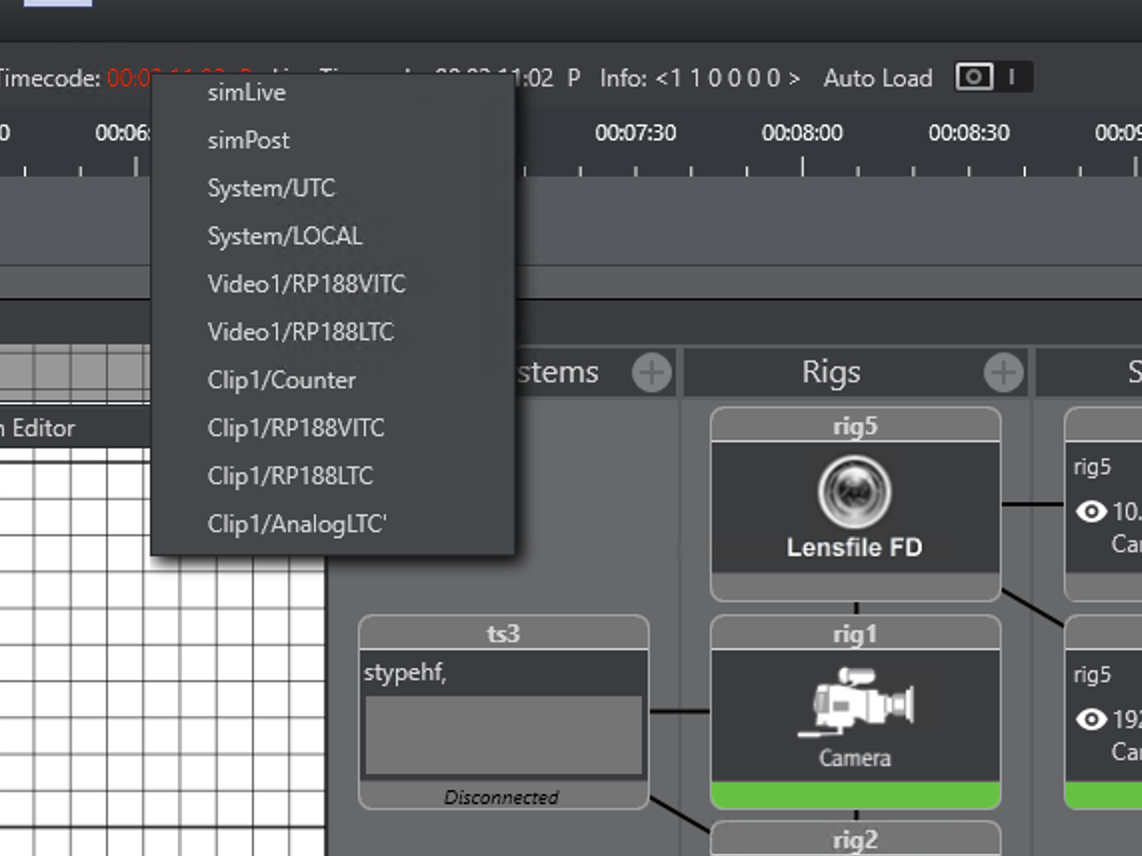
As post time code select Clip1/RP188VITC as live time code select Video1/RP166VITC. The live time code should be taken immediately.
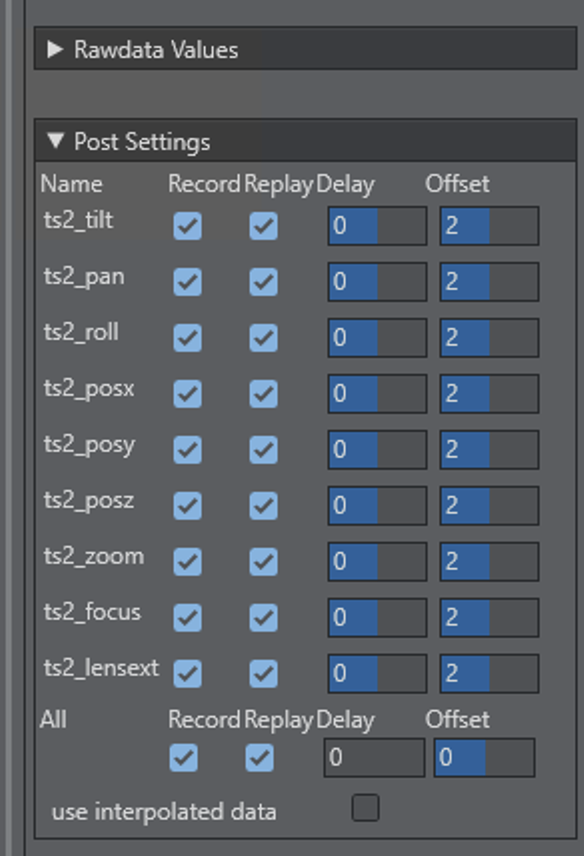
Select the parameters which should be recorded.
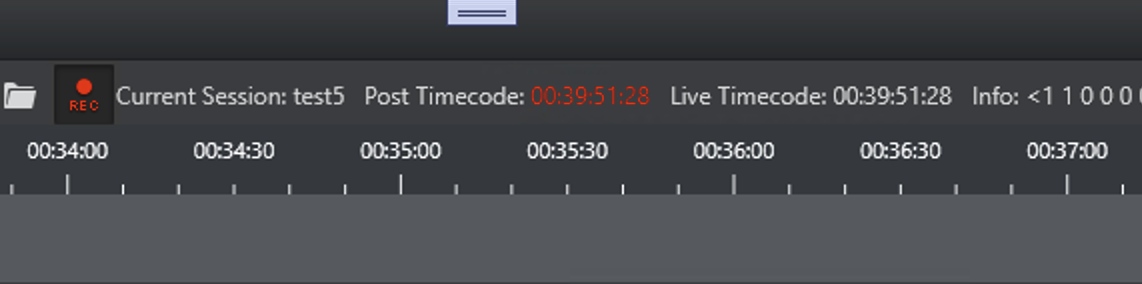
The press Record in the Post Tab.
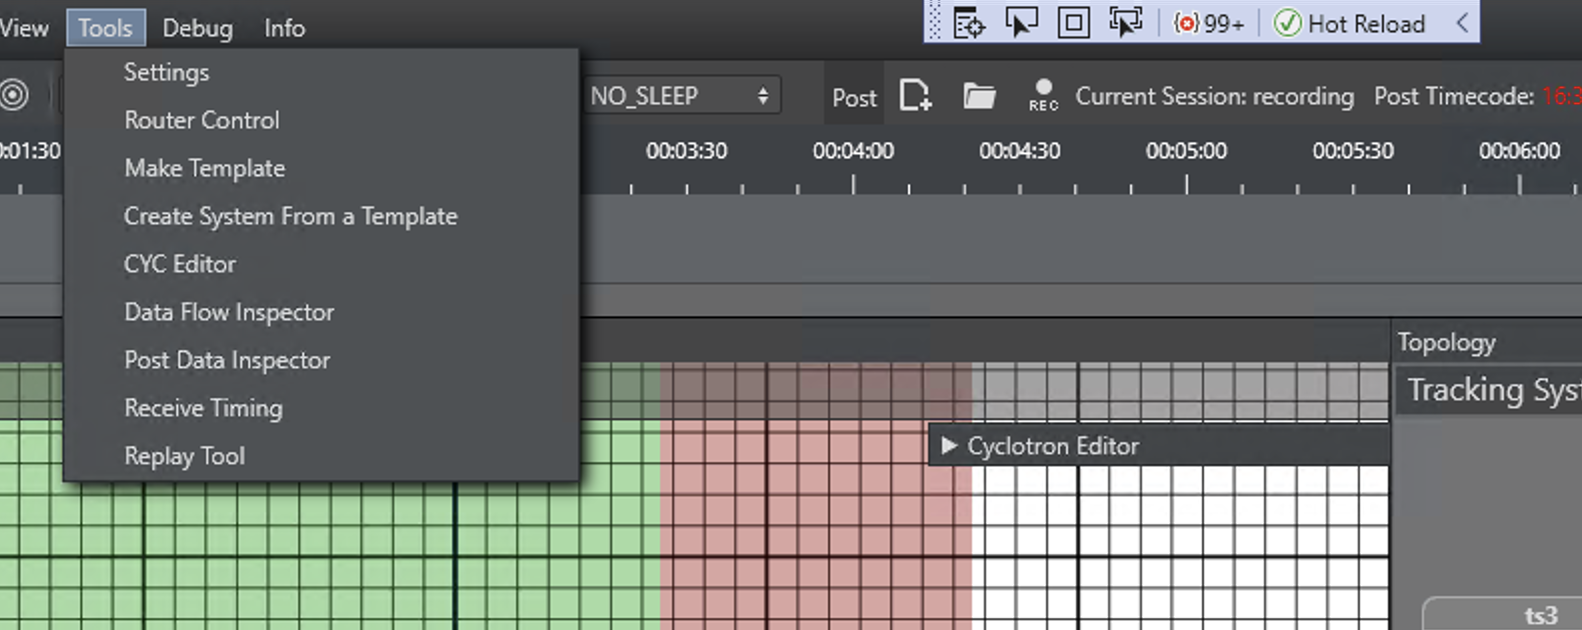
After the recording session has started, open the Replay Tool. The tool is located under Tools > Replay Tool.
The connect window opens. The first step is to connect to the Service Host instance. Select the IP address of the Service Host and enter the configured port (default 9000). After pressing Connect, a connection is established and all plug-ins installed on the Service Host are analyzed.
If the Connect button is not enabled, Studio Manager was not able to find a correct installed Engine on this IP address. Please check if use trackinghub is activated in the Engine configuration and that the correct IP address is provided.
Service Host Section
Select the Channel Recorder plug-in to be used for recording from the ChannelRecorder drop down. The connection also reads the Engine instance out of the configuration. It is normal that the Viz Engine Instance reports not connected after this step. The connection is established after the final connect. It is important that an Engine instance was found in the Service Host configuration. It is also important that Viz Engine was started and the plug-in instance has been started after Viz Engine.
-
IP: Shows the Service Hosts IP address.
-
ChannelRecorder: Shows all channel recorder plug-ins installed on the Service Host.
-
Engine Instance: Shows all Viz Engine instances running on the Service Host. It also checks whether Viz Engine is running.
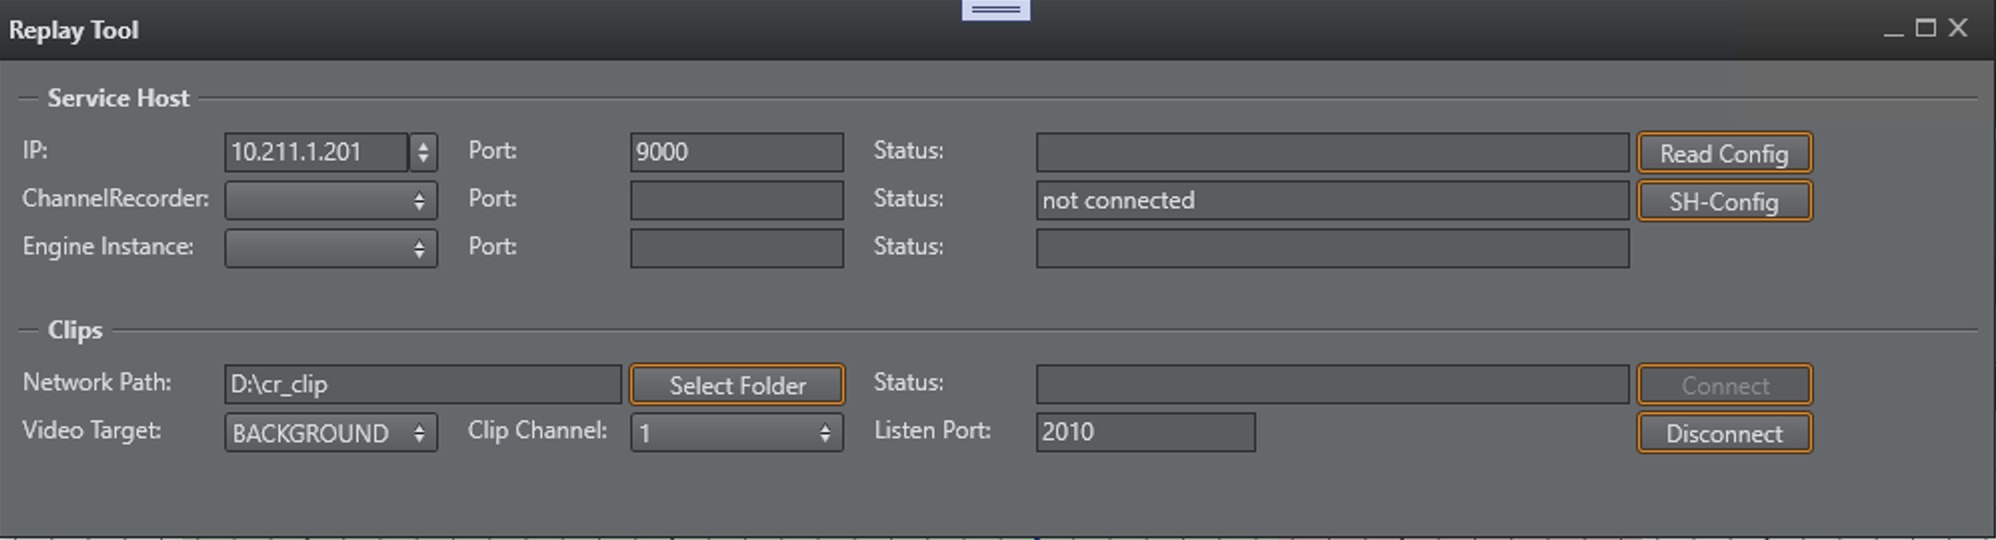
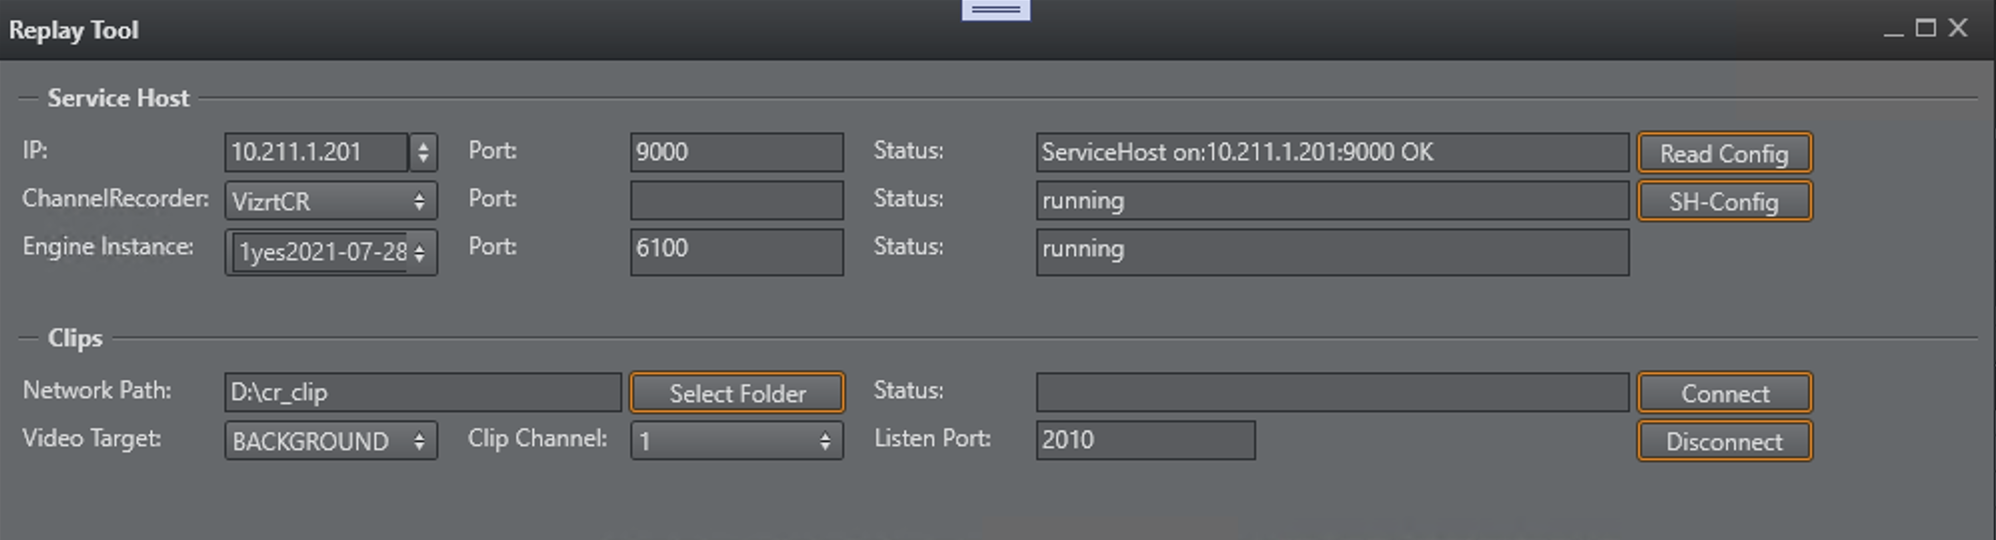
Clips Section
The next step is to connect a clip folder. If the Replay Tool runs on the same machine as the Engine, you can simply select the clip folder which was configured during Service Host and Channel Recorder installation. If the control runs on another Engine, it is necessary to map the clip folder from the Engine to the local machine, the Replay Tool is running.
To map a network drive, open Windows Explorer and right click on the This PC entry. Then select Map Network drive and browse to the folder you shared on the Engine. Please refer to the Windows manual on exact instructions for Mapping Network drives.
To find the correct mapped or local folder, click on Select Folder. A dialog opens where you can browse your computer. If the folder is still valid from the last session, you can now click Connect. If everything goes well, the configuration dialog is hidden and the Replay Tool opens the Replay tab.
The Video Target defines, if the clip and live video is played either in Foreground or Background. In case of a Virtual Studio with chroma keyer, select FOREGROUND. In case of Augmented Reality, use BACKGROUND.
The Listen Port defines the feedback port the Replay Tool is registering its information channels. Usually, there is no need to change this value, the only exception is, when another application uses the same ports.
Press Connect to continue.
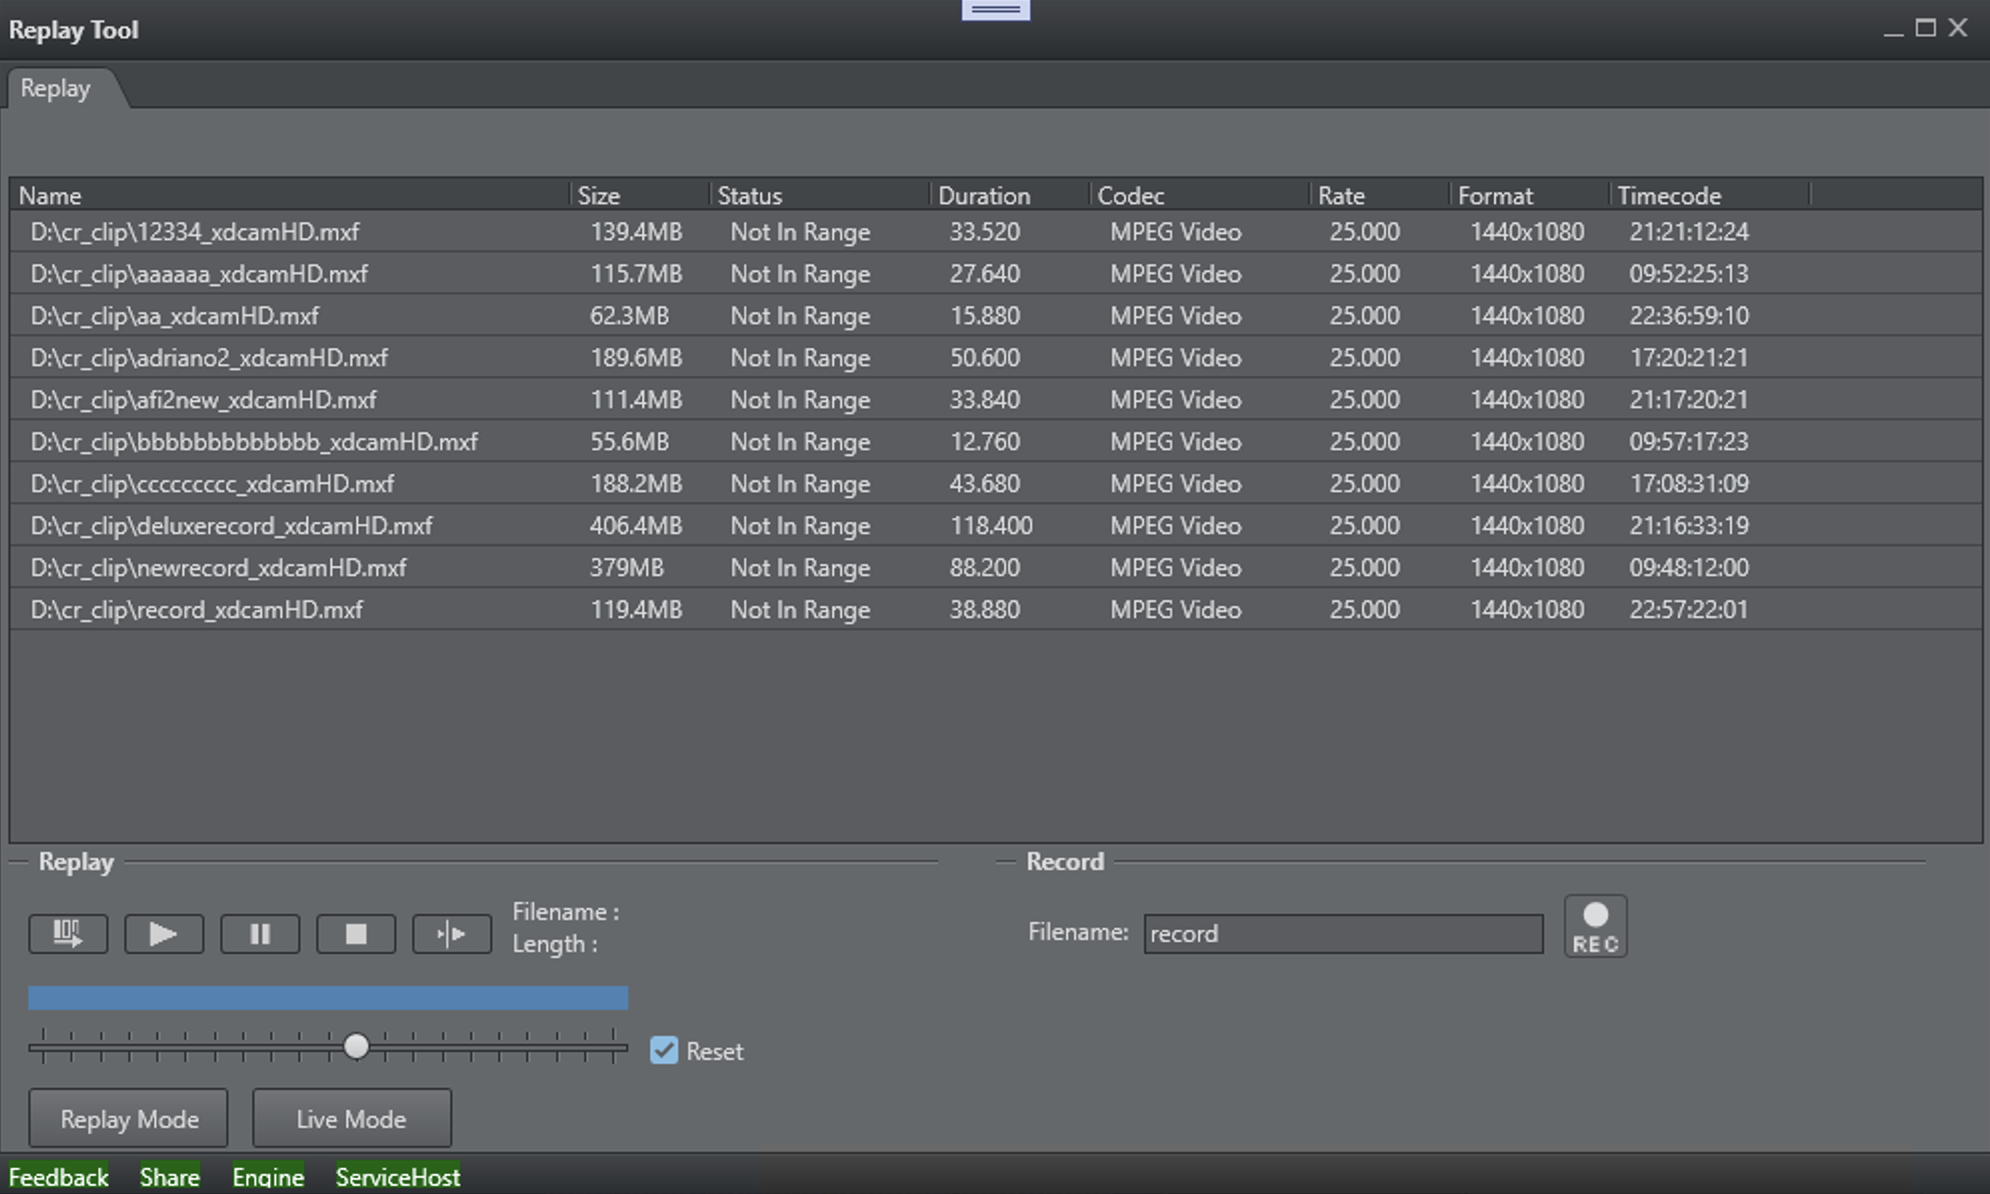
Replay Tool
It consists of two tabs. The Replay Tab and the Record Tab.
Replay Group
Clip Section
In the clip section the tool observes the clip folder and continuously analyses changes. The analyzer is able to read timecode, format, length, duration and format info from the clips. In the case of multiple time codes in the clip, the first one is used. This time code information is used to display if tracking data for the clip is actually in memory.
Select a clip to continue.
Play Section
![]()
The Play section consists of five buttons to control the clip player of Viz Engine. The commands are sent directly by the Replay Tool. The IP and Command port of the Engine is read from the Service Host configuration.
-
 Take: Loads the selected clip from the clip section into Viz Engine. As soon as the clip has been loaded, its name is visible in the Feedback Section.
 -
 Play: Starts the clip playback from beginning.
 -
 Pause: Stops replay at the current location. If you want to continue playing, press Continue instead of Play.
 -
 Stop: Stops the clip and makes it disappear from screen.
 -
 Continue: Resumes playback of the clip from the position pause was pressed.
Feedback Section

The Feedback Section reflects the clip channels feedback given from the Engine. During connect, the Replay Tool registers several feedback channels. One of them is the clip loaded feedback, which is triggered when a clip is ready for replay in the Engine. Therefore, Clip Name reflects the actual clip loaded in the Engine. If you try to load a clip with the Take button and the name does not appear in the Clip Name field, something went wrong or the clip is not playable. Please refer to the Viz Engine console for error messages.
The second feedback channel is the Clip Position channel. It is displayed in a progress bar and the position reflects the actual position which is played out in the Engine at this moment.
The third registered feedback channel is the actual timecode, which is played out by Viz Engine. The actual timecode is shown on the right side from the progress bar. This text field also shows the playback status of the clip.
On the bottom of the position progress bar the playback speed can be adjusted. By default the slider is set to 1 which is the default playback speed. You can drag the slider and adjust the speed from -10 up to 10. The reset button on the right side defines what happens if the user releases the slider. When Reset is selected, the speed returns to 1. If reset is not checked, the selected speed is kept.
Replay Live Section

The Replay button sets the selected clip channel as FOREGROUND or BACKGROUND depending on which source was selected in the connect dialog.
The Live button does the same with the live input.
Record Group
The Record tab is used to start or stop the recording of a new clip. If not recording, a clipname can be entered in the filename field. The filename is then extended by the channel recorder plug-ins and used for the new clip. Pressing on the REC button starts recording.
This is indicated by red blinking of the record button. Pressing REC again stops recording.

