
Viz Multiplay User Guide
Version 3.0 | Published October 23, 2020 ©
Preparing and Playing Out Content
This section covers:
Preparing Content
Initializing

Initializing means that the renderer will load all resources needed to play out the graphics into the memory, so they will appear instantly when taken on air. The Initialize function works the same way as it does in Viz Trio. If the graphics are not loaded, it may take some time before the renderer plays the graphics when a Take operation is executed.
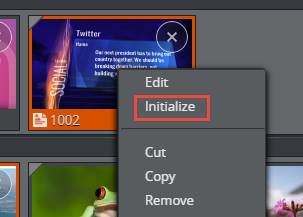
It's also possible to initialize single scenes by right-clicking the thumbnail and selecting Initialize.
Note: Initialize loads content but does not refresh it. If changes have been made to a scene that was already loaded, a Cleanup renderer command must first be issued, followed by an Initialize command. If single scenes need to be reloaded from the Graphic Hub, right-click the thumbnail for the element and select Reload Scene.
Initialize a Show
To initialize a show, click the Initialize button. The button shows the status and progress of the loading process:
|
Icon |
Status |
|
|
Action needed. No scenes are loaded on the renderer. Click the button to start the process. |
|
|
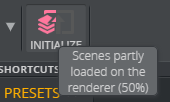
Action needed. Scenes are partly loaded on the renderer, but the loading operation is currently not active. Click the button to start the process. |
|
|
No action needed. The scenes are partly loading, and the loading process is active. Hover your cursor over the button to view detailed progress status. |
|
|
No action needed. All scenes are loaded into the renderer. |


Hovering your cursor over the Initialize button makes a tool tip with more detailed loading progress appear:
Warning: Initializing during a broadcast may impact the frame rate of scenes playing On Air. Initializing should be done in advance or when Off Air in order to avoid affecting the content in the renderer.
Initializing Elements
It's possible to initialize single graphic elements and filled presets in Viz Multiplay by right-clicking the graphics and selecting Initialize:
Warning: Initializing single elements will likely affect the frame rate on the renderer. Flickering or frame drops may occur.
GUI Feedback
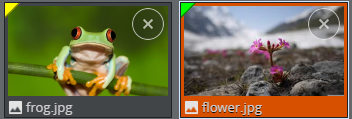
The colored symbols in the upper left corner of the elements in the Media column will indicate whether the element is not loaded (gray), partially loaded (yellow) or fully loaded (green) on the renderer.
The initialized status in the Media Pane shows the loaded status for graphics. Clips may remain unavailable even if the graphics are loaded. For filled presets: although there may be a green status for the graphics, some of the clips may still be unavailable:
Clicking the red error mark, or hovering your cursor over it, will display detailed status on the availability of individual clips in the filled preset.
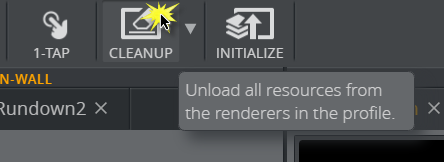
Cleaning up the Renderer
Clean up all video walls or a particular wall in a profile using the Cleanup button above. Cleaning up a wall unloads all the resources from the memory of the renderer, avoiding space issues and the inadvertent use of media from a previous session. Cleanup should be done before initializing a new show or in order to re-initialize the same show into the renderer’s memory.
Warning: Cleanup also removes media for all other operators using the Media Sequencer.
-
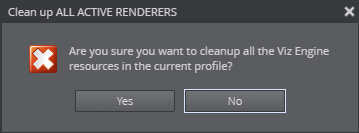
Clean up the renderer for all walls in a profile: Click the Cleanup button to clean up the renderer for all walls for the currently-active profile.
-
Click Yes in the warning dialog that appears to clean up the renderer for all walls in a profile.
-
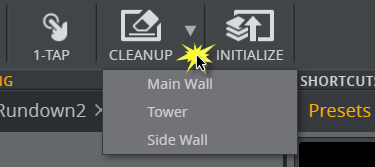
Clean up the renderer for a particular wall in a profile: Click the downward-facing arrow in the cleanup button to expose a menu and select the wall you want to clean up.
Arming
You can arm elements, which means preparing them to be played on air, in Viz Multiplay. Armed videos are prepared by the MSE, so the first frame is ready in the renderer. Images and graphics are not pre-loaded in any explicit way. To arm elements, disable 1-Tap mode so the Armed column becomes visible.
Armed elements are visible in all Viz Multiplay clients connected to the same MSE. A conflict will arise if two operators want to arm their own private content on the same channel, ready to be played out. To resolve this it is possible to select different workspaces for the two operators. Armed elements are visible per workspace - if the first operator has activated his own workspace, his armed elements are not visible to the second operator in another workspace.
Playing out Content
There are several ways of playing out elements in the renderer. The simplest way is to click an element, which sends it to the armed column or directly on air if 1-Tap mode is enabled.
Tip: Select elements manually from one or more groups and click Take Selected or Arm Selected. You can de-select elements by holding down the CTRL key.
Viz Multiplay also has another, more story-centric way of playing out elements:
-
Organize your material in groups, for example one group per story.
Tip: Each group can have one or more elements placed in the order they will be played on air. Elements can also be assigned to the channel where they are to appear.
-
The first element in each channel will be selected when the operator clicks a group (story).
-
All the selected elements can now be played out or armed by clicking Take Selected or Arm Selected.
-
The selection now jumps to the next element in each group.
-
When this procedure is repeated, Viz Multiplay can be used as a tool for sequential playout of elements ordered in a story-centric fashion.
Tip: There should always be a preset on air when using Viz Multiplay with video wall presets. The preset element plays out in the middle layer on the main channel of the renderer (normally host:6100). The GFX channels will not show without a preset On Air.
Transitioning Content between Armed and Program
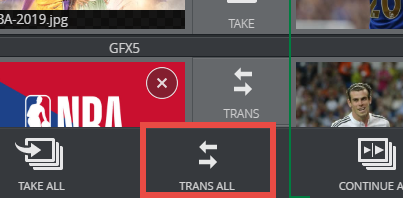
It's possible to test content that you plan to play out on the actual video wall itself. You can do this by exchanging (swapping) the content in both columns. For instance, the Multiplay operator can prepare a set of media elements in the Armed column for playout when the wall is off air. If the Extra Armed button TRANS has been enabled, you can test the content on the wall by clicking the TRANS ALL button.
Any content currently in the Armed column will play out on the wall, while the media elements currently playing out on the wall will move to the Armed column. When the operator sees that everything is okay, a new click on the TRANS ALL button will toggle the content back again. The wall will then resume playing out the content from a minute ago, and the Armed column will once again contain the media elements that are ready to be played on air.
In this way, the operator can test content on the actual wall.
It is also possible to swap single elements by clicking the TRANS button in the Armed column:
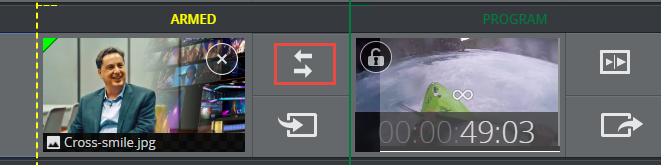
Info: If a channel in Armed does not contain any media elements when TRANS ALL is clicked, the existing content in the channel will remain on the Program engine. This ensures that the wall will never go black when TRANS ALL is used.
Auto-playlist
Viz Multiplay features an option to play out media elements automatically in succession. This can be handy if you have a set of media elements you want to loop on the video wall. Auto-playlists play out media elements in a specific channel, and the media elements must be a part of the same group.
To Create an Auto-playlist
-
Create a group in a playlist where your media elements for the Auto-playlist will be placed.
-
Drag media elements into this group. All media element types can be used in an Auto-playlist: Graphics, images, clips, and live sources.
-
Right click each media element (or go to Off Air mode and multi-select media elements) and select Add to Auto-playlist:
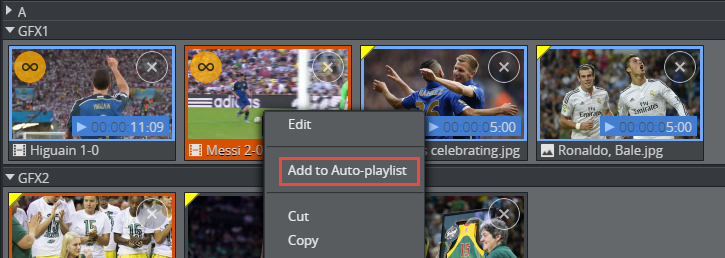
Info: Media elements added to an Auto-playlist have a blue duration field and a blue frame to differentiate them from regular media elements. The blue duration field shows how long the Auto-playlist element will stay in the renderer until the next element is played. The default duration for media elements is 5 seconds where no other duration has been specified.
-
To set a new duration for clips in auto-playlist: Edit the clip and set a new mark in and/or mark out. The new duration of the clip will be used as the duration in the Auto-playlist.
-
To set a custom duration for other media elements in auto-playlist: Right click the element and select Set Duration. A dialog will pop up prompting you to enter a number in seconds.
-
To reset the duration back to the default duration in auto-playlist: Right click the element and select Reset Duration. The default duration for clips is the actual clip length between Mark in and Mark out. For images with an image effect, the default duration is the image effect duration. Although graphics may have a specific duration (for instance, if the graphic is a continuously running animation), graphics with stop points do not have a specific duration - all media elements added to an auto-playlist have a 5 second default duration if no other duration is specified.
Tip: It's possible to add and remove media elements while an Auto-playlist is running.
To Start and Stop an Auto-playlist
Once all media elements in a group have been added to the Auto-playlist, and the duration has been set on each element, you can start the Auto-playlist:
-
Click one of the Auto-playlist elements. This starts the automatic playout of these elements.
-
Each media element stays in the renderer for as long as the duration indicates. When the element is finished, the next element plays out.
-
When the last element is finished, playout restarts from the first element.
-
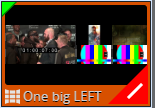
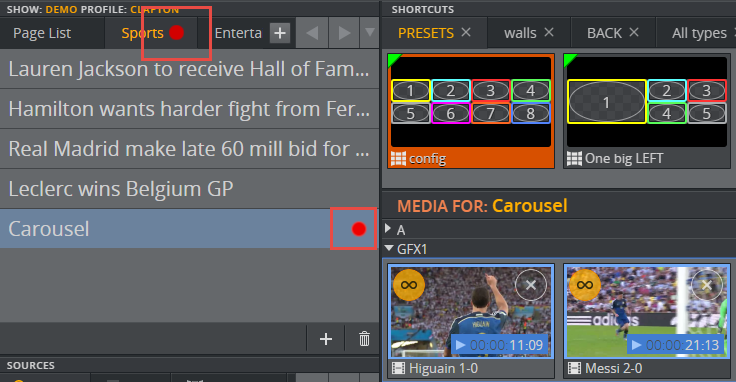
If a playlist contains a group with an Auto-playlist, a red blinking light at the top left indicates that it's running:
To stop an Auto-playlist, right click the Program column and select Stop Auto-playlist, or take the current element Out.