
Viz Multiplay User Guide
Version 3.0 | Published October 23, 2020 ©
Using Shortcuts
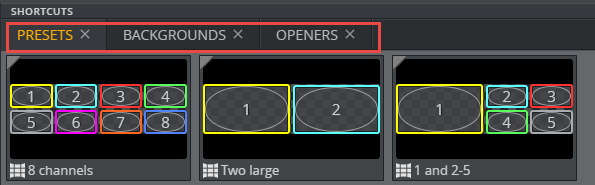
The Shortcuts Bar gives fast access to frequently used elements, such as scenes, backgrounds or videos. In addition, video wall Presets can be selected and modified from the Shortcuts Bar.
Note: The Shortcuts bar is actually a playlist within the show, so the content from this playlist is only available within the show in which the playlist is created.
A playlist is set as the Shortcuts bar by selecting it in Settings > General Tab > Shortcuts.
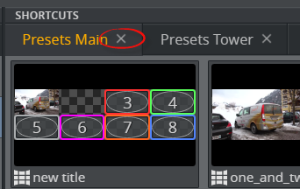
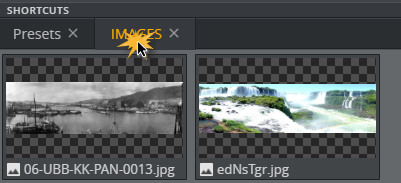
You can have multiple tabs of shortcuts to make it easy to access items that are used frequently, independent of which story you are working on. Each group in the Shortcuts bar playlist appears as a tab in the Shortcuts bar. The shortcuts are specific to a show so that when you change your show you can have different shortcuts for different productions.
Note: It's also possible to have shortcuts tab per workspace. This means that two workspaces can have different shortcuts. See Configuring Workspaces.
This section covers:
Elements in the Shortcuts Bar
-
Presets: Presets define the layout of the channels on a video wall. When a new preset is taken to air, it triggers a transition from the current layout to the new layout. New presets are created using the Video Wall Designer.
-
Filled Presets: A Filled Preset is a preset which also includes content. When a filled preset is taken to air, it populates the preset with content and plays out everything at once. Presets are filled with content using the preset content editor.
Note: If a video wall group is partly filled, the empty GFX channels will continue to contain the old content.
-
Backgrounds: Basic elements which load different scenes into the back layer of the video wall Engine. They need to be pre-assigned to the right channel and the right Viz layer so that they run in the back layer (this can also be set in the scene in its control object plugin).
-
Elements: Images, videos and graphics.
-
Activate the Shortcuts bar by selecting a Shortcuts Playlist in the General Tab of the Settings window.
Items in the Shortcuts Bar can be armed by clicking them, similar to arming channels.
Shortcuts Bar Menus
Access two context menus by right-clicking elements in the Shortcuts Bar. The options in each menu change depending on the type of media you are right-clicking.
Shortcut Menu for Presets
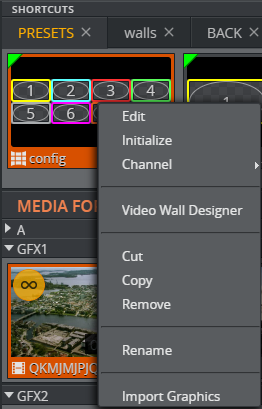
Right-click a preset in the Shortcuts Bar to expose the following context menu:
-
Edit: Open the Preset Content Editor.
-
Initialize: Load the preset scene on the renderer.
-
Channel: Change the playout channel of the preset. The main renderer is normally called "A".
-
Video Wall Designer: Open the Video Wall Designer
-
Cut : Cut a preset and paste it in another tab/column.
-
Copy: Copy a preset and paste it in another tab/column.
-
Paste: Paste an element previously copied or cut.
-
Remove: Remove the preset from the Shortcuts Bar.
-
Rename: Rename the preset.
-
Import graphics: Import graphics from the Graphic Hub directly into this group.
Shortcut Menu for Elements
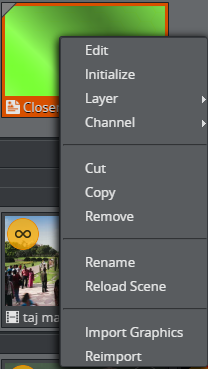
Right-click an element (video, image or graphic) in the Shortcuts bar to expose the following context menu:
-
Edit: Open the corresponding element editor.
Note: The image editor is only available for images assigned to a GFX channel.
-
Initialize: Load the resources for this element into the renderer. Should be used with care. It may affect renderer performance.
-
Layer : Change the Viz Engine layer (BACK, MAIN, FRONT). See Layers.
-
Channel: Change the playout channel of the element
-
Cut: Cut a preset and paste it in another tab/column.
-
Copy: Copy a preset and paste it in another tab/column.
-
Remove: Remove the element from the Shortcuts Bar.
-
Rename: Rename the element.
-
Reload Scene (only for graphics): Makes the renderer reload the scene from the Graphics Hub.
-
Import graphics: Import graphics from the Graphic Hub directly into this group.
-
Reimport (only for graphics): Re-import the graphics from the Graphic Hub. Does not affect the renderer. Useful if the scene designer has added or removed control fields.
Layers
Use different layers to show up to three elements on screen simultaneously. Play elements in the default, FRONT, MAIN and BACK layers (defined below).
The selected layer will determine the element’s position (whether or not it’s visible) in relation to other elements.
Tip: Set layers in the Shortcut menu for element.
-
default: Revert to the layer that is set by the scene designer.
-
FRONT: Front layer elements cover main and back layer elements, i.e. this layer will never be obstructed.
-
MAIN: The middle layer where elements cover back layer elements.
-
BACK: The first layer than be used as a background for a videowall. Front and back layer elements will overlap it.
Working with the Shortcuts Bar
This section covers:
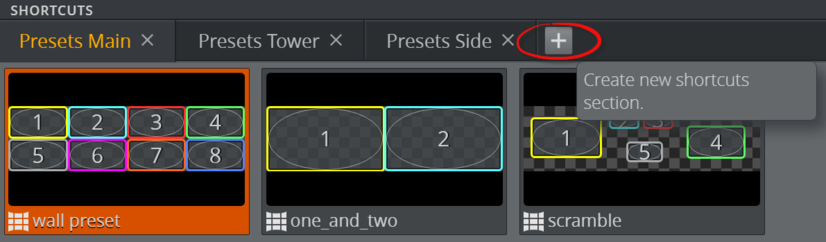
Add a Shortcuts Group
Add a group to the playlist you have chosen to appear in the shortcuts bar. Groups created via the shortcuts bar appear in the show pane when no shortcut playlist is set.
-
Click the Add (+) button in the Shortcuts Bar.
-
Give the new group a title.
-
Click OK.
Delete a Group from the Shortcuts Bar
Delete playlist groups from the shortcuts bar.
-
Click the close button in the top right corner of the shortcut group tab.
-
Click Yes.
Rename a Group
-
Double-click the group’s title.
-
The title field becomes editable.
-
Enter a new title in the field and press ENTER to confirm the change.
Re-position a Group in the Shortcuts Bar
-
Click and drag the group to the desired position in the top groups.
GFX Preset Mode
GFX preset mode the exposes a filled preset’s main and graphics (GFX) channels by pressing SHIFT.
The following sections cover the GFX preset mode and its advantages, and present a GFX preset mode workflow example:
Two Modes
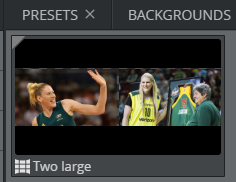
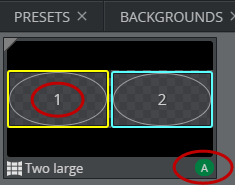
The shortcuts bar has two modes: thumbnail mode and graphics (GFX) preset mode. By default, the shortcut bar is in thumbnail mode. This means only item thumbnails in a preset will show in the program (on-air) column, as shown here:
You may, however, need to know the following:
-
Which main channel your presets are playing out on; and
-
Which GFX channel an item in a preset is playing out on.
This information is available in GFX preset mode, which provides:
-
A visual confirmation that presets are being sent to the desired wall; and
-
Assistance when replacing content in a GFX channel.
How Do I Activate GFX Preset Mode?
Press SHIFT when Multiplay is in focus. Once GFX preset mode is activated, small green icons appear in the bottom corner of a preset or item thumbnail showing the main channel the GFX channel number:
Note: These icons only appear for items and presets in the shortcuts bar.
Workflow Example
In this workflow, activate GFX preset mode to see which GFX channel hosts a picture you want to replace.
-
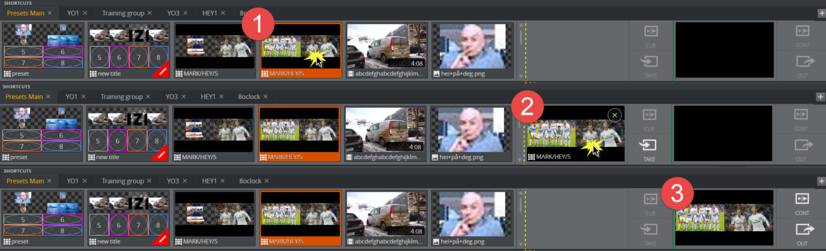
Take a filled preset to air from the shortcuts bar.
-
Click the preset to move it to the Armed column.
-
Click it in the Armed column to move it to the Program column.
-
-
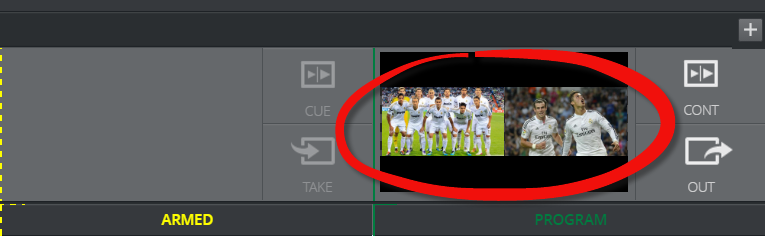
By default the thumbnails appear in the preset in the program column, and there is no visual indication which GFX channel they are playing out on.
-
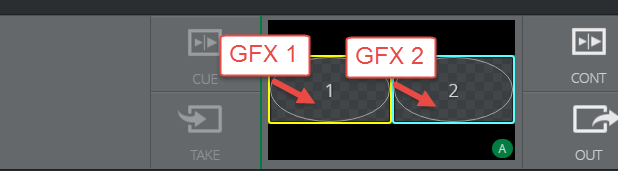
Press and hold SHIFT to see the preset’s main and GFX channels. The thumbnails are replaced with the GFX channel number. This preset is playing out on wall A and has images in GFX1 and GFX2.
-
Now, if you want to replace the team photo with another image, you know you must replace the photo in GFX1.
-
Drag an image from any channel into GFX’s program channel.
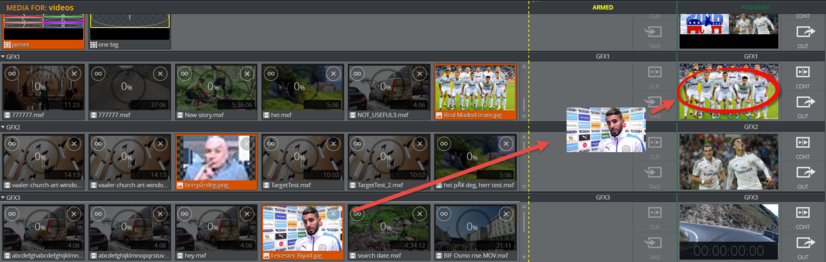
Tip: Drag an image into a program channel from any channel. This means that the image in the program column for a certain GFX channel can be exchanged with an image from any other channel.
Important! The new image does not appear in the Filled Preset in the shortcuts bar. A video wall set up is required to see it live On Air in the filled preset.
See Also