
Viz Multiplay User Guide
Version 3.0 | Published October 23, 2020 ©
Setting Up and Organizing Content
This section covers how to import graphics and set up servers to fill Viz Multiplay with content ready to be played out on the video wall.
The following topics are covered in this section:
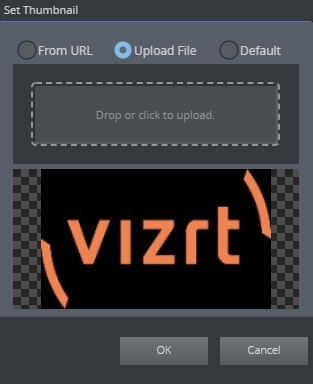
Using Custom Thumbnails for Media Elements
All media elements (images, graphics, clips), can have their own custom thumbnail. This is useful for elements that are used often or have a special significance to the operator, or if the thumbnail generated by default is not adequate.
Assigning a New Thumbnail to Media Elements:
-
Right click any media element
-
Select Set thumbnail
-
Upload a new thumbnail from file, or
-
Enter a URL to a thumbnail, or
-
Revert to the default thumbnail
Setting Up a Preview Server
The Viz Multiplay GUI contains thumbnails for video clips, images, graphics and other elements.
Video clip and image thumbnails are fetched from the asset management system; graphics thumbnails are generated on the fly by Preview Server, which ensures that the thumbnails contain the actual element data:
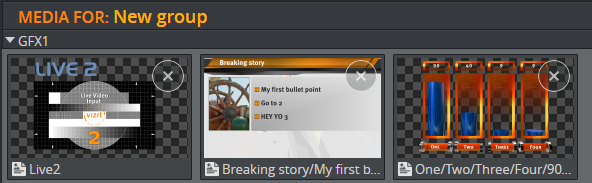
Note: Graphics thumbnails remain blacked out if no Preview Server is configured.
Tip: Viz Multiplay uses the Preview Server configuration in Media Sequencer. No actions need to be taken in Viz Multiplay if you are using Media Sequencer with a pre-configured Preview Server.
Running Preview Server
A separate Viz Engine in VGA mode is required to run Preview Server.
Note: If a Viz Engine is used to generate snapshots for Preview Server, it cannot simultaneously perform other tasks such as running Viz Trio or Viz Artist.
-
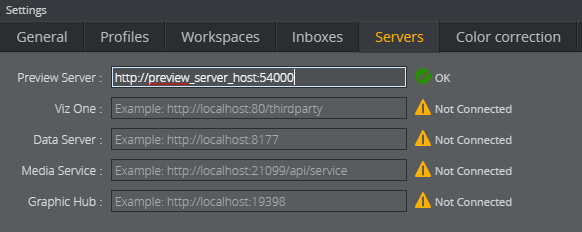
Once a Preview Server is up and running, click Settings > Servers.
-
Enter the hostname of the Preview Server in the input field:
-
Press the TAB key. Viz Multiplay will fill out the rest of the URL.
-
Click OK.
-
The thumbnails will now appear on the GUI if you have graphics in your show or playlist.
Tip: Viz Engine normally generates snapshots requested by Preview Server very quickly. However, it may take a few seconds before the thumbnails appear if your show or playlist contains a large number of elements. The HUI will refresh more quickly once thumbnails are cached in Preview Server or the web browser.
Tip: Bear in mind that the Preview Server is connected to one or more Viz Engines that are connected to one Graphic Hub database with the scenes and resources. When importing graphics from different sources like Viz Trio or Viz Pilot Data Server, the scenes used in these graphics must be stored on the Graphic Hub used in the Preview Server. It's best to have only one Graphic Hub on the system that contains all your graphics.
Working With Shows and Profiles
Creating shows and profiles involves the following steps:
Create a New Show
The first step is to create a new show.
-
Click the New button:

-
Give the new show a name.
-
Click OK.
Note: The show structure in Viz Multiplay is compatible with a Viz Trio show.
The Show Pane now has one tab with a Page List:
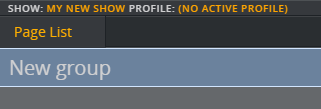
Page List displays the content of the page list in the Viz Trio show. Create additional playlists as required.
Differences between Viz Trio and Viz Multiplay Page Lists
-
In Viz Trio, the page list is mostly used to host pages with unique callup codes, while in Viz Multiplay the page list is a free structure that can contain any type of element with any name.
-
Viz Trio displays the page list and playlists as a tree, while Viz Multiplay organizes the playlist per channel. For instance, all elements in a group assigned to GFX2 are placed in the row representing GFX2 in the GUI in Viz Multiplay. You must therefore create and activate a profile for your show in Viz Multiplay containing the channels Viz Multiplay needs to organize the elements.
-
Viz Multiplay does not display any playlist or page list elements in the root group. All elements must be placed in groups to appear in the GUI.
Create a Profile
A profile with Output channels is required. Viz Multiplay creates one row for each channel in the GUI. The profiles you create in Viz Multiplay are compatible with any Media Sequencer client that uses profiles, such as Viz Pilot or Viz Trio.
-
Click Settings > Profiles.
-
Create a new profile by clicking the Add (+) button at the bottom of the Profiles list.
-
Enter the name of the new profile.
Create Playout Channels in the Profile
There are two ways to create playout channels in the profile:
-
Create channels manually (usually for a non video wall scenario): Add Viz Engines and Video Engines in the window to the right in the Profile Configuration. Next, create channels in the window in the middle and drag engines over to the channels. A single channel can contain multiple Engines.
-
Create a video wall: Channels and engines are created automatically.
Activate the Profile
You must activate the profile for a show in order to view the output channels in the GUI. Once activated, the Media Sequencer actively takes control over the show resources - monitoring and transferring clips and scene resources to the Viz Engine.
Note: Since activation can be a demanding operation for Media Sequencer if a show contains many assets, it's recommended to activate the profile before the show starts and deactivate it after the show has ended.
-
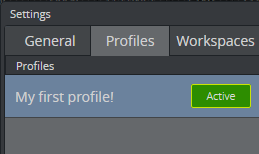
Go to Settings > Profiles.
-
Click the Activate button for your profile.
Note: Since activating a profile is a Media Sequencer operation, your show will be activated for all clients who have the show open. Your show can only be active in one profile.
Shortcuts
When a new show is created, Viz Multiplay generates a special playlist called shortcuts. The shortcuts playlist is a regular playlist with groups and elements.
If desired, you can select a different playlist to be the shortcuts playlist under Settings > General. Select a playlist from the Shortcuts dropdown:
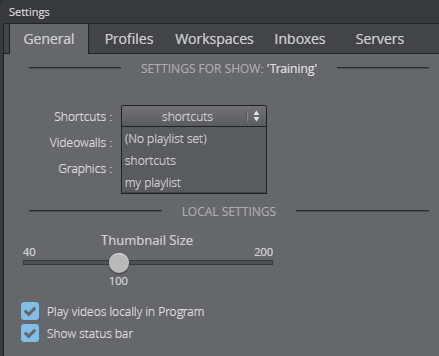
The shortcuts playlist appears in the Using Shortcuts. Each tab is a group in the playlist.
Create a new group in Viz Trio or click Settings > General and remove it as the shortcuts playlist. Select (No playlist set) as the value in the Shortcuts dropdown. It now becomes a regular playlist in Viz Multiplay, where you can add or remove groups.
Unlike other channel groups in Viz Multiplay, playlists in the Shortcuts bar are not assigned to a specific channel. Elements in the shortcuts bar play out on the channel assigned for each element. This means that if you drag an element from the GFX playlist directly to the Shortcuts bar, the element will keep its assigned channel. If the element has no assigned channel, it will play out on the Program channel in the profile.
Tip: The Shortcuts bar normally contains the video wall presets, “filled” video walls (presets with content) and backgrounds. These should be played out on the main channel of the video wall using the defaults from Viz Multiplay. The main channel is called A. Right-click elements on the Shortcuts bar to ensure that they have the correct playout channel.
Working with Graphics
Import graphics from Graphic Hub.
Basic Scene Import
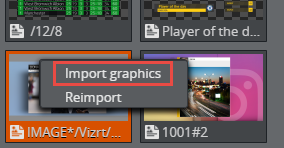
For basic scene import (without support for Transition Logic) - use the Import scene function directly in Viz Multiplay to import graphics created in Viz Artist. Right-click anywhere and select Import graphics:
Importing Scenes with Viz Trio
Graphics can be imported into Viz Multiplay using Viz Trio. This is handy if you need to import Transition Logic scenes or already have a graphics system running with Viz Trio. In Viz Trio:
-
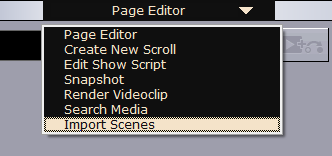
Select Import Scenes in the Page Editor menu.
-
Browse the scene tree in Graphic Hub and import the scenes you want to use.
Note: You now have one template per scene you imported. These are not visible in Viz Multiplay.
-
Create a page for each of the templates.
Note: These pages end up on the root level of the page list in Viz Trio and are not visible in Viz Multiplay. To make them visible, move the pages into groups.
Inboxes
Inboxes are global shows that are always available in the Sources pane. They can contain any type of element (images, clips and graphics), and the content does not need be placed in groups.
Inboxes are Typically Used
-
For a special show that is a target for Sequencer Ingest. New ingested material then appears automatically in the inbox, ready to be used in Viz Multiplay.
-
For listing available live source elements. These can be dragged to any group channel in Viz Multiplay and played out.
-
For graphics created during a broadcast or event that are imported by a Viz Trio operator into the inbox show. The graphics are then instantly available in Viz Multiplay.
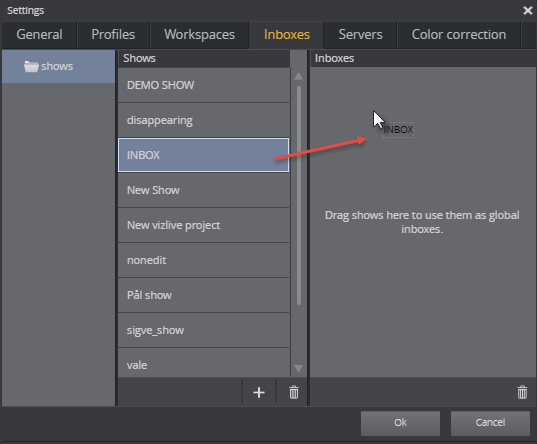
Use a Show as an Inbox
-
Click Settings > Inboxes.
-
Create a new show or select an existing show.
-
Drag the show over to the Inboxes list to the right.
-
The show now appears in the Sources pane:

Working with Images and Videos
Note: A MAM system such as Media Service, Viz One or a Graphic Hub REST service (images only) is required in order for Viz Multiplay to access media assets.
Once a MAM system is up and running:
-
Go to Settings > Servers.
-
Enter a hostname in the input field for the service.
-
Press TAB, and Viz Multiplay will fill out the full URL.
-
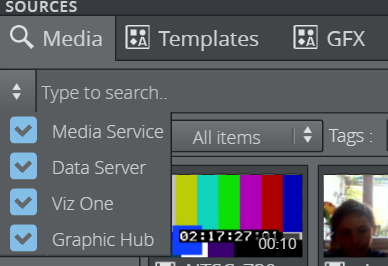
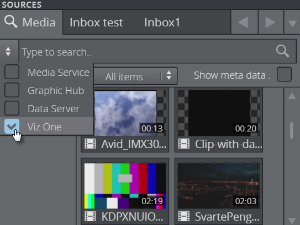
Click OK. The Media Tab in the Sources pane now contains your MAM system as a search provider.
Setting Asset Storage
The Viz One setting is global for Media Sequencer. When asset storage is configured, the Media Sequencer starts to monitor shows and playlists and transfer assets to the Viz Engines.
Note: If you have a Viz One system, you also need to set Asset Storage in the video wall dialog box by clicking Settings > Profiles and double-clicking the video wall in the selected profile.
Note: If you don't have video walls, the Asset Storage must be set for each Viz Engine and Video Engine in the list to the right. Failure to do so will result in videos not being transferred to the Viz Engine.
Configuring Media Service by Entering the Hostname in Media Service
-
Click Settings > Servers.
-
Enter the Media Service URL (or hostname) in the Media Service input field.
This setting is only visible to Viz Multiplay and is not shared with Media Sequencer, which will not register asset storage as configured. Since Media Service is designed to host its clips on the clip root of the Viz Engine, clips do not need to be transferred and it is therefore not necessary for asset storage to be registered by Media Sequencer. However, since error messages may appear from MSE and in Viz Trio, another way of configuring Media Service is outlined below:
Configuring Media Service by Entering the Hostname in the Viz One Input Field
-
Click Settings > Servers.
-
Enter the Media Service URL (in addition to the hostname) in the Viz One input field.
The Media Sequencer now thinks it is communicating with a Viz One service - and Media Service uses the same API as Viz One even though no file transfers are needed. You can use this method if it is OK that the Media Sequencer is configured with Media Service. Bear in mind that this configuration is common to all Media Sequencer users.
If you use Media Service, all the Viz Engines must use the Media Service clip folder as their clip root - as a shared disk. This can affect playout performance. If you have a single Viz Engine, Media Service is well suited to run on the same computer as the Viz Engine, where they both have access to the local clip root folder.
Note: If you have set up a Graphic Hub REST service you have access to images in the Graphic Hub. The play-out performance will be best for theses images as they can be pre-loaded. Images from Viz One and Media Service are loaded when they are played out, which can cause a short delay.
Configure all search providers and limit searches using the boxes in the search provider’s list in the search panel:
Edit Graphics, Videos and Images
If a show is prepared properly and an asset provider is set up, you can add and edit elements during a broadcast or event.
This sub-section covers the following topics:
Example Workflow
In Viz Trio
-
Prepare a show by importing scenes from Graphic Hub into the show. These scenes become templates in the show.
-
Create pages for the most frequently used graphics and drag them into groups in the GFX playlist.
-
These pages are now available in Viz Multiplay.
In Viz Multiplay
-
During the broadcast or event, select the page list or a playlist in the Show Pane.
-
Click a group. Each group channel is now populated with the relevant elements.
-
The Viz Multiplay operator needs a new element (a video, an image or graphics) and finds it in a source (Media tab, inbox, GFX playlist, etc.) before dragging it into the channel where it will be played out.
-
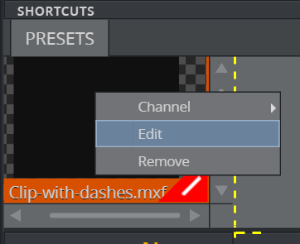
The operator can now edit the element by right-clicking and selecting Edit.
Editing Elements
Caution: Changes made to elements being edited are made in real time on the elements in the Media Sequencer for all operations. These changes are saved immediately and it is not possible to undo them.
Tip: Copy an element by dragging it and pressing CTRL.
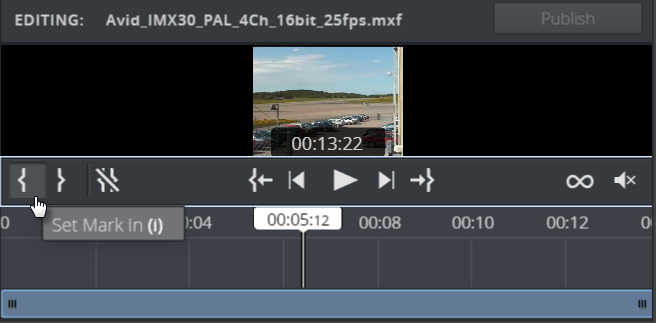
Setting In and Out Points in Video Clips
Scrub through video clips and set new in or out points:
-
Drag a video into the channel where it will be played out.
-
Right-click the video and click Edit.
-
Scrub in the timeline to where you want to set an in point.
-
Click the Set Mark In icon or press the i key to set an in point.
-
Click the Set Mark Out icon or press the o key to set an out point.
Zooming and Cropping Images
Add a zoom or crop effect to images:
-
Drag an image into the channel where it will be played out.
-
Right-click the image and click Edit.
-
Click either Crop or Animation.
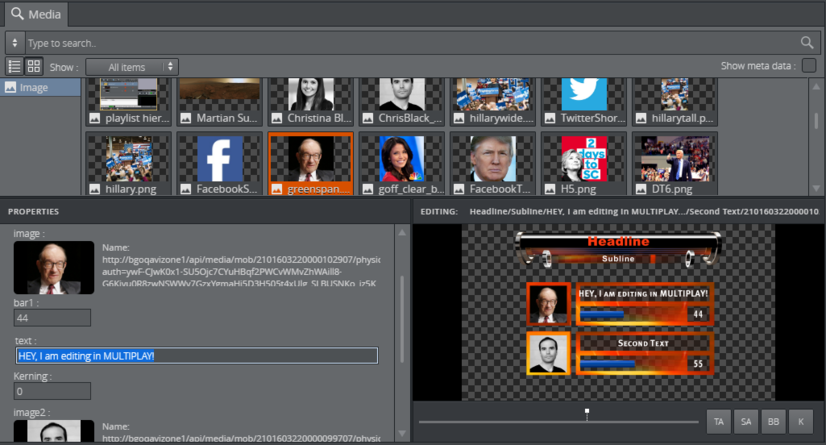
Editing Graphics
For graphics, the operator can enter data in the fields exposed by the scene designer.
See Also