
Viz Multiplay User Guide
Version 3.0 | Published October 23, 2020 ©
Settings
This section covers the following topics:
General
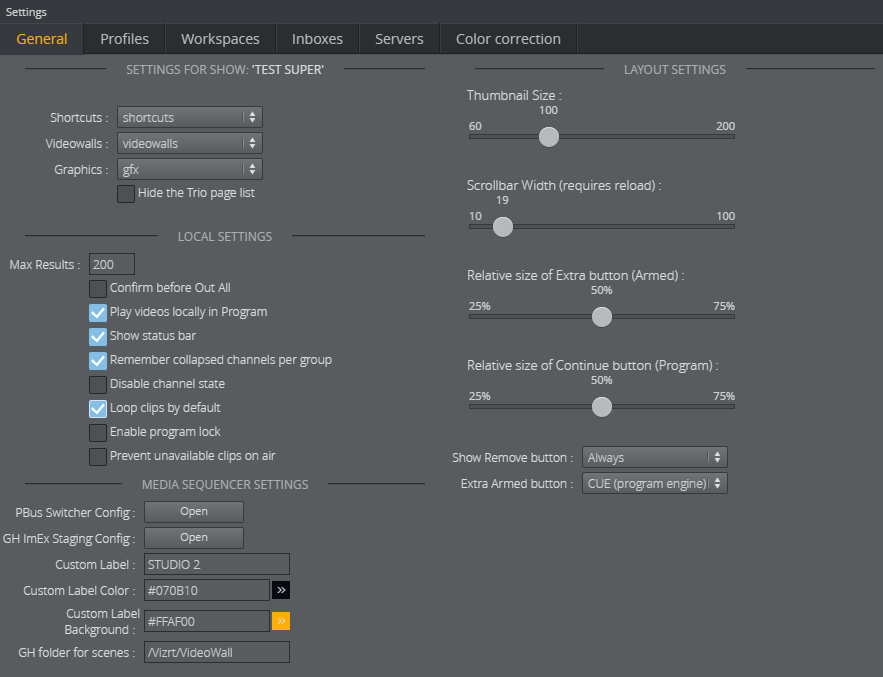
Open the Settings window from the toolbar
![]()
-
SHOW SETTINGS
-
Shortcuts: Select the playlist that contains your preset layouts and background scenes. The shortcuts are then displayed in the Shortcuts Bar at the top of the main window.
-
Videowall: Select the playlist that contains your Dynamic Channels videowall presets. This playlist will appear in the Dynamic Walls tab in the Sources area.
Note: The Videowall setting is discontinued for Superchannels. Superchannels presets are imported from the profile, and appear automatically in the VideoWall tab in the Sources area.
-
Graphics: Select the playlist that contains imported graphics. This playlist will appear in the GFX tab in the Sources area.
-
Hide the Trio page list: This can be useful if the Pilot workflow is used. The Trio page list is a special playlist that lets the Trio operator use numeric callup codes to play out graphics. In Viz Multiplay, the page list behaves like a regular playlist.
-
-
LOCAL SETTINGS
-
Max Results: Enter the maximum number of elements to be listed in the Scene importer, the Media tab and Pilot data elements in the Templates tab in Sources.
Note: The current search refreshes when a setting is changed.
-
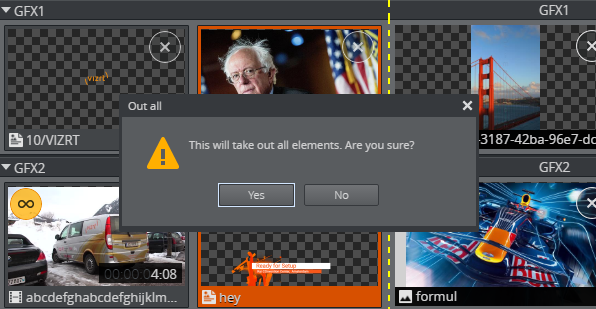
Confirm before Out All: When you click Out All a confirmation message appears:
-
Play videos locally in Program: show a preview in the Program column when clips are taken to air; a thumbnail is displayed when enabled.
-
Show Status Bar: at the bottom of the screen.
-
Remember collapsed channels per group: the collapsed/expanded state for each channel is stored per group. This is useful if one group contains content for a subset of the channels, while another group mainly contains content for another subset.
-
Disable channel state: shows the last element taken in the Program column. This element is restricted to Multiplay. The Out and Continue buttons will only operate on this element. Other clients will not update the Program column. When unchecked, Channel State is used for Media Sequencer version 5.0 or higher. When Channel State is used, the Program column contains a more accurate snapshot of the content of the renderer and the Out and Continue buttons operate on all layers currently in the renderer.
-
Loop clips per default: applies clips dragged in from a Media search.
-
Enable program lock: prohibits playout for a channel, including playout by other Viz Multiplay clients who have the lock enabled locally.
-
Prevent unavailable clips on air: clips that are flagged as unavailable to the playout engine are not available, preventing a clip that has not been transferred to the playout engine from being played out. Disabling this setting makes all clips available to the operator.
-
Custom Label: Enter a free text and specify the background and foreground color to be displayed as a label in the toolbar area. This indicates at a glance which video wall or studio the interface is controlling:
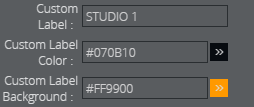
This will be displayed in the interface:

-
GH folder for scenes: The default Graphic Hub path for the scenes in the DynamicChannels archive and for the Superchannels scenes.
-
-
LAYOUT SETTINGS
-
Thumbnail size: of media icons in the Media column.
-
Scrollbar Width: (in pixels) of the vertical scrollbar in the Media pane. This can be handy when operating on a touch device. Default is 19.
-
Relative Size of Extra button (Armed): applies the Armed column (see below).
-
Relative Size of Continue button (Program): useful in preventing the operator from accidentally clicking Out instead of Continue in stressful situations. Make Continue bigger so it stands out.
-
Show Remove button: (the X) on playlists and elements. Use this to prevent accidental removal of elements and playlists:
-
Always
-
Only when Off Air
-
Never
-
-
Extra Armed button:
-
None
-
CONTINUE: Performs a continue operation on the external preview engine for a video wall, if preview is configured.
-
CUE: Sets the armed element at its first frame in the Program column.
-
TRANS: Swaps the content of the Armed and Program columns.
-
-
-
MEDIA SEQUENCER SETTINGS
-
PBus Switcher Config: Available if Media Sequencer supports the PBus protocol for communicating with switchers (requires Media Sequencer version 5.0 or higher). A new browser tab opens with the configuration application for communicating with the switcher.
-
GH ImEx Staging Config: Available if Media Sequencer supports image staging to Graphic Hub (requires Media Sequencer version 5.0 or higher). A new browser tab opens with the configuration application for the ImEx service, and all images in the active playlist originating from HTTP resources are automatically transferred to the Graphic Hub. The transfer status is shown on top of the images in the Media column. The status disappears once the image has been transferred to the Graphic Hub. This reduces the delay when the image is played out on air. Although the image still has to be transferred from the Graphic Hub to the Viz Engine on a Take, this operation is usually quicker than loading it from an arbitrary HTTP resource.
Tip: To reduce delay even more, initialize the show containing the image; the Viz Engine will then load the image from Graphic Hub into the memory.
-
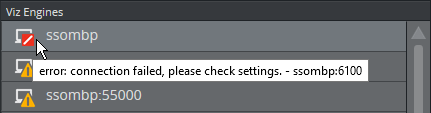
Handler Status
The status of the handlers is shown by their icons. The status is refreshed when the Media Sequencer needs to refresh them or when the user opens a handler editor. Hover over a handler to display the error message.
Profiles
Profiles are used to create different playout channel setups. Each playout channel represents one or more Viz Engines.
Open the Settings window from the toolbar
![]()
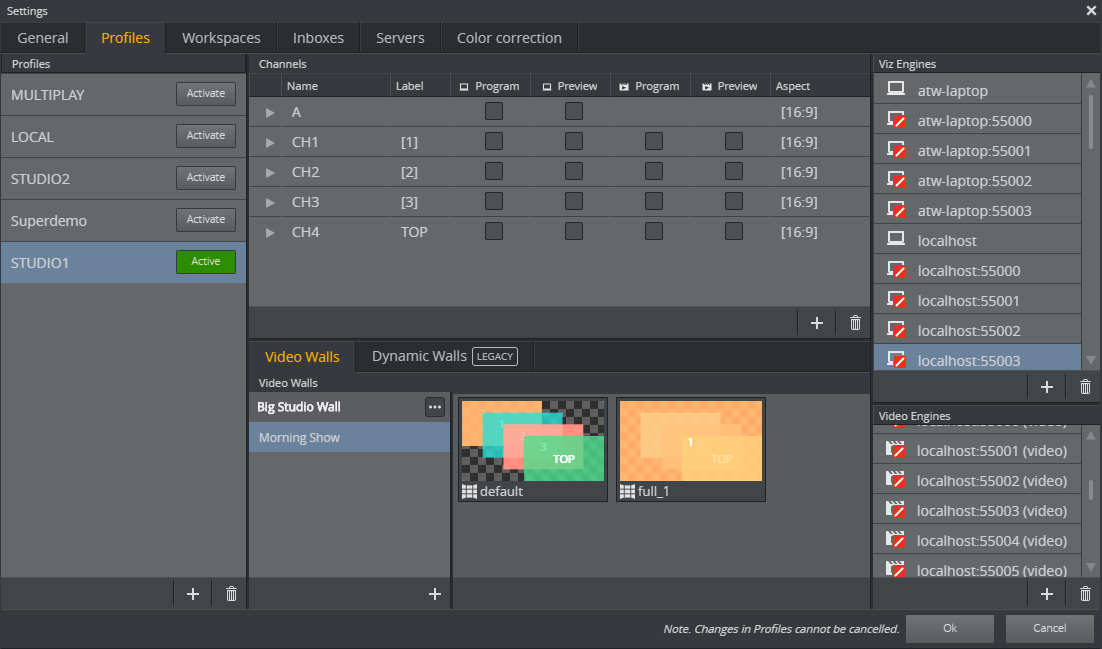
Use the Profiles tab under Settings to individually configure Profiles, Channels, Viz Engine handlers and Viz Video handlers, and to configure video walls.
Note: The Profiles tab is similar to profile configuration in Viz Trio and Viz Pilot. It uses the same data as Viz Trio, so changes made via either application are reflected in both.
Note: Profile changes cannot be canceled.
Activate/deactivate profiles using buttons in the Profiles list:

Note: Always set the Active Profile for a show in Viz Multiplay. If a show is activated by a Viz Trio client, then it will be deactivated if that Viz Trio client shuts down, and Viz Multiplay will lose its active profile.
Note: Renaming an active profile (from Viz Trio or Viz Multiplay) automatically deactivates the profile. Go back to Settings > Profiles Tab and click the Activate button for the profile again.
Configuring Channels
Content can be played out on multiple channels, with as many outputs as desired. Typically, each channel has multiple outputs and each output is a single Viz Engine. In a typical video wall setup, Viz Multiplay creates one main channel with one Viz Engine output to the default Viz Engine port (6100) and a number of channels with one Viz Engine output for graphics starting on port 55000, and one Viz Engine output for video.
Note: When elements are added to the channels in the Media Pane, the channel name is reflected in the Viz Trio page list. However, in Viz Trio, you can also specifically assign elements to channels. If an element is assigned to a channel name that is not present in the active profile, then that element will not be visible in Viz Multiplay. The element will also not be visible if the element's channel is hidden in the active workspace.
Elements that are assigned to the [PROGRAM] channel will be displayed in the channel set to viz/video program in the active profile in Viz Multiplay, regardless of the channel’s name.
Note: “Main channel” refers to the main channel of a video wall, while [PROGRAM] refers to the program channel of the profile.
Note: You can drag more outputs into the channels to make content play out simultaneously on multiple screens.
Note: Adding videos to a graphics-only channel or graphics to a video-only channel will result in the element not being played out correctly. Composite elements will only work on channels that support both graphics and video.
Adding Custom Labels to Video Wall Channels
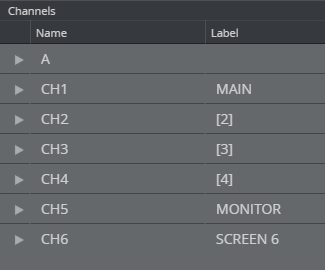
When adding a video wall to a profile, the different areas of the video wall are represented as channels. These are prefixed CH or GFX, for instance CH1, CH2, CH3 etc. In the different parts of the GUI, these channels are equivalent to their numbers, for instance in a video wall preset - the channel CH1 is just shown as the number 1 in the thumbnail where it appears. Though, it is possible to assign custom labels to the different video wall channels. When filling in content into the presets, it may be easier for the operator to identify the channels by names instead of number:
To assign labels to different video wall channels, go to Settings > Profiles, click a profile and modify the labels in the Channels column:
Workspaces
Workspaces define channels that are hidden from view for each type of user. Configuring multiple workspaces allows different users to have access to different channels. For example, an operator in the control room can access all channels, whereas the presenter in a studio can only see the channels they need to control.
Settings > Workspaces
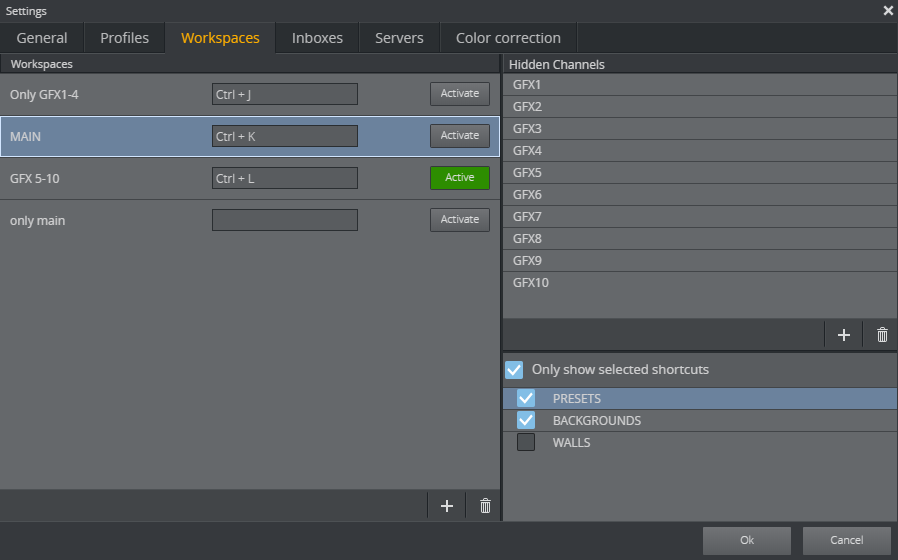
Create a New Workspace
-
In the Workspaces pane on the left, click Add (+), and give your new workspace a name.
-
In the Hidden Channels pane on the right, click Add (+) and type the name of the channel that you want to be hidden in this workspace.
Tip: Hide multiple channels with a single click. See Hide channel context menu below.
-
Set the active workspace for this user by clicking the Activate button.
Sharing Armed and Program Status with Workspaces
The status of the Armed column is shared according to the workspace - users with the same workspace will see the same armed content.
In contrast, the Program column is a global resource, which always shows what is currently on air in each channel. All Multiplay clients have a synchronized view of what is playing on air, independent of which user triggers playout.
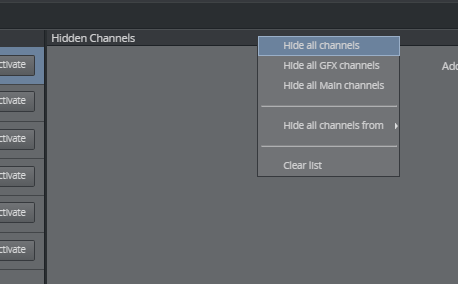
Hiding the Channel Context Menu
The Hidden Channels panel contains a context menu that allows you to hide multiple channels. Hide channels based on their type (GFX or Main channels) or on the video walls they are associated with.
Tip: Right-click the Hidden Channels panel to open the hide channel context menu.
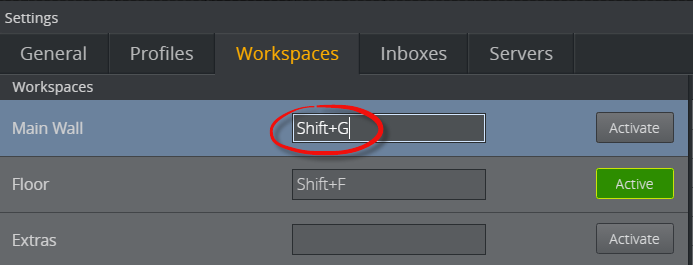
Setting Keyboard Shortcuts for Workspaces
Switch workspaces with a custom keyboard shortcut. This allows you to switch workspaces without opening the Settings panel.
First, assign a keyboard shortcut using the following procedure:
-
Open the Settings window.
-
Click the Workspaces tab.
-
Enter a shortcut in the field in the middle:
-
Click away from the field to confirm your choice.
Tip: Do not press ENTER to confirm your shortcut choice. Pressing ENTER will assign ENTER as a shortcut.
-
Click OK.
To Use the Shortcut:
Type the keyboard shortcuts at any time while viewing the main interface to switch between workspaces.
Inboxes
Inboxes are sources of content that are always available as an Inbox Tab in the The Sources Pane. You can configure multiple inboxes.
Any show on the Media Sequencer can be used as an inbox.
Note: The inboxes you configure are global, so they will be available in all shows.
Settings > Inboxes
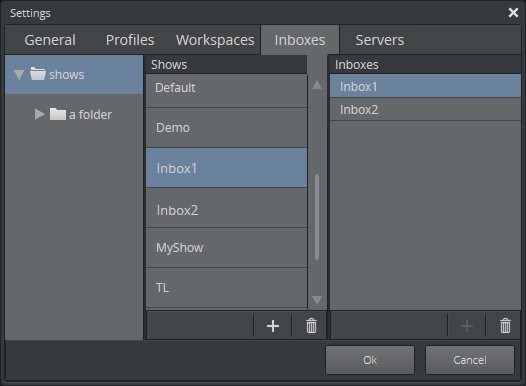
Configure a Show as an Inbox
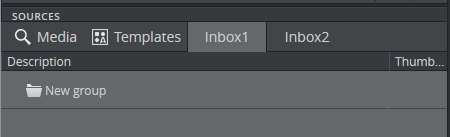
-
Drag the show from the Shows list to the Inboxes list, it will then appear as an Inbox Tab in the The Sources Pane, as shown below. Any content added to this show will be available as an Inbox tab, and can be dragged to a channel.
Servers
Settings > Servers
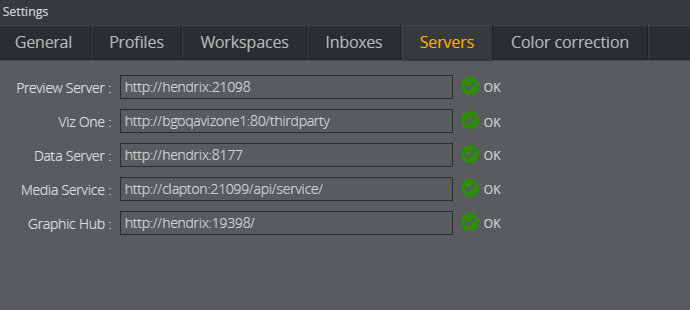
-
Enter the URLs for the search providers that you want to use to search and preview media. The Media Tab search will then search in all sources and aggregate the results.
-
The search providers that you configure will appear in the Media Search Filters in the Media Tab. You can search in a subset of these sources by deselecting some of them in the Media Search Filters.
Note: Multiple search providers can be used. However, we do not recommend configuring a Viz One and a Media Service simultaneously.
Using the Pilot Data Server
If a Pilot Data Server is configured, you can access the Viz Pilot workflow. Access Viz Pilot concepts and templates by dragging templates from the Templates Tab to your channels.
Server Connection Icons

Icons next to the URL input boxes show the status of the connection to the server.
Color Correction
Settings > Color correction
Correct colors for a monitor or group of monitors on a video wall:
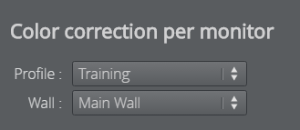
Select Profiles and Walls
Load the wall you want to edit:
-
Select the Profile and Wall from the drop-down menus:
Map Outputs to Monitors
Map outputs (1) to cubes (2). This is usually only done once.
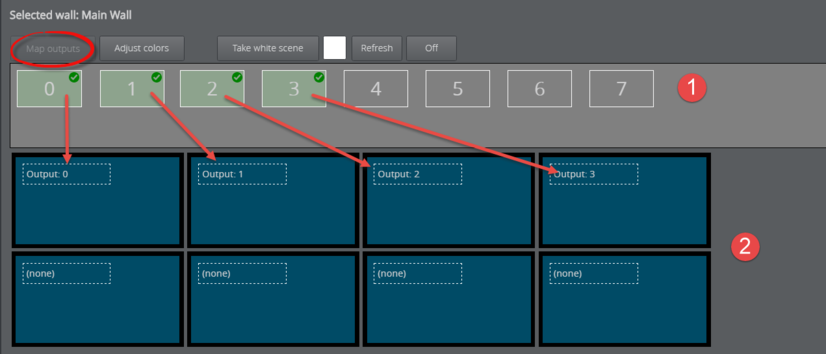
By cubes is meant the physical screens on your video wall. Drag outputs onto cubes to map them. For the sake of organization, the cube layout should ideally match the layout of the actual video wall.
Note: The Map outputs view opens by default as long as there are remaining outputs that need to be mapped. The Color correction tab always opens to the Adjust colors view once outputs are mapped.
The easiest way to match outputs with screens is to load a white scene.
-
Click Adjust color -> Take white scene. All monitors on your video wall now display white.
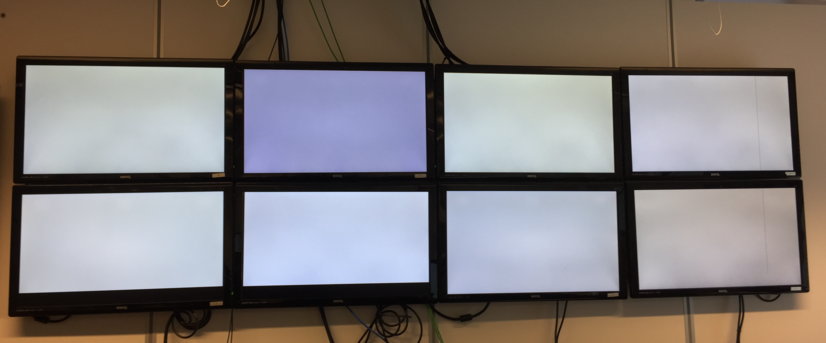
-
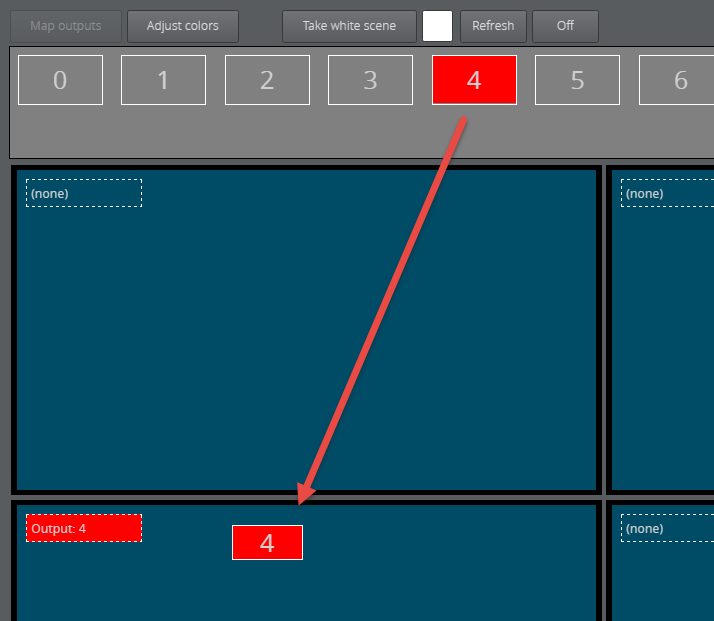
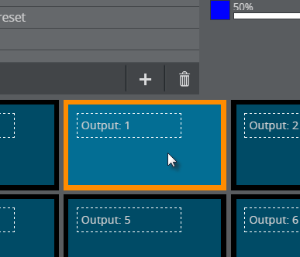
Click an output.

-
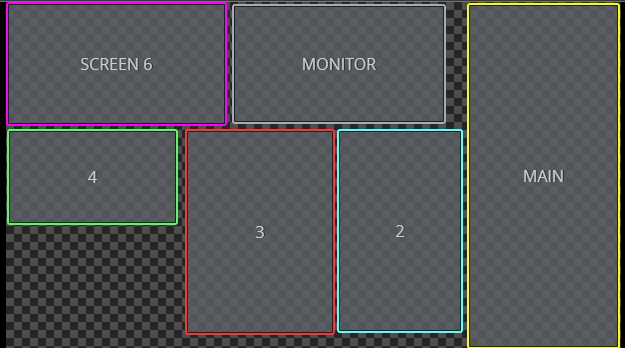
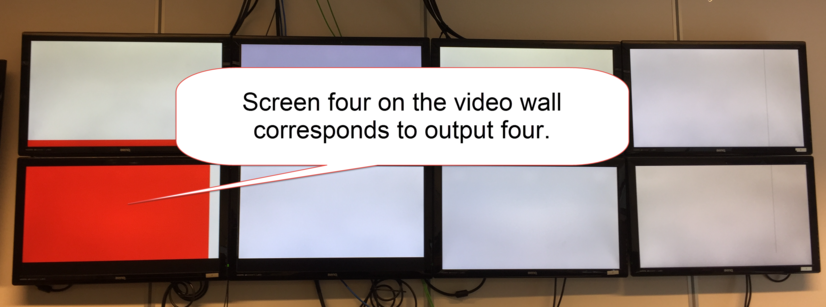
The video wall screen matching the output turns red. Below, the bottom left screen corresponds to output four:
-
Then drag the output to the same position in the editor to map.
Note: Remember that graphics channels feed content to the screens. Channels are mapped to screens in the output. In the video wall above, output four is mapped to screen four, which could be receiving content from any GFX channel.
-
Map output 1.

Note: The output turns green and a check mark appears when it's successfully mapped to a monitor.
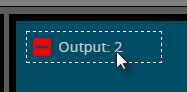
Tip: Unmap an output by hovering the mouse over a mapped cube and clicking the red icon.
Create a Preset
Create a color correction preset. This is useful in the case of multiple shows where each requires screens with different color intensity. A blue border appears around selected presets.
-
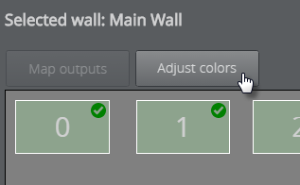
Click the Adjust colors button.
-
Click the Add new color preset button.

-
Give it a name and press ENTER.
Adjust Colors and Other Options
Adjust screen color on a monitor-by-monitor basis.
Note: Color corrections are only visible on the physical screen and are not shown in Viz Multiplay. You should therefore use a physical video wall when adjusting color.
-
Click a cube or screen to adjust its color:
-
Adjust colors in the menu below.
-
Click OK to save the values for the selected preset.
Note: Changes in color correction cannot be canceled.
-
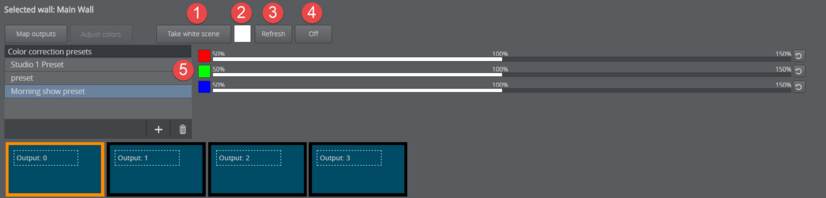
Take white scene: Take a completely white scene in the renderer.
-
Select a color: Alter the background color of the current screen.
Note: The Take white scene button must be clicked to expose the color picker.
-
Refresh: Sent the configuration of entire preset (all monitors) to air.
Note: You can also send presets to air using commands in the media sequencer.
-
Off: Removes all currently-applied color corrections for the video wall.
-
RGB sliders: Click or drag along the slider to adjust the screen’s RGB intensity. Select a value between 50 and 150 %, where 100% is default. For example, a 50% setting for red will deprive media in that screen of red.
Note: The luminosity in the color block next to the slider brightens or dims to reflect changes in luminosity. View the monitor on the physical video wall to see the changes in real time.
Grouping Screens
Apply the same color correction edits to multiple screens.
-
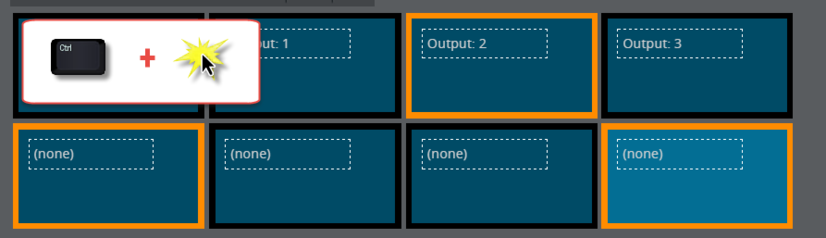
In Adjust colors view, hold down CTRL and click the screens you want to group together.
-
Right-click a screen and select Group.
Delaying Playout
Delay the playout in a Viz Engine:
-
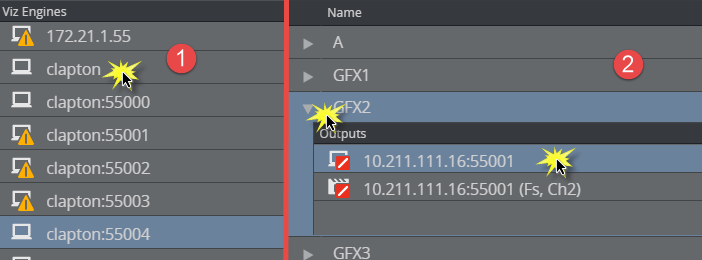
Double-click an item in Viz Engines (1) or or expand a channel and double click an Output (2).
-
Enter a value in the Delay box.
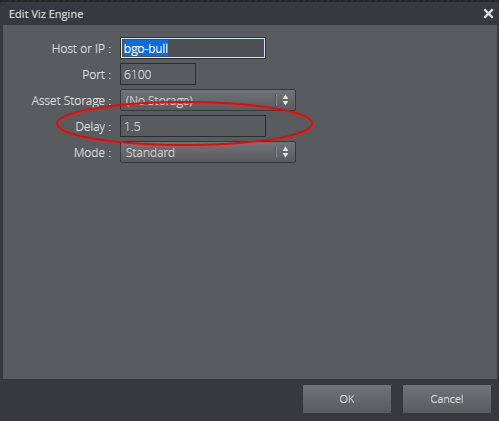
Playout is delayed for the specified number of seconds, which could include fractions of seconds.
Info: Delayed playout is not frame accurate.
Note: The delay applies all attempts to play out elements in the channel from both Viz Multiplay, and other applications like Viz Trio or Director.