Viz Channel Branding User Guide
Version 5.2 | Published June 05, 2024 ©
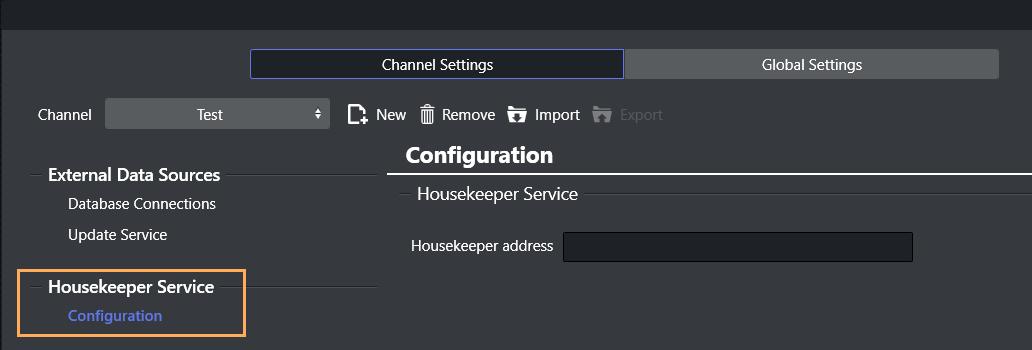
Configuring the Housekeeper Service
Housekeeper settings are made by navigating to Viz Channel Branding client > Channel settings > Housekeeper Service > Configuration.
Working with Housekeeper
Service Configuration
You perform configuration with the Viz Channel Branding client application, per channel, in the Channel Settings menu.
Channel Registration
To set up the service, you must first register the current channel in the Housekeeper service.
To register a channel in Housekeeper Service
-
In Housekeeper address, enter the hostname or IP address of the Housekeeper service.

-
Click Connect.
An attempt is made to connect to the Housekeeper service.
If there are issues, see Troubleshooting. -
If the the current channel is present in the Housekeeper service, no further configuration is necessary.
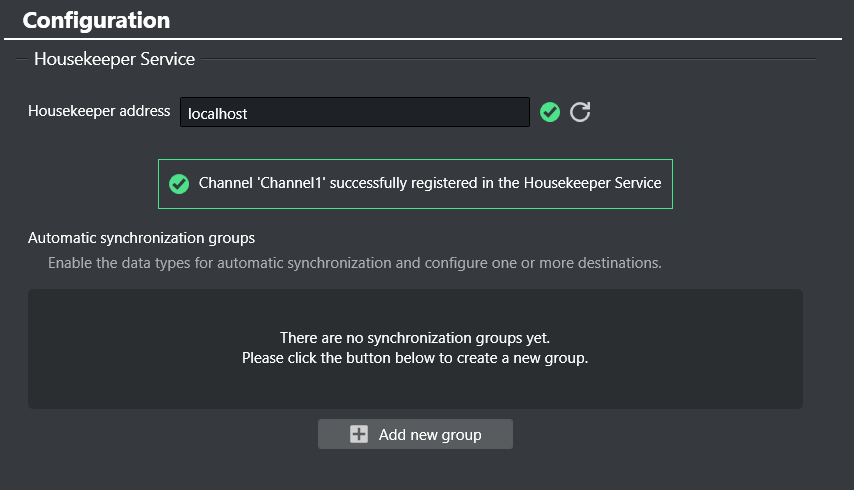
A list of synchronization groups for the current channel is presented. Please now refer to section Synchronization Groups below.
-
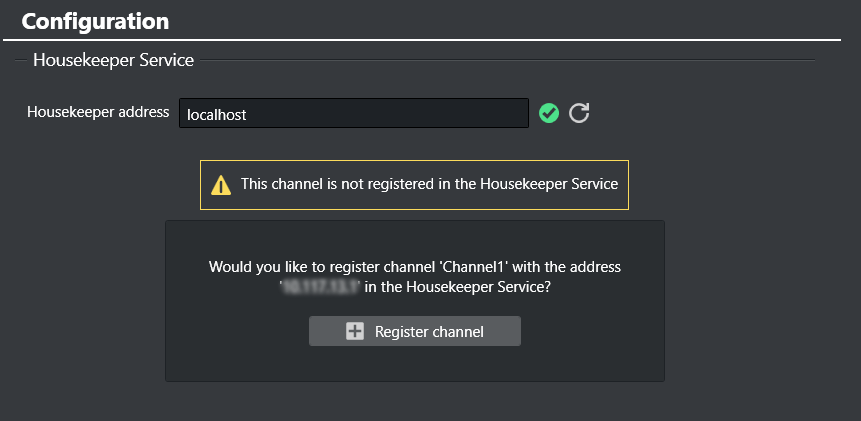
If the current channel is not present in the Housekeeper configuration, a prompt indicates which address and channel will be registered.
-
Click Register channel.
-
A confirmation message reports successful registration.
Troubleshooting
If the connection cannot been established, an error message is displayed.
-
Click Refresh (
 ) to retry the connection.
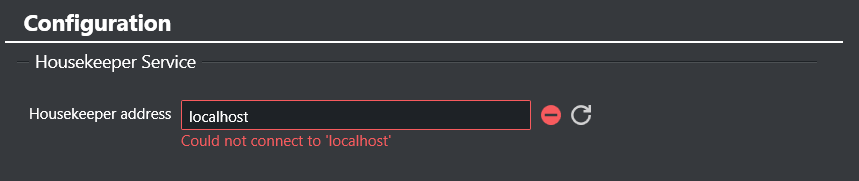
A common issue is an invalid address.
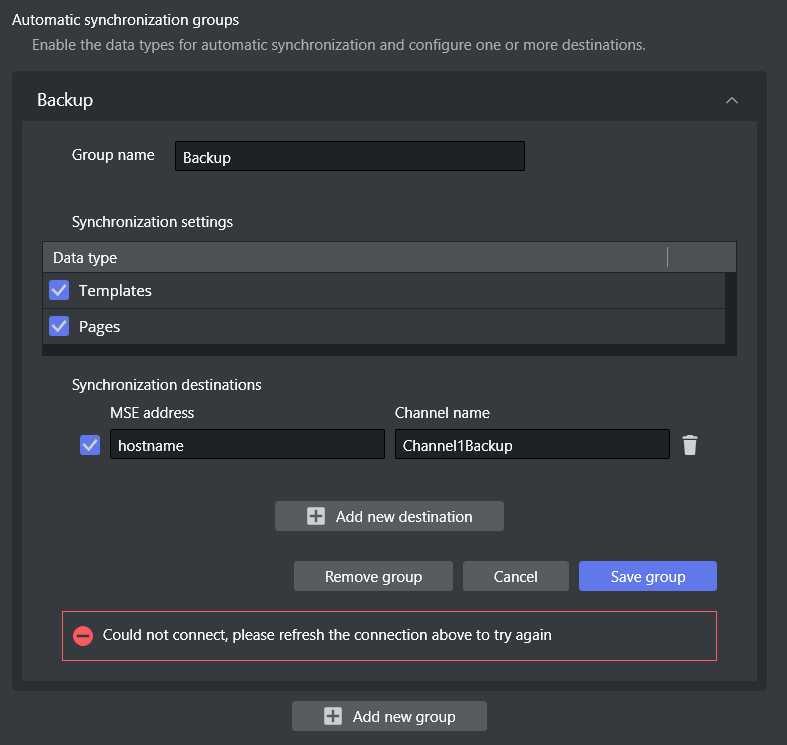
Synchronization Groups
After successfully registering the channel, it is possible to create any number of synchronization groups, each with a distinct configuration.
The Housekeeper service
-
stores the created groups and initiates automatic synchronization of the chosen data types from the current channel, to the designated destinations
-
monitors any alterations in the current channel and ensure automatic synchronization across all destinations.
To create a synchronization group
-
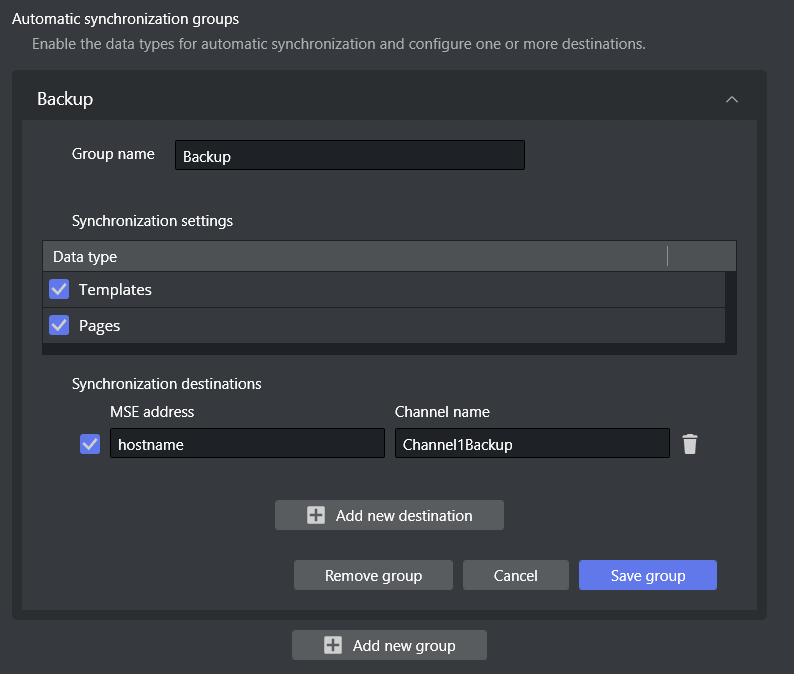
Click Add new group.
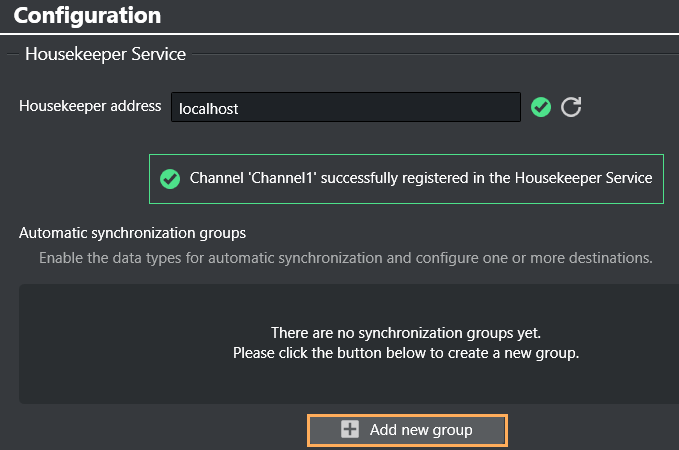
Note: The list of synchronization groups is empty in the initial configuration.
-
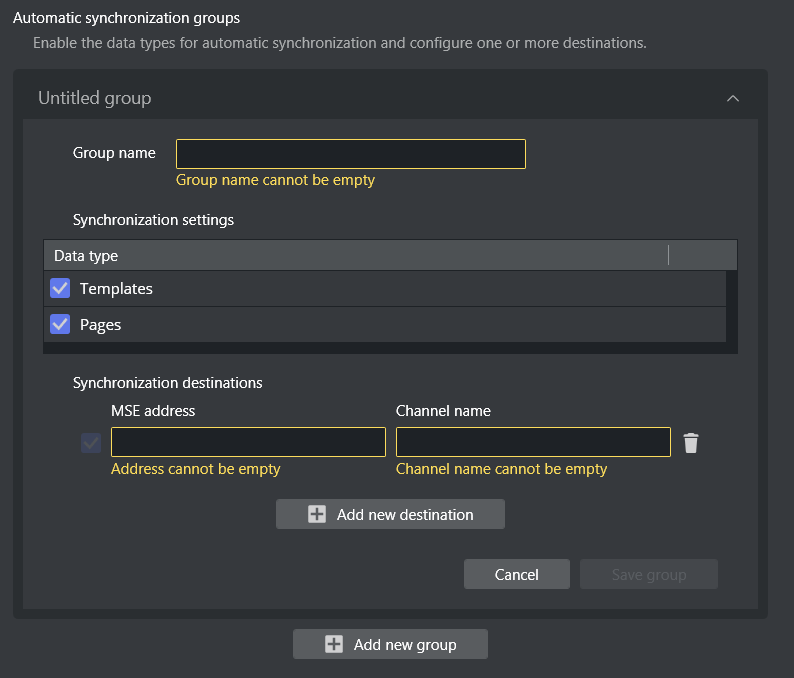
Automatic synchronization group options are displayed.
-
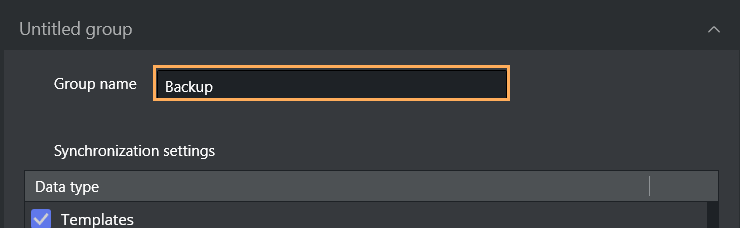
In field Group name, provide a meaningful name for your group.
-
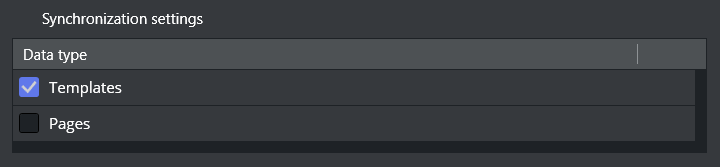
(Optional) Under Synchronization settings, you can enable or disable the data types that will be synchronized.
-
In field Synchronization destinations define the targets, by specifying the address to the Media Sequencer (MSE) and a valid channel name, for receiving the synchronized updates.
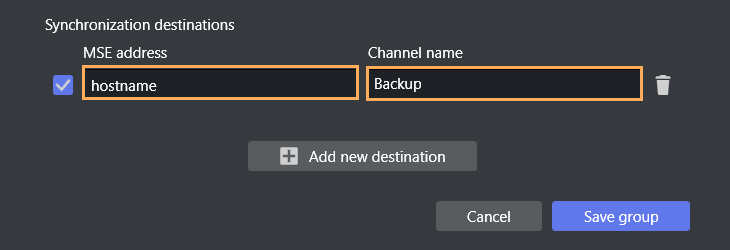
When Synchronization destinations and Channel name are valid, a checkbox is available to enable or disable the destination.
Note: Disabling (checkbox is unchecked) a destination halts synchronization for the destination.
-
Click Save group.
The new group name is displayed among a selectable list.

The Housekeeper service now begins monitoring the current channel for any changes, to initiate any synchronization. -
(Optional) To add another destination, click Add a new destination.
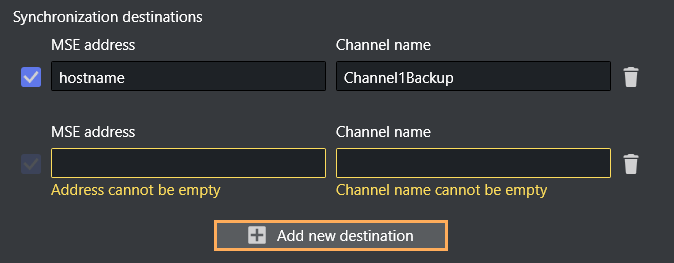
A new row for configuration is displayed. Repeat steps 2-6.
To modify a synchronization group
You can browse or edit a synchronization group, the expander can be opened and all the fields updated and the changes saved.
-
Click the expander to open.
-
Select a group from the listing.
-
Make required modifications.
-
Click Save group.
To remove a synchronization group
-
Click the expander to open.
-
Select a group from the listing.
-
At the bottom of the form, click Remove group.
-
Removing a group is an irreversible operation. From the confirmation dialog, click Remove group.
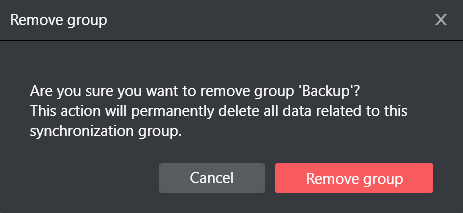
Once a group is removed, the Housekeeper service will cease all synchronization processes linked to that group's configuration.
Note: If you wish to temporarily halt the synchronization, it is recommended to disable the destinations by canceling the checkbox as described in step 5 above .
Troubleshooting Housekeeper Configuration
-
If any of the steps described above fail, you can restart or continue the operation from the failed step.