
Viz Multiplay User Guide
Version 2.5 | Published February 18, 2019 ©
Video Wall Designer
Use the Video Wall Designer to create and modify video wall presets. Each channel in the designer represents a graphics channel. Create the desired layout by moving, layering and resizing the channels.
There are two ways to open the Video Wall Designer:
-
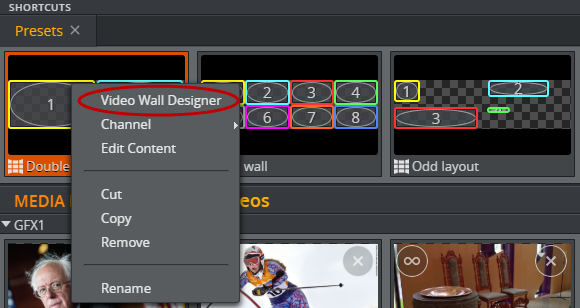
Right-click a preset in the Shortcuts Bar.
-
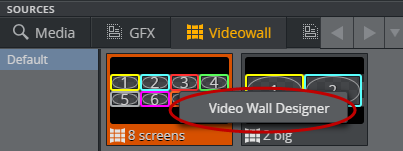
Right-click a preset in the Videowall Tab.
Areas of the Video Wall Designer
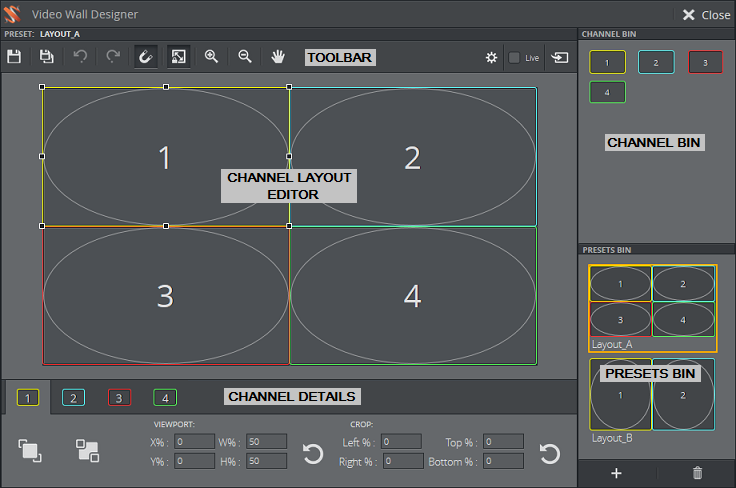
The Video Wall Designer is organized into the following areas:
The backdrop of the Video Wall Designer layout is called
Toolbar

The left side of the toolbar:
-
Save: Save changes to the current preset.
-
Save As: Save the layout as a new preset.
-
Undo/Redo: Undo/redo last move.
-
Toggle snapping: Snap to a grid, to the edges of Active Areas and GFX channels.
-
Number of snap points: The number of snap points (grid) distributed across the underlying Active Areas (the snap areas). For instance: 4 snap points will make the GFX channel snap to the edges of the underlying Active Area, and 2 in between. Increasing the snap points will make the grid finer.
-
Keep aspect ratio: Maintains aspect ratio of the channel when the frame is cropped or resized. Also enforce the aspect given for the channel in the Profile when the GFX channel is dragged from the Channel Bin or reset.
-
Zoom in/out: Click to zoom in or out.
-
Center. Center the view of the video wall area. (Hint: Use the scroll wheel to zoom in and out.)
-
Pan mode: When Pan mode is on, pan by dragging the background or a channel. When Pan mode is off, you can still drag the background to pan, but dragging a channel moves the channel. Dragging a handle always moves the handle.
The right side of the toolbar:
-
Active Areas editor mode: Hides the GFX channels and makes the underlying Active Areas become editable. The Active Areas represents the physical dimensions of the screens in the video wall. The Active Areas are snap points to which the GFX channels will snap. See Active Areas Editor.
-
Import Datapath configuration: When the setup of the display controller hardware is done, the layout of the screens can be imported from the PC hosting the Datapath device. Only enabled in Active Areas editor mode.
-
Open Advanced Settings.
-
Live: When Live is checked, all changes done to the preset and Active Areas are taken on air immediately. This is useful while adjusting and testing video wall configurations.
-
Color Active Areas: When adjusting the Active Areas and being in Live mode, the purpose is to create a backdrop in the Video Wall Designer that matches the physical screens. When adjusting this backdrop (the Active Areas) it is useful to fill the area with a color. When clicked - the selected Active Area will be drawn with a color on the renderer, so the area can be adjusted to whether it matches the physical screen. Only enabled in Active Areas editor mode. If not clicked - and being in Live mode the Active Areas will be filled with whatever content that is already played in the corresponding GFX channels.
-
Take Presets: When the Take button is clicked, the current state of the preset, including any unsaved changes, is taken on air. This is useful while adjusting and testing video wall configurations.
-
i: Opens the keyboard shortcuts window.
Channel Bin
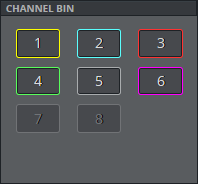
Click an item in the Channel Bin to turn it on or off in the Channel Layout Editor. You can also drag channels from the Channel Bin to the video wall.
Presets Bin
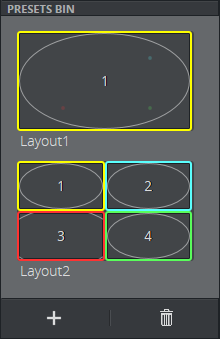
The Presets Bin lists the presets which are available. These presets are available in the shortcuts bar with their saved names.
In the Presets Bin you can:
-
Add or delete presets
-
Double click on the preset to open it in the editor
-
Double-click the name to rename it
Note:
If the preset or element is shown in a playlist in Viz Trio, the name given in Viz Multiplay will be shown in the Description column in Viz Trio.
Note:
Presets can also be deleted from within Viz Trio.
Channel Details

For each channel, you can modify the Layer Order, Viewport and Crop.
Layer Order
-
Bring to front / Send to back: Move the selected channel to the front or back. This changes the order in which items are layered, from front to back. Each channel is drawn on its own layer, which means all channels are independent and can be moved on top of, or behind, other channels.
A dashed line indicates that a part of the channel is behind another channel.
Viewport
Position of the channel frame relative to the video wall. Either type inside the text boxes, or drag your mouse to change the values.
-
X/Y: Position of channel’s top-left corner given in the wall coordinates specified in the Video Wall Dialog. These coordinates can be pixels.
-
W/H: Width/height of the channel’s frame given in the wall coordinates specified in the Video Wall Dialog. These coordinates can be pixels.
-
Reset: Resets the Viewport values to relocate the channel to the first Active Area of the video wall.
Tip:
When a GFX channel should not be visible - do not hide them by making them invisible. Instead, shrink the size to 0 (zero) and/or place them outside the visible video wall. The Viz Engine performance can be better when all channels are visible. All channels should be colored in the Channel Bin.
Crop
Position of the content of the channel relative to the content size. With this control you can perform cropping, shifting and zooming. Any part of the frame which is not filled with content will be transparent. Alternatively, use the Crop Editor to make these changes.
The Crop values in the channel tabs control the cropping. Either type inside the text boxes, or drag your mouse to change the values.
-
Left %/Right %: Position of channel content’s left/right border, relative to the channel frame (positive values push content outside the frame, negative values bring the content inside the frame)
-
Top %/Bottom %: Position of channel content’s top/bottom border, relative to the channel frame
-
Reset: Resets the Crop values to (0,0,0,0), so that the content fills the frame.
Tip:
Adjust the Snapping and Keep aspect ratio settings in order to achieve the precise crop you require.
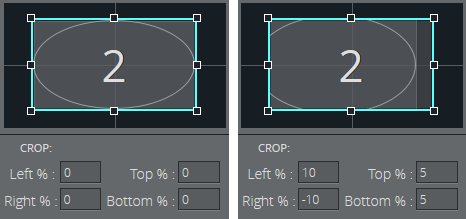
Example
In this case, the user has set the crop values in order to shift the entire content to the left by 10%, and zoom in by 5%.
Channel Layout Editor
Use the Channel Layout Editor to arrange and resize the channels on your video wall.
Each channel is “drawn” on its own layer, which means all channels are independent and can be moved on top of other channels.
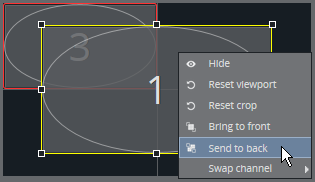
Context Menu
Right-click a channel to access the context menu:
-
Hide: Hide this channel from the video wall. To show it again, choose it in the Channel Bin, either by clicking it or dragging it from the Channel Bin onto the video wall surface.
-
Reset viewport: Reset Viewport to the first Active Area.
-
Reset crop: Reset Crop to (0, 0, 0, 0).
-
Bring to front: Put this channel in front of the other channels. See Layer Order.
-
Send to back: Send this channel behind the other channels. See Layer Order.
-
Swap channels: Select another channel with which to swap all Viewport and Crop values.
-
Copy to: Copies the size and crop values from the channel that was clicked into the channel selected on the context sub menu.
-
Hide All Channels: Hide all GFX channels.
Crop Editor
Double-click a channel frame to allow dragging and resizing the channel content, relative to the frame. In this mode, aspect ratio is forced on. Press <Esc>, or double-click the channel, to exit this mode. Any part of the frame which is not filled with content will be transparent. Alternatively, use the Crop values in the channel tabs to make these changes.
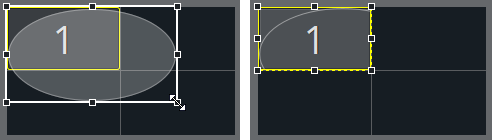
Example
In the image below, the user has double-clicked Channel 1 to enter edit mode. They have dragged the handle (left-hand image) and then pressed Esc to see the final result (right-hand image).
Animation between Presets
You can move channels outside the visible area of the video wall area, by dragging them or setting the Viewport values. This allows interesting in/out animations to be made when switching between presets.
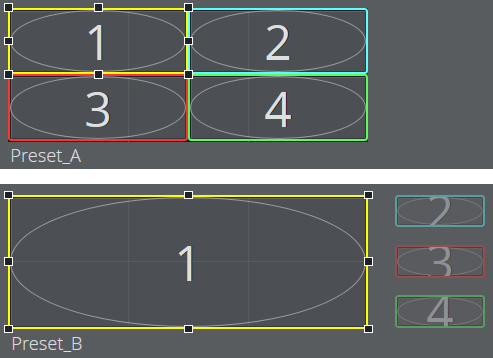
Example 1
When switching from Preset_A to Preset_B (see diagrams below), channels 2, 3 and 4 will become smaller and sweep to the right, off screen, and channel 1 will stretch to fill the whole video wall.
Example 2
Animate a channel so that it shrinks into nothing by using the Viewport settings to set the channel frame width and height to (0, 0).

Example 3
Control the order of the items using the layering of the channels relative to one another. Either right-click a channel frame and select Send to back/Bring to front, or select a channel frame and use the Layer Order buttons.
Active Areas Editor
In Active Areas mode, the backdrop of the video wall layout can be edited. These areas work as snap points for the GFX channels. They make it easier to create precise GFX channel layouts (presets). The backdrop represents the active areas on the video wall - for instance separate physical screens. When designing a preset, it can be useful to use the active areas to indicate where in the physical world the pixels are located. The Viz Engine draws its output on one surface - but through the use of NVidia Mosaic or the Datapath Fx4 display controller - the pixels from the renderer surface can be mapped to active areas on physical screens.
There are 3 ways the Active Areas in this editor can be created:
-
Imported from a Datapath Fx4 configuration file. When using one or more Datapath Fx4 devices, the wall layout from these boxes can be imported into the editor. The backdrop will then have the same layout as the configured layout in the boxes.
-
Auto generated based on rows, columns and screen size in the Video Wall dialog. When adding a new video wall in Profile Configuration, it is possible to specify the screen size (normally the resolution), and rows and columns of the screens. This info is used to auto generate a backdrop.
-
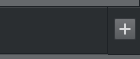
Created from scratch in the editor. Clear existing areas and start by clicking the plus button down to the right of the editor:
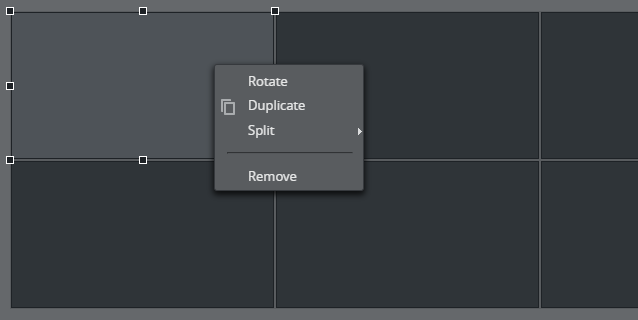
The context menu when right clicking one Active Area contains:
-
Rotate: Rotates the active area 90 degrees. Free rotation is not supported. The content on the wall is not rotated. Only the aspect is changed.
-
Duplicate: Duplicate the active area.
-
Split: Split the active area into 2 or 4 new areas.
-
Remove: Removes the active area.
Tip:
-
Use the live function to play out either the existing content of the corresponding GFX channel in the Active Areas - or a fill color. This is useful when a part of the renderer output should be mapped to a physical screen.
-
Use the arrow keys to fine tune a position.
Active areas can be grouped by clicking and Ctrl + clicking areas, and right clicking on one of the areas:
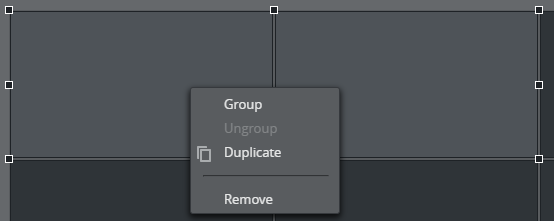
Create a group of the selected areas. The areas can be moved, resized and deleted as one unit. The group number is located at the bottom of the editor:
![]()
The highlighted numbers indicate whether a group or an individual Active Area is selected. To toggle between individual selection and group selection - click the active area. Keep an eye on the highlighted numbers and the selection markers around the active areas to see whether the selection contains a group or an Active Area.
Tip:
It is possible to undo and redo operations in Active Areas mode. The configuration is saved automatically.