
Viz Multichannel
Version 4.1 | Published May 27, 2019 ©
External Data Sources
You locate channel-specific general settings from the cog wheel icon, and selecting the Channel settings tab.
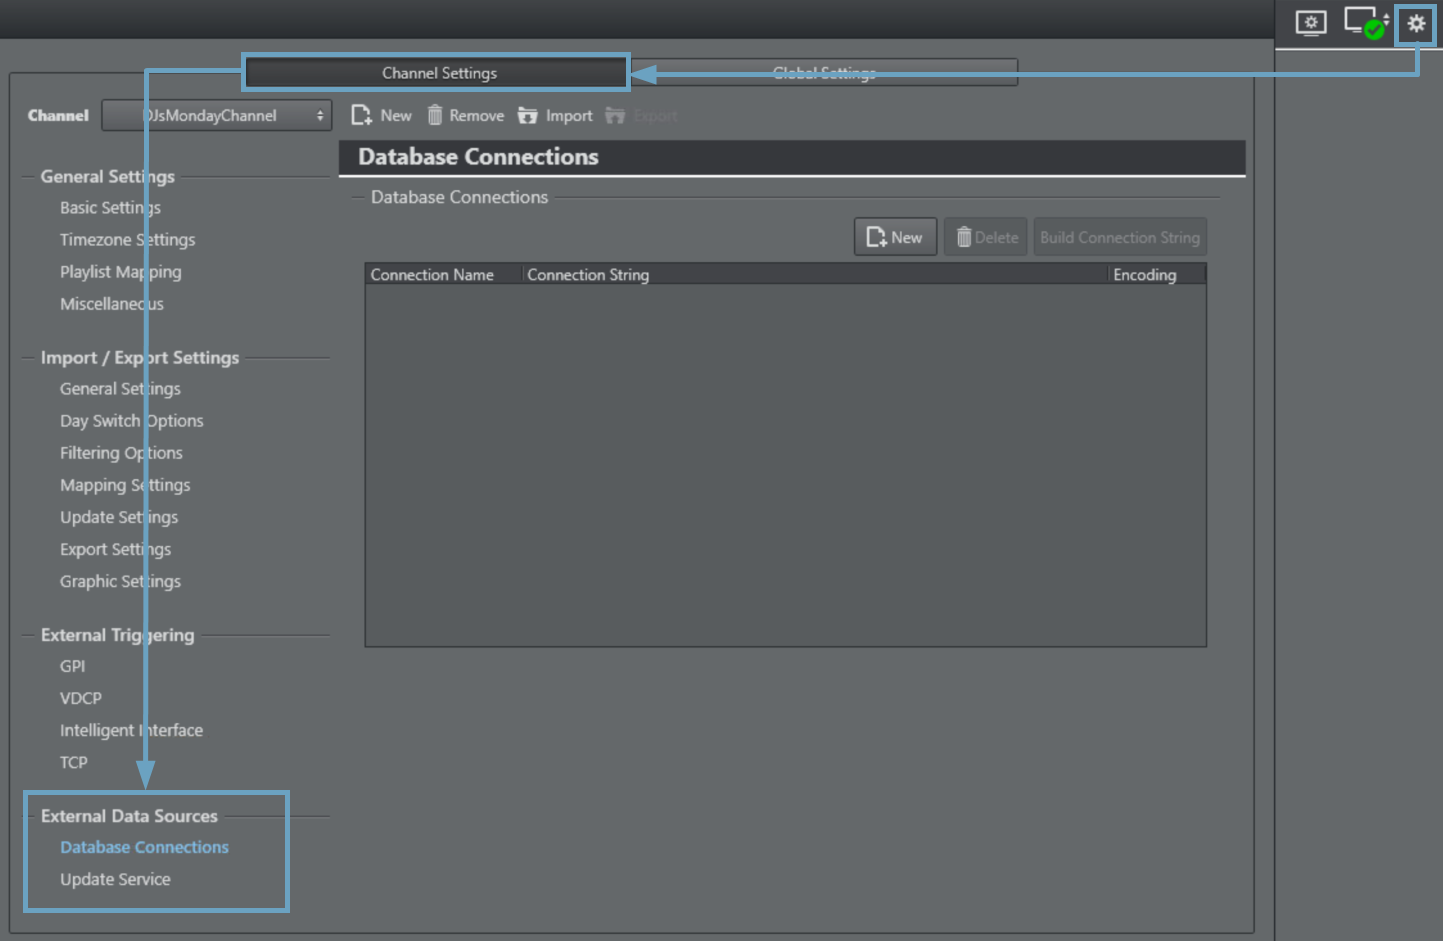
The External Data Sources settings group comprises:
Database Connections
This section describes the Viz Multichannel’s database connections interface, listing all available database connections.
-
New connection (first button): Allows you to manually enter a connection string. Clicking the New connection button adds a new entry to the list of available connections.
-
Delete connection (second button): Deletes the selected connection.
-
Build connection string (third button): Allows you to build a connection string. Clicking the Build connection string button opens a dialog box that allows you to set all parameters needed in order to successfully connect to your source.
Creating Database Connections
Before populating page content from database look-ups you must first configure the connection to the external data source. You can then proceed with mapping according to your data source.
IMPORTANT! If using ODBC in a 64-bit Windows environment, please be aware that there are small driver and driver-name changes to be aware of, see Using ODBC 64-bit Drivers for further information. The driver names and connection strings below are for the 32-bit drivers. The procedures will be the same for 64-bit systems, but the driver names/connection-strings could be slightly changed.
To Configure the Connection to an External Data Source
-
In the Settings dialog, click Database Connections.
-
Click the New.
-
Enter a name for the connection.
-
Enter the connection string provided by your DBA.
-
Click OK.
To Map from a Microsoft Excel Spreadsheet
Note: The file should only contain data of type text.
-
Perform the procedure To configure the connection to an external data source.
-
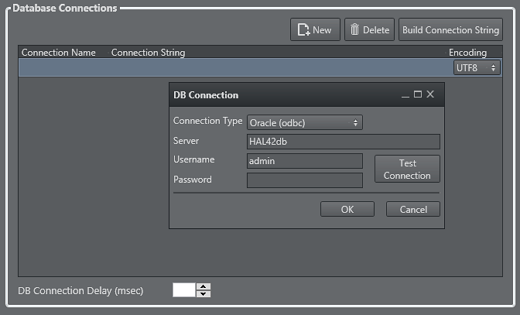
Click the Build Connection String button.
The DB Connection window is displayed.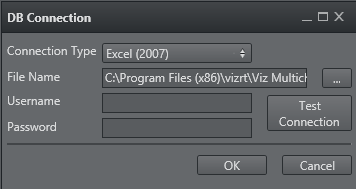
-
For Connection Type, select Excel 2003 or Excel 2007.
-
Click the ellipsis to select the desired Excel file.
-
Click the Test Connection button.
-
If the test is successful, click OK.
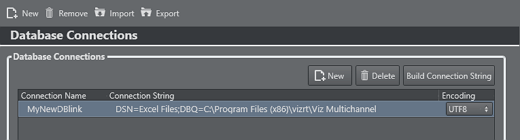
DSN=Excel Files;DBQ=C:\Temp\Movies.xls;UID=<username>; PWD=<password>;Note: An Excel spreadsheet is available in the SampleContent folder (e.g. C:\Program Files (x86)\vizrt\Viz Multichannel\SampleContent\Database).
To Map from an Microsoft Access Database
Note: The file should only contain data of type text.
-
Perform the procedure To Configure the Connection to an External Data Source.
-
Click the Build Connection String button.
The DB Connection window is displayed.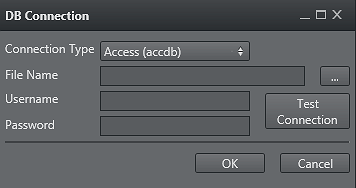
-
For Connection Type, select Access (accdb) or Access (mdb).
-
Click the ellipsis to select the desired Access file.
-
Enter the database’s username and password.
-
Click the Test Connection button.
-
If the test is successful, click OK.
Driver={Microsoft Access Driver (*.mdb)};DBQ=C:\Temp\Movies.mdb;UID=<username>; PWD=<password>;
To Map from a Microsoft SQL Server Database
-
Perform the procedure To Configure the Connection to an External Data Source.
-
Click the Build Connection String button.
The DB Connection window is displayed.
-
For Connection Type, select SQL Server.
-
Enter the database’s server name, using the following format: <hostname>:<port> or <IP address>:<port>.
-
Enter the database’s username and password.
-
Click the Test Connection button.
-
If the test is successful, click OK.
Driver={SQL Server};Persist Security Info=True;Mode=ReadWrite;SERVER=<hostname>:<port>;UID=<username>; PWD=<password>;
To Map from a MySql Database
-
Perform the procedure To Configure the Connection to an External Data Source.
-
Click the Build Connection String button.
The DB Connection window is displayed.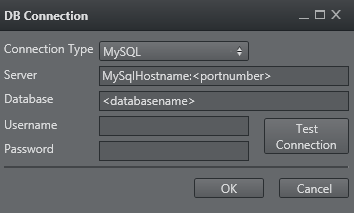
-
For Connection Type, select MySql.
-
Enter IP address or hostname of the database.
-
Enter the name of the database.
-
Enter the username and password for the database.
-
Click the Test Connection button.
-
If the test is successful, click OK.
Driver={MySQL ODBC5.1Driver};SERVER=<hostname>;DATABASE=<name>;USER=<username>; PASSWORD=<password>;
To Map from an Oracle Database
-
Perform the procedure To Configure the Connection to an External Data Source.
-
Click the Build Connection String button.
The DB Connection window is displayed.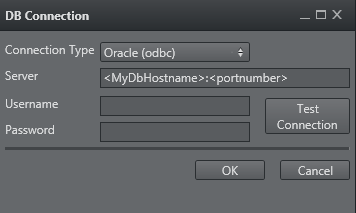
-
For Connection Type, select Oracle (native) or Oracle (odbc).
-
Enter the database’s server name, using the following format: <hostname>:<port> or <IP address>:<port>.
-
Enter the database’s username and password.
-
Click the Test Connection button.
-
If the test is successful, click OK.
DRIVER={Microsoft ODBCforOracle};SERVER=<hostname>:<port>;UID=<username>; PWD=<password>;
To Map from a Text File
-
Perform the procedure To Configure the Connection to an External Data Source.
-
Create a folder for the text file database, for example C:\Channel32DB.
-
In the folder, create two files, such as Channel32DB.txt and Schema.ini.
The structural details for the Schema.ini file can be found at: -
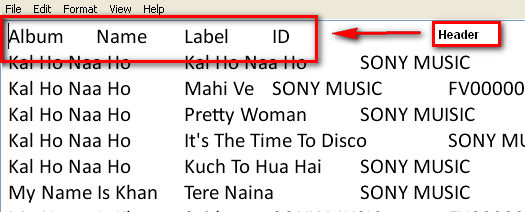
In Channel32DB.txt enter a database header for mapping.
-
In Schema.ini:
-
[v-ind.txt] : Name of txt file database
-
Format=TabDelimited : This example uses TabDelimited
-
ColNameHeader=True : If using a header (recommended), set to True.
Note: Another option is not to use a header, in which case you set this parameter to False; the column mapping will then be F1, F2, F3 and F4.
{{MaxScanRows=0}}{{CharacterSet=ANSI}}
-
-
In the Database Connections panel, enter a connection string for the text file database, in the following format
Driver={Microsoft Text Driver (*.txt; *.csv)};Dbq=C:\Channel1_DB;Extensions=asc,csv,tab,txt; If using the Microsoft Access64-bit ODBC drivers the format would be: Driver={Microsoft Access Text Driver (*.txt, *.csv)};Dbq=C:\Channel1_DB;Extensions=asc,csv,tab,txt;Note: For further connection string detail, see: http://www.connectionstrings.com/textfile.
-
Click OK.
Using ODBC 64-bit Drivers
When configuring and using ODBC in a 64-bit environment you need to have 64-bit ODBC drivers installed or bridge 32-bit drivers in a 64-bit system.
A solution is to install the Microsoft native 64 drivers that is part of the Microsoft Access Database Engine 2010 Redistributable driver pack, available at (external link): http://www.microsoft.com/downloads/details.aspx?familyid=C06B8369\-60DD\-4B64\-A44B\-84B371EDE16D&displaylang=en
However, please note that all 64-bit ODBC drivers from the Microsoft Access Database Engine 2010 Redistributable have slightly changed their driver names to differentiate them from their 32-bit counterparts.
The connection string for ODBC text and csv files will be:
Driver={Microsoft Access Text Driver (*.txt, *.csv)};See www.microsoft.com for further information.
Update Service
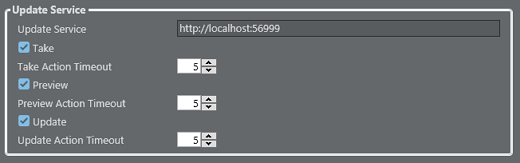
Update Service is an option that makes use of your own custom web service for page content filling. Update Service settings are per channel settings. In addition you may define separate update service settings per template.
The Update Service, when configured and enabled on one or more templates, will activate the Media Sequencer (MSE) to send an XML Payload when a Page is put in pre-queue of being triggered, to a custom web service. This web service can modify the content of the payload and send it back. When Media Sequencer Engine receives the payload it will parse it and put the data into the page’s tab field.
The typical use case could for example be for sport-results or latest headlines from a feed. Since it relies on a custom web service the solution can be tailored to be unique. This update service is not an existing server solution, it is a path for external modules to be able to integrate and function with Multichannel and the Media Sequencer.
A timeout of N seconds on the available actions (Take, Preview and Update) may be set. This is to make sure a reply is given back during the configured timeout (default is 5 seconds) for a given action. If no reply is received within the time-frame the action is not sent/issued, even though a reply is received later.
See Also