
Viz Multichannel
Version 4.1 | Published May 27, 2019 ©
Quick Scheduler
Quick Scheduler (QS) is a tool for creating schedules. A schedule in this context can be understood as a playlist with items or complete run-downs.
Schedules created with Quick Scheduler can be published to and used by Viz Multichannel using the Quick Scheduler Server.
Installation and Startup
-
Install Quick Scheduler using the MSI installer or install QS as part of a bundled (wrapped) installer by fetching the file
VizMultichannel_QuickScheduler_<VERSION>.msi
from https://download.vizrt.com -
Depending on your Windows version, start Quick Scheduler by navigating to
[Windows Start button] > Vizrt > Viz Multichannel - Quick Scheduler
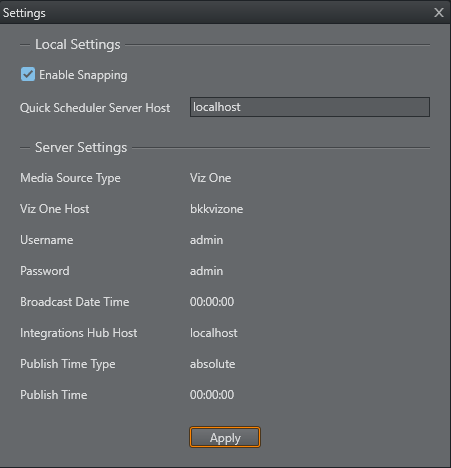
Configuration
You need to configure Quick Scheduler. Depending on your usage you will need to know:
-
Enable Snapping: Items on the timeline automatically snap to the closet grid line.
-
Quick Scheduler Server Host: Host name of Quick Scheduler Server.
Other settings are read only. They are settings from Quick Scheduler Server side.
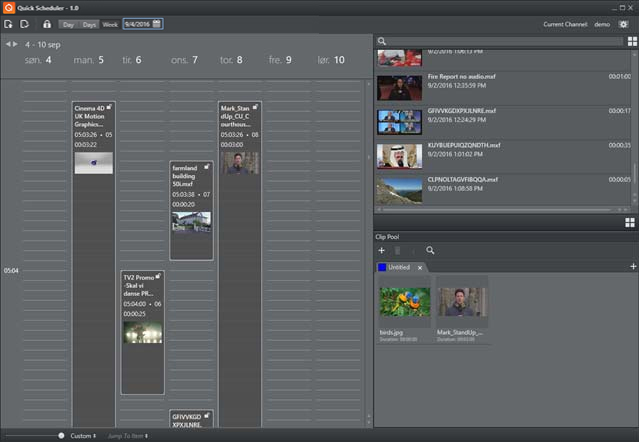
Using Quick Scheduler
Using Quick Scheduler is mostly drag-and-drop. The numbers in the image below correspond to the items in the bullet list.
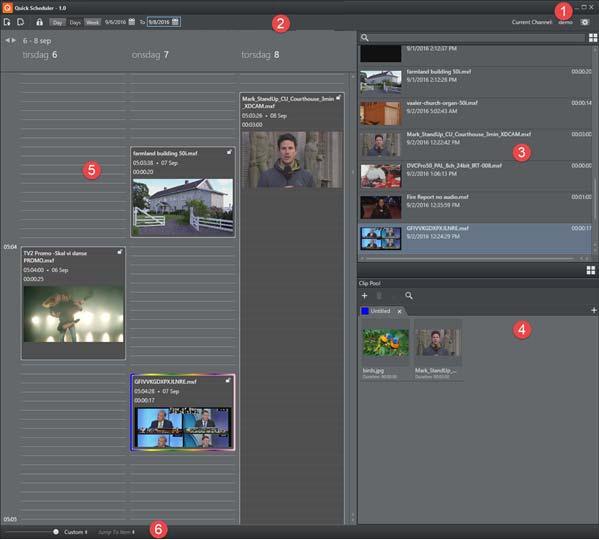
[1] Click the Configure button to configure Quick Scheduler
[2] Use the Calendar buttons to select the date / time view you require. You can view by date, multiple dates or week. The time-view type you select will be reflected in the Schedule-list [5].
Use the Request Edit Access buttons to edit items in timeline.
[3] Scroll and view media items (from Viz One or Media Service) in the media pane.
Click the Grid/List view button for different item views. You can also search for items in the search bar.
Select items by clicking them. Right-click on any item the displayed item-list to:
-
Refresh (F5)
-
Deselect
-
Sort by Title
-
Sort by Name
[4] The Clip Pool list contains items (clips) you often work with, typically recurring clips.
Drag items from the media list to the Clip Pool.
[5] The Schedule or playlist items. New items can be created by dragging from the media lists or by right-click in the Media panel and select New Item.
[6] Use the slider to Zoom the Schedule view or use the Custom-button to select a Schedule view from full day to 15 minutes.
You can also use the mouse wheel to zoom:
Ctrl + Wheel UP: Zoom in
Ctrl + Wheel DOWN: Zoom out
Ctrl + Shift + Wheel UP: Zoom in more granularly
Ctrl + Shift + Wheel DOWN: Zoom out more granularly
[6] You can use the dynamic (the list is updated depending on what is in the Schedule) Jump to Item. This allows you to quickly jump to items in the Schedule.
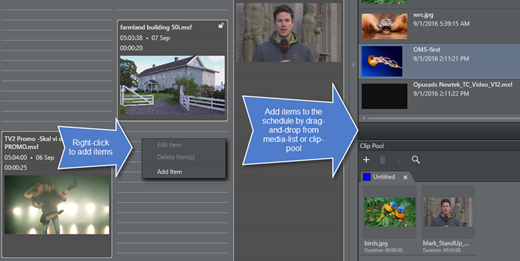
To Add a New Item to the Schedule
Right-click on the Schedule and select Add Event to access the Add Time Event dialog:
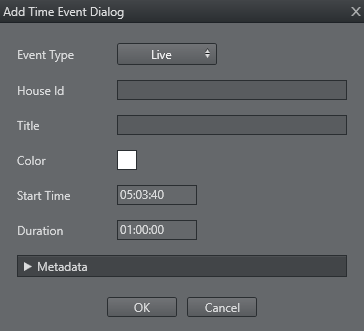
Fill in the various data options as required. Event Type can be Live or Placeholder (meaning reserve a spot in Schedule).
To Modify Metadata for an Item in the Schedule
Right-click an existing item in the schedule and select Edit item to view and possibly change metadata for the item. If the item originates from Viz One you can view or change item data by selecting Edit metadata in Viz One.
Options presented and save option depends on you having the required credentials for saving to Viz One
To Export a Schedule
Use the Export button in the main menu to export a schedule to a XML file.
An example saved Schedule
<?xml version="1.0" encoding="utf-8"?> <schedule> <event> <id>1092781a-6d23-4504-956d-66d472991c90</id> <title>Opusads Adobe Adobe Snakebite Mar2016_Summit_Grade_v2.mxf</title> <startdate>2016-09-06</startdate> <starttime>05:00:00</starttime> <houseId>ZBCRUPDJOOFINWFC</houseId> <duration>00:01:00</duration> </event> </schedule>