
Viz Multichannel
Version 4.1 | Published May 27, 2019 ©
Templates and Pages
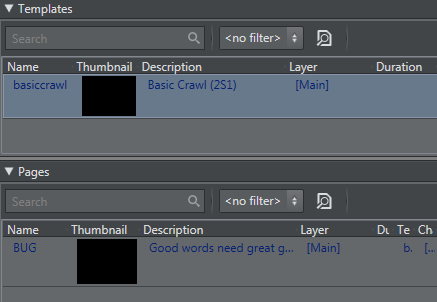
In the Templates and Pages panel, you can view all imported templates, and pages based on those templates. You can also filter your templates and pages view, and add content to pages using the Page Content Filling Window.
Template Context Menu
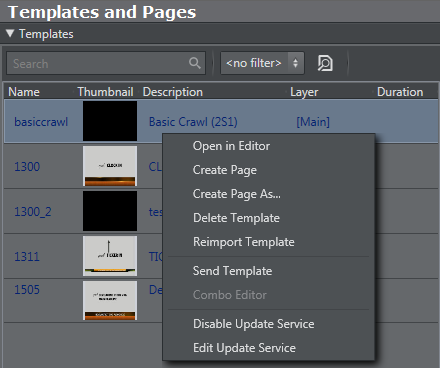
Right-clicking a template opens the context menu:
-
Open in Editor: Opens the template editor which allows you to create a new page based on the template.
-
Create Page: Creates a page based on the selected template. The page can be opened in the template editor for editing.
-
Delete Template: Deletes the selected template/data.
-
Reimport Template: Will scan the scene and re-import the selected template. The resulting object will be recreated. When reimporting, you will first be asked if you want to do this and then a reminder will be shown: existing pages description might not reflect the true data content until refreshed by update.
-
Add To Favorites: Adds the template to your pre-defined Favorites filter.
-
Send Template: Sends the selected template(s) to the master control room. This option is only enabled if the Remote Host is defined in the General Settings.
-
Combo Editor: Opens the “Combo” (short for Combination) template editor where you can change templates based on multiple Transition Logic (TL) scenes. For more detailed information, see the Combo Page Editor section.
-
Enable Update Service: Enables you to assign an update service for the selected template.
-
Disable Update Service: Disables the update service for the selected template.
-
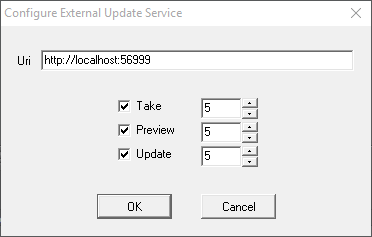
Edit Update Service: Edit the update service for the selected template by setting the service URI. A timeout on the available commands (i.e. take, preview and update) may be set as well. This will delay the given command sent by the Media Sequencer to the Viz Engine.
Page Context Menu
Right-clicking a page opens the following context menu:
-
Open in Editor: Opens the template editor which allows you to update the page or save it as a new page based on the same template.
-
Save Page as: Creates a page based on an existing page. The page can be opened in the template editor for editing.
-
Rename: Change name of selected page. Duplicate page names are not allowed.
-
Delete Page: Deletes the selected page(s).
-
Add to/Remove from Favorites: Adds or Removes the page from the pre-defined Favorites filter, see To add a template or page filter.
-
Send Page: Sends the page to the defined remote hosts, see General Settings.
-
Reload Page: Reloads the scene referenced by the page on the device defined as the program Viz Engine, see Configuring Device Channels.
-
Set as Logo Scene: Sets a selected page as the default Logo Scene that can be controlled from the Toolbar.
-
Set as Error Scene: Sets a selected page as the default Error scene that can be controlled from the Toolbar.
-
Set as Video-only Scene: Sets the selected video scene as the default Video-only scene that can be controlled from the Toolbar.
-
External Preview: Shows the scene on your defined preview Viz Engine.
-
Take: Immediately takes the page on-air on your program Viz Engine.
-
Continue: Continues the page on-air on your program Viz Engine.
-
Out: Immediately takes the page off-air (hard cut) on your program Viz Engine.
Right-clicking the column headers allows you to customize your templates and pages view.
-
Channel: Allows you to set a default playout channel (see Configuring Device Channels) for a given page.
-
Description: Shows the template or page description.
-
Duration: Shows the duration of the template or page. Click the area and type to set a default duration for the page.
-
TTL: Time To Live. This header is available for Pages pool only. It allows to set an “expire” (TTL) date for a page. Page(s) that has a TTL-date equal to (or older) than the current date will be removed when PLHM is run.
-
Layer: Defines the layer the scene should play in. Available options are Front, Middle, and Back. Default is Middle.
-
Name: Shows the name of the template or page.
-
Template Name: For Pages an additional column shows the template associated with a given page.
-
Thumbnail: Shows a thumbnail image of the template or page.
-
Store as Default: Allows you to arrange and store your columns as a default column arrangement.
-
Use Default: Reverts to your current default column arrangement.
-
Auto Fit Columns: Automatically fits the columns to the available space.
Page Content Filling Window
This is described in the section Page Content Filling.
Database Connection Window
-
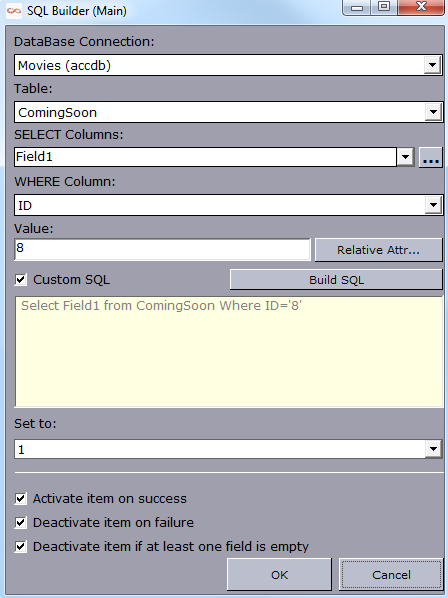
Database Connection: Allows you to select from your list of pre-configured Database Connections.
-
Table: Allows you to select a table from your selected database.
-
SELECT Columns: Allows you to select a column from your selected table.
-
WHERE Column: Allows you to select from where the value should be selected.
-
Value: Allows you to set which value that should be selected from the WHERE column.
-
Relative Attr...(button): Allows you to select a relative attribute from the Page Content Filling Window.
-
Custom SQL: Allows you to write a custom SQL query with multiple dynamic mappings (e.g. Select Field1 from ComingSoon Where Field4=’PG-13’ AND Field2=’23.12.2013’).
-
Build SQL (button): Builds the query based on your previous selections.
-
Set to: Allows you to select which page field that should be updated by the query. Ensure that the SELECT columns match the page fields!
-
Activate item on success: Ensures that playlist items will be marked as active if the query is successful and data fields have been populated. Leave it unchecked if you do not want the success of the query to have any effect on the status of a playlist item.
-
Inactivate item on failure: Ensures that playlist items will be marked as inactive if the query fails and data fields have not been populated. Leave it unchecked if you do not want the failure of the query to have any effect on the status of a playlist item.
-
Deactivate item if at least on field is empty: Ensures that playlist items will be marked as inactive when one of the fields the query returns is empty. Leave it unchecked if you do not want an empty field to have any effect on the status of a playlist item.
Template and Page Filters
To Add a Template or Page Filter
The Templates and Pages panel allows you to add filters to quickly sort the list of templates or pages.
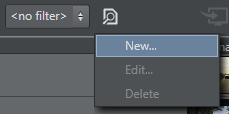
-
Click the funnel icon, and from the menu click New....
-
This will open the Edit filter window.
-
-
Enter a Filter name.
-
Select if the filter should apply when:
-
All conditions match, or
-
One of the conditions matches, or
-
None of the conditions match.
-
-
Continue to define your filter by adding one or multiple conditions.
-
As you define your conditions the list of templates or pages will be filtered, helping you to verify that the filter is configured correctly.
Note: There is also a built-in Favorites filter.
-
To Manage a Template or Page Filter
-
Select your filter
-
Click the funnel icon, and from the menu click Edit... or Delete.
See Also