
Viz Mosart Administrator Guide
Version 5.6 | Published July 22, 2024 ©
Generic REST Drivers
Working with Generic REST Drivers
Viz Mosart offers an easy to create, generic driver which is able to send REST commands to an external device. Once created, the driver's features can be controlled from a standard Mosart template, as described in section Controlling a REST-based Driver.
Key features of Viz Mosart Generic REST drivers:
-
Device configuration: Ability to configure multiple devices that are providing REST API services.
-
Authentication support: Options for basic, digest, and API key authentication methods.
-
Connection status monitoring: Ability to monitor the connection status of the device.
-
Heartbeat: Integrated heartbeat mechanism for consistent device status checks.
-
Standby mode: Facility to set devices in standby mode.
-
Template-based command execution: Options to configure and execute commands on cue, take or take-out.
-
HTTP command requests: Support for GET, POST, and PUT HTTP request methods.
-
Integration with Newsroom Systems: Enables the use of newsroom tags in request commands. This allows journalists to overwrite with content from Newsroom System.
-
Directtakes functionality: Execute directtakes with REST commands for a configured device from templates or keyboard shortcuts in the Viz Mosart UI.
Out-of-the-box features available with a Generic REST driver:
-
Control a Mosart Server from a template using the Mosart Remote Control REST API instead to use GPI control commands.
-
Control other Mosart servers from a Mosart server using the Mosart Remote Control REST API.
This section presents the following topics:
Setting up and Connecting to a REST-based Device
You construct your REST-based driver from the Settings menu in the combined Mosart Administrator utility.
-
Open the Settings window. There are two methods:
-
From the Manus Administrator console, type settings.
-
From AV Automation menu bar, navigate to Devices > Settings (Ctrl +Shift +P).
-
-
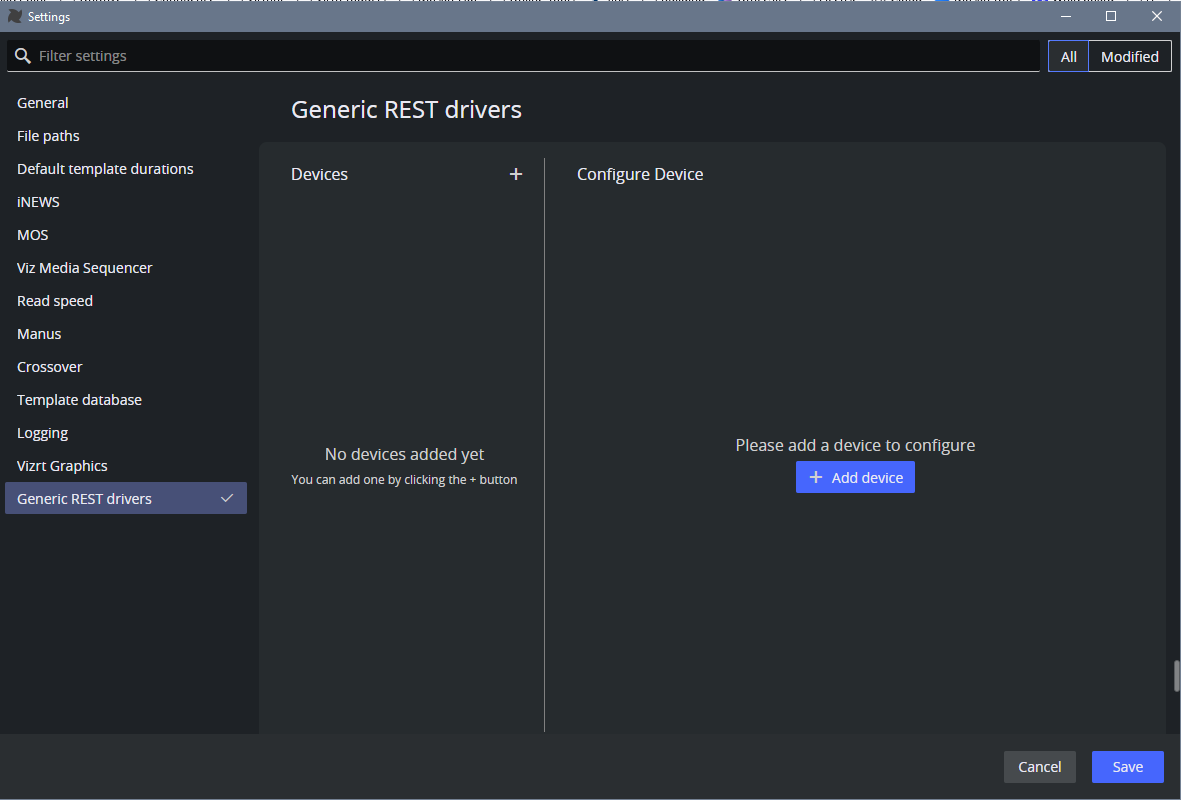
In the left-side of the Settings menu, select Generic REST Drivers.
-
Add a new device by either
-
Clicking Add device or
-
Clicking the plus (+) sign next to Devices.
You can add up to 50 devices.
-
-
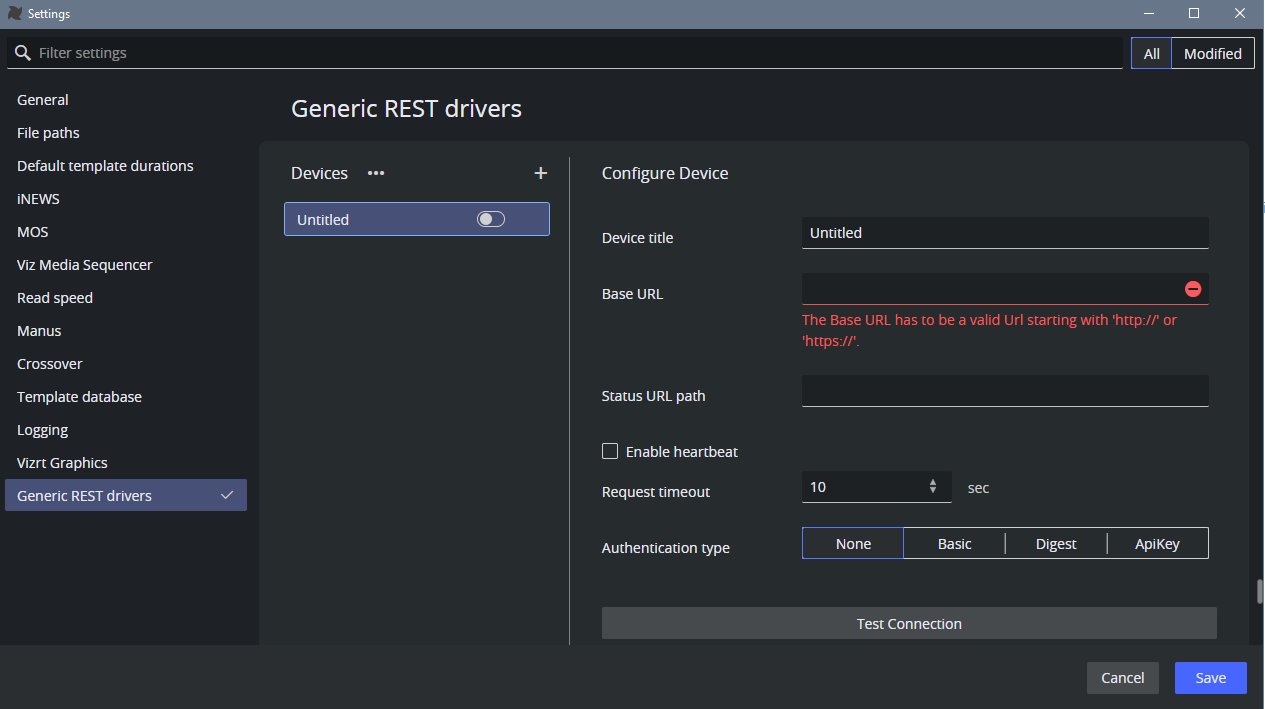
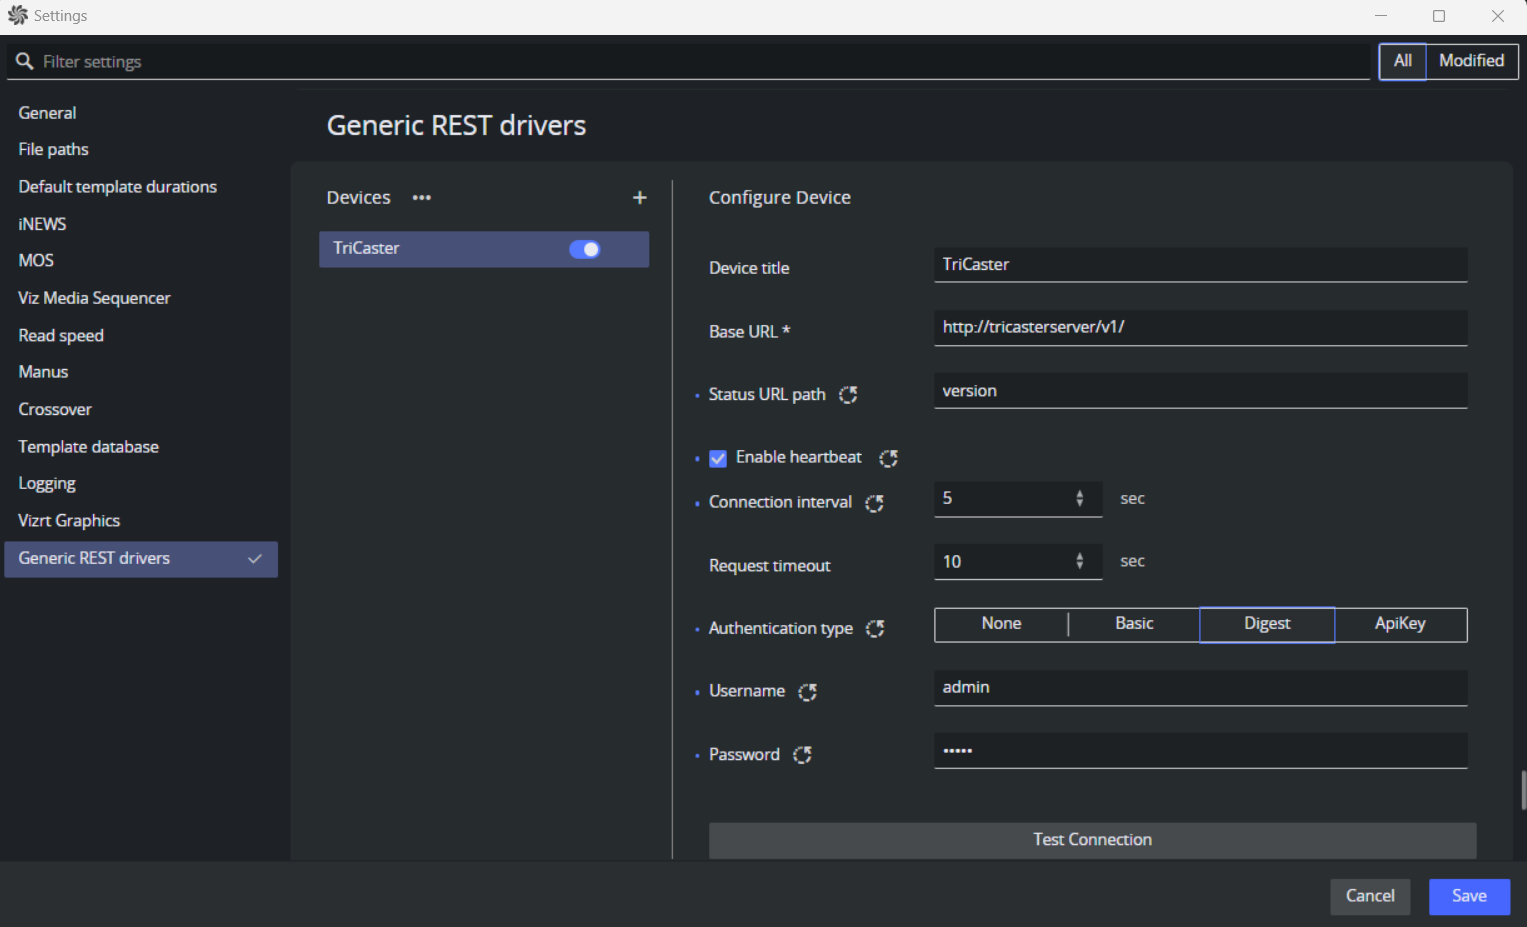
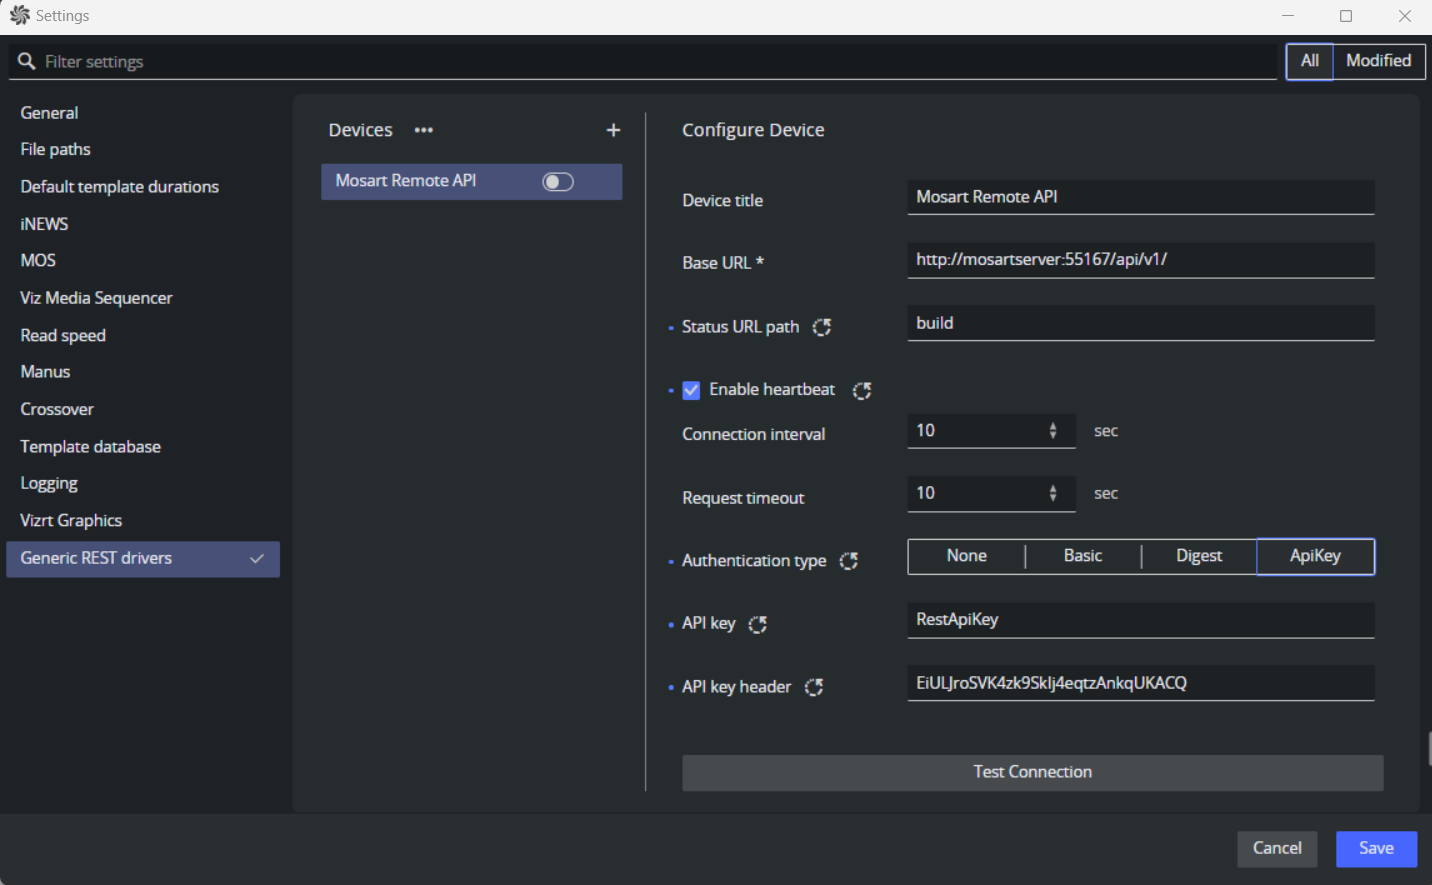
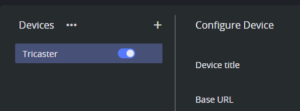
A new device appears in the device list (below heading Generic REST drivers).
You configure its properties in the right side panel.
-
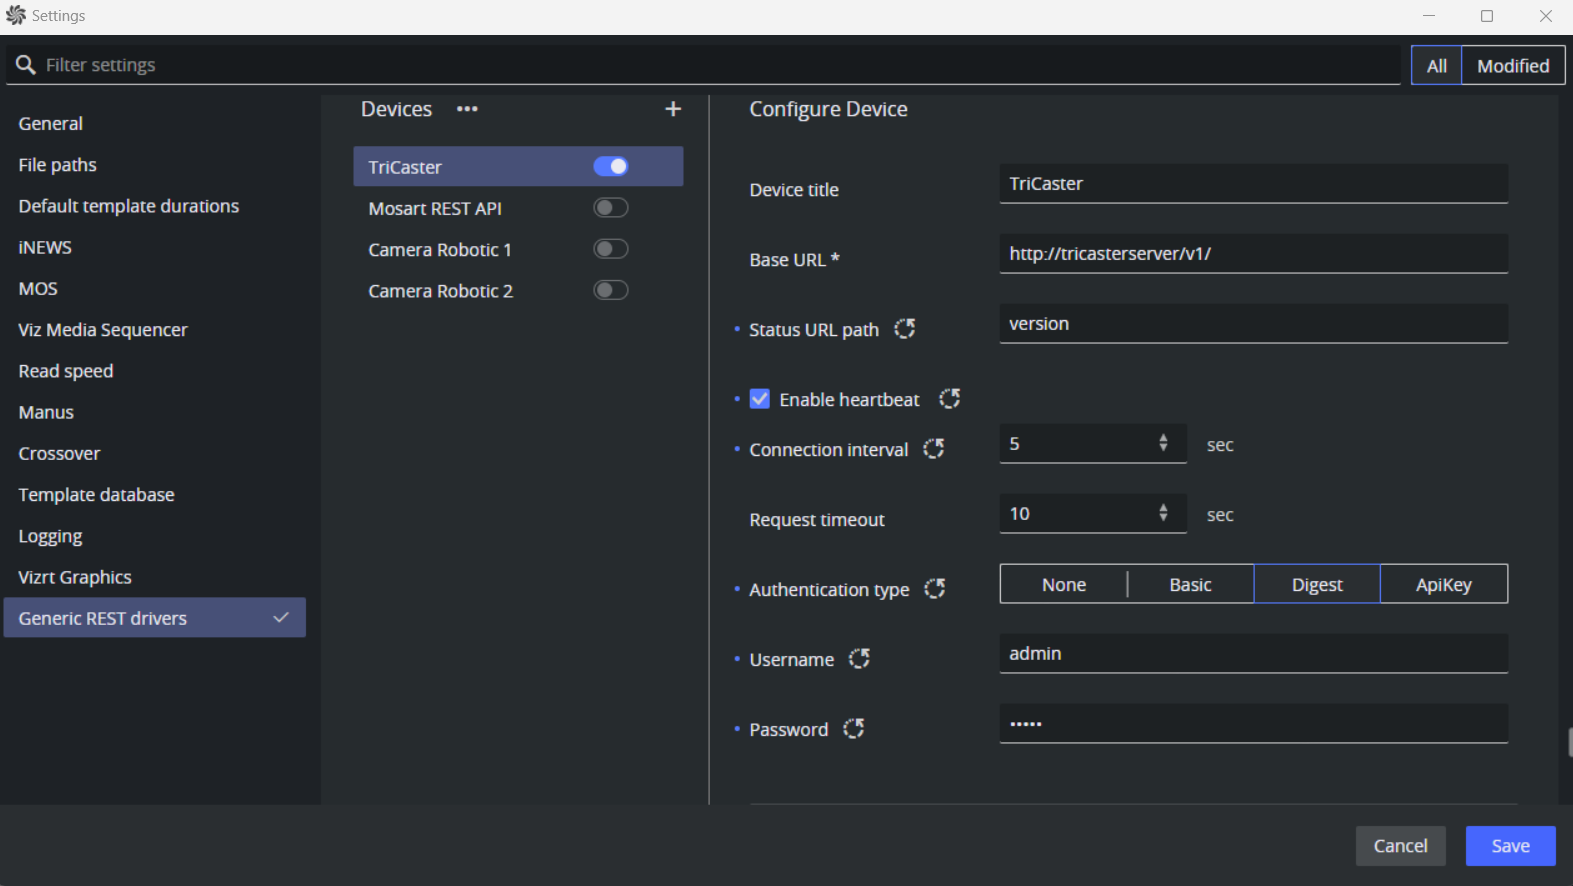
Device title: A name that uniquely identifies the generic REST device. Default: Untitled.
-
Base URL: This mandatory field must include the minimum necessary components of the REST API's URL: the scheme (http:// or https://) and the hostname or IP address of the device. Additionally, it can include a common resource path that forms the base for all requests to the device. Essentially, the Base URL should represent the shared part of the URL used in all requests to the device.
-
Status URL path: The resource path to be attached to the base URL for testing the connection to the device's REST API or checking the device's heartbeat.
Provide this if the base URL alone is insufficient for testing the connection. Default: empty. -
Enable heartbeat: When enabled, Viz Mosart will periodically send a request to the combined URL (Base URL concatenated with the Status URL Path) to verify the device's endpoint.
This check occurs at the interval specified in the setting Connection interval. Default: disabled. -
Connection interval: The interval, in seconds, for sending the heartbeat request. Default: 10 seconds. Minimum: 1 second.
-
Request timeout: The maximum time Viz Mosart will wait for a response from the server when an HTTP request is sent to the device, before timing out. Default: 10 seconds.
-
Authentication type: Authentication type required by the device. Options include:
-
None: No authentication required by the device. This is also the default.
-
Basic: A simple authentication scheme using a Username and Password as configured on the device.
-
Digest: An authentication scheme using a Username and Password as configured on the device.
-
ApiKey: An authentication scheme requiring the API Key name and value as configured on the device.
For example, when configuring Mosart Remote Control REST API as a Generic Rest driver, add X-API-Key as the key header and the value of RestApi setting from Remote Control Dispatcher Service (RCS) configuration file as the API key:
-
-
-
Test the connection by clicking Test Connection.
If the connection fails, an error message is displayed. See the Troubleshooting section for more details.Note: A REST-based device might not require authentication for certain HTTP request commands, such as those used to check the API version. These commands are commonly utilized for testing the connection to the device's REST API.
However, a successful response from this type of test does not necessarily confirm that authentication has been verified. In scenarios where authentication is crucial, it is recommended to configure the Status URL path to a resource that demands authentication.
Successful testing with this path ensures proper authentication setup. Afterwards, you can change the path to the one intended for regular heartbeat checks.For example, the Mosart REST API does not require authentication for the endpoint http://lbu-pc:55167/api/v1/build. Consequently, a connection test using this URL will not validate the validity of the APIKey settings.
-
Once connection is successfully established, enable or activate the device by toggling the Switch button next to the device's name.
This action initiates an HTTP connection to the device, preparing it to receive commands from Viz Mosart.Note: If the device is not enabled, Viz Mosart will not transmit any commands to it!
-
As necessary, add, configure and enable more devices:
Note: In the initial release (Viz Mosart version 5.5), only one Generic REST device can be enabled at a time. To enable an alternative device, first disable the currently active one.
For this reason, the Enable all devices action on the Devices context menu is disabled in v5.5. -
After configuring the device(s), save all settings by clicking Save.
-
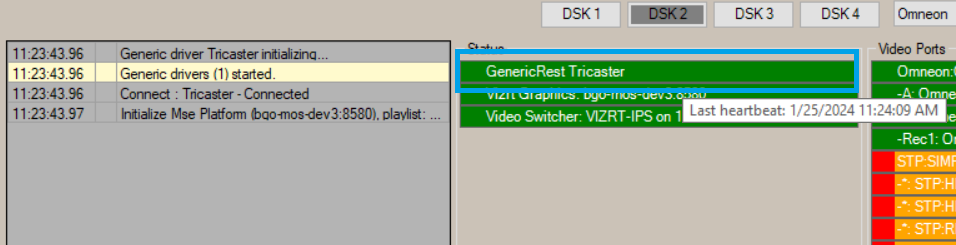
In the AV Automation UI, check that the enabled device(s) are displayed in the Status panel.
-
If no heartbeat is configured, Mosart only checks the connection once and shows the correct status (green for OK, red for not OK).
-
If a heartbeat is configured, hovering over the device in the status area displays last heartbeat check details.
-
You can re-connect to the device by pressing Ctrl+Shift+Z in AV Automation.
-
Device Management
To remove a configured device
-
Click on the three dots to the right of an item in the list of devices and select Remove device.
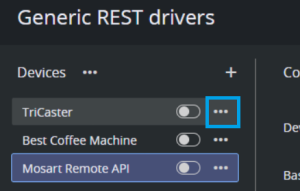
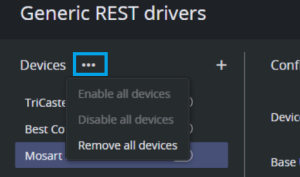
To enable, disable or remove all configured devices
(See the Note above related to which features are available).
-
Right-click the three dots next to Devices and select from the context menu.
Controlling a REST-based Driver
Standard Viz Mosart templates can be used to control a REST-based driver.
These show-specific operations are described in section Controlling a REST-based Driver.
Troubleshooting
When testing, if the connection to the device fails:
-
Ensure the Base URL is correctly configured.
-
Consider adding a Status URL Path in addition to the Base URL, if needed, and ensure it is correctly formatted.
-
Check that the correct authentication is set up if the device requires it.
-
Confirm that AV Automation is operational.
-
Review the Mosart logs for further details.