The Playlists pane displays the playlist(s) created for the selected channel. Viz Multichannel supports two types of playlists: continuous and broadcast day playlist. In addition, the pane contains a location to store prepared non-scheduled events named Channel Pool.
When a playlist is opened, the primary and secondary events will be displayed in the right pane. In the Playlist pane you can view all the playlists you have for a specific channel.
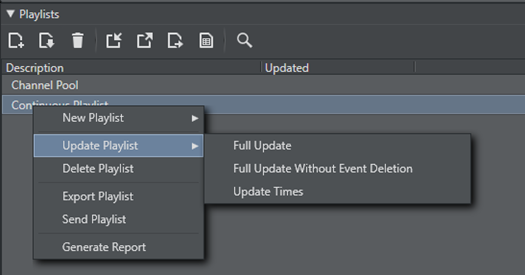
Right-clicking on a playlist in the left pane displays a context menu of playlist commands:
- Update Playlist: allows you to select one of the following update options:
- Full Update: updates the entire playlist, primary and secondary events.
- Full Update Without Event Deletion: updates the entire playlist, primary and secondary events; however, it will not delete events that have already been added.
- Update Times: Allows you to only update the event times according to the imported schedule.
- Delete Playlist: Deletes the playlist.
- Export Playlist: Exports the playlist to a native Viz Multichannel XML format. You can also export the Graphics and Data as part of the export.
- Send Playlist: Sends the playlist to the master control room.
- Generate Report: Generates an HTML report of the selected playlist.
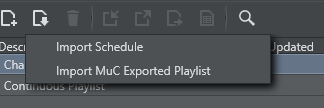
Import a MuC Exported Playlist
A playlist that has previously been exported from MuC as an XML file can be imported back using the Import MuC Exported Playlist menu item.
This will import the XML playlist to MuC without performing any mapping settings. Playlist data is set as it appears in the imported file.
If the contained broadcast date already exists, the imported data will not replace the existing playlist. You must first delete the existing playlist.
- Click the Import icon and select Import MuC Exported Playlist
This section covers:
Channel Pool
The Channel Pool playlist is used for those elements that may require special handling, such as a series of animated logos, an advanced trouble slide, or a special pre-prepared legally mandated breaking news event. For example, these can be accessible to and used by external control applications in order to trigger elements that are not scheduled in a normal playlist.
Pages added to the Channel Pool will have the page name set as the Media ID by default. The Media ID can be changed manually by editing the Media ID column (individually for each element). Enable editing by checking the Edit Events option for Media IDs in Mapping Settings.
A separate channel pool is added for each channel.
Playlist Toolbar
The following table describes the different buttons, modes and status icons available to the playlist.
Icon | Description |
|---|---|
  | When green, the playlist is running. When gray, the playlist has stopped. |
  | When a playlist is active it is added to the Media Sequencer, which starts checking that all resources (such as videos and imagery) are available (see Available status) to Viz Engine for playout. This means that videos are transferred from Viz One to Viz Engine, for example. |
  | 100% available means that full screen video clips are available to Viz Engine for playout. |
| 100% loaded means that all pages (the actual graphics including embedded video clips and imagery) are loaded and ready for playout. |
  | Enables you to run and stop the playlist. Note that in order to run the playlist successfully your elements must have a begin and end time. |
 | Searches the description field of your playlist elements. To see the next result, press Enter. |
 | Predefined filters allow you to filter the playlist. Click the funnel icon to create, edit or delete filters. See To add a playlist filter. |
| Takes the selected playlist element (or group of elements) on air |
 | Continues the animation of the playlist element |
 | Takes the current playlist element off air |
 | Initializes the playlist’s pages on the preview and program renderer. When complete, the loaded status is set to 100%. See the Playlist Context Menu on how to initialize the playlist and individual elements from the context menu. |
 | Refreshes the data in use by the pages. |


Playlist Keyboard and Mouse Shortcuts
Function | Key | Mouse |
|---|---|---|
Move one or more secondary events to another primary event (up or down). | Combine mouse-drag with CTRL to prevent the playlist from auto-scrolling while dragging. | Drag and drop. |
Move selected entries to previous group in the playlist | ALT + UP ARROW | |
Move selected entries to next group in the playlist | ALT + DOWN ARROW | |
Collapse the group | LEFT ARROW | Double-click left mouse button |
Expand the group | RIGHT ARROW | Double-click left mouse button |
Expand all groups | CTRL + Numpad + | |
Collapse all groups | CTRL + Numpad - | |
Select all events | CTRL + A | |
Open search | CTRL + F | |
Select individual events | CTRL | Left mouse button |
Remove the selected event(s) | DELETE | |
Make an event’s Description field editable | F2 | Double-click left mouse button on the Description field |
Move the focus to the top of the playlist | HOME | |
Move the focus to the end of the playlist | END | |
Move the focus one section down | PAGE DOWN | |
Move the focus one section up | PAGE UP | |
Select events (up or down) | SHIFT | Left mouse button |
Display the context menu | Right mouse button |
Playlist Columns
When the right pane displays the playlist, all events along with pages and actions scheduled together are displayed.
To edit the playlist columns you must check the Edit Events check-box in your mapping table (see Table Columns) for each column.
Right pane showing playlist
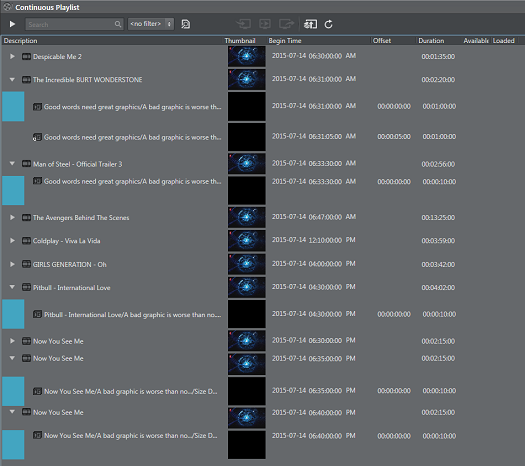
The layout and visibility of the playlist columns can be customized by drag-and-drop and by right-clicking one of the columns to select or de-select them. Secondary events that have been edited will have a color indicator in the left side of the edited row.
Note: If there are any errors found in the playlist, the primary element(s) causing the error will be shown in red. Hover the mouse over the red no-entry icon of the error element(s) for more information.
The default columns available are:
- Available: Shows if a video clip is available to your playout device.
- Begin Time: Shows the element’s begin time (see also Duration and Offset, and External Data).
- Channel: Shows the name of the currently selected device channel for any given element in the playlist (see Configuring Device Channels).
- Description: Shows a description of the element. An arrow-head next to a description indicates other elements are group together with the event. This may be a primary event with pages and/or actions scheduled for it as secondary events. Click the arrow-head to expand and show the secondary events.
- Duration: Shows the duration of the element (see also Begin Time and Offset).
- End Time: Shows the end time (Begin Time + Duration) for each element.
- Event ID: For playlist updates. The ID must be unique since it is the event's identifier. If it is not unique, you must construct a unique identifier with other properties toward the internal property
name. - Layer: Shows on which logical layer the element will be playout out (front, middle, or back). The middle layer is the default layer for Pages. The back layer is the default layer for full screen video clips.
- Loaded: Shows the loaded status of pages on the Viz Engine program device channel.
- Mark In: Shows the mark in point for a video clip set by the schedule.
- Mark Out: Shows the mark out point for a video clip set by the schedule.
- Media ID: Shows the ID of the element.
- Offset: Shows the offset of the secondary event relative to its primary event (see also Begin Time and Duration).
- Page Name: Shows the name of the page (secondary event).
- Template Description: Shows the template name as saved in Viz Artist.
- Template ID: Shows the template name as saved in Viz Artist.
- Thumbnail: Shows a snapshot/thumbnail of the template used in a Secondary Event.
Elements in the playlist that are inactivated will be show with a gray background as illustrated in the screenshot below.
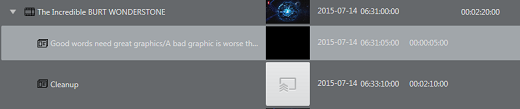
Note: Elements in the Multichannel playlist can be de-activated by external events or applications. For example, by Media Sequencer if the required resources are not available for the element.
Playlist Context Menu
Right-clicking the playlist opens the following context menu:
- Direct Take: Takes the playlist element directly to air. If the element is available and/or loaded it will play immediately. If not, the element will be taken on air as soon as it is.
- Continue: Continues the animation of the graphics if the graphics has a continue point.
- Out: Takes the element off air (i.e. hard cut).
- External Preview: Previews the element on your configured preview channel (see section Configuring Device Channels and Configuring Playout Devices).
- Enable or Disable Element: Only for secondary events. Allows you to either enable or disable a secondary element.
- Re-try creating page from this element: This menu item will only shown for elements with errors. An example error condition that could trigger this is: A request to create a page is pushed via the Integrations Hub, but the page is not found in the Page Pool at creation time. A stub-version containing meta-information will be created. If the requested page is later created in the Page Pool you can use this menu item on the element and store the page-relevant data under the element.
- Initialize (see section Playlist Toolbar).
- Playlist: Initializes the entire playlist.
- Element: Initializes the selected playlist element.
- Refresh Data: Request a refresh of automatic page content or primary event Viz One metadata, as shown in the screenshot below:
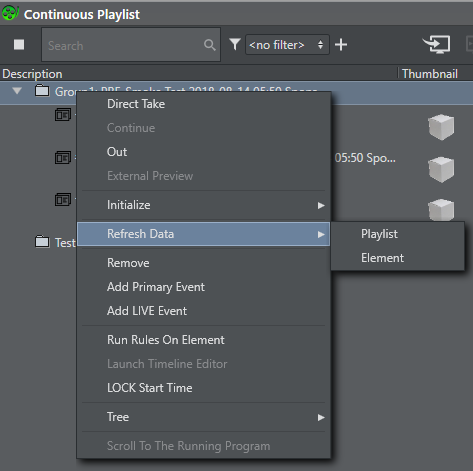
- Playlist: Clicking here iterates through the entire playlist and update all elements.
- Element: Clicking here updates page data or Viz One metadata for the selected element of the playlist only.
- Remove: Removes an element from the playlist. This action cannot be undone.
- Add Primary Event: Adds a primary event to the playlist.
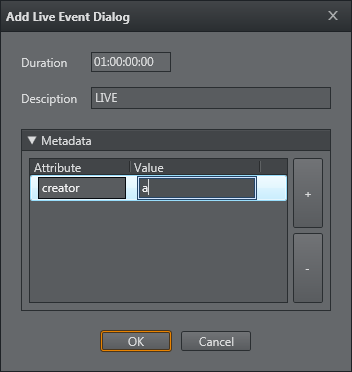
- Add Live Event: Adds a live event.
- Run Rules On Element: enabled for group and video primary events only. When selected, defined Rules will be run for the selected primary element only.
- Launch Timeline Editor: Launches the Timeline Editor, see Working with Video Clips.
- LOCK Start Time: Lock the event. Note that you can modify live or locked events in the playlist column.
- Tree:
- Select All: Selects all events.
- Select Inverse: Inverts your current selection, selecting all other elements.
- Select None: Cancels all selections.
- Expand All: Expands all primary events to show secondary events.
- Collapse All: Collapses all primary events to hide secondary events.
- Hide Empty Groups: Hides all empty groups.
- Wrap Text: Wraps the text according to column width.
- Font...: Allows you to set your own system font for the playlist.
- Scroll To The Running Program: Scrolls the playlist view to show the current running primary element at the top.
Playlist Filters
The Playlist allows you to add filters to quickly sort the list of events.
Add a Playlist Filter
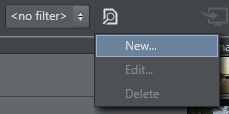
- Click the funnel icon, and click New.... This opens the Edit filter window.
- Enter a Filter name.
- Select whether the filter should apply if:
- All conditions match, or
- One of the conditions matches, or
- None of the conditions match.
- Select whether or not to Filter on Group.
- Continue to define your filter by adding one or multiple conditions. The list of events is filtered as you define your conditions, allowing you to verify that the filter is configured correctly.
Manage a Playlist Filter
- Select your filter
- Click the funnel icon, and from the menu click Edit... or Delete.