
Viz World User Guide
Version 17.0 | Published March 11, 2019 ©
Classic Map Editor

The WME window includes the map area, navigation and map editing area, map details area and the map tool bar. The user can select (zoom and pan) a region on the map, or use the search tool to find the requested location. The user can add information to be displayed over the map by selecting objects from the database or by manually marking a place on the map. The added objects are displayed in the Map Details area.
This section contains information on the following topics:
Map Area
The map area displays the current map and enables the user to modify the map interactively, according to the selected tool in the buttons toolbar and by using the integrated Zoom Options.
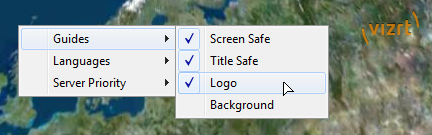
Context Menu
-
Guides: Allows you to display default guides (e.g. safe and title area) or custom guides and/or images (e.g. logo and background). For more information, see how To add custom guides.
-
Languages: Defines the language setting for labels. See the Server Configuration tool’s Display section and how To create a new language file.
-
Server Priority: Sets the connection priority given by the Viz World Server. See the Server Launcher Configuration section and the Enable Priority Login option. If you are working on scene design using Viz Artist, Viz Artist also needs to be configured (separately). See Viz Artist’s Maps Configuration section.
To add custom guides
With custom guides you have three options; two for placing an image as a background or logo and one for placing guides such as title and safe area boxes.
-
On the Viz World Server machine locate and open the CustomGuides.txt file under
-
32 bit: C:\ProgramData\Curious Software\Curious World Maps\Settings
-
64 bit: C:\ProgramData\vizrt\Viz World\Settings
-
-
Enter the following to show an image (e.g. logo) on top of the map:
-
Syntax: Type "Title" Ratio Width(%) Height(%) "Filename" Image X(%) Image Y(%) Opacity(%)
-
Example: Image "Logo" 1.333 80 80 "C:\logo.png" 0 0 75
-
This will add an image on top of the map, the image will be applied with 75% opacity (alpha is supported).
-
-
Enter the following to show a background image on top of the map:
-
Example: Image "Background" -1 90 90 "C:\background.png" 5 5 25
-
This will stretch background.png to fit the current aspect ratio (-1) with 5% on each side as margin at 25% opacity.
-
-
Enter the following to add a custom guide to the map:
-
Syntax: "Title" Ratio Width(%) Height(%)
-
Example: "4:3 Title Safe" 1.333 80 80
-
Valid width and height values have to be between 50 and 100. Set ratio (width divided by height), or -1 for current aspect ratio. You can define up to 5 custom guides.
-
Zoom Options
In the upper left corner of the Map Area there are two rectangular blue shaped buttons that can be used to zoom in and out of the map. In addition it is also possible to use the mouse (left button) and/or in combination with the keyboard.
The zoom options, besides menus and buttons, are:
-
Drag and draw a rectangle to zoom in to fit.
-
Click the left mouse button to zoom in.
-
Hold down SHIFT to zoom out.
-
Hold down CTRL to zoom in in smaller steps.
-
Hold down CTRL and ALT to zoom out in smaller steps.
Navigation and Map Editing Area
The navigation area enables the user to locate places by searching the database or selecting a place from the explorer list. When a place is found (or selected) the user can fit the map to the requested area, add information to the map, highlight the region and modify the map.
Using the Results
After conducting a search or using the explorer, the results will be displayed as a list. When an entry is selected, the buttons on the right side of the list will become enabled:
-
 Add to map: Adds the selected entry to the map. The selected entry will be added to the map graphically as defined in the selected map style. A map style defines map symbols, fonts, icons, colors, and so on. For map styles see also Map Tool Bar and the Map Style drop-down menu.
 -
 Center map: Pans the map to center the selected entry (keeping the current map scale size).
 -
 Fit to fill: Centers the map and scales the map to fill the map area.
 -
 Show details: Opens the browsing tool, which displays the context information for the selected detail. The context information includes the regions containing the detail (that is country, state and county) and the capital of that country.
Search Tab
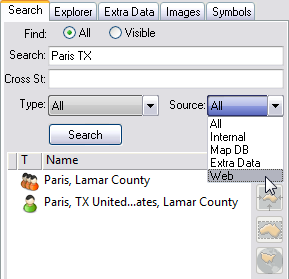
The search tab is used for searching the database for a place, using a string or sub string typed in the name text box. The search results can be filtered using the radio buttons and the drop-down list.
Searching is instant (after the first three characters) and optimized according to relevance; hence, if you search for Paris your result will show all places named Paris, but if you search Paris TX you will get Paris in Texas, USA.
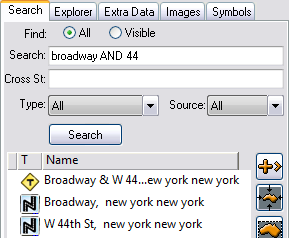
If you have street data (see Extra Data Tab) you can also search for crossroads using AND or & (e.g. Broadway AND 44th).
Search Parameters
-
Find All: When selected it displays all matching entries in the database.
-
Find Visible: When selected it only displays matching entries visible in the current map.
-
Addr and Cross st.: Enables the user to search for specific addresses.
-
Type: Limits the result list according to the selected Type. For example region, capitals, tourist attraction, and so on.
-
Source: Searches a range of sources.
-
All: Searches all sources.
-
Internal: Searches the map database and extra data.
-
Map DB: Searches the Viz World database.
-
Extra Data: Searches all extra data packages bought in addition to the standard installation (see Map DB).
-
Web: Searches Yahoo for online point data.
Note: Searching for addresses requires licensed street data installed on the server.
-
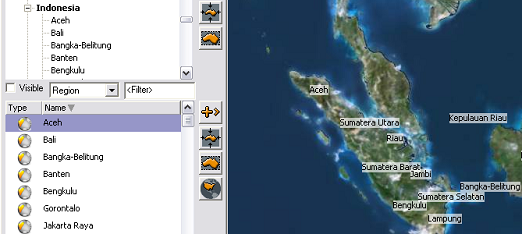
Explorer Tab
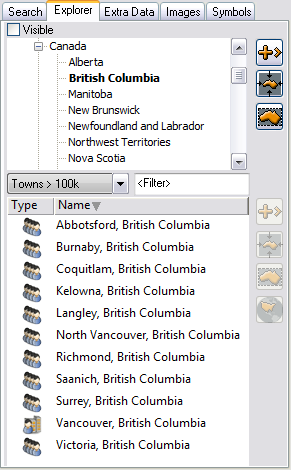
The explorer tab is used for selecting a location from a list of places derived from the server’s database. The list is displayed in a tree format showing countries, regions, cities, and so on.
Explorer Parameters (list filter)
-
Visible: Only displays location entries visible in the current map.
-
Type: Limits the search result list to the selected type like region, capitals, tourist attraction, and so on, when one of the entries in the list of available types are selected.
-
Filter: Filters the search result further.
Note: To find New York, type N, then type E, etc. with every character typed in the string filter the list will be smaller.
Extra Data Tab
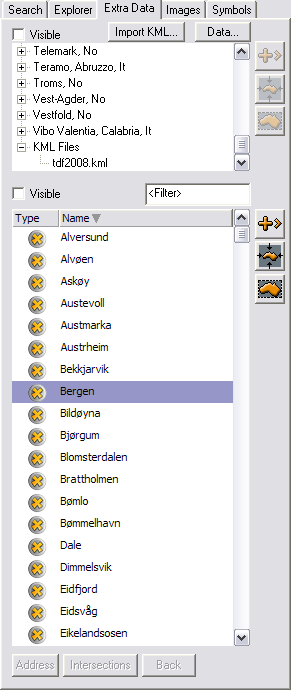
The Extra Data tab is used for selecting a street from the streets database on the server, and Keyhole Markup Language (KML) files.
Note: Streets data requires additional license features and the installation of street data on the server.
Streets
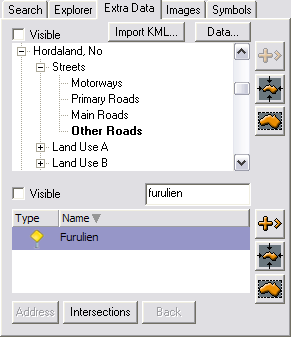
Streets data is available from the Streets node, and are sorted by Motorways, Primary Roads, Main Roads and Other Roads. Use the Filter search to search for streets.
Import KML
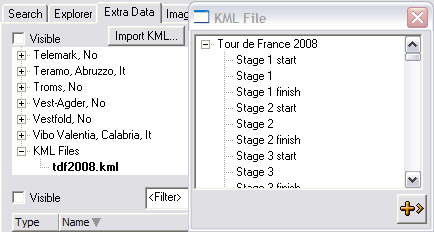
Keyhole Markup Language (KML) files can be imported and added to the map. The KML data will be accessible from the Extra Data tab as with street data. By clicking the KML Files node, all the imported KML files will appear as sub nodes. Click one of the imported KML files to open the KML file window the respective file will be file.
KML files currently must be manually imported into the server. Files are placed in the following location:
-
32 bit: C:\ProgramData\Curious Software\Curious World Maps\KML
-
64 bit: C:\ProgramData\vizrt\Viz World\KML
Symbols Tab
Symbols are added using Viz World Classic, and can be imported using the Configuration tool or Viz World Classic.
To add symbols
-
Start Viz World Classic, preferably on the maps server.
-
Create or open a map project.
-
From the Tools menu, select Symbols.
-
In the Symbols dialog box, click the + symbol (bottom) to search and select for a symbol.
-
Close Viz World Classic.
-
Restart the Viz World Server to load the new images.
Note: Images should reside on the map server or on a shared drive.
Map Tool Bar

The map tool bar includes a row of buttons controlling the map interactive mode. The map area enables an interactive map selection and manipulation and the map tool bar is used for selecting the map interactive behavior.
Map Tool Options
-
Available Map Stylesheet: Displays a list of available map styles of the selected template. Select a map style to apply the style’s design to the displayed map.
-
View Presets: Displays a set of view presets. Available options are: The World, United States, N America, S America, Americas, Africa, Asia, Middle East, S Asia, Europe and United Kingdom.
-
 Open New Template: Loads one of the defined templates installed on the server creating a blank map with the template’s styles and settings. When pressing this button a confirmation window will open. When confirmed, the template window will open. Select one of the projects in the list and click OK. A new map will appear in the map area using the new template’s default styles and settings.
 -
 Save Favorite: Save map as a favorite.
 Note: User favorites will not be synchronized across servers when working with server allocator. When working with multiple servers, synchronizing user favorites can be done as an automated process of replicating the relevant folders. User favorites are stored by default under C:\ProgramData\Vizrt\Viz World\Users\Default\Favorites.
-
 Undo button: Cancels the last change on the map.
 -
 Redo button: Cancels the last canceled change on the map.
 -
Bird’s Eye: Displays the available imagery Bird’s Eye imagery from the Bing Maps Platform. When clicking the button, the imagery for the area of the current map will be displayed enabling the user to select an image for the map.
-
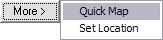
Quick Map: Opens the Quick Map location browser that enables the user To create a map using the Quick Map location browser.
-
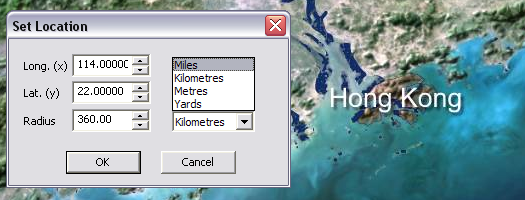
Set Location: Opens the Set Location dialog which enables the user To set the map location using longitude, latitude and map size values (radius around the defined point).
-
 Region Zoom: Enables the user to click and drag the mouse on the map to create a rectangle surrounding an area on the map (rubber band).
 -
The rectangle displays two icons; a cancel icon in the upper right corner and accept icon in the lower left.
-
The rectangle keeps the aspect ratio set for the map unlike regular zoom (see below).
-
Region zoom can be adjusted before accepting the area selection.
-
-
 Zoom: Zooms into the map on every click on a point in the map centering the clicked point in the Map Area. Another option is to drag and create a selection area. When the mouse button is released, the selected area will become the selected map. Selecting an area using the zoom option does not maintain the aspect ratio.
 Note: Both Region Zoom and Zoom allows for area selection in the Map Area; however, Region Zoom will maintain aspect ratio and allow the user to cancel the operation after the selection was made.
-
 Pan: Enables the user to click and drag on the map to move the map in the direction of the drag.
 -
 Pick Feature: Shows a group of available places from the database as “phantom labels”. This feature enables the user To pick a label and add it to the map. The labels will appear over the map only when an entry is selected in the explorer tab or in the search area.
 -
 Browse Map: When clicked any click on the Map Area will update the browse window with context information for the clicked position. The context information includes regions containing the position (for example country, state and county) and the capital of the country.
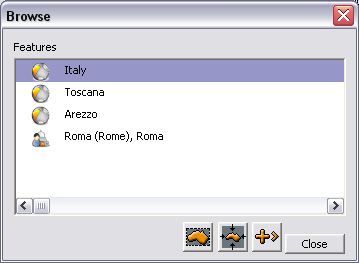
-
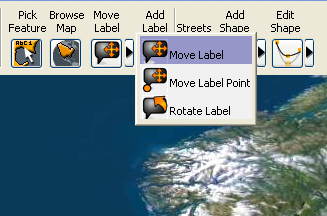
 Move Label: Enables the user To move a label in the Map Area. Map Label enables the user to move the tip and the caption of user-created labels or to rotate them. In other labels only the caption can be moved and rotated.
 Note: Rotation of labels in WME will not effect label objects generated by Viz (3D labels). The rotation is noticed only when using labels as part of the map texture.
-
 Add Label: Adds a label at the click point, enabling the user to enter and select a label text and label icon type.
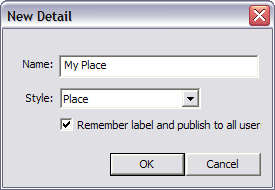
-
Remember label and publish to all users: When this option is checked, the new label will be added to the database. Whenever the place is selected all the customized labels will be available for selection by the user. When the option is unchecked, the modified label will be used only by the current map.
-
 Streets: Enables the user to select and label streets on the map. Street data must be loaded for this feature to work (see Extra Data Tab).
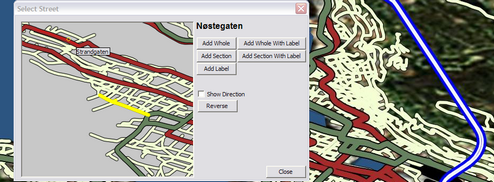
-
Add Shape: Adds shapes to the map. Select between points (straight) and bezier (curved). Selecting the Add Shape button also opens a small toolbox for selecting shape designs.

Available options are:
-
Area: Fills the drawn shape, and will also close the line (see Closed Line).
-
Closed Line: Allows the user to close the shape without setting the final point (e.g. 2 points will draw a third closing the line with the first point).
-
Open Line: Allows the user to draw a line that is not closed.
-
Delete Last: Deletes the last drawn line.
-
Cancel: Cancels the draw operation.
-
-
Edit Shape: Allows the user to edit the shapes and streets added to the map. Streets (roads) can be offset, while shapes can be adjusted using the Point toolbox that appears when the Edit Shape button is selected.

Note: Shapes and streets can be edited further using the maps plugins (e.g. 3D Line and 3D Line Manager).
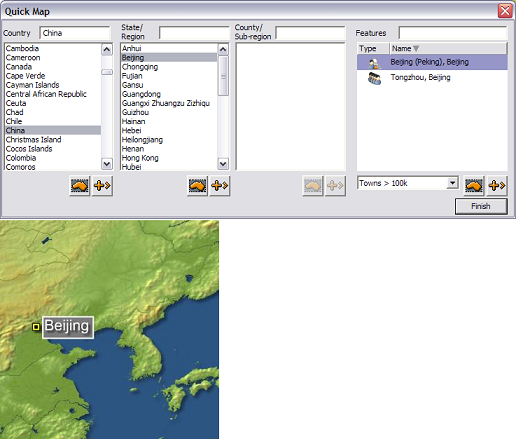
To create a map using the Quick Map location browser
-
Click the More button’s Quick Map option in the WME.
-
Select or search for a country in the Country list.
-
The map area will fit to the selected country and the State/Region list will show a list of available regions of the selected country.
-
When a country is selected in the list, the Add to map and Mark Area buttons will be enabled.
-
-
Select an entry from the list, the County/sub region list will be filled.
-
Click Finish to close the location browser and create the map.
Tip: Clicking the Search button switches the Quick Map tool to the search tool mode.
To set the map location
-
Click the Set Location button in the WME to open the Set Location dialog box.
-
Enter the longitude, latitude, and map size radius in miles, kilometers, meters or yards.
-
Click OK to calculate and display the map in the Map Area.
To pick a label and add it to the map
-
Perform a search and select a location.
-
Click the Pick Feature button to display all the phantom labels for the selected area.
-
Click a label to add it to the map.
To move a label
-
Click the drop-down button to open a list of options.
-
Select one of the options and then select a label on the map and move the label around in the graphic display.
Map Details Area
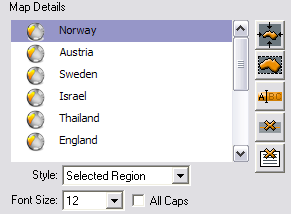
The Map Details area displays a list of all the added locations over the map. The user can modify the map, by selecting one of the added places and the control buttons on the right side of the map details area.
Map Details parameters
-
Style: Sets or modifies the graphic display representing the selected place on the map. The style selection will affect the highlighting color used to mark the selected place, the label, and so on.
-
Font Size: Sets the font size used for the label in the graphic display. Font size is only relevant for the display in the editor and for text labels that are exported as part of the map texture; hence, it will not affect the size of labels rendered by Viz.
-
All Caps: Uses only capital letters in the graphic display when showing the selected place’s label.
-
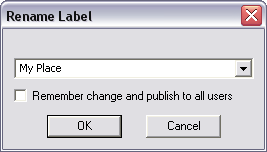
 Rename label button: Opens the Rename Label dialog box that will allow the user to customize and add other labels to the database by entering a new label for the selected place or by selecting an existing label from the list of labels or modifying an existing label.
 -
Remember change and publish to all users: When this option is checked, the renamed label will be added to the database. Whenever the place is selected, all the customized labels will be available for selection by the user. When the option is unchecked, the modified label will be used only by the current map.
Note: The label will be used in the graphic display and in the map details area.
-
-
 Delete place from map: Removes the selected entry from the map (and from the map details list).
 -
 Delete all places from map: Removes all added places from the map (and from the map details list).