
Viz World User Guide
Version 17.0 | Published March 11, 2019 ©
Tools
This section contains information on the following topics:
Map Editor Toolbar
The Map Editor has the following toolbars:
Horizontal Toolbar

The horizontal toolbar contains the following options:
-
 Save Favorites: Save current project as a favorite project. Unlike projects which only contain the base map styling, a Favorite is a project which also has data saved as part of it, such as selected countries, loaded streets, and labels.
 Note: User favorites will not be synchronized across servers when working with server allocator. When working with multiple servers, synchronizing user favorites can be done as an automated process of replicating the relevant folders. User favorites are stored by default under C:\Program Files\Vizrt\Viz World\Users\Default\Favorites.
-
 Open Favorite: Open a favorite project.
 -
 Open Project: Open existing map template files.
 -
 Undo: Undo last change
 -
 Redo: Redo last change
 -
 Copy Map to Clipboard:
 -
Click the icon to copy the current map view, and its details, to a clipboard that can be used later on when reopening World Map Editor.
-
Select a previously copied map from the dropdown. The clipboard is a local list, for the currently active directory.
-
Delete an item from the clipboard list by right clicking an item and selecting Delete from the context menu.
-
-
Search: Search the map.
-
Select stylesheet: Select one of the template’s available stylesheets.
If the stylesheet uses either Digital Globe or Microsoft Bing, an additional dropdown will allow you to select the profile of imagery to use from the provider. The different Profiles provide a different imagery set for the same location.
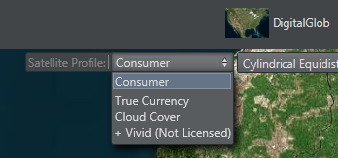
Note:+Vivid provides a set of seamless tiles of imagery for every level, however some images may not be the most recent imagery. The +Vivid option on Digital Globe is a paid subscription, contact your local Vizrt Sales representative if you require a license.
-
 Notifications: Displays notifications of errors.
 -
 Settings: Change the Settings (Viz World Server, Language, Map Legend, Safe Guide)
 -
 Information: Displays version information about the Viz World Client and Server.
Vertical Toolbar
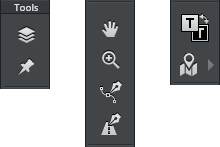
The vertical toolbar contains the following options:
-
 Layers: Enables you to search for and filter features based on the current map Layers in view.
 -
 Details: Shows the Details for all selected features. Right-clicking the button will open a context menu that allows you to fit to, center to or clear all details.
 -
 Pan: Enables the user to click and drag on the map to move the map in the direction of the drag.
 -
 Zoom: Zooms the map according to the area selected. To select an area, click and drag to draw a rectangle.
 -
 Shapes tool: Opens the Shapes Tool. Right-clicking the button will open a context menu that allows you to select the shape.
 -
 Streets tool: Opens the Streets Tool.
 -
 Inverse Colors: Toggle the color of the map legend and map features (countries, cities, etc.) See Settings for how to enable/disable the map legend.
 -
 Show/Hide Features on Map: Click the button to show or hide the selected map features. Click the arrow to select which map features to show. See Show or Hide Map Features.
Quick Map Toolbar

Use this to access the Quick Map features.
Locator and Preview Tabs
Use this to access the Locator and Preview features.
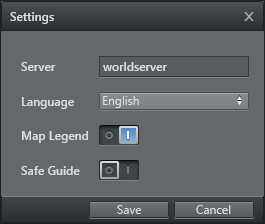
Settings
-
Server: Set the Viz World Server hostname. If not specified, the Map Editor will connect to localhost.
-
Language: Select from the available map languages. See Map Name Editor for information on how to configure the languages.
-
Map Legend: Enable or disable the map legend.
-
Safe Guide: Enable or disable a safety area around the map (e.g. for text safety)
Search
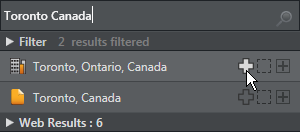
The search option allows you to search for, and add notable locations to the map. The map can then be fitted, or centered around these locations.
From the results list, each item has the options:
-
 : Add/remove the selected location to/from the map
 -
 : Fit the map to the selected location
 -
 : Center current map view to the selected location
All locations that have been added to the map can also be edited from the Details view.
Layers
Places
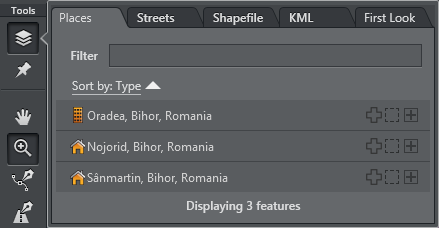
Enables you to search for and filter features based on the current map layer in view. You can also sort based on Country, Name, and Type.
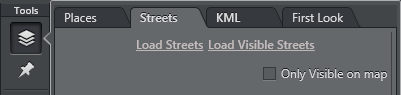
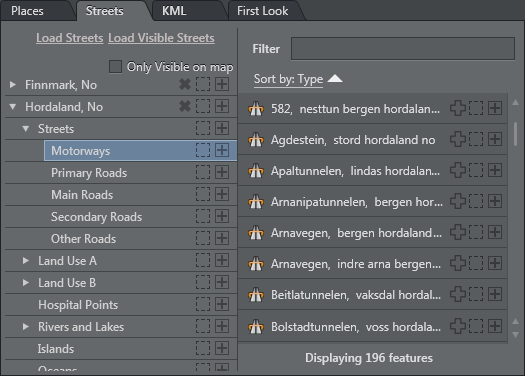
Streets
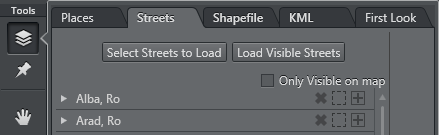
This tab allows users to load street data by clicking Select Streets to Load, and using the Extra Data Manager, as well as add items to the map using the Extra Data Browser.
The roads in the visible map can be loaded into the list by clicking Load Visible Streets.
Shapefile
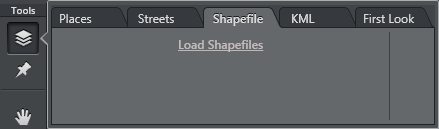
This tab is to allow users to load Extra data such as Shape files.
KML
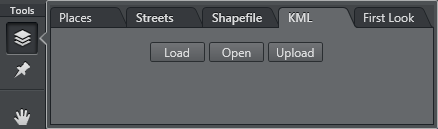
The KML Manager lets you load Keyhole Markup Language (KML) files which can then be added to the map. The KML file can be uploaded from the Viz World Server or opened from a local file.
-
Load:Load a file from the Viz World Server. Clicking the Load button, opens the KML Browser and lists all the available KML files. It works the same way as the Extra Data Browser.
-
Open:Open a file from the file system, but do not copy it to the Viz World Server
-
Upload File: Open a file from the file system and copy to the Viz World Server
Note: If the KML file includes a camera position, then the map will zoom to that position, otherwise the map will focus on all of the data found in the file.
KML files can also be manually imported into the server, and must be placed in the following folders:
-
32 bit:
-
C:\ProgramData\Curious Software\Curious World Maps\KML
-
C:\ProgramData\Curious Software\Curious World Maps\Users\Default\KML
-
-
64 bit:
-
C:\ProgramData\vizrt\Viz World\KML
-
C:\ProgramData\vizrt\Viz World\Users\Default\KML
Any files uploaded from the client will be stored in this same location.
-
First Look
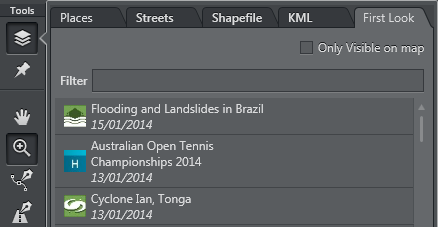
The events tab is a feed of events from Digital Globe’s FirstLook service.
FirstLook provides rapid imagery of major global events, such as:
-
Natural disasters: Earthquakes, fires, tornados, hurricanes
-
Man-made crisis: Terrorism, large accidents
-
Political instability: Riots, civil war
-
Human interest: World Cup, Olympics, F1, NFL
It requires a yearly license to use the imagery.
Extra Data Manager
The Extra Data Manager is available from the Layers Tool and allows users to manage extra data that is stored on the Viz World Server.
Note: In order to work with Extra Data, the Viz World Server must have data loaded.
Note: Streets data requires additional license features and the installation of street data on the server.
Using Extra Data
-
In the Layers tool, click on the Streets tab, to open the Extra Data Browser. (this will be empty if no data has been selected).
-
Click on Load Streets to open the Extra Data Manger.
-
Navigate to the required data and use the Add, Fit and Centre buttons to select the data and/or move the map.
Close the Extra Data Manager when finished. -
Open the Extra Data Browser again to see all the loaded data and add features which are related to the loaded data.
-
Data can be deselected either from within the Extra Data Manager or the Extra Data Browser, using the ‘X’ button.
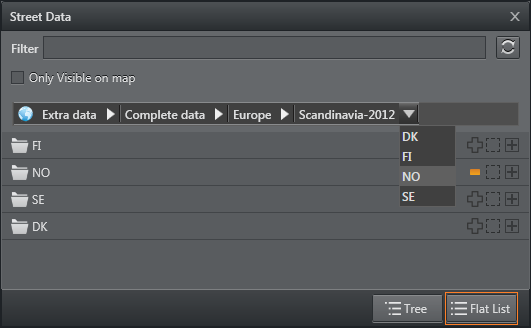
Extra Data Manager
In the Extra Data Manager, the view can be switched between Flat List view and Tree view, using the buttons at the bottom of the window.
The Flat List view presents the data in a flat structure with a navigation bar at the top. To navigate in the data, double-click an item in the list to open it, or use the drop-down menus. In this case, the Filter only filters the content of the current directory.
The Tree view presents the data in a hierarchical structure. To navigate in the data, double-click an item in the list. The Filter filters the whole tree and lets you navigate within the results using Enter and Shift+Enter keys or the ‘^’ and ‘v’ buttons.

Extra Data Browser
The Extra Data Browser displays all the loaded data and can be used to add features which are related to the loaded data.
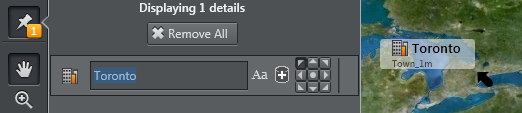
Details
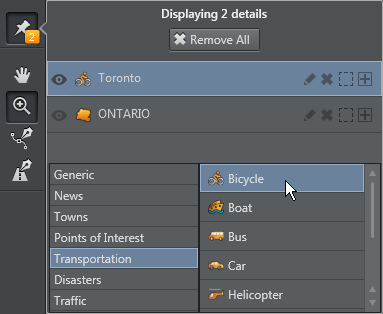
The Details view allows you to edit the name and appearance of details. Changes can be made to multiple details by selecting them together. The details in the list can be reordered by dragging them, or easily hidden from the map.
Custom styles and style families can be created in the Map Designer using the Style Editor. These styles will then be available in the Editor.
The icon used for each detail can be changed by selecting the detail in the list and browsing for a new icon in the list of icons.
Details can be sorted alphabetically using the  buttons.
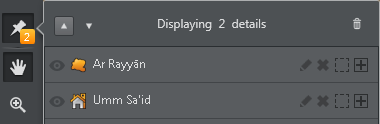
Show/hide each detail, without removing it from the list, by clicking the ![]() icon. When a detail is hidden, it is not rendered in the scene.
icon. When a detail is hidden, it is not rendered in the scene.
Clicking the Edit button next to each item in the Details list allows editing the following features:
-
All Caps: Caps on or off
-
Add to Database: New name alternatives (e.g. language specific) can be saved to the database
-
Label Location: Adjust the location of the detail’s label.
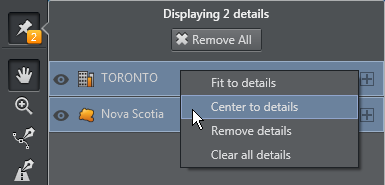
The context menu provides the following options:
-
Fit to details: Fits the map according to the selected details
-
Center to details: Centers the current view according to the selected details
-
Remove details: Removes all selected details
-
Clear all details: Removes all details regardless of selection
Note: If the default style defined in the server is not available in the scene designs, then the first design which is available in that scene will be used.
Shapes Tool
The Shape Tool lets users draw shapes on the map.
Context Menu
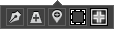
A right-click or a long left-click on the Shapes Tool icon will present a context menu with the following options:
-
Spline Shape: Draw segments of a smoothed, curved line. It can be closed or open. Double click to finish drawing.
-
Linear Shape: Draw straight-line segments. It can be closed or open. Double click to finish drawing.
-
Closed Shape: The shape drawn is closed, i.e. the first and last points drawn will be joined.
-
Fill Shape: The shape will be filled. Forces the shape to be closed.
-
Circle / Ellipse / Rectangle: Select a geometric shape. If none are selected, the tool will default to drawing a spline or linear shape.
Edit Mode
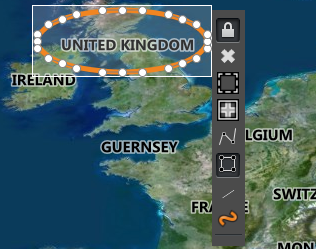
When the Shapes Tool icon is selected, clicking on an existing shape will present the Shapes toolbar:
-
Lock/unlock the handles (only relevant to spline shapes): Allows the shape to be modified more flexibly.
-
Remove the shape from the map.
-
Fit the map to shape.
-
Center the map on shape.
-
Convert shape to spline/linear (not relevant to geometric shapes).
-
Make shape closed/open (only relevant to lines).
-
Fill the shape with color.
-
Change the shape style (for example an ellipse can be a Region or a Country). Note that this may affect the appearance in Viz Artist scenes.
Shortcut keys
When a shape is in edit mode, the following shortcuts keys are available:
-
DELETE key deletes the shape.
-
* (asterisk) key centers the map on the shape.
At any time, pressing the D key will activate the Shape Tool. When the D key is released, the previously active tool will become active and the shape will be submitted to the Server.
To add a shape to the map
-
Click on the Shapes Tool icon to activate it.
-
Right-click on the Shapes Tool icon. A context menu will appear.
-
Select the kind of shape to draw, for example an ellipse.
-
Drag on the map to create a shape. When the mouse button is released, the shape is submitted to the Viz World Server.
To edit an existing shape
-
Click on the Shapes Tool icon to activate it.
-
Click on the shape you want to edit. A toolbar will appear next to the shape.
-
Use the Shape Tool to modify the shape.
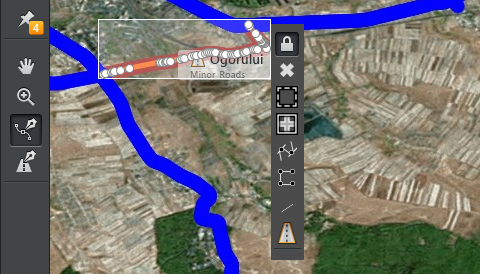
Streets Tool
![]()
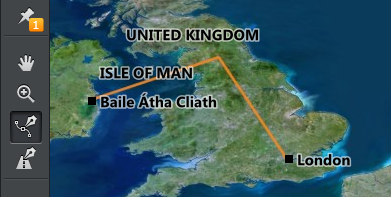
The Streets Tool can be used to add streets or segments of streets. It uses the data that has been added by the Extra Data Manager.
When the Streets Tool is activated, a red dot will appear when the mouse is hovered over a street. Clicking on the red dot brings up the Streets Tool menu bar.
The Streets Tool menu bar contains:
-
Add Segment: Allows the user to add segments of the street. Each click on the map adds a segment. Double-click to finish the operation and submit the shape to the Server.
-
Add Street: Add the selected street to the map.
-
Label Street: Add just the label without the line.
-
Fit the map to the street.
-
Center the map on the street.
Once a street is added to the map, the user can edit it using the Shapes Tool.
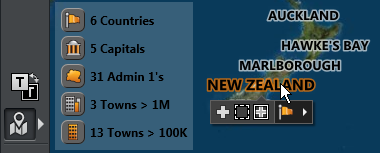
Show or Hide Map Features
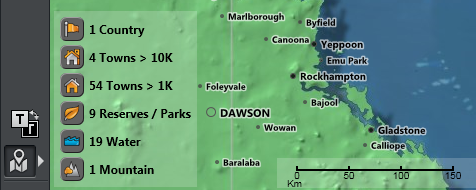
The Show/Hide Map Features button toggles the features on and off. If they are on, a summary of features is also displayed.

To configure which features will be displayed, click the arrow and select which map features to show.
To modify a feature, you can also hover over the feature on the map to display the tool bar.
Note: You can also show or hide individual details, using the Details tool.
Quick Map
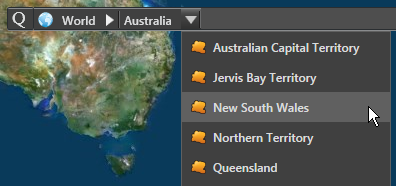
The Quick Map toolbar allows quick navigation to regions, countries and cities. It works together with the Locator tab to identify the location of the map segment which is currently displayed in the Map Editor window.
-
Q: Click on the Q icon to filter the drop-down lists and configure which features will be listed in them.
-
Globe: Provides quick access to regions of the world, for example, Asia, Middle East, Europe.
-
World drop-down: Select a country
-
Country drop-down: Select a State or City
-
Click on the drop-down headings (e.g. World or Australia) to zoom to the corresponding level (i.e. world or country).
-
Type in the text field to search for countries, regions or sub-regions.
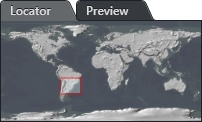
Locator and Preview
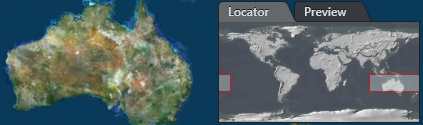
The Locator-Preview tabs display the following information:
Locator
-
Select an area and the map will zoom to that location
Preview
-
If the Map Editor was opened from Viz Artist, Viz Trio or Viz Pilot, the Preview tab will generate a snapshot of the Viz Scene. For Viz Pilot it will only work if a preview server is configured.
Note: The Preview Server URI must include the http prefix (e.g http://localhost:54000). In Viz Pilot 5.7.x and earlier, check the setting in VizPilot under Options > Preferences > Advanced > preview_server_uri. In Viz Pilot 6.0 or later, check the setting in the Data Server under Settings > VCP Parameters > preview_server_uri. For more information see the section ‘To give applications access to the Preview Server’ in the Viz Pilot User Guide.
Preset Editor
-
Right click on the Locator to display a list of predefined regions.
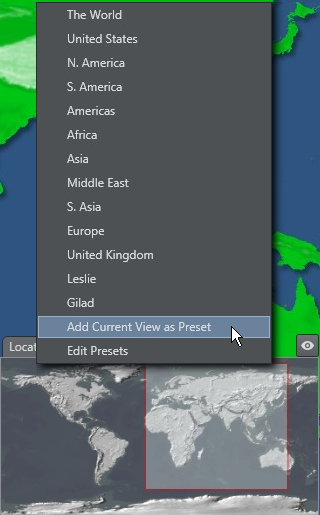
-
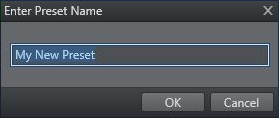
Add your own presets to this list by right-clicking and selecting Add Current View as Preset. Then enter a name for the preset.
-
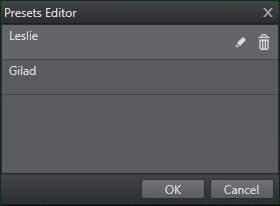
Edit your presets by right-clicking and selecting Edit Presets. In the window that appears, you can rename, reorder, delete, or duplicate the custom list.
Multihop Editor
The Multihop Editor allows users to control the number of hops on a template. For example, if a scene was designed with 2 hops, the user in Viz Trio would be able to add up to 30 hops.
Enable the Multihop Editor
The Multihop Editor is hidden by default, but can be enabled in the following ways:
-
If a scene contains a Control Multihop plugin, then when the World Map Editor is opened from Viz Trio or Viz Pilot, it will include the Multihop Editor.
-
When a scene in Viz Artist contains the Hops Manager plugin, then pressing the Multihop button will open the World Map Editor, including the Multihop Editor.
Using the Multihop Editor
Once enabled, the Multihop Editor appears on the right-hand side of the World Map Editor, and shows all the hops that are defined. The hops can be reordered by dragging them to the desired place in the list.

Multihop Editing Options
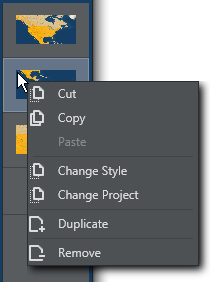
A context menu on the Multihop Editor displays the following options:
-
Cut, Copy, Paste, Duplicate or Remove items in the list.
-
Change Style: Select one or more hops and change their style. The change will ONLY apply to the selected hops.
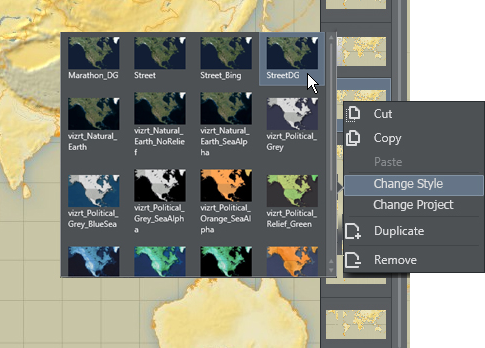
Note: To change the style of ALL hops, use the Select stylesheet button in the Horizontal Toolbar.
-
Change Project: Select one or more hops and select a new map template file for these hops. The change will ONLY apply to the selected hops.
Note: To change the project of ALL hops, use the Open Project button in the Horizontal Toolbar.