
Viz Engine Administrator Guide
Version 3.12 | Published October 17, 2019 ©
AJA Hardware
VizEngine with AJA Hardware supports up to two 3G-SDI inputs and fill/key output.
This section contains information on the following topics:
Overview and Connectors
AJA boards support current SD and HD SDI workflows with frame rates up to 50p/59.94p. Audio is supported as embedded signal in the SDI stream.
Configuration
IMPORTANT! For 1080p only 3G Level A is supported.
Audio Configuration
Embedded audio is supported, always with 16 channels in and out. However, mixer settings are active, and respected. Example: if the user requests only two-channel output, the remaining 14 channels are silent.
Video Configuration
The default configuration is:
|
Live Input 1 |
SDI 1 |
|
Live Input 2 |
SDI 2 |
|
Fill Output |
SDI 3 |
|
Key Output |
SDI 4 |
|
Genlock |
[REF IN] |
If Live Input 2 is inactive in the configuration, SDI 2 is enabled for preview output.
Configuration Utilities
Vizrt includes two configuration utilities from AJA:
-
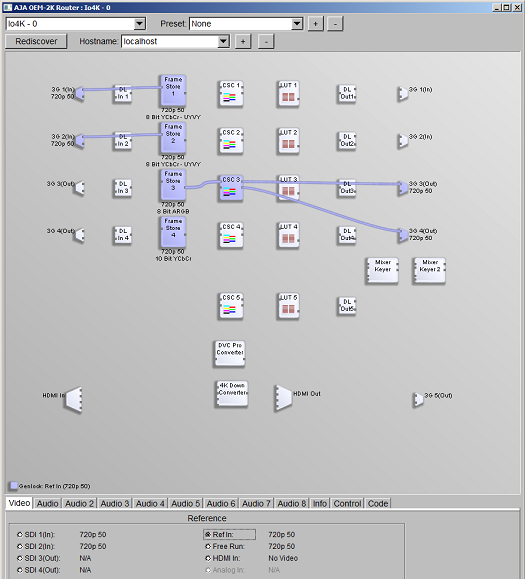
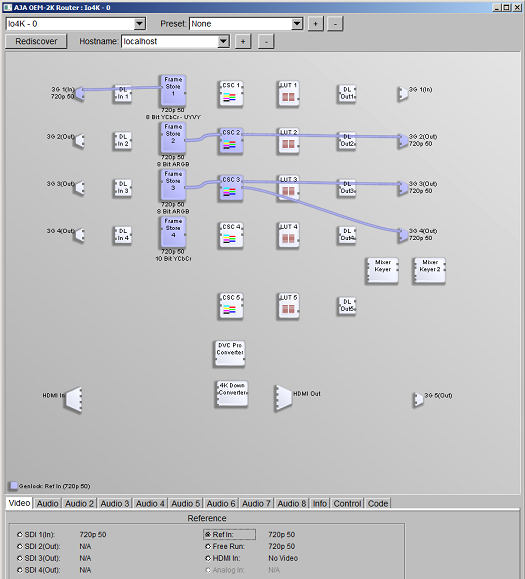
cables.exe This utility shows the current topology running: inputs, outputs, color space conversion, fill and key paths. Firmware and driver version information is also accessible. Screen-shots of cables.exe usage showing two typical topologies (A: two video inputs and B: one video and one preview) are shown below
Example A- topology using two video inputs:
Example B- One video input, one preview:
-
watcher.exe This utility shows register settings. You may also write out a status log file. The auto-circulate engine is also observable. This utility is mostly of value for support specialists.
Firmware Upgrade
Only do an upgrade of Io4K firmware if instructed to do so by Vizrt or AJA support. All files for firmware upgrade are provided in a separate directory, typically supplied as a zip-archive. To install the firmware:
-
Open a command window.
-
cd to the directory where the firmware upgrade files are located. Make sure no other programs are running that could interfere with the firmware upgrade.
-
Install the firmware, in this example named IO_XT_4K_13.bit, using the ntv2firmwareinstaller utility. Example: ntv2firmwareinstaller -f IO_XT_4K_13.bit
-
The window then pauses for a few minutes. When the firmware upgrade is complete, the command line program asks for a return key press to exit. Please be patient, the firmware upgrade can take three to six minutes or more, depending on hardware.
-
Power-cycle the Io4K and reboot the computer to make sure the upgraded firmware configuration is active.
See Also
-
Manufacturer’s documentation (external link at www.aja.com): AJA Io 4K