Viz Engine Administrator Guide
Version 3.12 | Published October 17, 2019 ©
Matrox X.RIO

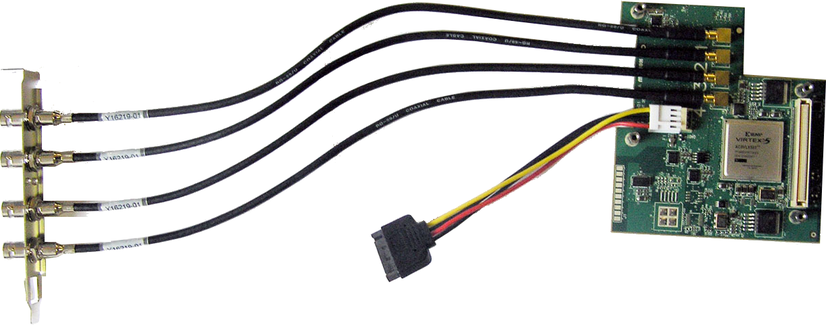
Matrox X.RIO is an expansion module for the Matrox X.mio2 board that provides four configurable I/Os. With the Matrox X.mio2 and X.RIO combined, Viz Engine supports up to eight video inputs. The use of eight inputs requires an upgrade of the X.mio2, which in most cases ships with two inputs and four outputs. Support for the Matrox X.RIO expansion module started with Viz Engine 3.5.
This section contains information on the following topics:
Cables and Connectors
As the X.RIO module expands the capabilities of the Matrox X.mio2-based systems providing four extra inputs you are able to have four key and four fill inputs and two key and two fill outputs.
Note: The extra connectors can only be used as four extra inputs, they cannot be used as outputs.
With an HP Z800 machine, Matrox X.mio2 and X.RIO, the following is possible: with SD, eight inputs are working as DVE or Texture, whereas with HD, six inputs are working as DVE (at approximately 65%) or Texture.
Note: The actual number of working inputs depend on the bandwidth of the system, resource usage, how many clips are played at the same time, and if they are played as DVE or Texture.
Breakout Cables and Connectors
All breakout cable assignments are handled by the X.mio2 board and its breakout box, see the Matrox X.mio Series section.
Video Cable Assignment
All video cable assignments are handled by the X.mio2 board, see the Matrox X.mio Series section.
Audio Cable Assignment
All audio cable assignments are handled by the X.mio2 board, see the Audio Cable Assignment.
Install and Configure the Matrox X.RIO
To Install the Matrox X.RIO Expansion Module
-
Connect the power cable to the X.RIO.
-
The slot panel has numbers from 1-4. Make sure to connect them carefully, as the mini-BNCs can break easily.
-
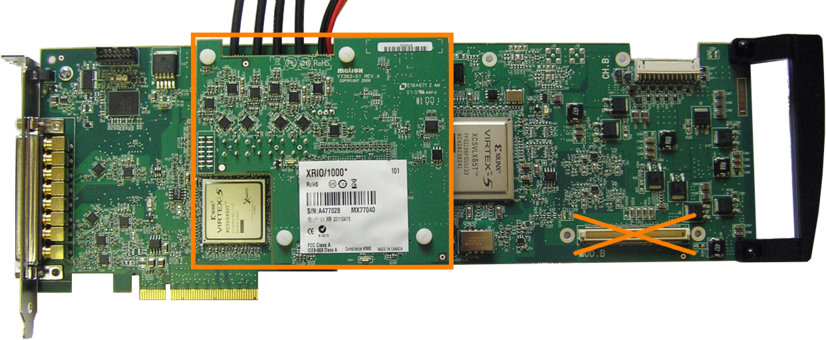
Mount the X.RIO on the X.mio2 board “Mod A” connector. The Mod B connector does not work.
-
Use the screws to fix the X.RIO expansion module.
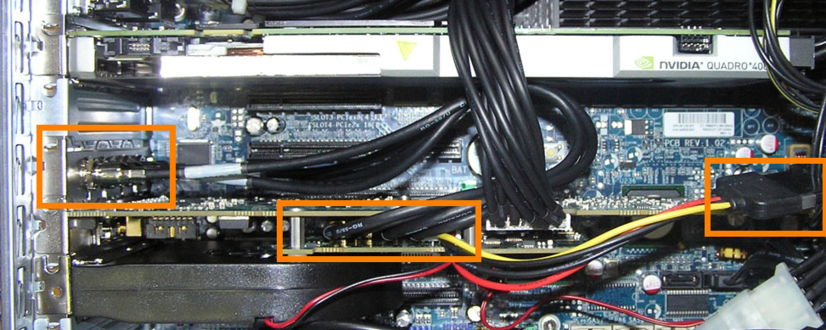
Tip: When installing an X.mio2 with X.RIO into a HP Z800, make sure that the mini-BNCs do not get disconnected during installation, as they are very hard to connect while the X.RIO board is mounted on the X.mio2.
-
Mount the slot panel with the 4 additional inputs in any free slot and connect the power for the X.RIO. Also, make sure the cables is not in touch with any fans.
To Configure the Matrox X.RIO Board
-
Install the Matrox driver.
-
Start Matrox X.Info.
-
Under the X.mio2 /24 Card tab select the Hardware option, to enable the X.RIO Configure button.
-
In the X.RIO Module Configuration dialog-box check that the configuration for next restart is set to four Inputs and zero Outputs.
-
Restart the computer.
-
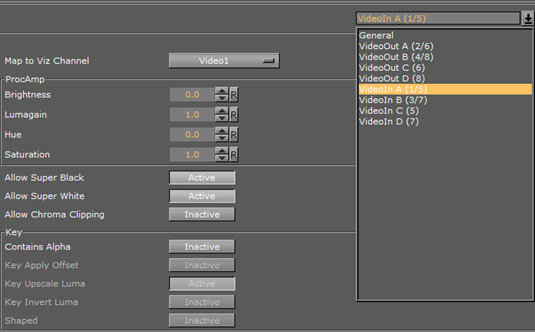
Start Viz Configuration, and go to the Matrox section. From the drop-down menu, the VideoIn parameters, for example E, F, G and H, can be configured. Note that the X.RIO inputs are mapped to Viz Engine’s channels 5-8 by default. This means that when an X.mio2/24 is in use, Viz Engine’s channels 3 and 4 are not in use.