
Viz Engine Administrator Guide
Version 3.12 | Published October 17, 2019 ©
Authentication
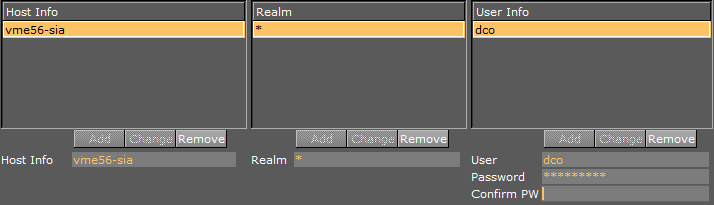
The Authentication panel is for the authentication of one or more Viz One systems on Viz Artist. Enter the details of each Viz One system to connect to. To save a new user, all three panels of the Authentication panel must be completed. If a Realm is not required, enter <empty> in the Realm panel. If only one or two panels are completed, the information is not saved.
-
Host Info: The host name of the Viz One server.
-
Realm: Determines if an entry should be used in an authentication process for a given URI.
-
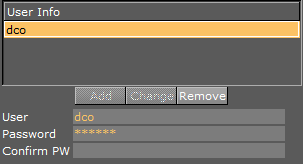
User Info: Name and password for each User, for the selected Host and Realm.
Authentication Properties
Host Info Properties
The host name of the Viz One server (see also Fsmon (File System Monitor)). The host info is in the form ‘host:port’, where the colon and port number are optional. An asterisk value, '*', shows that it is used against all hosts. The host info can be the Viz One host name or IP address.
Examples:
-
Host Info = myhost.mycompany.com:8080
-
Host Info = 10.0.1.2:8080
-
Host Info = *
-
A Host cannot be added without at least one Realm (or an empty Realm with <empty> entered) and one User defined.
-
A Host can have more than one Realm.
-
Add: Adds a host name.
-
Change: Changes a selected host name.
-
Remove: Removes a selected host name.
-
Host Info: Displays the name of the required Viz One host.
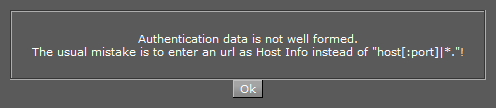
Note: Do not enter a URL as the Host Info name. The Host Info name format must be host[:port], for example: vizone.mycompany.com:8080.
Realm Properties
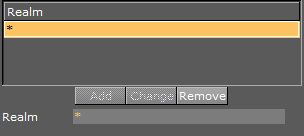
Determines if an entry should be used in an authentication process for a given URI.
Example: A single value of shows that it should be used against all realms, i.e., Realm = [a-zA-Z_0-9] or ‘ * ’
-
A Realm cannot be added to a Host without at least one User defined
-
A Realm can have more than one User.
-
Add: Adds a Realm.
-
Change: Changes a selected Realm.
-
Remove: Removes a selected Realm.
-
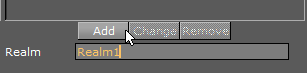
Realm: Displays the name of the required Realm.
User Info Properties
Name and password for each user, for the selected Host and Realm. Passwords are not mandatory.
-
Add: Adds a user.
-
Change: Changes a selected user.
-
Remove: Removes a selected user.
-
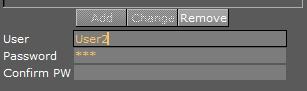
User: Enter the user name.
-
Password: Enter a password for the user, if required.
-
Confirm PW: Confirm the user password.
Authentication Panel Procedures
Do not enter a URL as the Host Info name. The Host Info name format must be host[:port]. For example: www.mycompany.com:8080. Only entries which consist of Host + Realm + User are saved to the configuration file. After the completion of the required procedures, make sure that you restart Viz Artist. Changes are not saved until Viz Artist has been restarted.
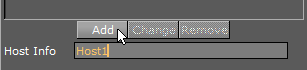
To Add a Viz One Host
To add a Viz One Host, a Realm and a User must also be defined.
-
Enter a Viz One Host name.
-
Click Add.
-
Enter a Realm name. If no Realm is required, enter <empty>.
-
Click Add.
-
Enter the new User name.
-
Enter and confirm the password, as required.
-
Click Add.
-
Click Save or Save as...

To Add a Realm
-
Click on a Viz One Host.
-
Enter a Realm name.
-
Click Add.

-
Enter a User name.
-
Enter and confirm the password, if required.
-
Click Add.
-
Click Save or Save as...

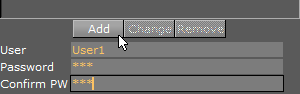
To Add a User
-
Select a Viz One Host.
-
Select a Realm.
-
Enter a User name.
-
Enter and confirm a User password, if required.
-
Click Add.
-
Click Save or Save as...
Note: The password of the currently highlighted User always shows in the Password box.
To Change a Host, Realm or User Name
-
Click in the name field for either the:
-
Host Info
-
Realm
-
User
-
-
Make a change to the name as required.
-
Click Change.
-
Click Save or Save as...
To Delete a Host, Realm or User Name
If a Host is removed, any defined Realms or Users for that Host are also removed. If a Realm is removed, all Users for that Realm are also removed. When the last User is deleted then the related realm is deleted as well.
-
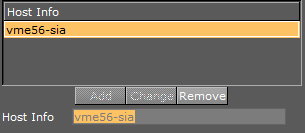
Make sure that the item to be deleted is highlighted (1).
-
Click Remove (2) for either the:
-
Host Info
-
Realm
-
User
-
-
Click Change.
-
Click Save or Save as...

See Also
-
Viz One Configuration panel