
Viz Multichannel
Version 4.0 | Published January 23, 2019 ©
Hosted Page Editor via ActiveX
Included with the Viz Multichannel package is the Hosted Page Editor, delivered as an ActiveX component. This component can be hosted in a custom web-page or 3rd party application.
Caution: As of v4.0 the Hosted Page Editor via ActiveX is DEPRECATED. This means no more features will be added to it and it may be removed from future releases.
See Also
Register the ActiveX
In the Viz Multichannel installation folder you will find a folder named AX containing the actual ActiveX component, its settings file and an HTML page for testing.
As the ActiveX component is not installed and registered during regular installation you need to register and configure it manually in order to create and test your own Page Editor.
To Register the ActiveX Component

-
Run Command
-
Change directory to Viz Multichannel’s AX folder (e.g. C:\Program Files (x86)\vizrt\Viz Multichannel\AX)
-
Enter regsvr32 VCPAxFiller.ocx and press Enter
-
This will register the ActiveX component.
To Register ActiveX Component Settings
-
Open the AX folder in the Viz Multichannel installation directory.
-
If Viz Engine and Media Sequencer are not running on your local host you must edit the registry file and set the correct host names.
-
-
Double-click the AX-HKEY_LOCAL_MACHINE.reg file.
-
This will set PreviewPort to 50008, PreviewHost to localhost, and MseHost to localhost, and in registry.
-
Open the ActiveX
Before you can open the ActiveX component and its features you need To Register the ActiveX Component. Once that is done you can continue testing the ActiveX.
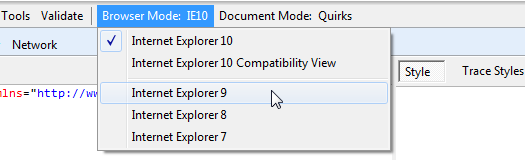
Note: The ActiveX component must run in browser mode: Internet Explorer 9.
To open the ActiveX component
-
Open the AX folder in the Viz Multichannel installation directory.
-
Open the VizrtActiveXTestPage.html file in Internet Explorer.
-
If Internet Explorer 10 is used, press F12 and set browser mode to Internet Explorer 9.
-
Allow Internet Explorer to run blocked content (i.e. ActiveX).
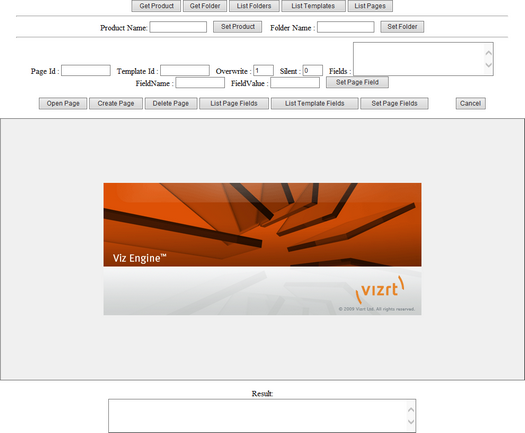
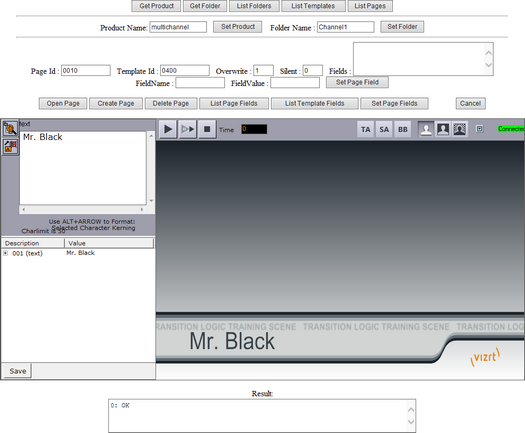
Product and Channel Settings
Before you can use the ActiveX to create, edit and delete pages based on already available templates and pages you need to define the product and channel the you will work with.
To Set the Product
-
Click the Get Product button.
-
This will display the configured product in the Result area (at the bottom of the page).
-
If trio is shown, enter multichannel in the Product Name field and click the Set Product button.
To Set a Channel
-
Click the Get Folder button, and the Result area will show the channel name currently in use.
-
If nothing is shown in the Result area then press the List Folders button, and the Result area will show a list of channel names stored on the Media Sequencer.
-
Enter the channel name in the Folder Name field and click the Set Folder button.
Note: Channel name is case sensitive.
-
Click the Get Folder button again.
Templates and Pages
To List Templates and Template Fields
-
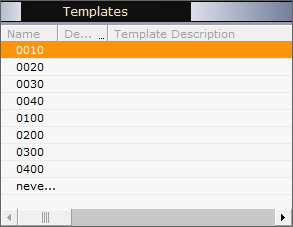
Click the List Templates button, and the Result area will show templates currently available.
<result><item>0400</item><item>0030</item><item>0200</item>...</result> -
Enter the item value (e.g. 0400) in the Template ID field and click the List Template Fields button, and the Result area will show the templates’ exposed fields.
<result><item name="001"description="text"type="richtext">Arial-Regular</item></result>
To List Available Pages and Page Fields
-
Click the List Pages button, and the Result area will show pages currently available.
<result><item>0011</item><item>0012</item>...</result> -
Enter the item value (e.g. 0011) in the Page ID field and click the List Page Fields button, and the Result area will show the pages’ filled content.
<result><item name="001"description="text"type="richtext">Mr. Black</item></result>
The Page Editor
To Create a Page
-
Enter a new item *(e.g. 0010) in the *Page Id field (see how To List Available Pages and Page Fields).
Note: Alternatively, enter a new Page Id when saving the new page.
-
Enter an existing item value in the Template Id field (see how To List Templates and Template Fields).
Note: Alternatively, select the Template Id from the Page Editor’s template list.
-
Click the Create Page button.
-
Edit the page and click the embedded page editor’s Save button (see Page Editor).
Similar to creating a page you may also edit or delete a page by providing an existing Page Id, and then click the corresponding Open Page or Delete Page button.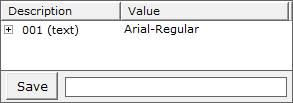
If you do not enter a new Page Id before creating a new page you may enter it before you save the page.
If you do not enter a Template Id before creating a new page the Page Editor will list all available templates. This also requires that no Page Id has been set before clicking the Create Page button.
To Edit a Single Page Field Without a Page Editor
-
Enter an existing item *(e.g. 0010) in the *Page Id field (see how To list available pages and page fields).
-
Click the List Page Fields button, and the Result area will show the pages’ existing content.
-
Enter the item name in the Field Name field.
-
Enter the new* item value* in the Field Value field.
-
Click the Set Page Field button.
-
Click the List Page Fields button, and the Result area will show the pages’ new content.
To Edit Multiple Page Fields Without a Page Editor
-
Enter XML to the Fields area in the following format:
<fields><item name="[field name]">[newvalue]</item><item name="[field name]">[newvalue]</item><item name="[field name]">[newvalue]</item>...</fields> -
Click the Set Page Fields button.
ActiveX API Error Messages
-
In case of errors in the ActiveX (AX) API, the following list shows the possible messages and error codes that a client can receive:
0: OK1: No Change Has Occurred During The function Call2: Unknown Product3: Unknown Folder4: Page Id Not Supplied5: Template Id Not Supplied6: Page Id Does Not Exists7: Page Id Already Exists8: Template Id Does Not Exists9: Error Opening Page, Ex Info: No templates found for page pagename9: Error Opening Page, Ex Info: Read canceled because scene does not exist: scenename9: Error Opening Page, Ex Info: Page 222 refers to /VizRundown/channels/1/sceneinfos/02_GFX\VizMultiChannel\MOVIE\06fullframe which was not found.10: Error Opening Template, Ex Info: No templates found for page pagename10: Error Opening Template, Ex Info: Page 06fullframe refers to /VizRundown/channels/1/sceneinfos/02_GFX\VizMultiChannel\MOVIE\06fullframe which was not found.11: Error Saving Page, Ex Info: A page id cannot contain the character '\q.12: Invalid Fields XML, Ex Info: invalid fields XML12: Invalid Fields XML, Ex Info: Invalid at the top level of the document.13: Field Does Not Exists, Ex Info: field 'fieldname' does not exists14: List Templates Error15: List Folders Error16: Context not Fully Set. Check Folder17: List Pages Error900: Last API Call Was Not Completed1000: Media Sequencer Engine Is Disconnected1100: Not Connected to Viz EnginePage already exists, can't overwriteUnable to save. please enter a page idUnable to open page-
Following error messages are present but not displayed in client:
11: Error Saving PageUnable to save. Page not setError Opening Page, Ex Info: can't open a template for editingError Opening Template, Ex Info: can't open a template for editing