
Viz Multichannel
Version 4.0 | Published January 23, 2019 ©
Working with Rules
For imported (and subsequently updated) playlists, you can create sets of rules that govern how pages can be automatically inserted into certain events within a playlist. Rules are applied when working with schedules or updating playlists from an external source. Any number of conditions can be applied to defined rules for exact filtering.
When rules are defined and marked as active the following actions will automatically be applied upon receiving or updating playlists:
-
When schedules are received (or changed):
-
For each event in the schedule the rules engine will try to match each rule against the current event read.
-
If the rule matches then apply the action/page specified in the rule, otherwise do nothing and insert the event to the playlist unchanged.
-
-
Repeat this until all events are read and processed.
Rules UI and using Rules Overview
To create, delete or change the definitions of rules:
-
From the main menu, make sure that the channel you want to work with is selected.
-
Select Rules from the menu actions, this will bring up the user interface for working with rules:
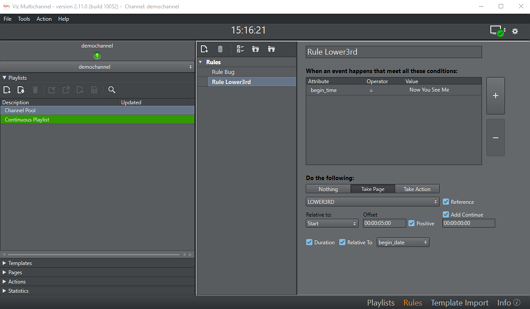
In the screenshot above, on the right-hand side we now have two window panes:
In the left pane we can create, delete, activate/deactivate, select and import/export rules.
In the right pane we can work with a selected rule: name it and give it the appropriate conditions and actions.
Working with Rules
Select by clicking the rule you want to work with. Otherwise select the appropriate icon to create, delete, activate/deactivate or import/export rules.
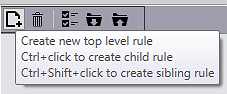
Rules can be grouped into a hierarchy with children and siblings. Hover the mouse over the create rule icon to see the options: Ctrl+click to create a child rule and Ctrl+Shift+click to create a sibling rule:
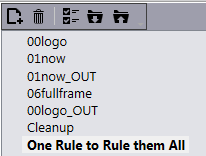
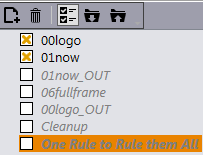
Existing rules can be activated/deactivated as appropriate. In the example below only the rules named 00logo and 01now are activated. The other rules are present, but will not be acted upon.
Import/Export of rules are from/to XML-files. When importing rules, you will overwrite existing rules. So make sure you want to do this (or create a copy safely stored to disk as backup) before importing.
Defining Rules to have Conditions and Actions
Having selected a rule, you can use the rules panel to create conditions and actions for the rule:
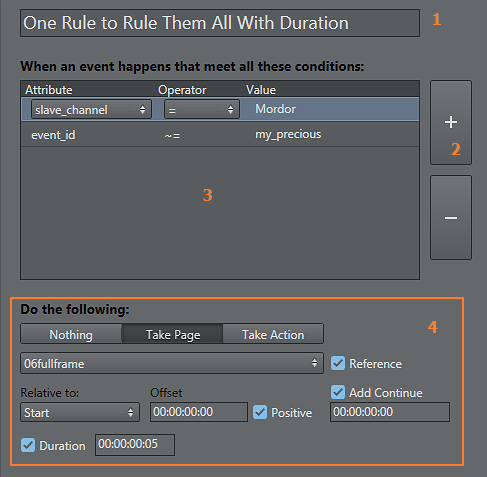
Referring to the screen-shot above:
-
Name the rule (if newly created)
-
Create or delete conditions. You can have as many conditions as needed. Conditions are expressions that specify if the rule should be applied. Using the various condition operators you can answer questions such as: if the next film is for the ages over 12, display a legal-age page as graphics 10 seconds into the film.
-
Define the conditions of the rule. A rule is only applied if all the criteria in the conditions are met. Click the column Attribute, Operator or Value to select possible values from a dropdown-list or to change the actual Value. The various condition-types are explained in a little bit more detail in the next section Rules criteria and conditions.
-
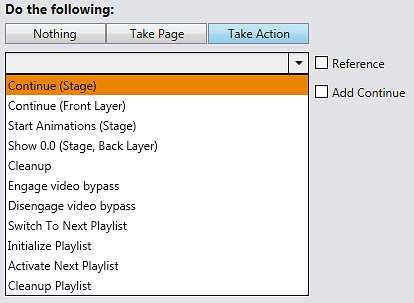
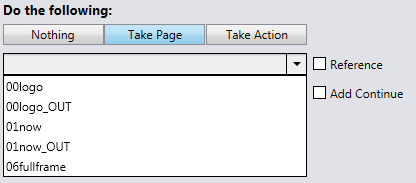
If all conditions for the rule are met then the rule will be acted upon and you can specify what should happen. This could be to do Nothing, take a specific Page or perform a predefined Action. Clicking on the Page or Action button and the dropdown list below will allow you to select either the appropriate page or action as illustrated in the screenshot below:
Modifiers / checkbox selectors in the Rules UI panel:
-
Select the Reference checkbox to allow page/actions to be added as a referenced page/action.
-
Select the Add Continue checkbox to add Continue action after the event added by rules. When this option is checked, it allows to set offset time for the continue action.
-
Relative to: the starting reference point for time calculations, example: Start or End.
-
Offset: The offset from the selected reference point.
-
Positive: if selected, the offset is positive from the reference point.
-
Duration: Duration for the action. If no duration is set, the call-back will be the origin page.
Rules Criteria and Conditions
Any number of conditions can be applied to a rule so that the rule is applied only when specific criteria are met. Without conditions, rules are applied on every primary event when a playlist is imported.
Conditions are made up of an attribute representing a column in the playlist table, an operator (greater than, less than, equal to, etc.) and a value (time, number, text). Only when the condition as defined is met will the rule be applied on that particular event. Likewise, when there are multiple conditions, only when all of them are met will the rule be applied to an event.
For any event dealing with time (e.g. 19:00:00) Viz Multichannel can look up elements that start after a given time (>) or at a given time and later (>=). In addition Viz Multichannel can do partial matches on strings which allows you to find primary elements that is “right before”, “first one before this” or “current one at this time”.
Rules are executed in the order they are listed. However, the order of the rules have no impact on the final result as there is no adjustment for any pages already added. Said in another way: when setting up the rules you should make sure that the end-result you are seeking is not dependent on the order the rules run.
While defining rules, there might be a possibility that many of them share some common conditions. So having a parent rule defined with such conditions, we can define the remaining in child rules. Hence, the child rules will only run if all the conditions in parent rule is met.
Partial Match
In order to find partial matches such as “NEWS*” to match against “NEWSROOM” you use the partial match operator (~=). This allows for string based comparisons of partial hits (“contains”) and time-based comparisons (“currently playing”).
The partial match operator can also be negated with !~= which can be read as “does NOT partial match”.
The logic for time-based look-up using the partial match operator would be a proper check of “time” (e.g. at 19:00:00) and start-time of a primary element (e.g. at 18:45:00) and its duration (e.g. 00:30:00) and detect that the primary element is currently on air.
Partial match enables Viz Multichannel to take pages such as “Now playing at channel X” and “In this movie channel Y we are watching NN” and “Over at our sports channel Z they are watching MM”.
Condition Types
|
Operator |
Description |
|
= |
equal to |
|
> |
greater than |
|
< |
less than |
|
>= |
greater than or equal to |
|
<= |
less than or equal to |
|
<> |
different from |
|
~= |
partial match |
|
!~= |
does NOT partial match |
|
RegExp |
a regular expression |
Regular Expressions
You can also use regexp (regular expression) in conditions. This gives near unlimited flexibility in defining conditions and is a very powerful tool. It is advisable to test any regexp before using it in a rule. It is out of scope to explain regexp in detail in this manual, so please use one of the many books or internet resources that explains RegExp.
Some simple examples for the RegExp operator are shown below.
|
Attribute |
Operator |
Value |
Meaning |
|
Description |
RegExp |
^[a|b|c] |
Description begins with a or b or c |
|
Description |
RegExp |
[a|b|c]$ |
Description ends with a or b or c |
|
Description |
RegExp |
^a.*b$ |
Description starts with a and ends with b |
|
Description |
RegExp |
^[a|b].*[d|e]$ |
Description starts with a or b and ends with d or e |
|
Description |
RegExp |
^[a|b]|[d|e]$ |
Description starts with a or b or ends with d or e |
|
Description |
RegExp |
^(?=.*a)(?=.*b).* |
Description contains a and b |
|
Description |
RegExp |
^(?=.*a)|(?=.*b).* |
Description contains a or b |
|
Description |
RegExp |
^((?!a).)*$ |
Description does not contain a |
|
Description |
RegExp |
^(?=.*a)(?!.*b).* |
Description contains a and does not contain b |
|
Description |
RegExp |
\+ |
Description contains + |
Back up and Restore Rules
All rules and their associated conditions can be saved as XML files for later use.
To Back up Rules
-
Select your channel.
-
Click the Rules button.
-
The list of rules is displayed in the pane.
-
-
Click the *Export Rules *icon
-
Enter a file name and click Save.
To Restore Rules
-
Select your channel.
-
Click the Rules button.
-
The list of rules is displayed in the right pane.
-
-
Click the *Import Rules *icon.
-
You are asked to confirm the overwriting of any existing rules.
-
-
Click Yes to proceed.
-
Select the XML rules file and click Open.