
Viz Artist
Version 3.10 | Published May 03, 2018 ©
Script Editor
This section contains details how to open, create, search and show scripts in the Script Editor.
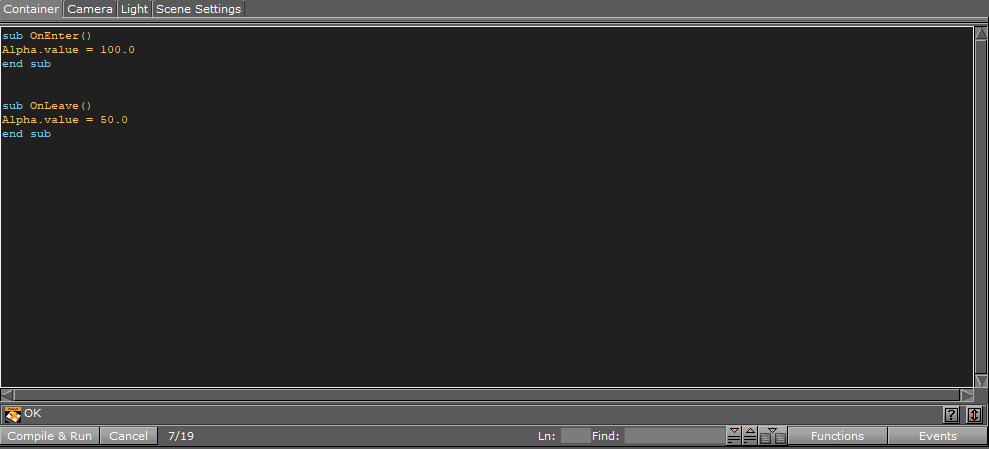
Viz Artist can be scripted on two levels, using Scene Scripts or Container Scripts. The events available for Scene and Container scripts differ, and can be accessed by clicking the ![]() drop-down button in the script editor.
drop-down button in the script editor.
Before adding scripts and code, the designer needs to think about where the logic should reside. If there are functions acting like an interface to the scene, it is a good idea to add this logic as a scene script. Also, if functions or variables are used throughout several other scripts within the scene, the scene script is the proper location for those. On the other hand, if the script code is container specific or planned for a container prototype-instance(s) approach, the script code should be hosted in a container script.
This section contains the following topics:
Script Editor Properties
The Scene Script Editor and the Container Script Editor have the same properties and functionality, but a script created in one can not be placed in the others folder.
This section gives details on Script Editor properties and context menu.

-
 Shows that all parts of the script entered are correct. If there is an error, it will show where the error is.
 -
 Checks the code entered and translates it into byte code, so the script can be run. If there is an error, a message is shown in the text above.
 -
 Ignores the last source code changes and compiles previous version.
 -
 Go to the line number entered in the field.
 -
 Enter free text search. The up icon (
  ) searches above the cursor location. The down icon (
  ) searches below the cursor location.
 -
 Search down.
 -
 Search up.
 -
 Search in all scripts used in this scene.
 Shows a list of used functions in the script (both built-in and self defined ones). Select a function in the list and go there in the script editor.
-
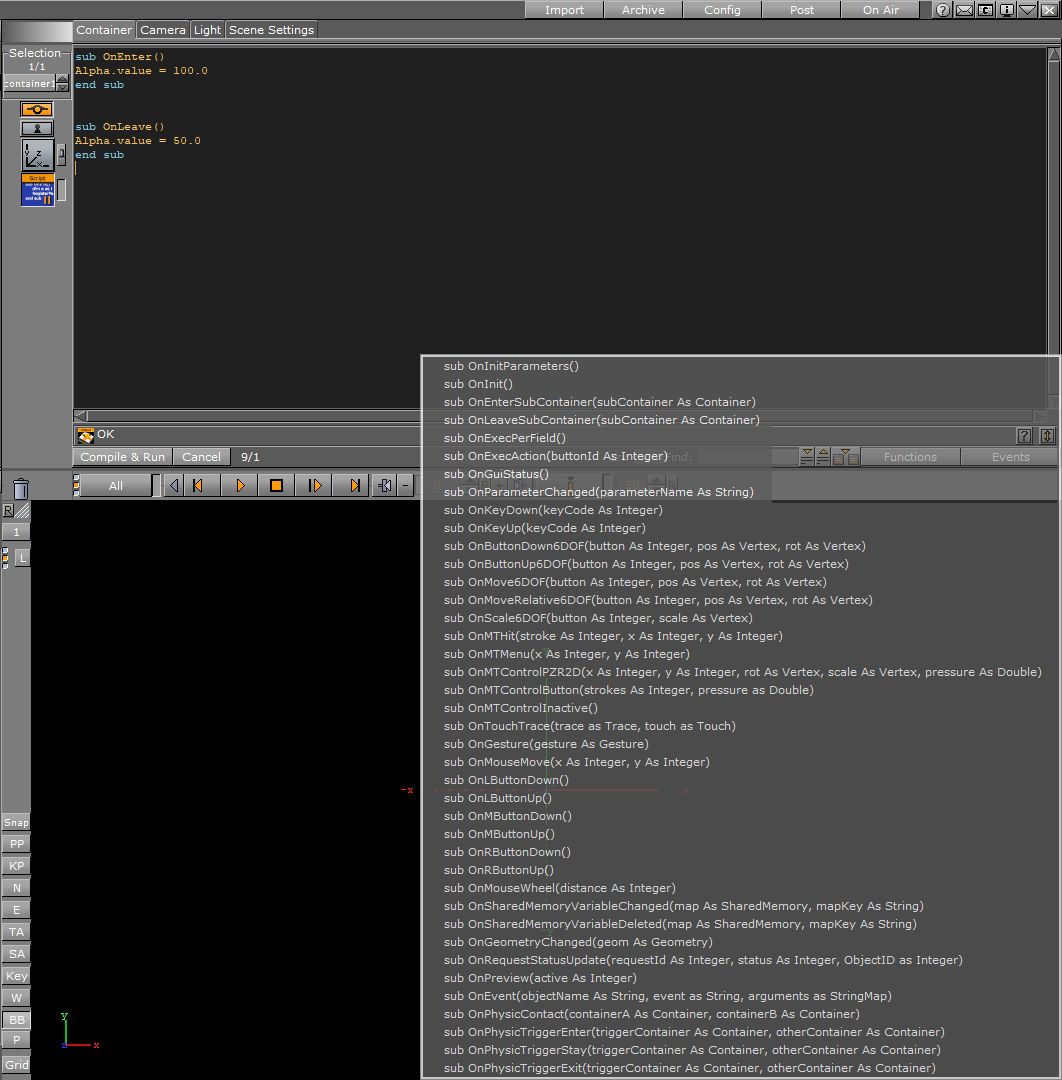
 Shows a list of built-in events. Select one to add it to the script:
-
 Open the script documentation.
 -
 Click the arrow buttons to open or close a script editor floating window.
 Tip: The floating window can be scaled to any size.
Script Editor Context Menu
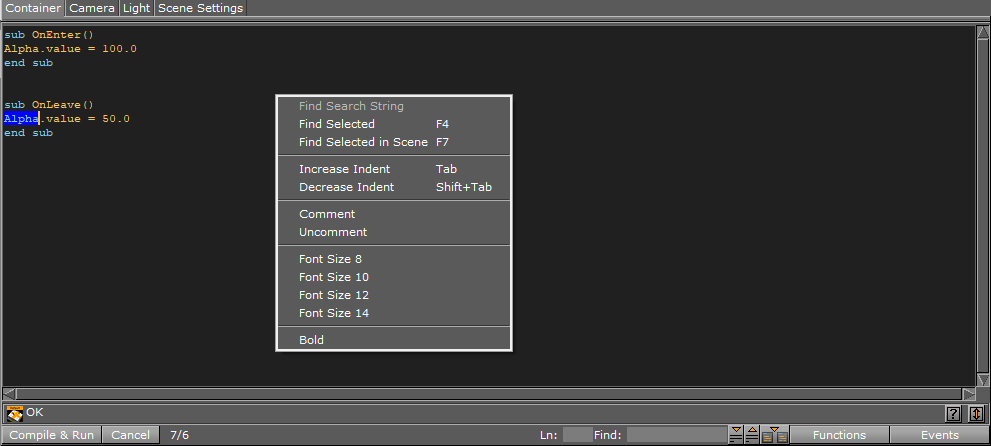
Right-click in the Script Editor to open the Script Editor context menu:
-
Find Search String: Search for text entered in the Find input box.
-
Find Selected (F4): Searches for highlighted text.
-
Find Selected in Scene (F7): Searches for highlighted text in all scripts in the scene.
-
Increase Indent (Tab): Increases the indent of the selected text.
-
Decrease Indent (Shift+Tab): Decreases the indent of the selected text.
-
Comment: Comments the selected text.
-
Uncomment: Uncomments the selected text.
-
Font Size: Sets the font size.
-
Bold: Sets the font to bold.
Script Editor Search
This function allows you to search for highlighted elements in the actual container script, but it can also search in scripts on all containers in your scene.
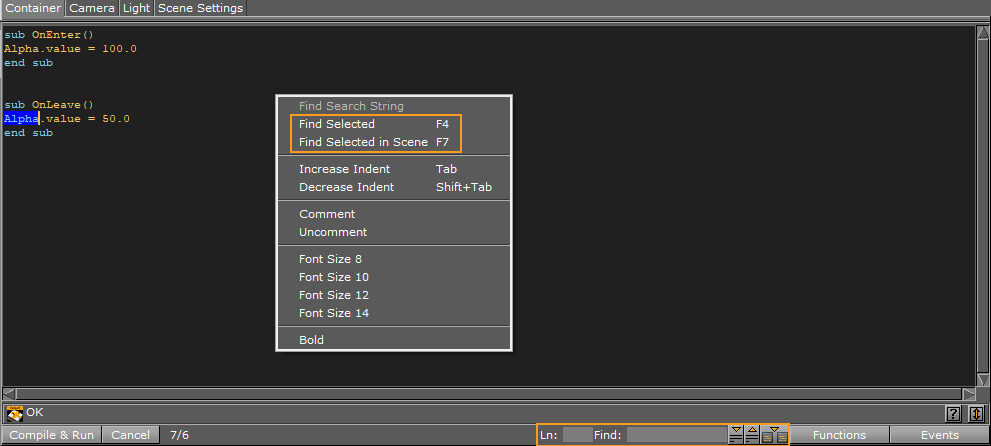
Tip: You can also search in scripts from the Scene Tree Menu.
Script Editor Procedures
This section details common script Editor procedures:
To Create a Container Script plug-in
![]()
-
Add the Script plug-in to the target Container.
Note: This plug-in is located in: Built Ins -> Container plug-ins -> Global
-
Click on the Script plug-in icon.
-
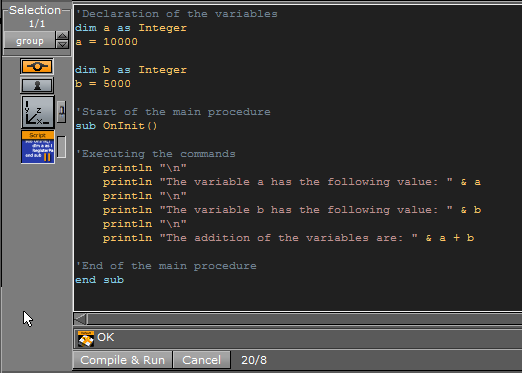
In the Script Editor type in the new script (see also Script Editor Properties).
Note: Also, copy and paste a script from another source, if required.
-
Click
 .
. 
-
Drag the
 icon to Container plug-ins -> Scriptplug-ins folder.
 Note: The created plug-in is saved in <viz data folder>/Scriptplug-ins as <plug-in_name>.vsl.
To Show Container Script plug-ins in the Script Editor
-
Add the Script plug-in to the target Container.
Note: This plug-in is located in: Built Ins -> Container plug-ins -> Global
-
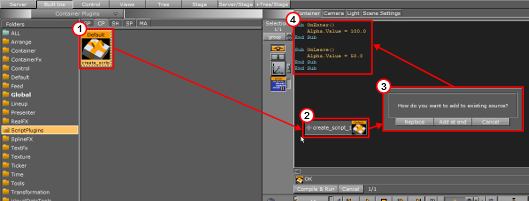
Drag and drop a created Script plug-in (1 (see Script plug-ins)) icon to the Script Editor (2).
Note: These plug-ins are located in: Built Ins -> Container plug-ins -> Scriptplug-ins
-
Click Replace or Add to End (3).
Example: Replaced text (4).
To Create a Scene Script plug-in
-
Click Scene Settings -> Script.
-
In the Script Editor type in the new script (see also Script Editor Properties).
Note: Also, copy and paste a script from another source, if required.
-
Click
 .
. -
Drag the
 icon to Scene plug-ins -> Scriptplug-ins folder.
 Note: The created plug-in is saved in <viz data folder>/Scriptplug-ins as <plug-in_name>.vsl.
To Show Scene Script plug-ins in the Script Editor
-
Click Scene Settings -> Script.
-
Drag and drop a created Scene Script plug-in (see Script plug-ins) icon to the Script Editor.
Note: These plug-ins are located in: Built Ins -> Scene plug-ins -> Scriptplug-ins
-
Click Replace or Add to End.
Note: You can also do an advanced search from the Scene Tree Menu to search for terms across all scripts used in the scene.