
Viz Ticker User Guide
Version 3.1 | Published May 27, 2020 ©
Flipping Carousels
Flipping carousel scenes are characterized by containing one or more Toggle plug-ins with belonging directors and stop points. The elements in a flipping ticker are flipped in a static position. A flipping carousel is made up from multiple scenes; one that contains the design for the background, and another one that contains the templates that are used to create content for the ticker.
Tip: If you do not want to perform these steps, flipping carousel example scenes can be imported by following the instructions in To Import Viz Artist 3 Example Scenes. Note that the design in the example scenes are slightly different from the scenes created here, so the name of the scenes, carousels, templates, and so on may vary.
Creating a Flipping Carousel Background Scene in Viz Artist
When finished with the tasks in this section, the flipping carousel background scene includes an animated cube object and state transitions for animating the background in and out of the scene. The Toggle plug-in makes it possible to add text message template elements to the scene.
To Get Started
Start Viz Artist 3.
To Create a New Scene
-
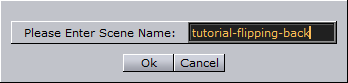
Create a new scene named tutorial-flipping-back.
-
Open the new scene.
To Add a Cube
-
Drag a Cube to the scene tree.

-
Rename it to background.
-
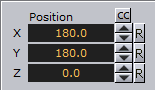
Open the background container’s Transformation Editor and set the Position to X,Y= 180.
-
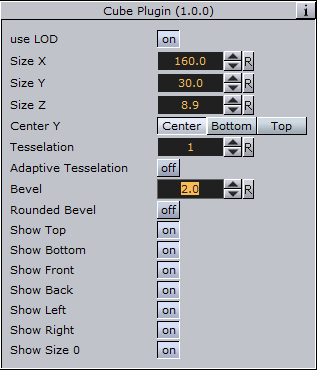
Open the Cube Editor, and set the Size X to 160, Size Y to 30, and Size Z to 9.
-
Set the Bevel to 2.
To Add a Material
-
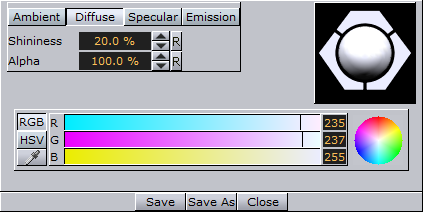
Add a material, for example grey (R= 235, G= 237, B= 255), to the background container.
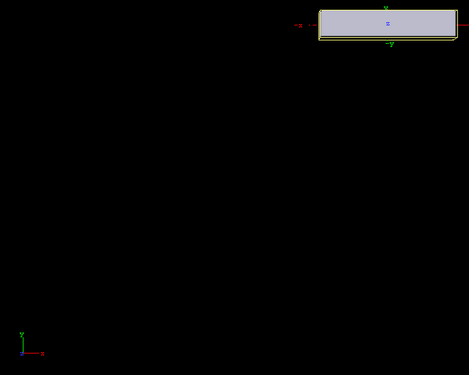
At this point, the output of the scene should have the following appearance:
To Add a Director
-
From the Main menu, click Stage.
-
In the Stage Editor that appears, click the Add Director button.

-
Rename the director to Tutorial.
Tip: The director name should consist of alphanumeric characters only. For more details, see Global Conventions.
To Add a Stop Point
-
Make sure that the Tutorial director is selected, and the Timeline is set to 0.
-
Click the Add Stop button.

-
Select the stop point that appears in the Stage Editor.
-
In the appearing Stop Point editor enter the letter O (capitalized) to the Name field.
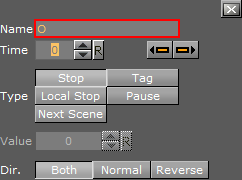
-
O is a standard design convention for the out state.
-
To Add Another Stop Point
-
Select the Tutorial director, and set the Timeline to 50.
-
Click the Add Stop button again, and name the new stop point Headlines. As the O stop point is automatically the out state of the scene, this new stop point is the in state.
To Add a Keyframe
To create a simple in/out animation, perform the following steps:
-
Select the background in the Scene tree.
-
Make sure the Timeline is at position 50.
-
Click the Set key frame button in the Animation bar.

-
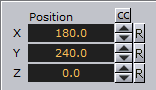
Open the background container’s Transformation Editor and set the Rotation to X= 180.
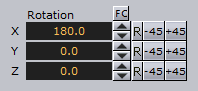
-
Set the Position to Y= 240.
To Add Another Keyframe
-
Set the Timeline to 0.
-
Click the Set key frame button again.
In the Stage Editor, a new animation has now appeared. -
In the Director tree, make sure that the new background animation is placed inside the Tutorial director.
The Director tree should now look like this: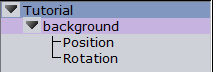
The animation can now be played.
-
Click the Start and Continue buttons to reset the scene to its out state, and to run the scene to its in state.

If the previous steps have been carried out correctly, a horizontally oblong cube object should rotate downwards into the screen’s upper right corner.
At this point, the scene tree still only contains one node:

To Add a Group
-
Add a Group to the scene tree, and place it as a subcontainer of background.

-
Rename the new group to Tutorial.
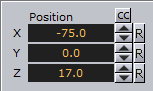
-
Open the Tutorial container’s Transformation Editor and set the Position to X= -75 (note the minus sign), Z= 17.
To Add the Toggle Plug-in
-
From the Main menu, click Built Ins.
-
From the dropdown list, click Container Plugins.
-
Open the Container folder.
-
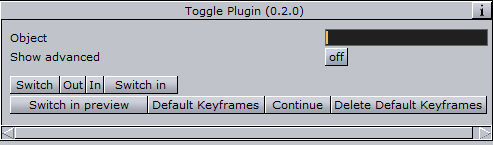
Drag the Toggle plug-in onto the Tutorial container.

Four child containers are automatically added to the Tutorial container. The scene tree should now look like this:
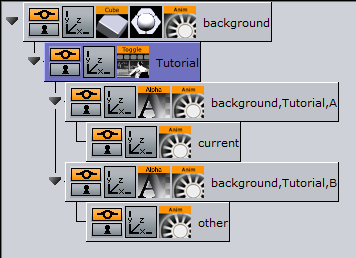
Note: The container holding the Toggle plug-in must have the same name as the director holding the stop points.
-
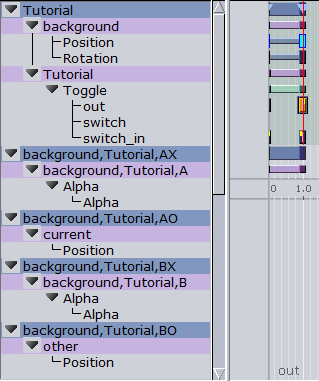
In the Toggle Editor, click the Default Keyframes button. This adds additional keyframes in the Stage Editor. The Stage Editor should now have the following appearance:
To Save the Scene
The flipping carousel background scene is now finished.
-
Make sure that the Timeline is set to 0.
-
Click the Save button.
See Also