
Viz Ticker User Guide
Version 3.1 | Published May 27, 2020 ©
Wizards
Various wizards are available in Ticker Wizard.
This section contains information on the following topics:
Note: These sections describe how to use the Carousel Wizard to create a new carousel. Existing carousels can be edited in the Ticker Carousels Panel.
Scrolling Carousel Wizard
Scrolling carousel scenes are characterized by containing one or more Scroller plug-ins with the relevant directors and stop points. The elements in a scrolling ticker enter the screen from one side, scroll through the screen, and exit on the other side.
Note: This section describes using the Carousel Wizard to create a new carousel. Existing carousels can be edited in the Ticker Carousels Panel.
Using the Scrolling Carousel Wizard
-
To open the Scrolling Carousel Wizard, click the Create Scrolling Carousel button in the Main Panel.
-
The wizard opens and you see the Carousel Panel.
-
Give the Carousel a name in the Carousel Caption box.
Note: The carousel caption should contain alphanumeric characters only. For more details, see Global Conventions.
-
Double click a carousel in the Available Carousels list.
-
-
The wizard then proceeds to the Scrolling Templates Panel.
-
Select one or more templates from the Available Templates list.
-
Optional: Add Presentation Files. (See To select the presentation file for a template).
-
Optional: Select a color for the messages. (See To select the background color for a template).
-
Click Next.
-
-
The wizard proceeds to the Confirm Panel.
-
Make sure that the setup information is correct.
-
Click Finish. This exits the wizard and create the new carousel.
-
Carousel Panel
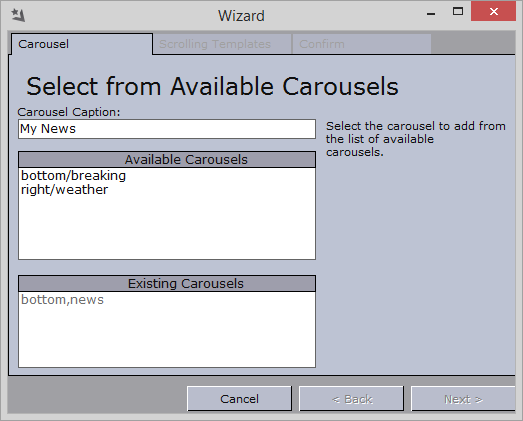
The Carousel Panel opens at wizard startup and contains the following options:
-
Carousel Caption: Defines the carousel specific tab name in Viz Ticker Client. By default, the carousel caption is equal to the carousel name.
-
Available Carousels: Shows a list of all available carousels. Carousels become available once a scene has been scanned. For more information, see To scan a scene.
-
Existing Carousels: Shows a list of all carousels that have already been created.
Scrolling Templates Panel
The Scrolling Templates Panel contains a list of all available templates.

The settings that are defined in this panel affect messages that are created in Viz Ticker Client. To edit the settings of a specific template, click the various columns. Each template is presented with the following information:
-
Select: Selects one or more templates. The templates that are selected here are available when creating messages in Viz Ticker Client.
Note: The same template can be available for various carousels.
-
Name: Shows the name of the template. The name is used for example when changing the default template for a carousel. The template name is defined in the Viz Artist scene settings, and cannot be changed in Ticker Wizard. The name reflects the template root container (direct sub-container of ticker_templates).
-
Description: Shows the text that is displayed in the Template column in Viz Ticker Client’s Carousel Frame. By default, the description is taken from the ControlObject description field specified during scene design.
Note: Non-ASCII characters must not be used in the description. Also, the system resets descriptions of templates that are reimported.
-
TTL: Defines the TTL (Time To Live) value. TTL refers to how many times the message should run before it is taken out of the carousel. By default, the TTL is set to infinite (column is cleared).
-
TTL Action: Defines what should happen to the message when the TTL value is reached.
-
Pool: Moves the message from the Carousel List to the Pool List.
-
Remove: Deletes the message.
-
Inactive: The message status is set to inactive, and the message remains in the Carousel List.
Note: If the Show Time to Live checkbox has been selected in Ticker Wizard’s Ticker Carousels Panel, the TTL and TTL Action options can be modified in Viz Ticker Client’s Settings Frame when creating or modifying a message.
-
-
Presentation: Presentation Files can be used instead of the default editor when messages are created or edited in Viz Ticker Client. For more information, see To select the presentation file for a template.
-
Color: All messages based on this template are displayed in Viz Ticker Client’s Carousel List with the selected color. For more information, see To select the background color for a template.
To Select the Presentation File for a Template
-
In the Scrolling Templates Panel, click to enable the Presentation file column.
-
Click the ... button that appears.
-
In the Select Presentation File dialog box that opens, browse to locate a presentation file (.vtw or .vtwc).
Tip: Presentation files are placed at the following location in the installation directory of Viz Ticker Client normally <Installation-Directory>\presentations\<MyPresentationFile>.vtwc. See Installation Directories.
-
Click the Open button. Presentation Files can be used instead of the default editor when messages are created or edited in Viz Ticker Client. Presentation Files are created in Template Wizard.
For more information, see To prepare a scrolling carousel for presentation file creation and To create a presentation file in Template Wizard.
To Select the Background Color for a Template
-
In the Scrolling Templates Panel, click to enable the Color column.
-
Enter the HTML color hex code in the text field that appears (for example #00FFFF), or
-
Click the ... button that appears.
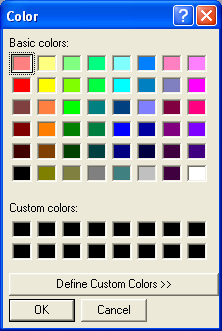
-
In the Color Dialog Box that opens, select a color.
-
Click the OK button.
Tip:
The text color in Viz Ticker Client is automatically adjusted to have a good contrast to the selected background color.
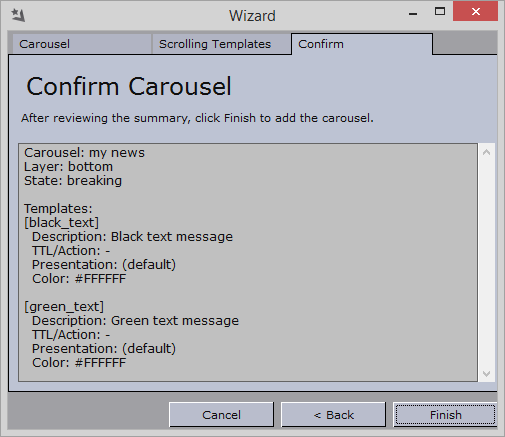
Confirm Panel
The Confirm Panel contains a summary of the carousel setup information.
Flipping Carousel Wizard
Flipping carousel scenes are characterized by containing one or more Toggle plug-ins with relevant s and stop points. The elements in a flipping ticker are flipped in a static position.
The Flipping Carousel Wizard is similar to the Scrolling Carousel Wizard. The Carousel Panel and Confirm Panel are identical in the two wizards, while the settings in the Scrolling Templates Panel and Flipping Templates Panel are slightly different.
Note: This section describes using the Carousel Wizard to create a new carousel. Existing carousels can be edited in the Ticker Carousels Panel.
Using the Flipping Carousel Wizard
-
To open the Flipping Carousel Wizard, click the Create Flipping Carousel button in the Main Panel.
-
The wizard opens and you see the Carousel Panel.
-
Give the Carousel a name in the Carousel Caption box.
-
Double click a carousel in the Available Carousels list.
-
-
The wizard then proceeds to the Flipping Templates Panel.
-
Select one or more templates from the Template Scenes list.
Tip: The scenes can be sorted by name or date, and presented in forward or reversed order.
-
Optional: Add Presentation Files. (See To select the presentation file for a template).
-
Optional: Select a color for the messages. (See To select the background color for a template).
-
Click Next.
-
-
The wizard proceeds to the Confirm Panel.
-
Make sure that the setup information is correct.
-
Click Finish. This exits the wizard and create the new carousel.
-
Flipping Templates Panel
The Flipping Templates Panel shows the paths and names of all available carousel and template scenes.
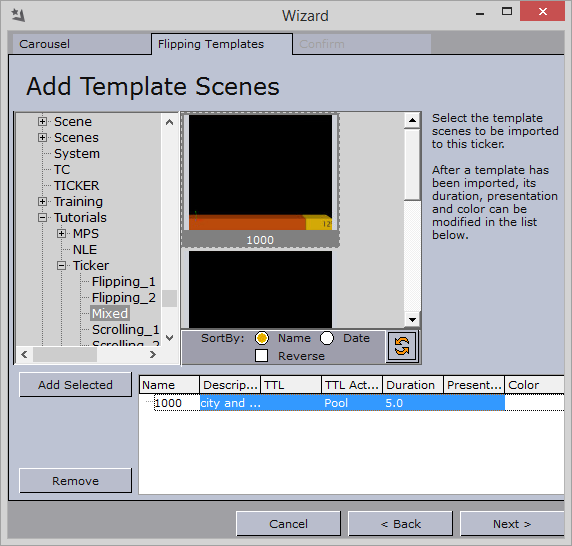
The settings that are defined in this panel affect the messages that are created in Viz Ticker Client. Each template is presented with information such as name, description, TTL, TTL action, duration, presentation file, and color. For detailed information about these settings, see Scrolling Templates Panel.
Note: The Duration column is only available for flipping templates. Duration refers to how many seconds the message should be on air, before flipping to the next message in the carousel.
To edit the settings of a specific template, click the various columns in the list.
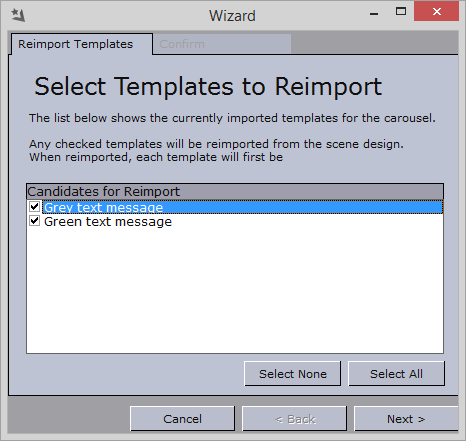
Reimport Templates Wizard
The Reimport Templates Wizard allows reimporting existing templates that have changed scene design since the original import. Templates that have changed control plug-ins, animations, container structure, or other settings must be reimported before the changes take effect.
To Reimport Templates
-
In the Ticker Carousels Panel, click the Reimport Templates button.
-
Select the templates that should be reimported.
-
Click Next.
-
Check that the details are correct and click Finish. This exits the wizard and reimports the selected templates.
Note: The selected templates are deleted first from the Media Sequencer, and then reimported as new templates.
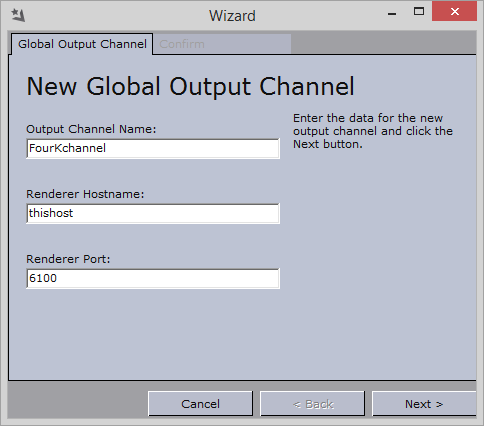
Output Channel Wizard
The Output Channel Wizard allows creating new output channels.
The Main output channel is created by default when a carousel is set up in one of the carousel .Wizards v3.1. Other output channels must be created from this Output Channel Wizard.
To Create an Output Channel
-
In the Output Channels Panel, click the New button. The Output Channel Wizard opens.
-
Type a descriptive name in the Output Channel Name text box.
Note: The output channel name must contain alphanumeric characters only. For more details, see Global Conventions.
-
Enter the Renderer Hostname and Renderer Port.
-
Click Next.
-
In the Confirm Carousel panel that appears, make sure that the output channel settings are correct, and then click the Finish button. This exits the Output Channel Wizard and create a new global output channel.