
Viz Ticker User Guide
Version 3.1 | Published May 27, 2020 ©
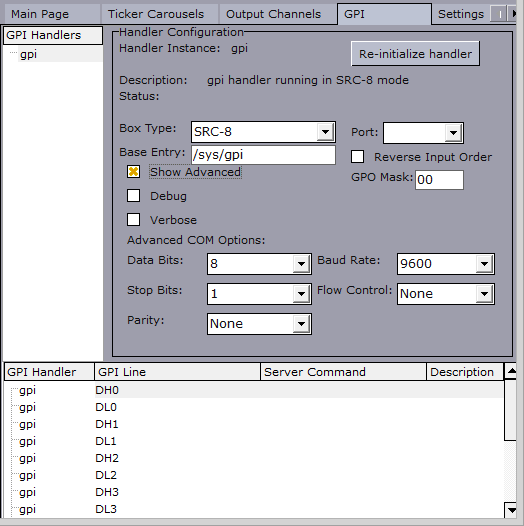
GPI Panel
The GPI Panel opens when clicking the GPI tab in the Main Menu.
GPI units register electrical tension (voltage) in one end as high or low, and output a digital signal (on or off) in the other end. This is used to connect control desks and similar devices to arbitrary software. Various Vizrt software, including Viz Ticker, can be controlled by GPI through the Media Sequencer.
This section contains information on the following topics:
Existing GPI Handlers List
On the left side of the GPI Panel is the Existing GPI Handlers List.
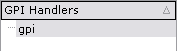
The Existing GPI Handlers List contains the names of all available GPI handlers. To view the details for a specific GPI handler in the GPI Settings Frame and GPI List, double-click an item in the list.
To create a GPI handler
-
In Ticker Wizard, click the GPI tab in the Main Menu.
-
Right-click the handler that should be deleted in the Existing GPI Handlers List. A new GPI handler is then created and added to the Existing GPI Handlers List.
To delete a GPI handler
-
In Ticker Wizard, click the GPI tab in the Main Menu.
-
Select the handler that should be deleted in the Existing GPI Handlers List.
-
Right-click the Existing GPI Handlers List.
-
In the menu that appears, click Delete Selected GPI Handler. The selected GPI handler is then deleted and removed from the Existing GPI Handlers List.
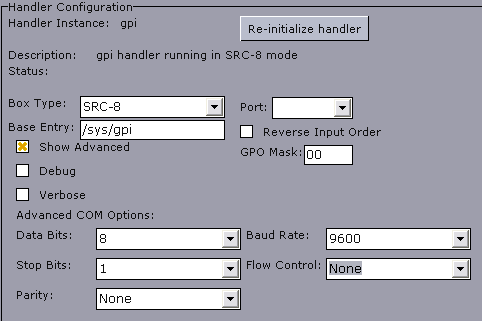
GPI Settings Frame
At the right side of the GPI Panel is the GPI Settings Frame.
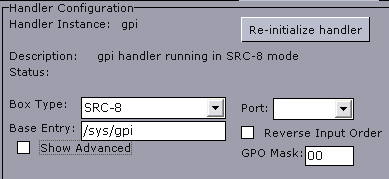
The GPI Settings Frame shows various information about the GPI handler that is currently selected in the Existing GPI Handlers List.
-
Handler Instance: Shows the name of the GPI handler (equal to the name in the Existing GPI Handlers List).
-
Re-initialize Handler: Re-initializes the GPI handler.
-
Description: Shows a description of the GPI handler.
-
Status: Shows the status of the GPI handler.
-
Box Type: Defines the type of GPI box that is being configured. The box type can be set to SRC-8, SRC-8 III, SeaLevel, or SeaLevelMAX.
-
Port: Defines the port that the GPI box is connected to. The port can be set to COM1-COM8, or none.
-
Base Entry: This is the node in the Media Sequencer’s data structure where the systems look for the GPI actions. The base entry is by default set to /sys/gpi.
-
Reverse Input Order: If enabled, the signal line that originally triggered GPI action DL0/DH0 now triggers GPI action DL7/DH7, the signal line that originally triggered GPI action DL1/DH1 now triggers GPI action DL6/DH6, and so on. This option is only available if the box type is set to SRC-8.
-
Use Card: Defines the GPI card that should be used. This option is only available if the box type is set to SeaLevel.
-
IP: Defines the IP address of the Ethernet box. This option is only available if the box type is set to SeaLevelMAX.
-
Unit: Defines the available Ethernet boxes. This option is only available if the box type is set to SeaLevelMAX.
-
Unit: Defines the unit number of the Ethernet box.
-
Slave Id: Defines the Slave ID of the Ethernet box.
-
Advanced GPI Settings
The Advanced GPI Settings become available when Show Advanced is selected.
-
Verbose: Outputs log information from the Media Sequencer’s GPI handler, if enabled. This information can be useful for debugging.
-
Data Bits: Defines the number of data bits that should be used for each transmitted and received character. The communicating computer or device must have the same setting. The number of databits can be set between 4 and 8.
-
Stop Bits: Sets the interval (bps) for when characters should be transmitted. Stop bits can be set to 1, 1.5, or 2.
-
Parity: Changes the type of error checking that is used for the selected port. The communicating computer or device must have the same setting. The parity can be set to:
-
Even: May add a parity bit to make the number of ones in the data bits even. This enables error checking.
-
Odd: May add a parity bit to make the number of ones in the data bits odd. This enables error checking.
-
None: Does not add a parity bit to the data bits sent from this port. This disables error checking.
-
Mark: Adds a parity bit set to 0.
-
Space: Adds a parity bit set to 1.
-
-
Baud Rate: Defines the maximum rate of bits per second (bps) that should be transmitted through this port. The baud rate can be set between 75 and 128.000. It is recommended to use the highest rate that is supported by the computer or device that is being used.
-
Flow Control: Changes how the flow of data is controlled. The flow control can be set to:
-
XonXoff: Uses the standard method of controlling the flow of data between two modems. This type of flow control is often referred to as software handshaking.
-
Hardware: Uses the standard method of controlling the flow of data between a computer and a serial device. This type of flow control is often referred to as hardware handshaking.
-
None: Does not use a method of controlling dataflow.
-
-
Sample Interval (microseconds): Defines how often the PCI card should be checked for updates. The interval is defined in microseconds. This option is only available if the box type is set to SeaLevel.
-
Poll Delay: Defines how often the Ethernet box should be checked for updates. The interval is defined in microseconds. This option is only available if the box type is set to SeaLevelMAX.
GPI List
At the bottom of the GPI Panel is the GPI List.
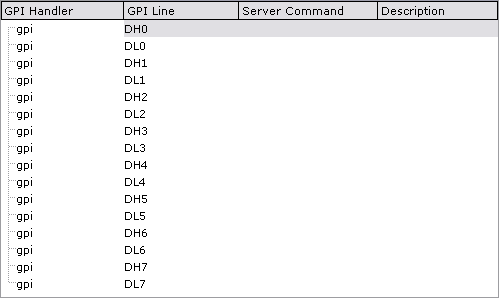
The GPI List contains a list of all available GPI handlers and signal lines.
-
GPI Handler: Shows the GPI handler that the currently selected GPI line belongs to.
-
GPI Line: Shows the name of the GPI line.
-
Server Command: Shows a text box in every row, where the action to be performed on this GPI line can be defined.
Example: If the server command Program Main is set to be the GPI action of DL0/DH0, DL0 (low line 0) sets Program to off for the main feed, and DH0 (high line 0) sets Program to on.
-
Description: Shows a description of the GPI line action.