Viz Arc User Guide
Version 1.8 | Published October 13, 2023 ©
Multizone Chroma Keying
Use multizone chroma keying to define multiple chroma keying areas (or fullscreen) with different keying settings. Typical use-cases are areas with different colors or shades, such as horse racing tracks that have multiple shades of green. Multizone keying allows you to define specific zones of your tracked area where a specific key should be applied.
Configuring the Multizone Chroma Keyer
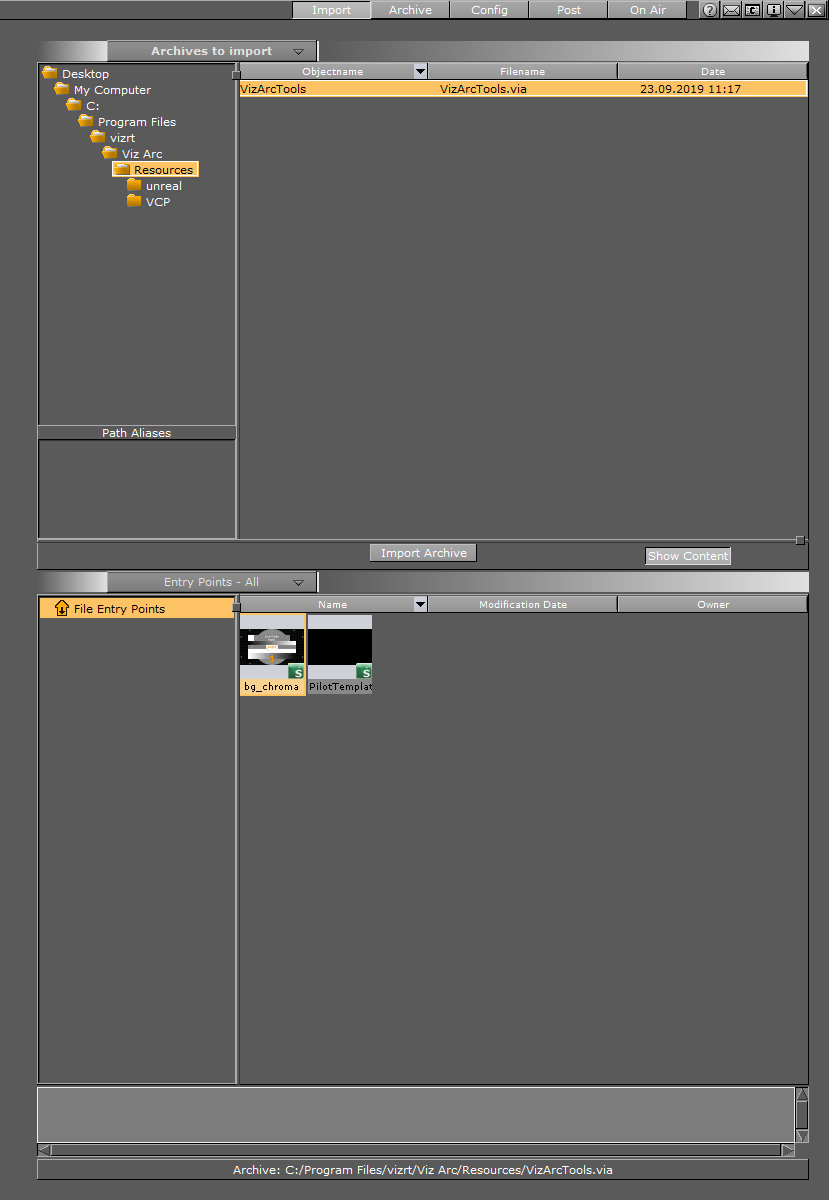
In order to make the multizone keying action work from Viz Arc you'll need to set-up a couple of things beforehand. The way the Multizone Chroma Keyer works in Viz Engine requires the Keyer to run in the back layer and the video input to be configured properly in mzone keying. Viz Arc ships with a template-based scene that you need to import into your Graphic Hub.
-
Locate the archive in the Viz Arc program-data folder (typically C:\ProgramData\vizrt\VizArc\) under Resources\MZChroma\VizArcTools.via. The via file contains a scene named bg_chroma.
-
Import the bg_chroma scene into your Graphic Hub:
Since the scene is stored in the back layer of Viz Engine and all multizone controls are located there, you'll also need to configure a dedicated channel for the back layer in Viz Arc:
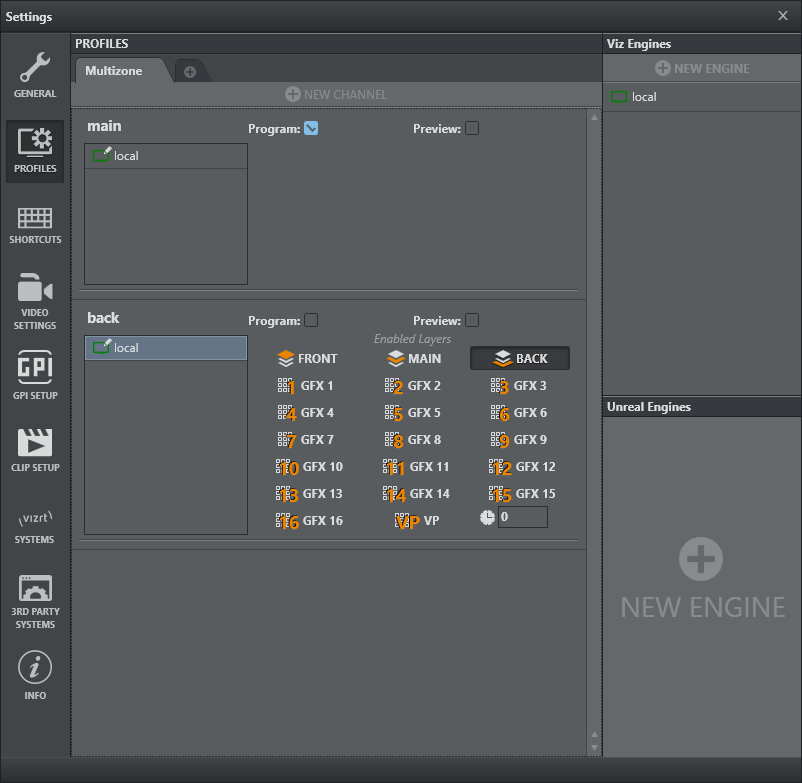
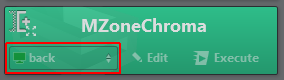
3. Add a channel to your Engine, uncheck the MAIN layer and check the BACK layer only. Give the channel a meaningful name like "back". The other channel (in this case main) will be used for the actual AR/VR graphics, where only the MAIN layer is checked (default).
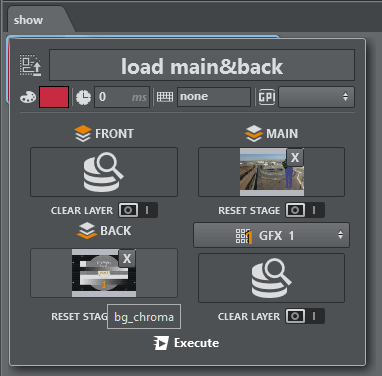
4.The next step is to create a scene loader by right clicking the action canvas and selecting Create Viz Scene Loader. This loads the recently imported scene into the back layer. You can also load your main scene as in the same loader.
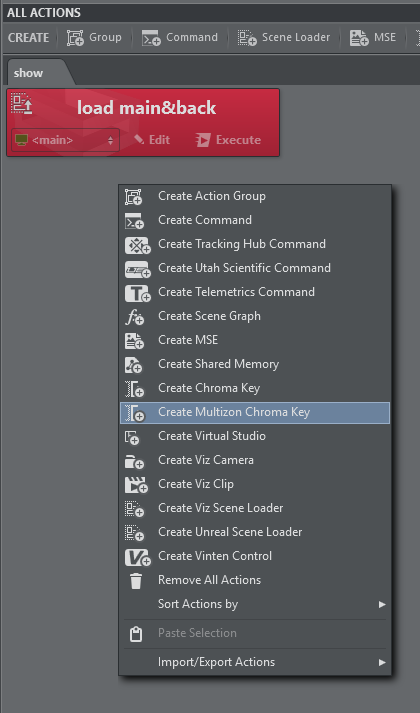
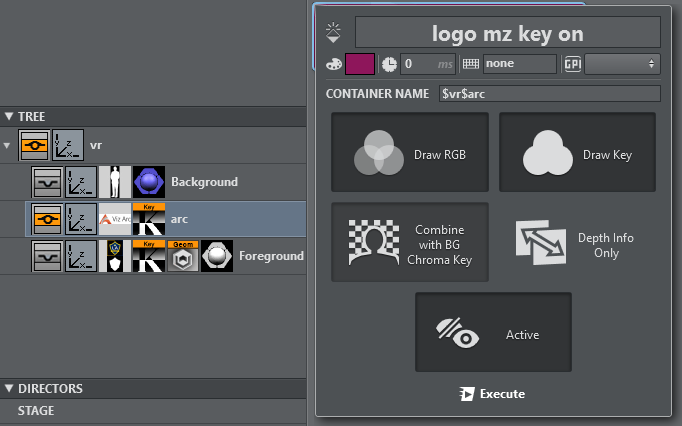
5.Once the background chroma scene has been loaded into the Viz Engine and a valid video signal has been connected, you can start adding a multizone chroma action to the Viz Arc action canvas. To do so, right click on the action canvas and select Create Multizone Chroma Key.
Once the action has been created you can fill in a name for a new full screen multizone, for example fsGreen.
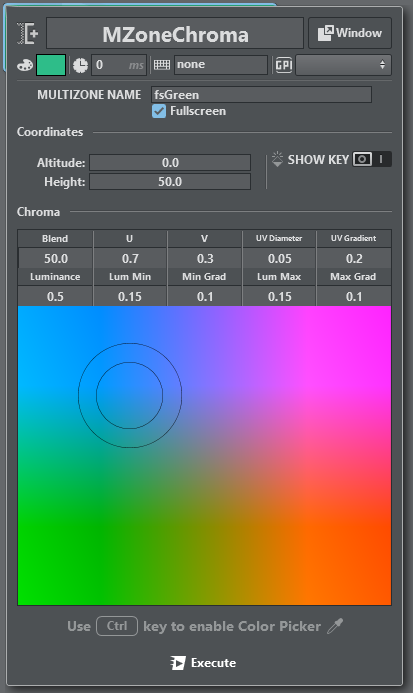
Make sure the action's channel is set to your back channel.
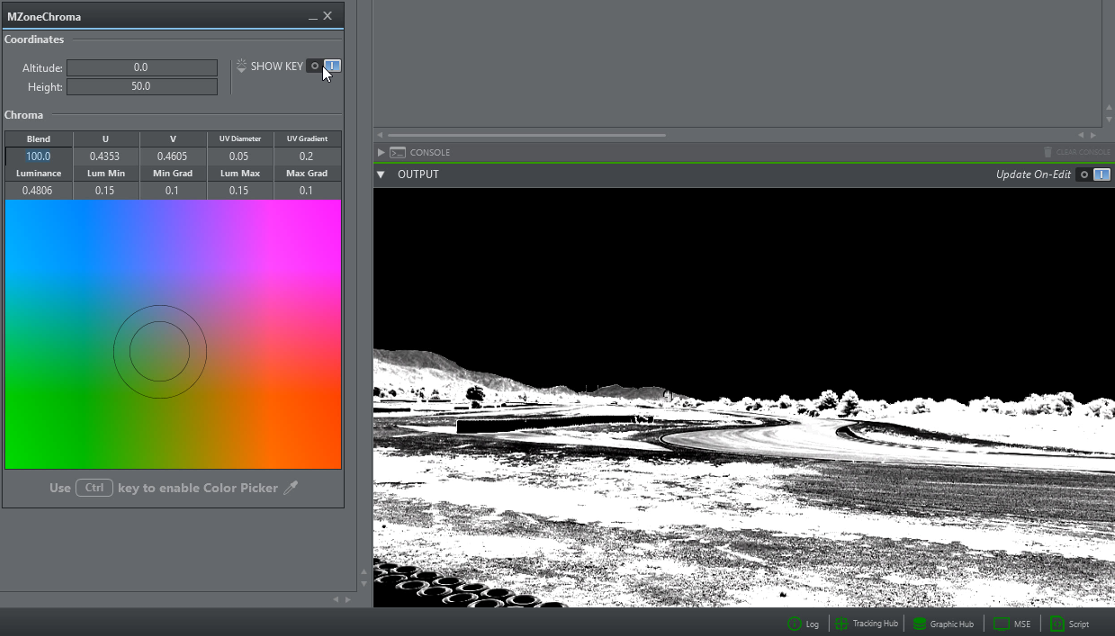
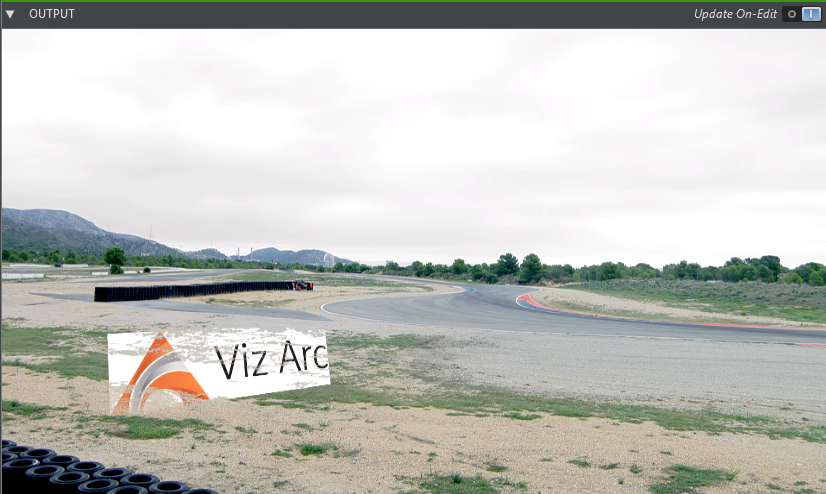
You can now start using the picker on your output directly or you can adjust the key manually. For picking, it's recommended to use the Window mode to make sure the window remains open after picking. Simply hold down CTRL and click on the preview output. In order to see the actual key on the output, press the SHOW KEY toggle.
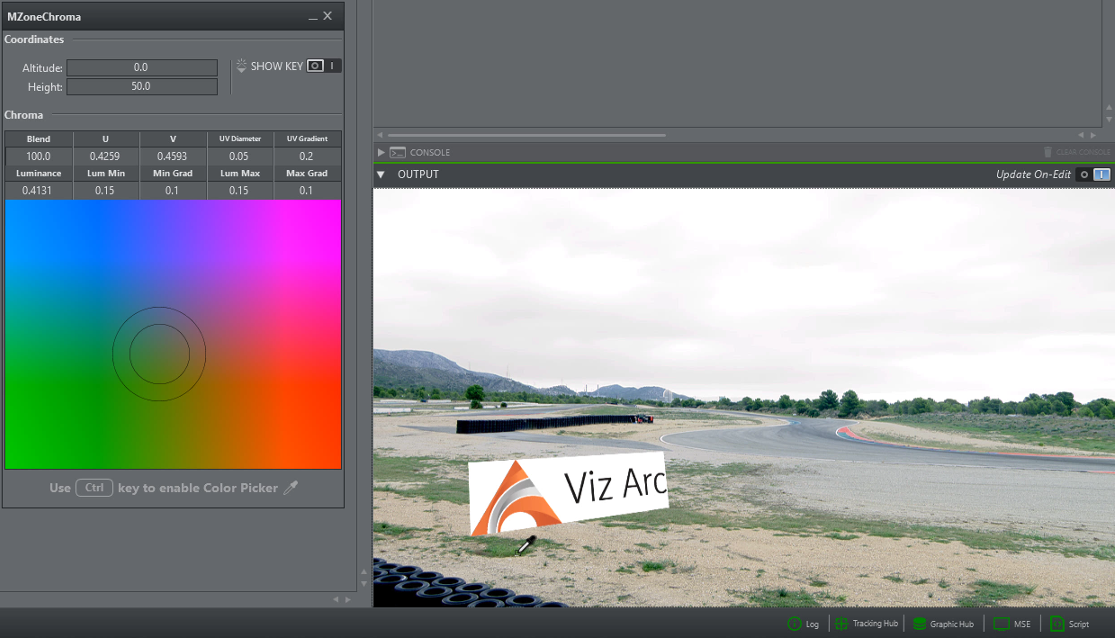
Once you have adjusted the key, you can test it with an element in your main scene. To do this, create a Key Action by dragging the key plugin to the action canvas. In the keying action enable Combine with BG Chroma Key.
You'll now see the respective viz object keyed on the green areas in the output.
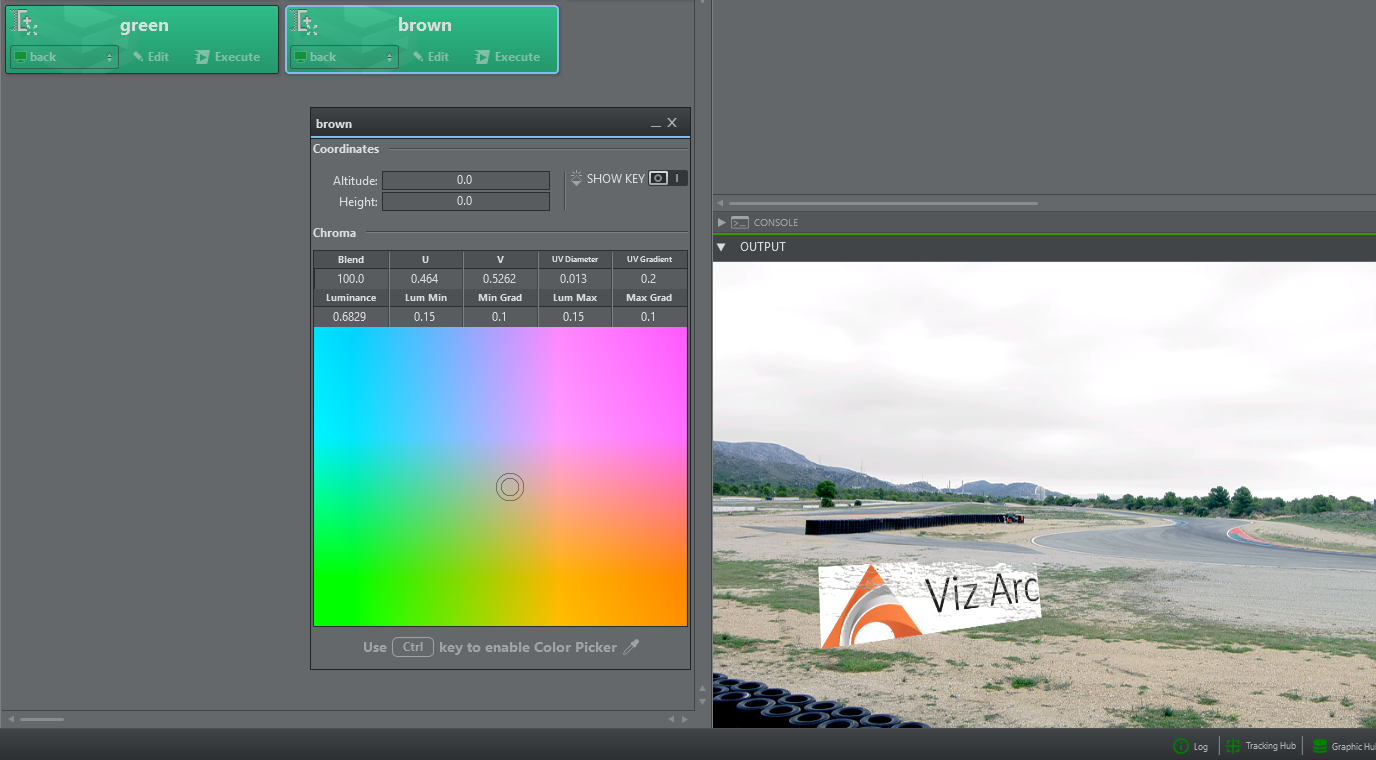
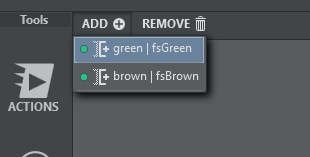
You can now add more Multizone Chroma Actions to key more colors, for example a key for the color brown.
To make On Air operation more efficient, you can use the dedicated CHROMA view for quick operation. This button appears as soon as a multizone chroma action is present.
Click at the top to ADD or REMOVE specific Multizone Actions to this view.
Once you have added all relevant keys for your show, you can easily navigate through the keys using the arrow keys on your keyboard. You can directly pick in the video window where you can also adjust the picking size with the mouse wheel.
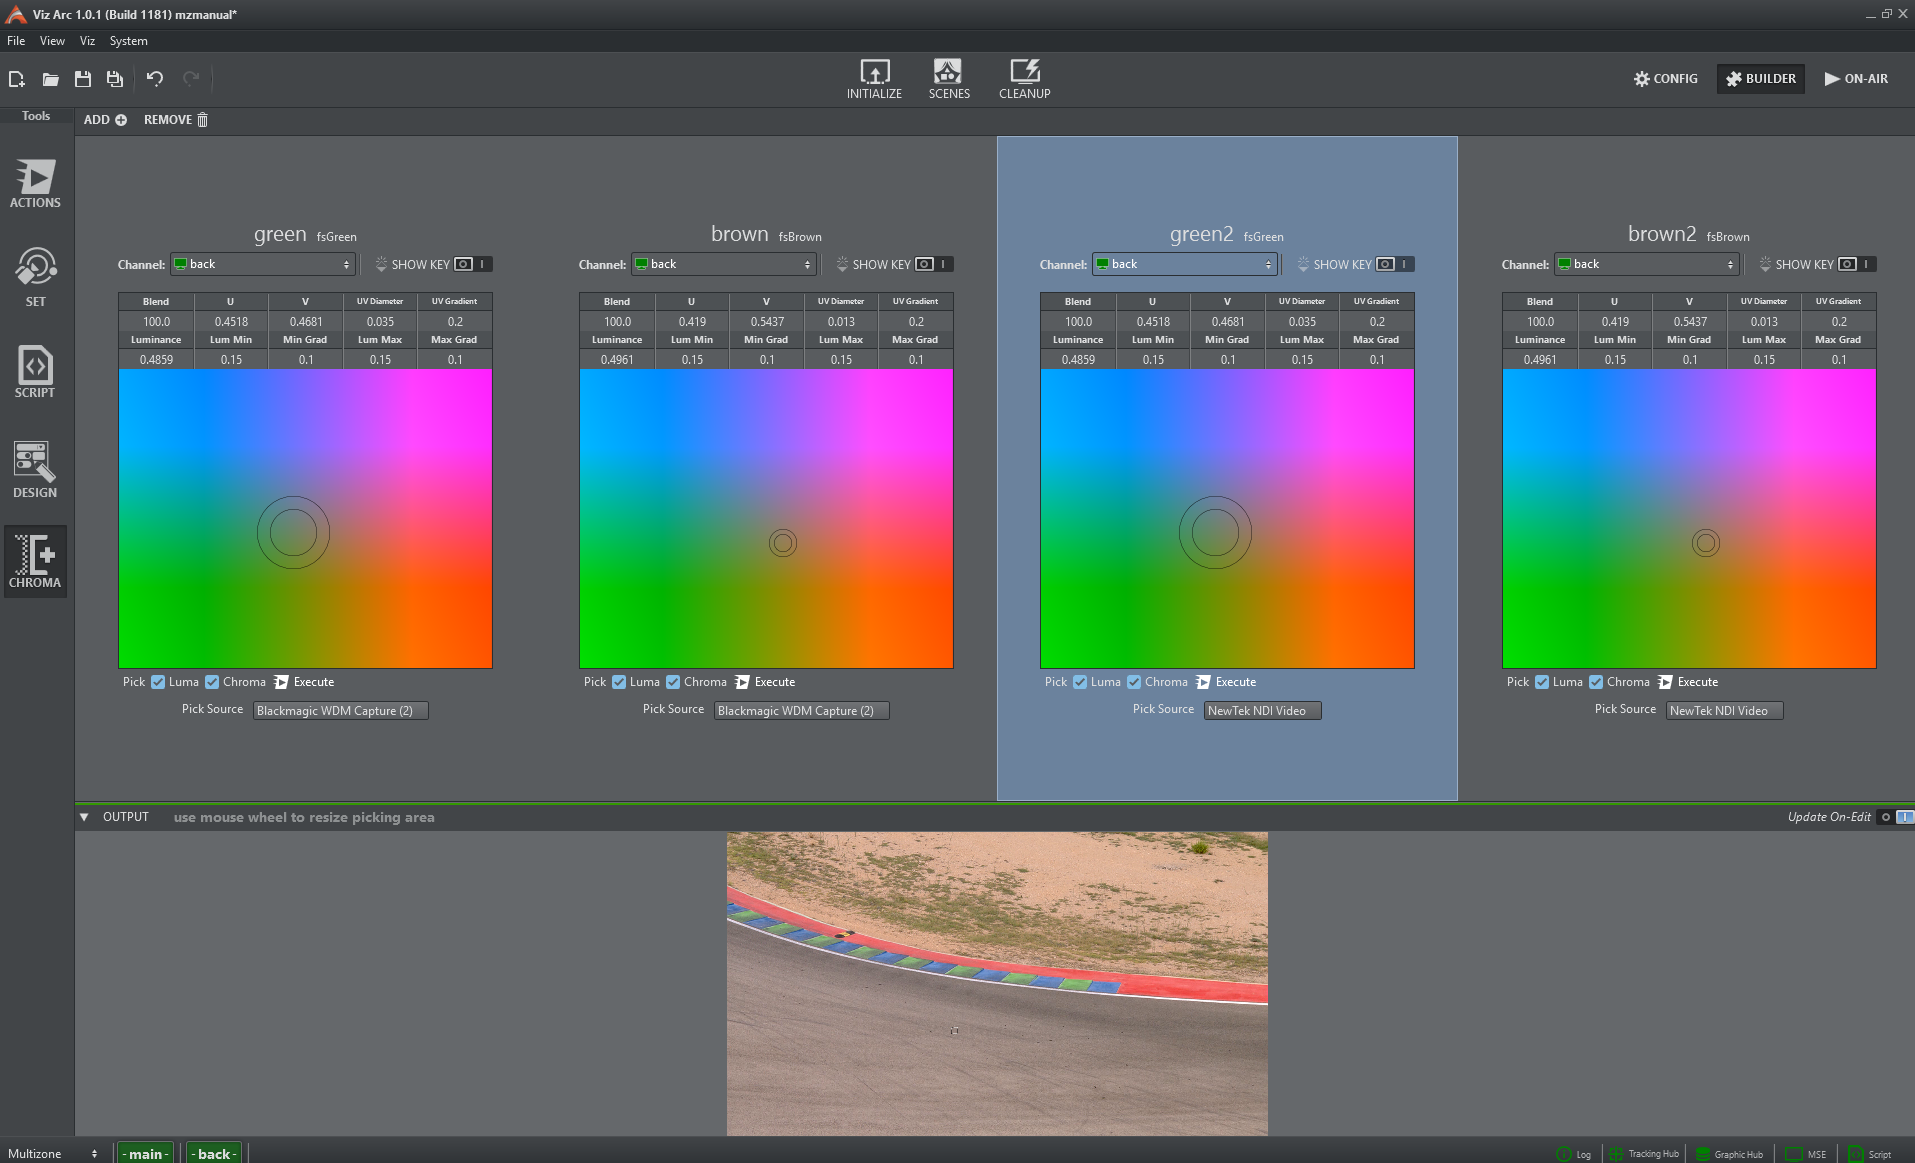
In Pick Source you can select the signal that is to be shown when the chroma key is selected. Both DirectShow sources and local engine output are supported. This is particularly useful for multi-camera set ups.
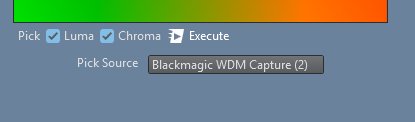
You can also specify what is to be evaluated during picking.
-
Check Luma if you just want to pick the luminance (for example, if you want to react only to changes in brightness shading).
-
Check Chroma if you want to pick the color too.
-
Or check both if you want to change both of them.
The keying values will be sent to the engines directly as long Update On-Edit is enabled.
You can pick by simply clicking the left cursor button on the output window. The size of the picking area can be adjusted with the mouse wheel. The space bar will freeze or unfreeze the output window.
Working with Polygons and the Map
If you want to restrict your key to a certain area or shape, you can use polygon shapes that can be defined in the map view. Go to MAP, right click and select Polygon...

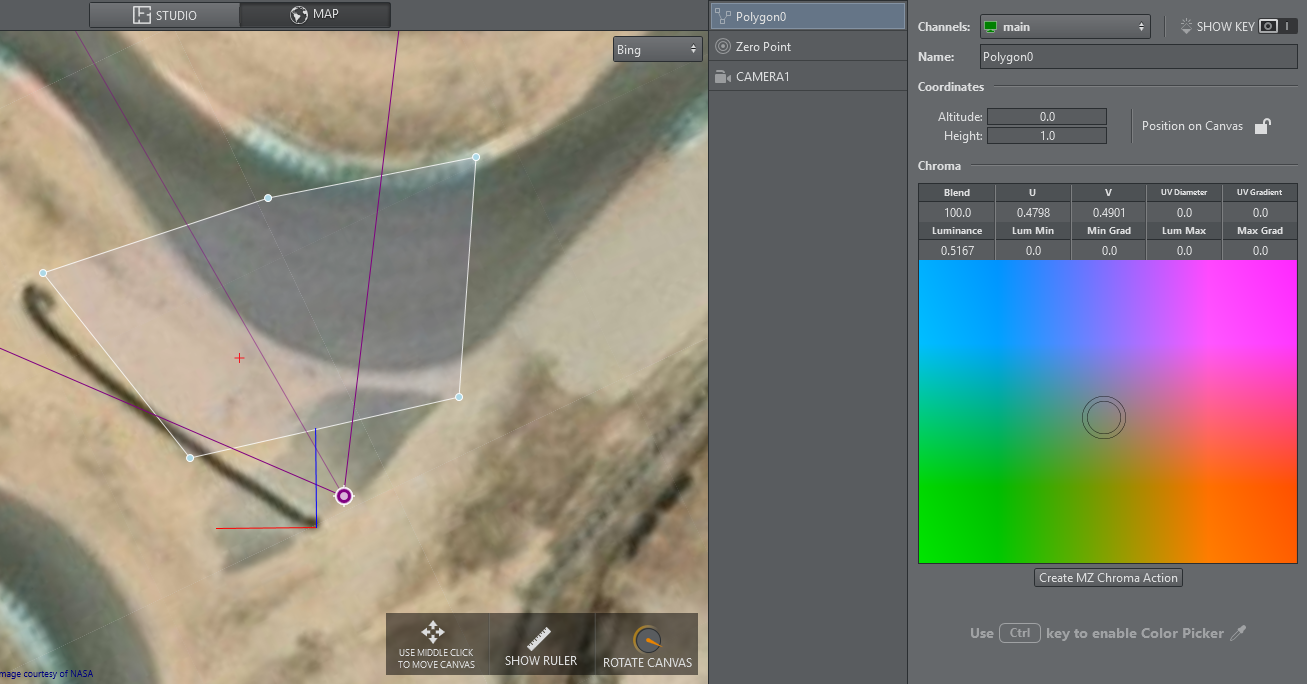
Click on the map for each vertex and finish the drawing by pressing the ESC key. You'll see a multizone chroma control on the right hand side. If you now click on Create MZ Chroma Action, a corresponding action will be inserted on the action canvas.
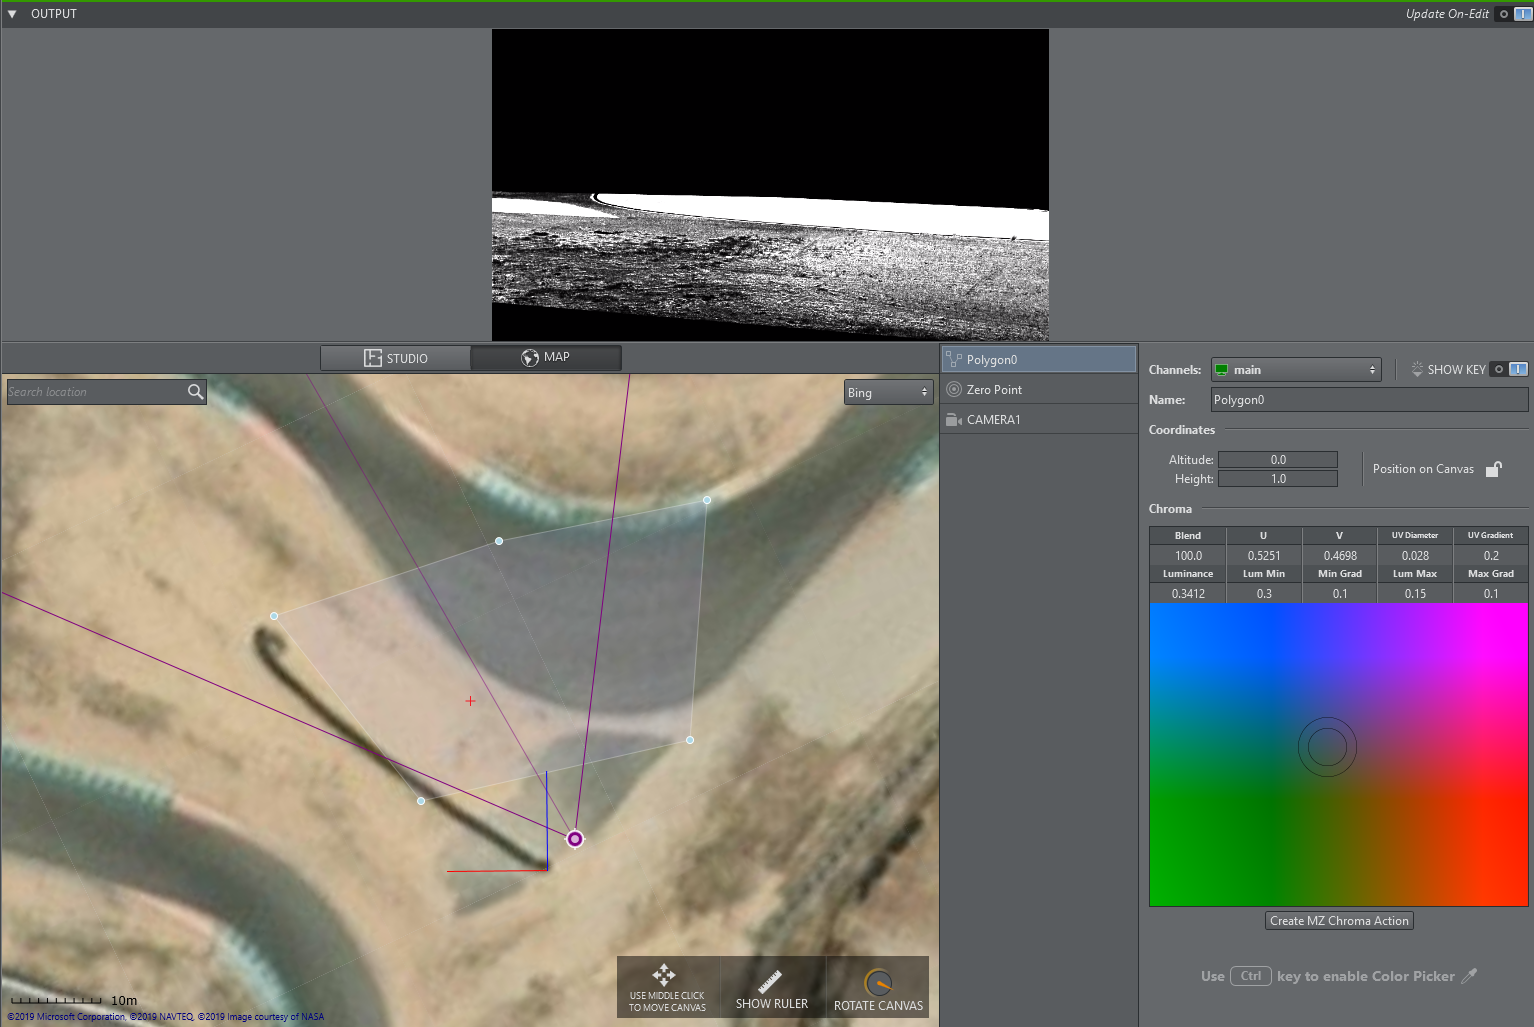
Viz Arc creates a polygon in the background scene that will be tracked with the tracked camera. The area that is keyed on remains fixed in the same place. Note that the polygon is flat and a flat floor is therefore assumed.
Multizone Chroma Key Action in Detail

|
|
Alpha of key signal, 100 is full opacity, 0 is completely transparent |
|
|
U value for color keying |
|
|
V value for color keying |
|
|
All colors between the reference UV and this diameter will be removed |
|
|
Gradient for fade out at diameter border (0=sharp, 1=soft) |
|
|
Luminance is defined as 0.0 for dark and 1.0 for bright |
|
|
Lower luminance limit for keyed colors |
|
|
Gradient for lower luminance limit (0=sharp, 1=soft) |
|
|
Upper luminance limit for keyed colors |
|
|
Gradient for upper luminance limit (0=sharp, 1=soft) |
Note: Lum Min and Lum Max are not absolute values, but are relative to the Luminance (e.g. when Luminance is 0.5, Lum Min is 0.1 and Lum Max is 0.2, the Keyer works in the range 0.4 to 0.7).