Viz Arc User Guide
Version 1.8 | Published October 13, 2023 ©
Scene Action Types
Import from a scene/stage tree and edit parameters of these supported types:
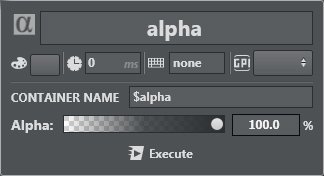
Alpha
Alpha lets you set the opacity to the referred object, from 0.0 (not visible) to 100.0 (fully visible).
Control Channel
Control Channel lets you control basic Control Channel types such as floats, integers, and Boolean values. This can be particularly handy in conjunction with the Viz Engine 4 Render Graph.
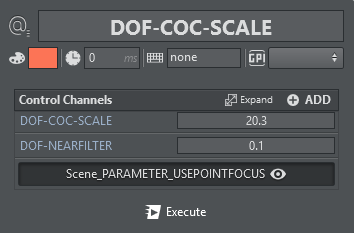
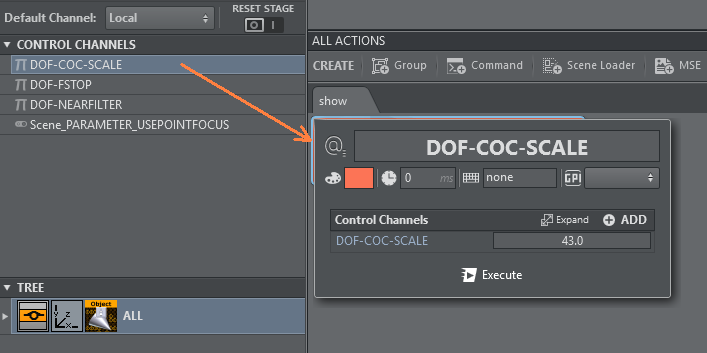
To create a Control Channel action, drag and drop a Control Channel to the action canvas:
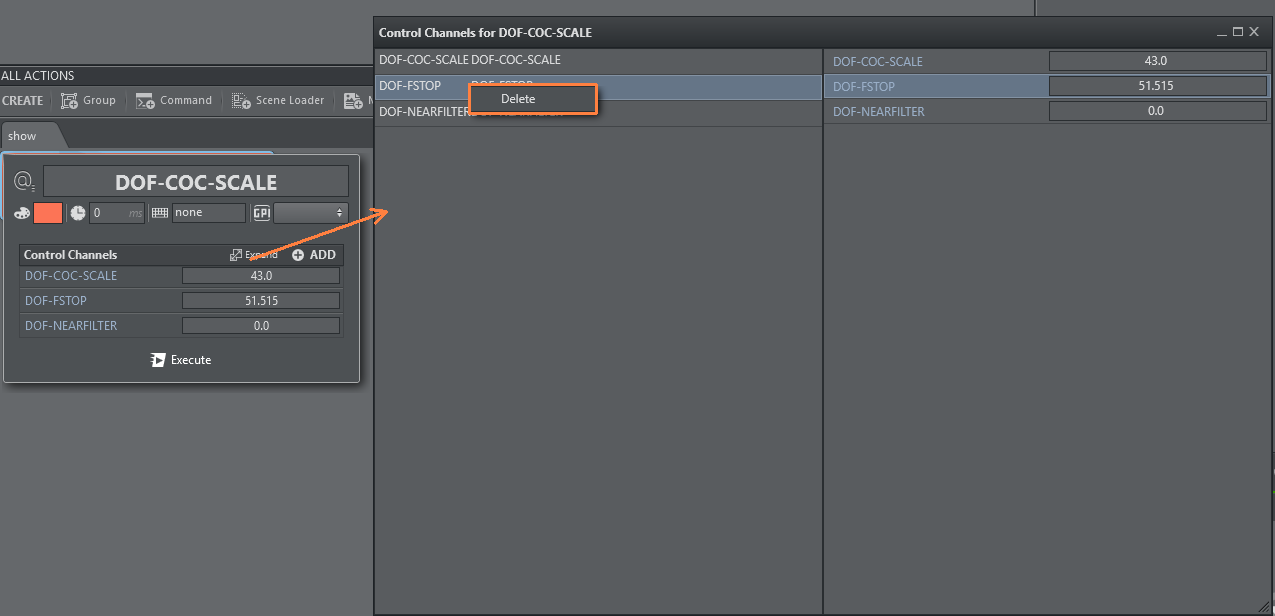
If more than one parameter needs to be controlled by the same action, edit the action and drag more parameters into the designated area:
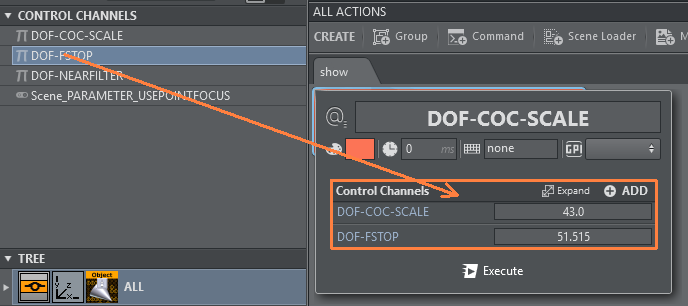
or use the ADD button to select from a list of available Control Channels to be added:

To remove Control Channels from the action, click the Expand button and use the context menu to delete single Control Channels in the newly opened window:
Control Objects
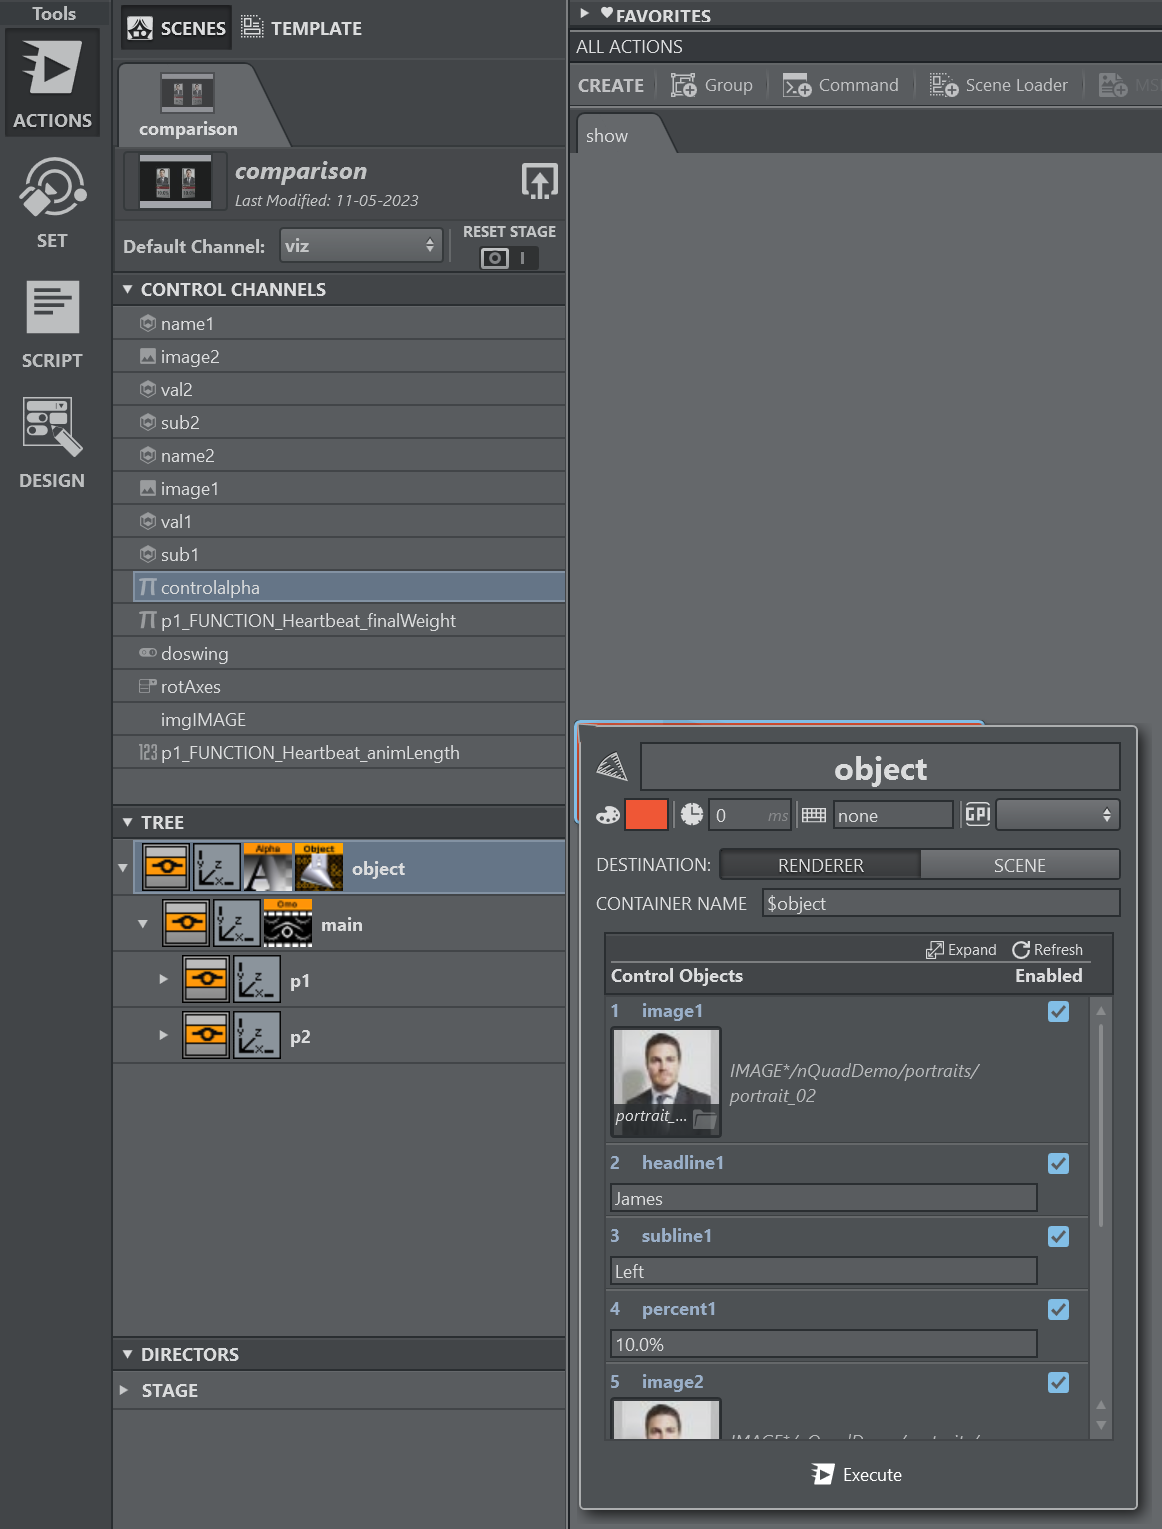
Control Object actions can be used by dragging a Control Object plug-in from the scene tree into the action canvas. It gives you a list of the Control Objects under the respective tree structure.
Expand the controls clicking the Expand button for a better overview and to enable deletion of single or multiple Control Objects. Select all the controls that shall not be set by this action, then select Delete from the context menu.
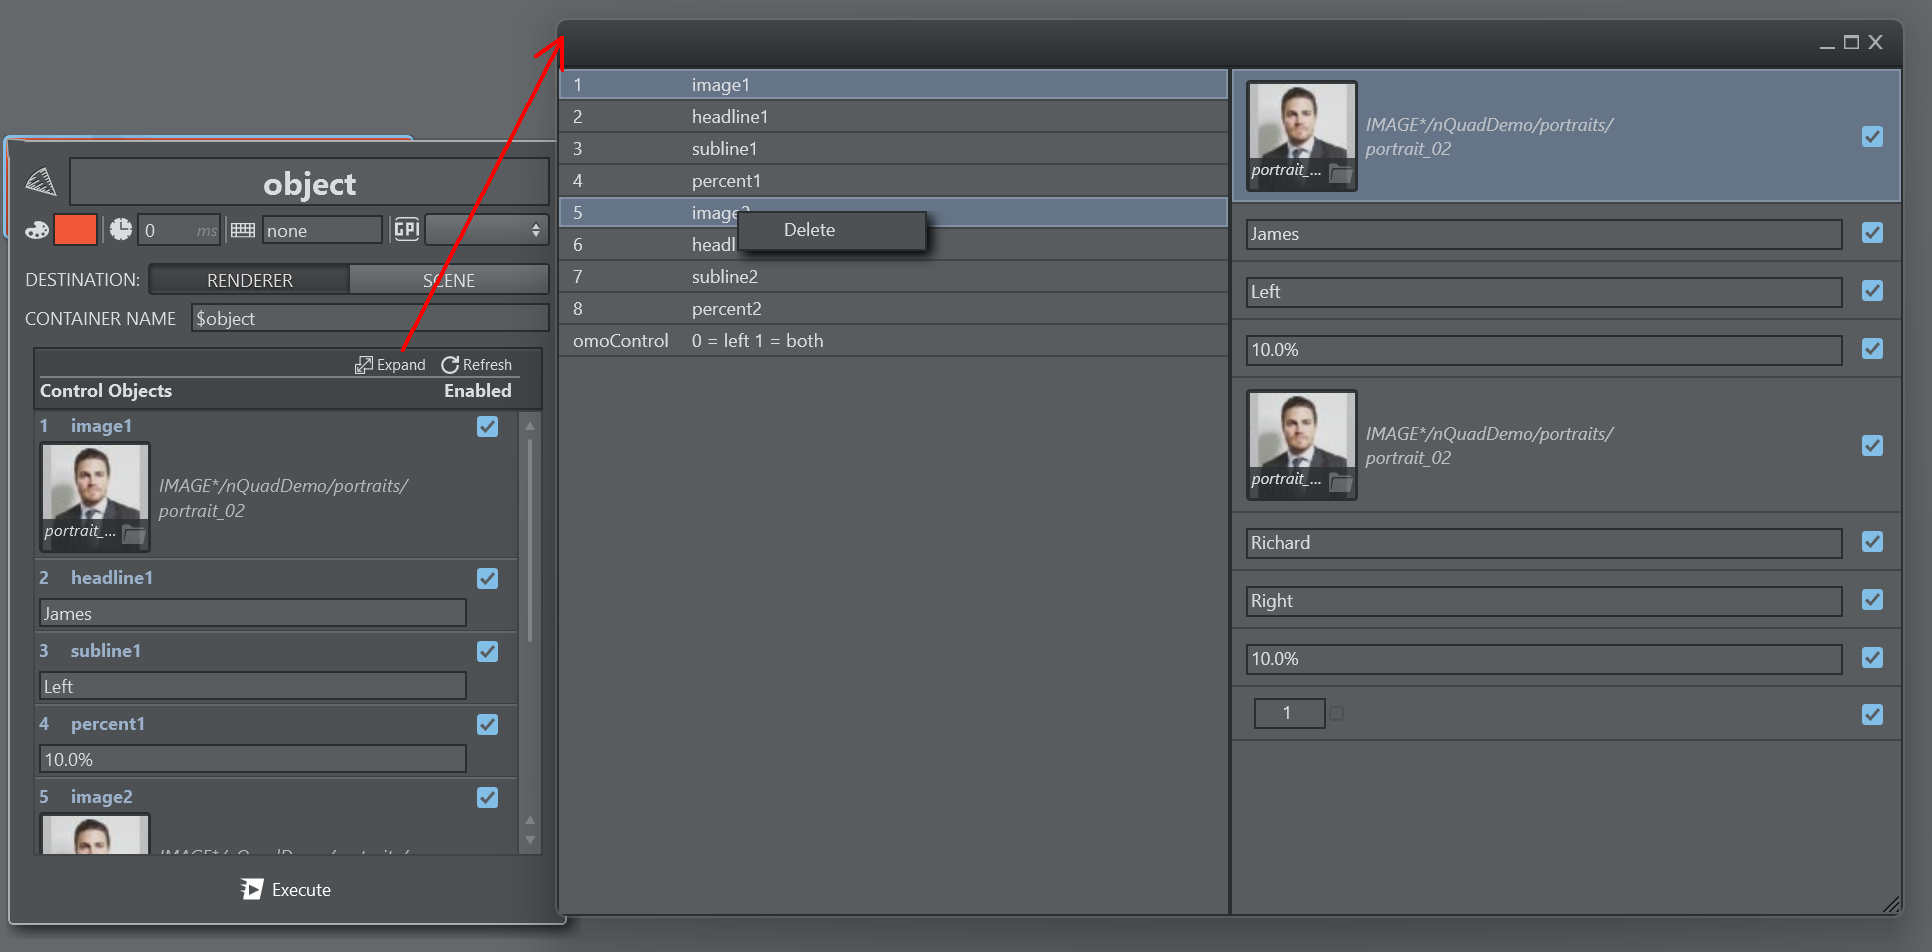
Use the Refresh button to update the list from the associated scene, in case the scene has been modified after the action's creation.
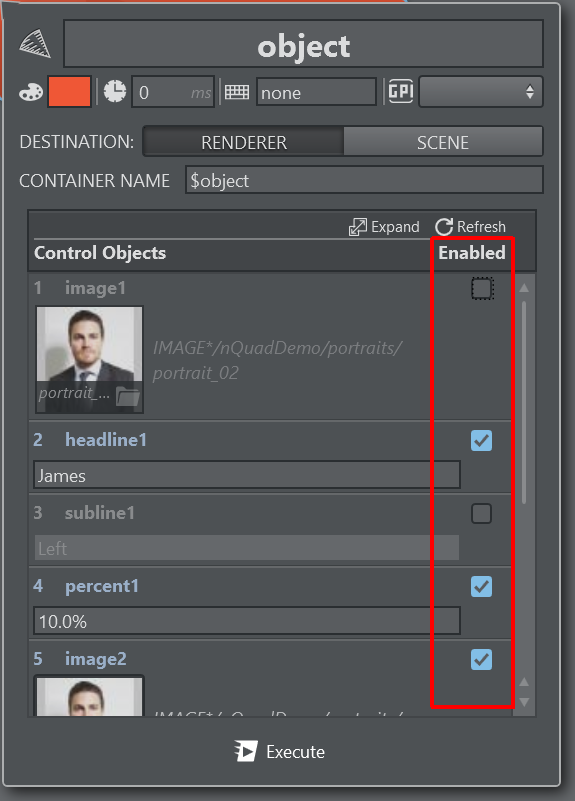
In some cases you might want to send only a subset of the entire Payload. Use the Enabled toggle flag for each Control Object to enable or disable setting the specific property on the Viz Engine. It behaves similar to the delete option described above, but in this case you can re-enable the disabled Control Object easily.
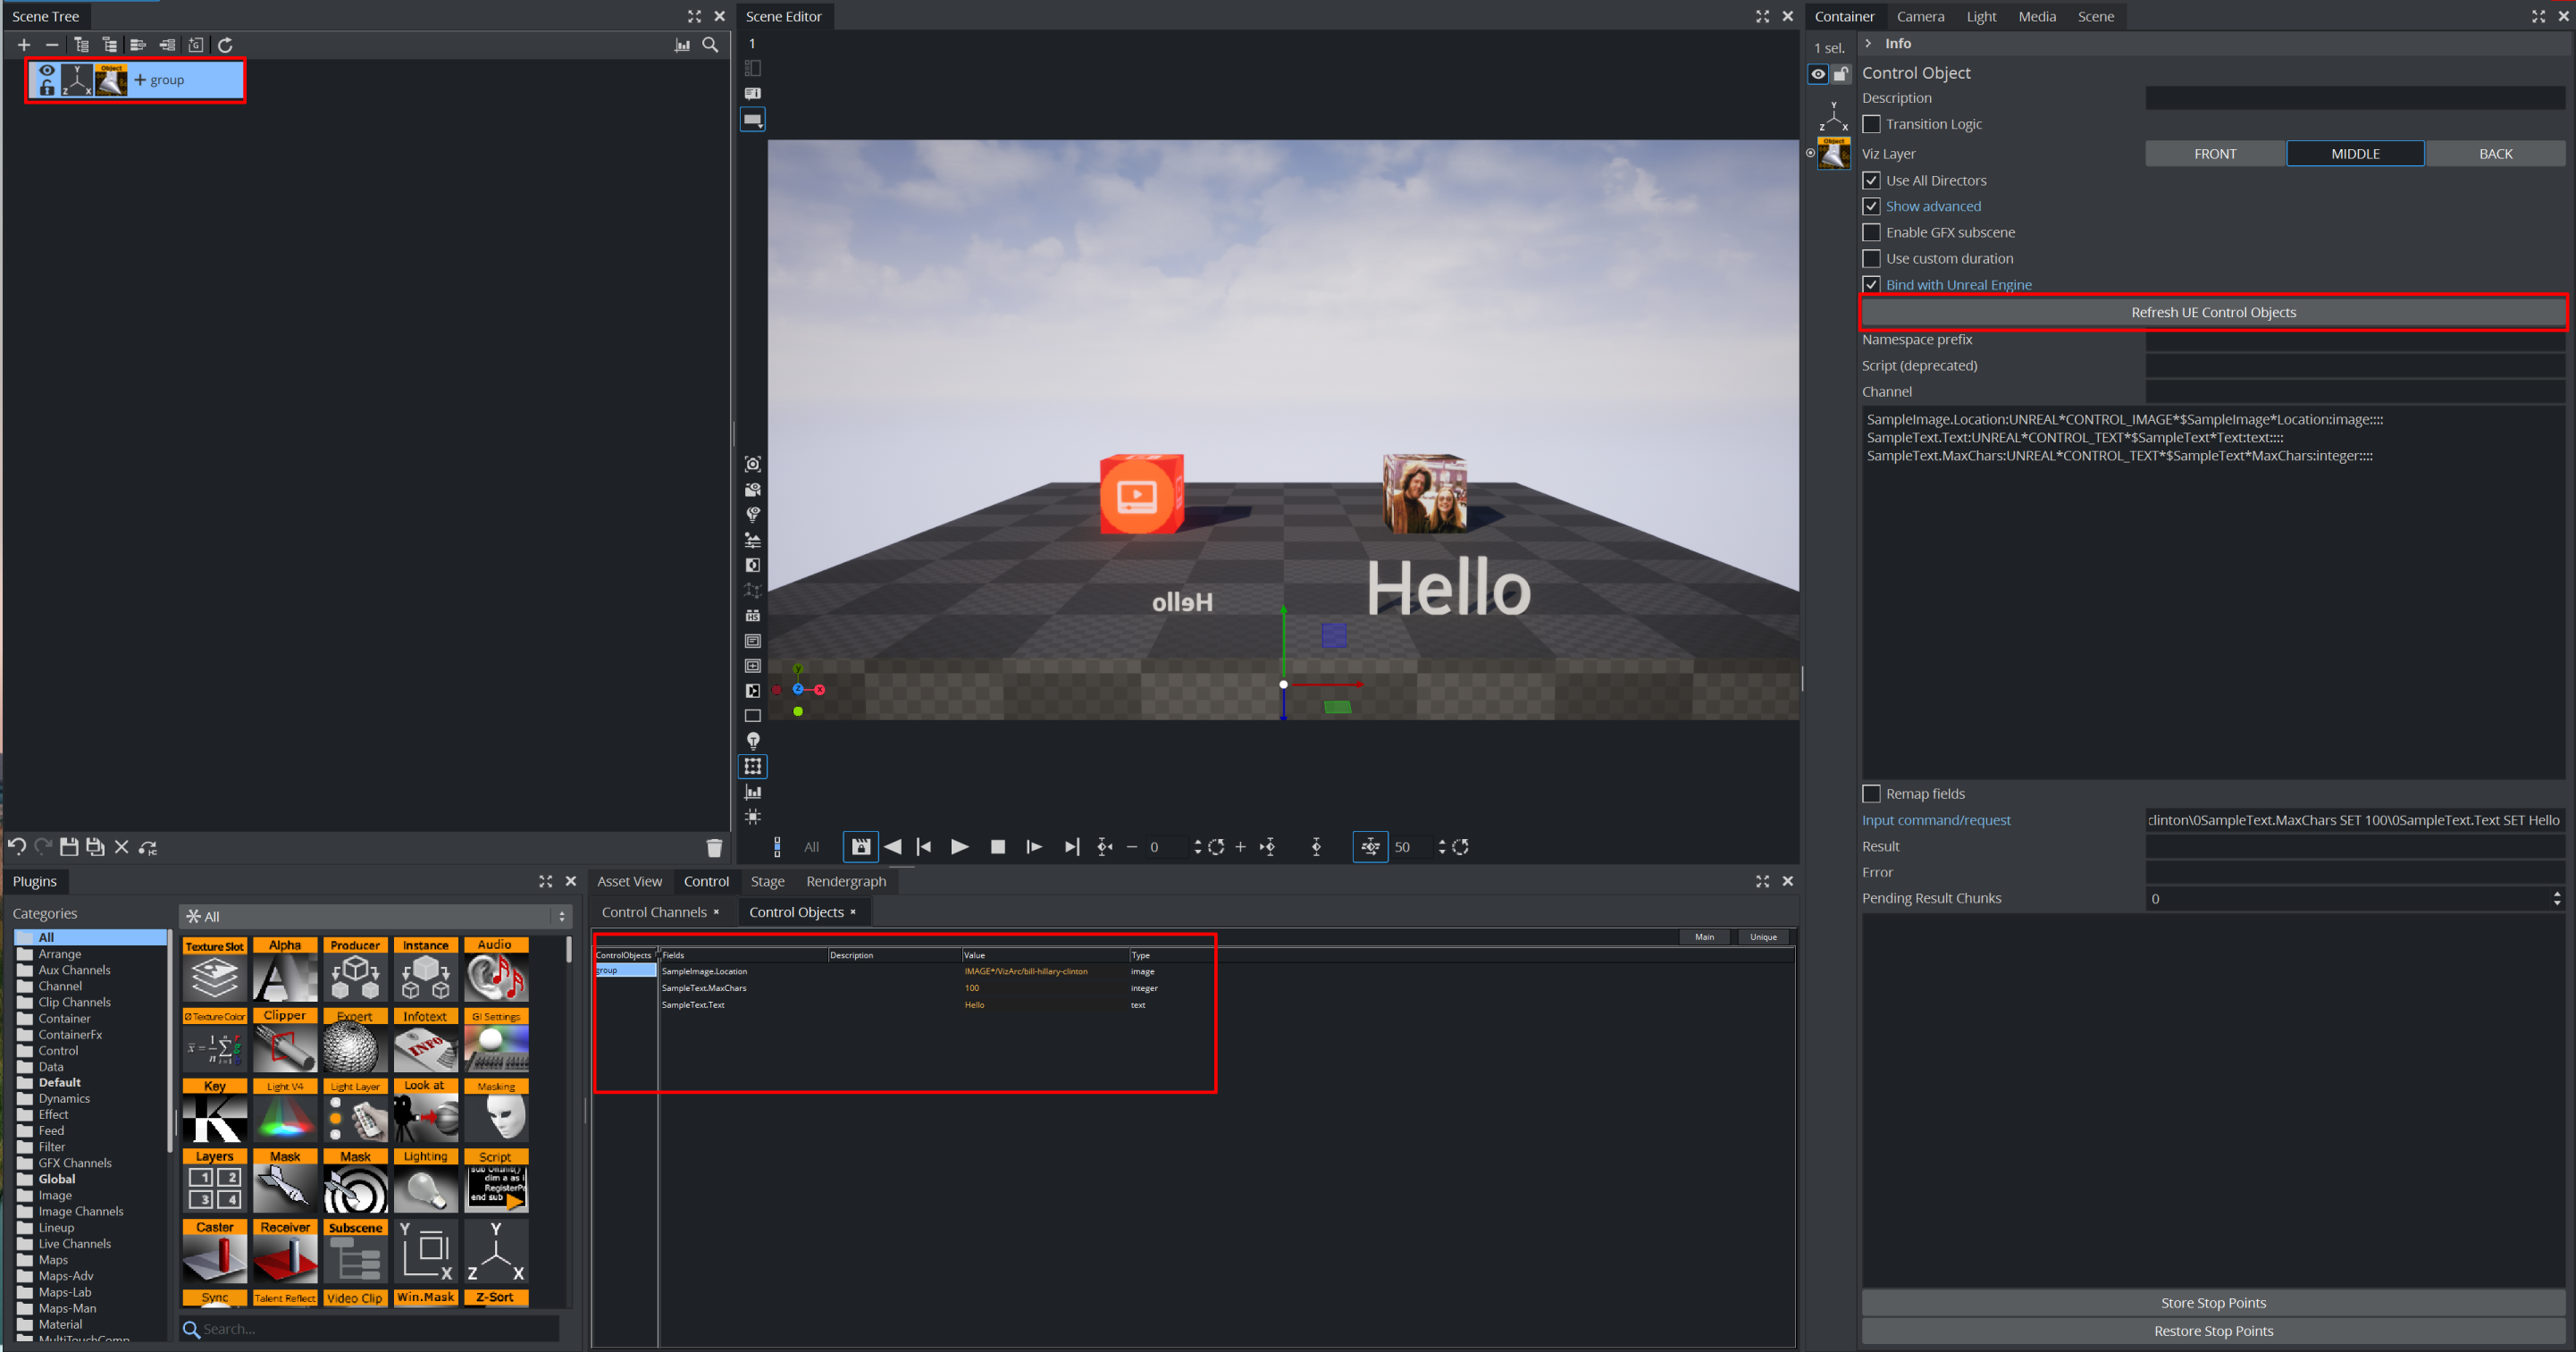
ControlObjects in Unreal Engine
The Viz Engine's Control Object integration allows you to control aspects of the Unreal scene using Control Objects. Viz Engine's Control Objects can be used to ingest images from the Graphic Hub to the Unreal Engine.
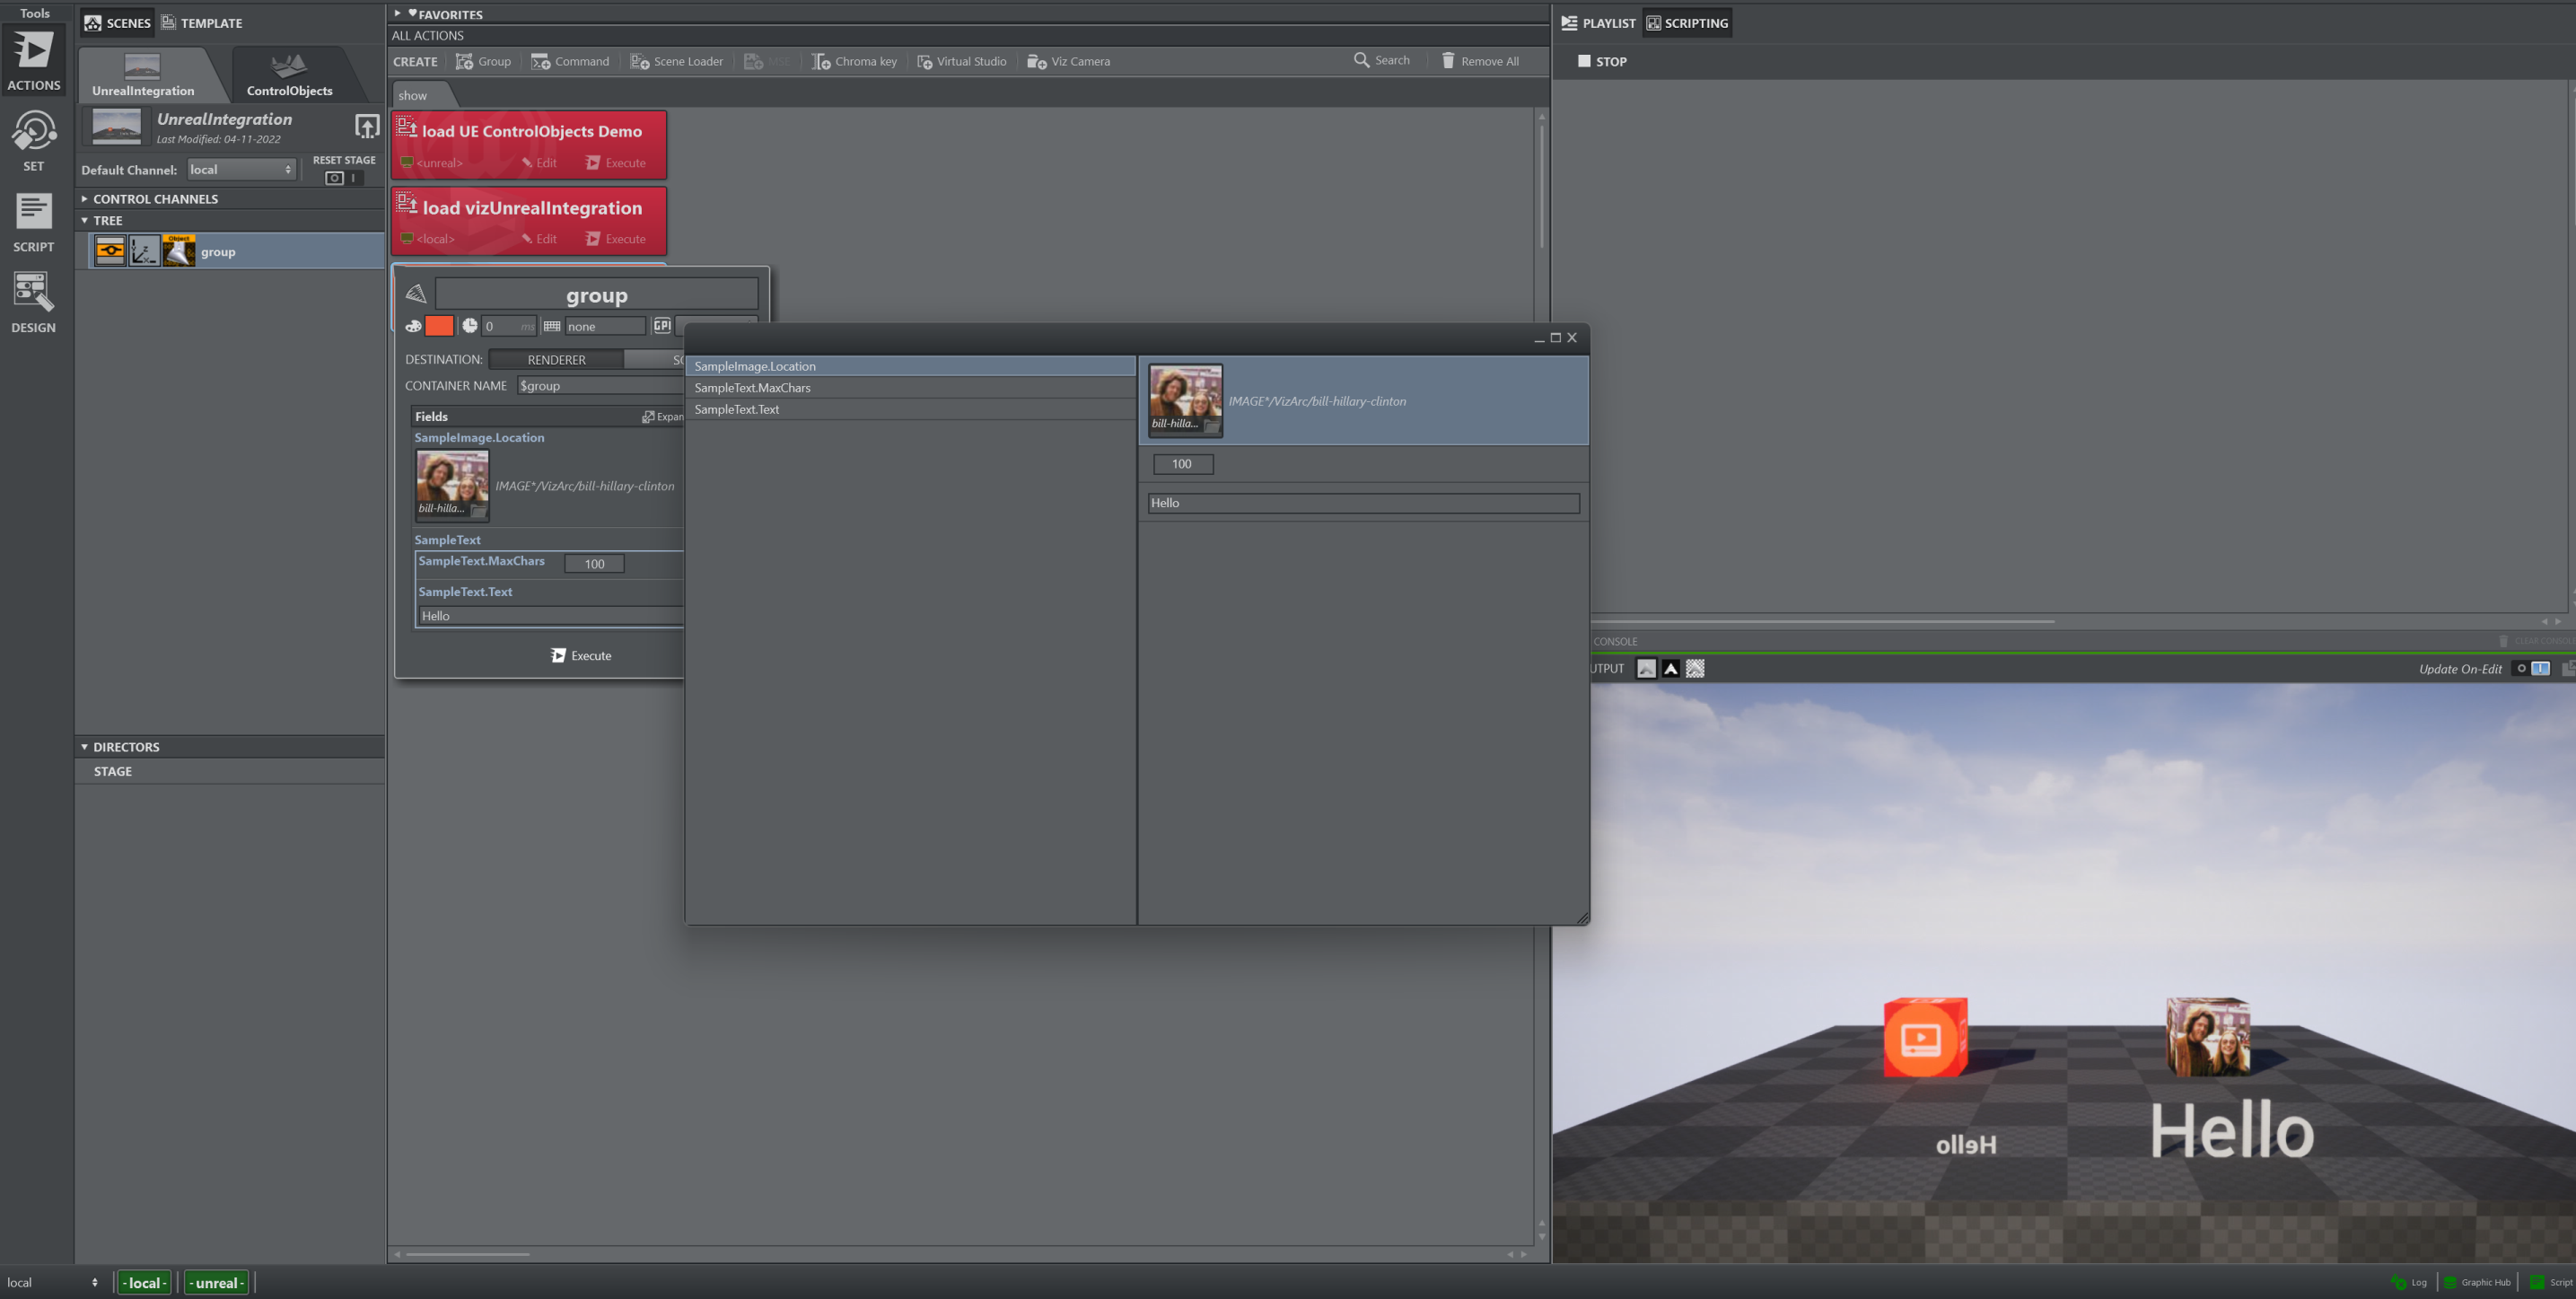
Control Objects can be refreshed within the Viz Engine by using the Refresh UE Control Objects fetching the exposed controls of the currently loaded Unreal Level.
Director
Director lets you handle stage animation of a specific stage director or ALL stages.
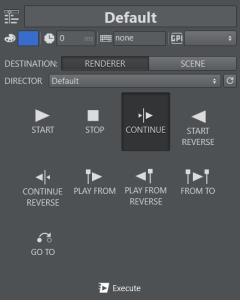
It’s possible to:
|
|
START an animation. |
|
|
STOP an animated director. |
|
|
CONTINUE an animation to the next step. |
|
|
START in REVERSE mode. |
|
|
CONTINUE in REVERSE mode. |
|
|
PLAY FROM a specific KEYFRAME. |
|
|
PLAY FROM a specific keyframe in REVERSE mode. |
|
|
PLAY an animation FROM a specific KEYFRAME TO another. |
|
|
SET an absolute time in seconds and jump (GO TO) tag/stop points. |


|
|
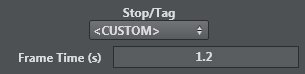
This menu lets you set the Stop/Tag for PLAY FROM, PLAY FROM REVERSE and GO TO options, and the Frame Time for the CUSTOM option. |
|
|
This menu lets you set the From stop/Tag and To Stop/Tag for playout of an animation for the FROM TO option. |
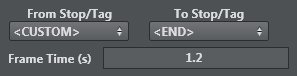
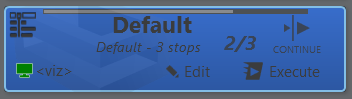
The Director Action shows the number of stop points when a specific director is selected (for example, not the <STAGE>). When the action is selected, a progress bar on top alongside with the currently reached stop point (for example, 2/3) is visualized. The number of stop points is read on the creation of the action and when the action is explicitly refreshed.
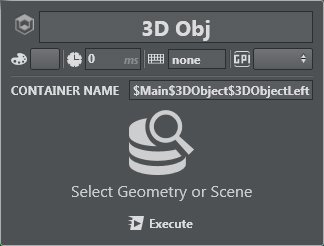
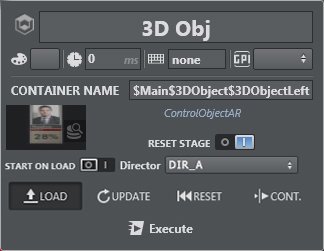
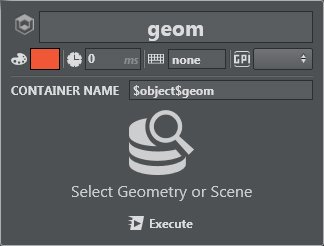
Geometry
Use this menu to set an OBJ or SCENE element in a specified container.
|
|
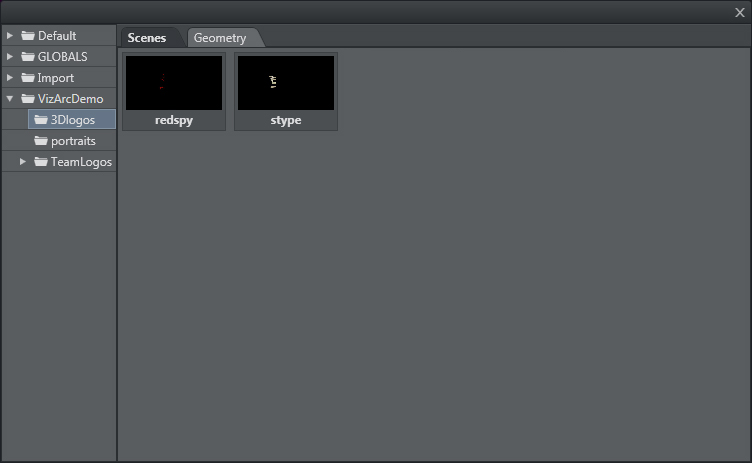
Clicking Select Geometry or Scene makes all GH trees appear in a new window, where you can select a new GEOM. |
|
|
Selecting OBJECT makes the relevant thumbnail appear in the action box. |
|
|
It’s also possible to select a SCENE instead of GEOM. Once the scene is loaded in the geom plugin, a separate edit section appears where it's possible to handle control object (if applicable) of the selected scene. |
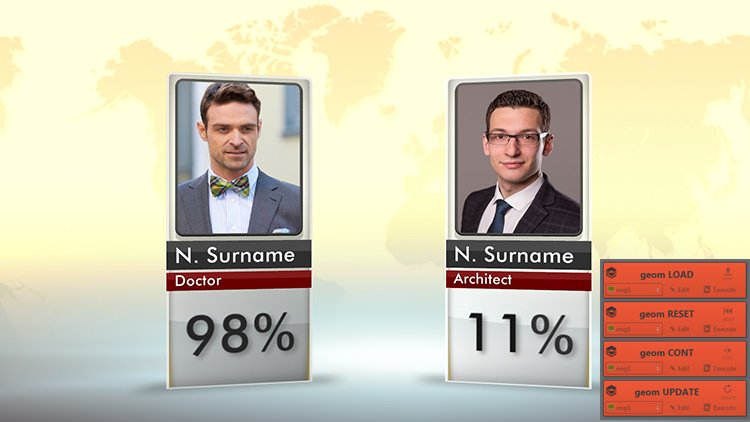
To Import a Geometry
In Viz Arc, it's possible to import objectified scenes (GEOM) into another scene through the GEOMETRY element. Once the selected object is imported in the right GEOM, it's possible to load, update, refresh and continue. A step-by-step example of importing and playing an objectified scene follows below:
|
|
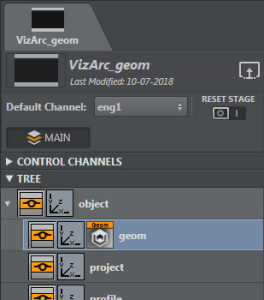
Load a main scene that contains at least one GEOM element. |
|
|
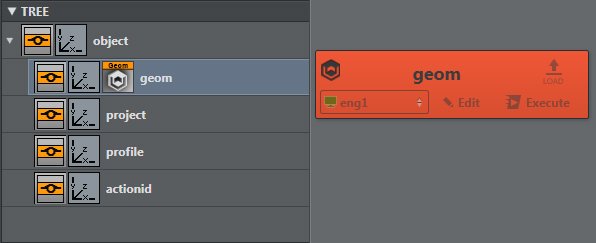
Drag the GEOM element into the main area. |
|
|
Press Edit and select the scene. |
|
|
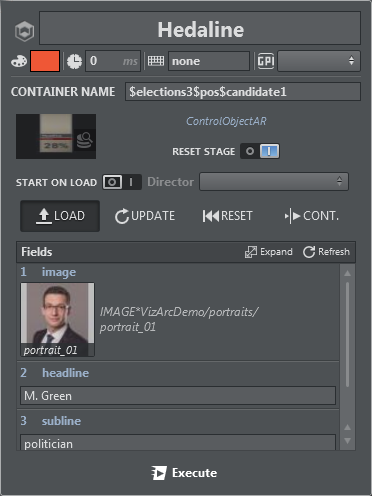
Once you select the scene, a list of control objects appears (if applicable). You can enable the RESET STAGE option to have the scene placed on the 0.0 frame in the stage. |
|
|
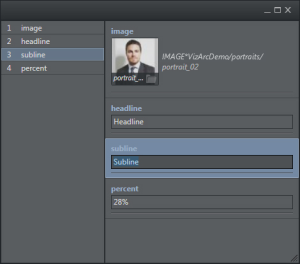
You can edit every control object listed in the scene. |
|
|
You can use the
|
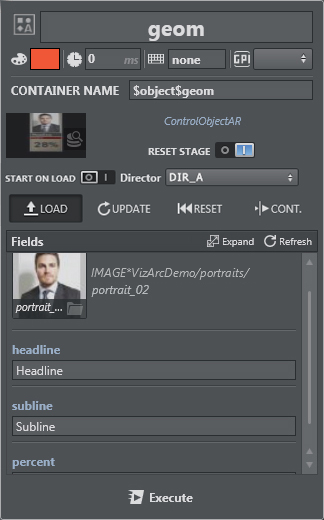
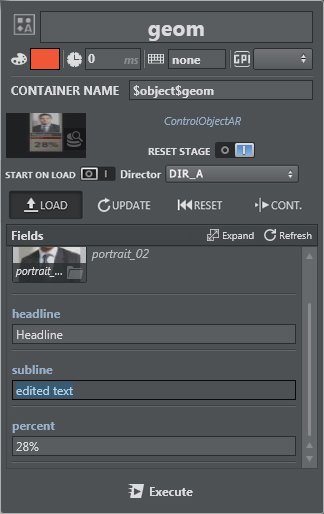
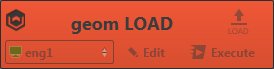
Once you have created your action box, you can duplicate it by pressing CTRL +D and assign a different action (LOAD, UPDATE, RESET, CONT) to each box. Follow the steps below to play the GEOM scene in the main scene:
|
|
This command loads the scene/object in geom. If If |
|
|
This command updates all changed control objects On Air. |
|
|
This command initializes the stage (frame 0.0). |
|
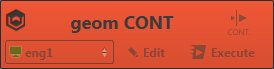
|
This command plays the scene. If the scene has multiple animation steps, you can continue the animation by clicking it multiple times. |


For LOAD, RESET and CONTINUE, you can choose a specific director instead of the full stage. ![]()
Light
The light action works together with Viz Engine V4 lights. All light types are supported (directional, area, spot, point).
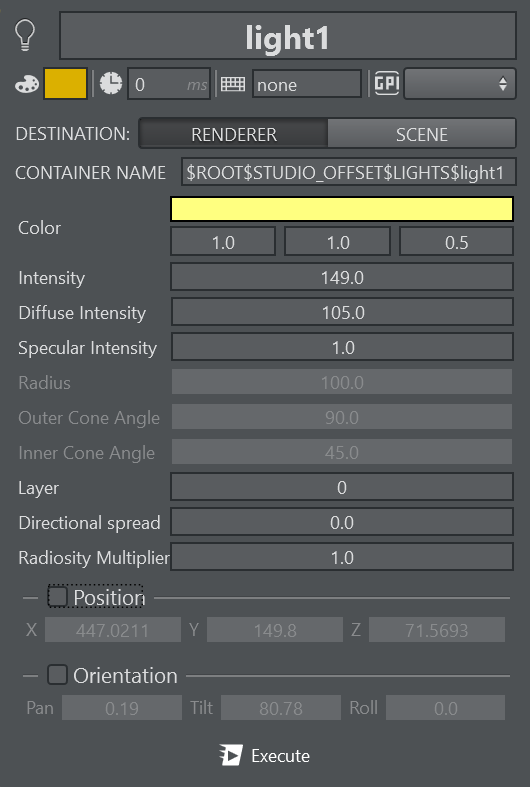
The Position and Orientation settings can be optionally set and act on the container transformation.
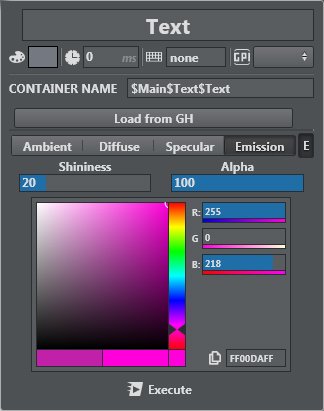
Material
The Material menu lets you set the material of an element and its Shininess and Alpha. Set a unique color or set every color to Ambient, Diffuse, Specular, Emission lighting by enabling/disabling the E button next to the lighting tabs.
-
Ambient: Determines the color that the object reflects when illuminated by a natural ambient light.
-
Diffuse: Determines the real color of the object, revealed when the object is illuminated by a neutral light.
-
Specular: Determines the color that the object has when the light meets the object surface and reflects in the camera.
-
Emissive: Determines the self-illumination color.
You can import an existing material in GH (Graphic Hub) by pressing the Load from GH button.
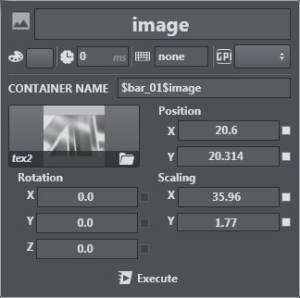
Image
Image lets you select an image, both from GH tree and external explorer files, and set basic transformation parameters like Position, Rotation, and Scaling of the image texture.
|
|
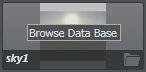
Once in edit mode, click image to browse the database and select an image from Graphic Hub. |
|
|
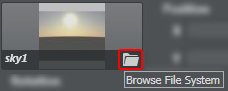
Once in edit mode, click the folder icon |
|
|
To see the image path, hover your cursor over it. |
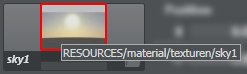
With a properly configured Viz One or Viz Media Service, assets can be picked from those sources in addition to local files or Graphic Hub. It is possible to search for assets within Viz One using the search box. 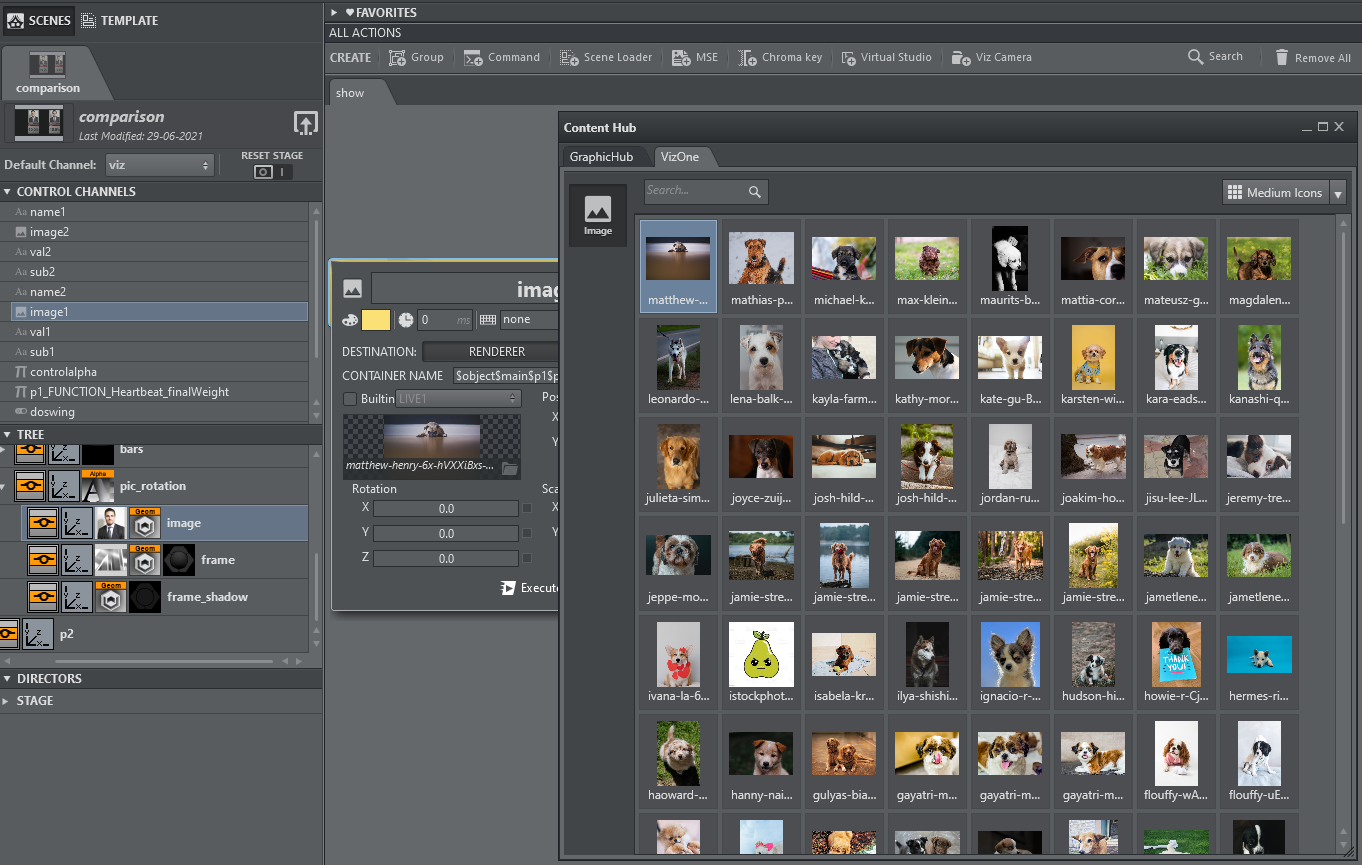
Key
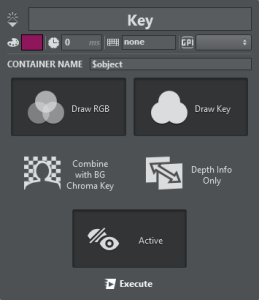
Use the Key menu to handle Key options for a container:
|
|
Draw RGB |
|
|
Draw Key |
|
|
Combine with BG Chroma Key – combines the alpha of the container with the alpha of the background before blending the foreground with the background. |
|
|
Depth Info Only – depth only for occlusion rendering with Live Video. |
|
|
Active - shows if the Key plugin is active or inactive. Typically used in a green screen scenario to determine whether an object should appear in front of or behind the talent. |


Omo
Use this menu to adjust the Omo plug-in settings:
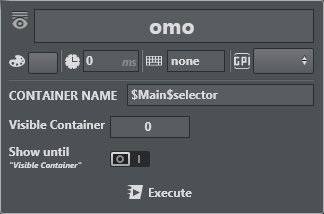
This plug-in displays all sub-containers, either one at a time or by keeping the previous container visible until the selected container appears (by enabling the Show until parameter). The Visible Container parameter determines which sub-container is displayed.
Note: For more on the Viz Omo Plug-in, see the Viz Artist User Guide.
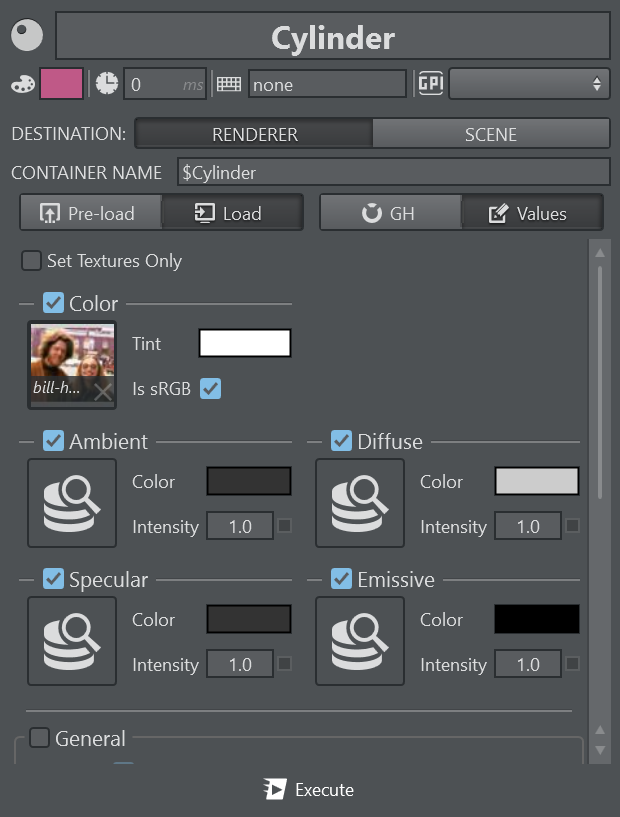
PBR Material
The PBR Material action works together with Viz Engine V4 materials.
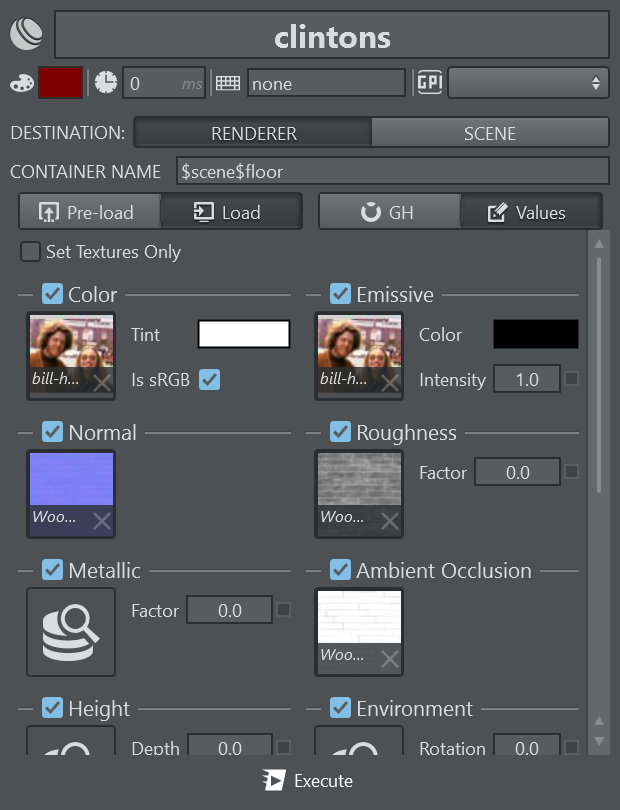
The action offers a subset of Viz Artist's PBR settings, exposing only the most prominent features, such as all textures and colors defining the PBR material.
Enable the Set Textures Only checkbox to send texture information only, use the respective checkboxes on the various attributes to send to enable or disable them.
Use drag and drop from any image assets to copy and paste a texture asset to another slot.
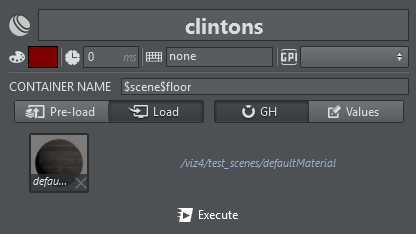
When the GH Mode is selected, you can browse Graphic Hub for PBR materials and load them through this action.
The action can be executed in two modes: Pre-Load or Load. Pre-Load preloads all the images present in the action on the Engine. Load effectively loads the PBR Material onto the Engine. Typically, you group all Pre-Load actions and execute them on Initialization, then trigger only the Load actions. Right clicking the action execute button always sends Pre-Load commands.
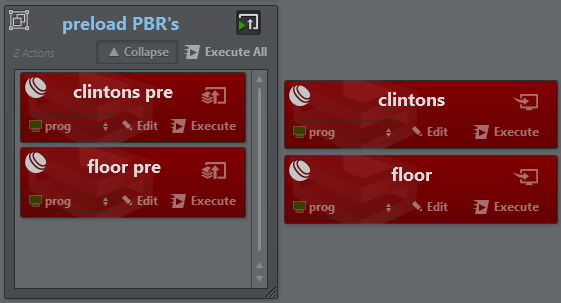
The screenshot above shows two PBR actions in an initialization group as pre-loading and the same actions on the right for loading.
Phong
The Phong Material action works together with Viz Engine 4.3 and newer.
The action offers a subset of Viz Artist's Phong material settings, exposing only the most prominent features, such as all textures and colors defining the Phong material.
When GH Mode is selected, you can browse Graphic Hub for Phong materials and load them through this action.
Analog to the PBR Material, the action can be executed in two modes: Pre-Load or Load. Pre-Load preloads all the images present in the action on the Engine. Load effectively loads the Phong Material onto Viz Engine. Typically, you group all Pre-Load actions and execute them on Initialization, then trigger only the Load actions. Right clicking the action execute button always sends Pre-Load commands.
Enable the Set Textures Only checkbox to send texture information only, use the respective checkboxes on the various attributes to send to enable or disable them.
Use drag and drop from any image assets to copy and paste a texture asset to another slot.
Script
The Script action lets you modify the registered UI parameters of a Viz Engine container script. Additionally, it lets you invoke any of the script's functions with its respective parameters.
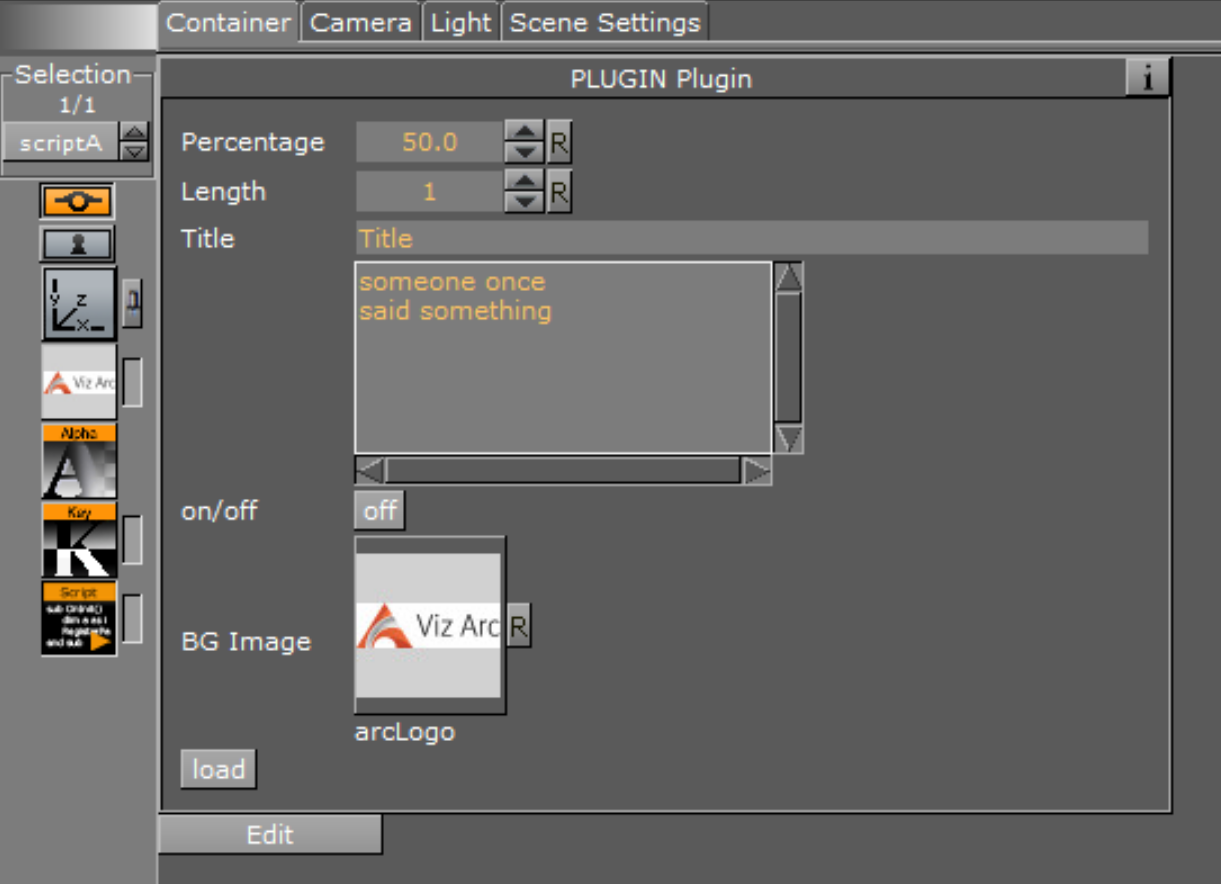
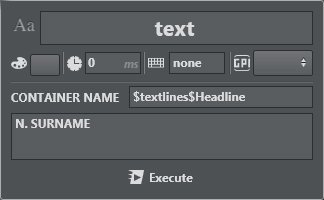
An example of a container script UI in Viz Artist.
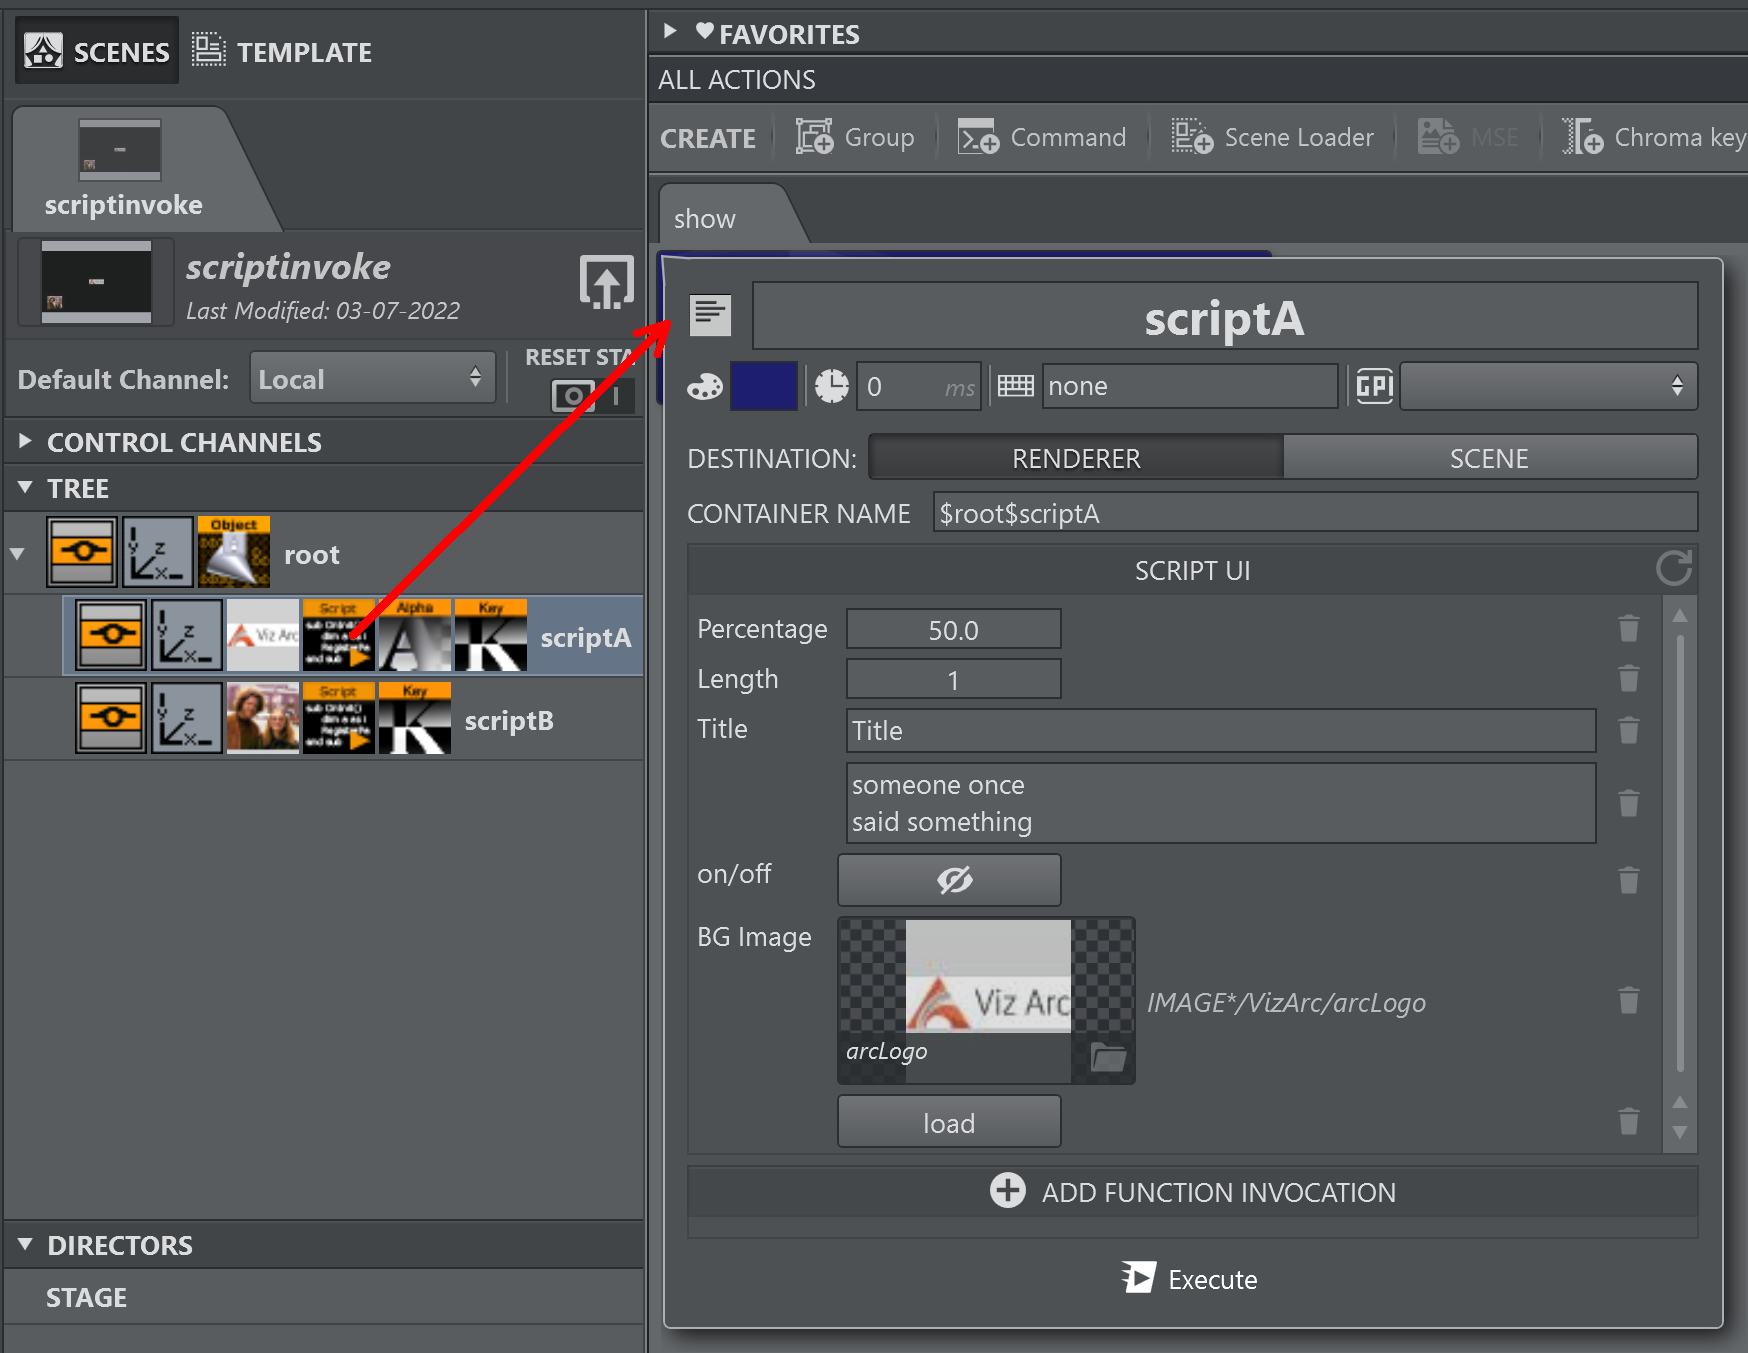
Drag and drop a Script container plug-in from the tree view into the action canvas to create a Script Action.
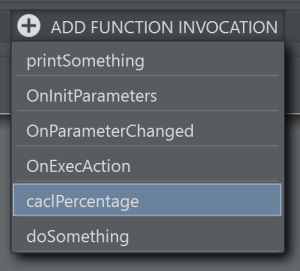
Click on the ADD FUNCTION INVOCATION button to add any of the script's functions to the action.

After adding the functions you whish to invoke, enter the parameters where necessary. A hint in the parameter's text box in the parameter gives you the signature of the function.
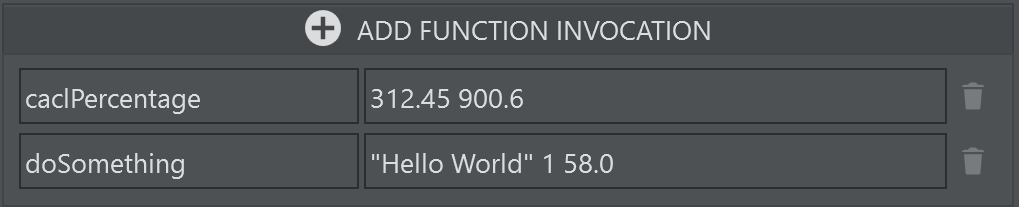
Note: Parameters need to be separated by a space character. When strings containing spaces are passed as parameters, use the quote " character as a delimiter of the string as in the "Hello World" sample above.
On execution of the Script Action, all UI parameter values and function invocations listed in the action are sent to the selected channel's Viz Engine(s).
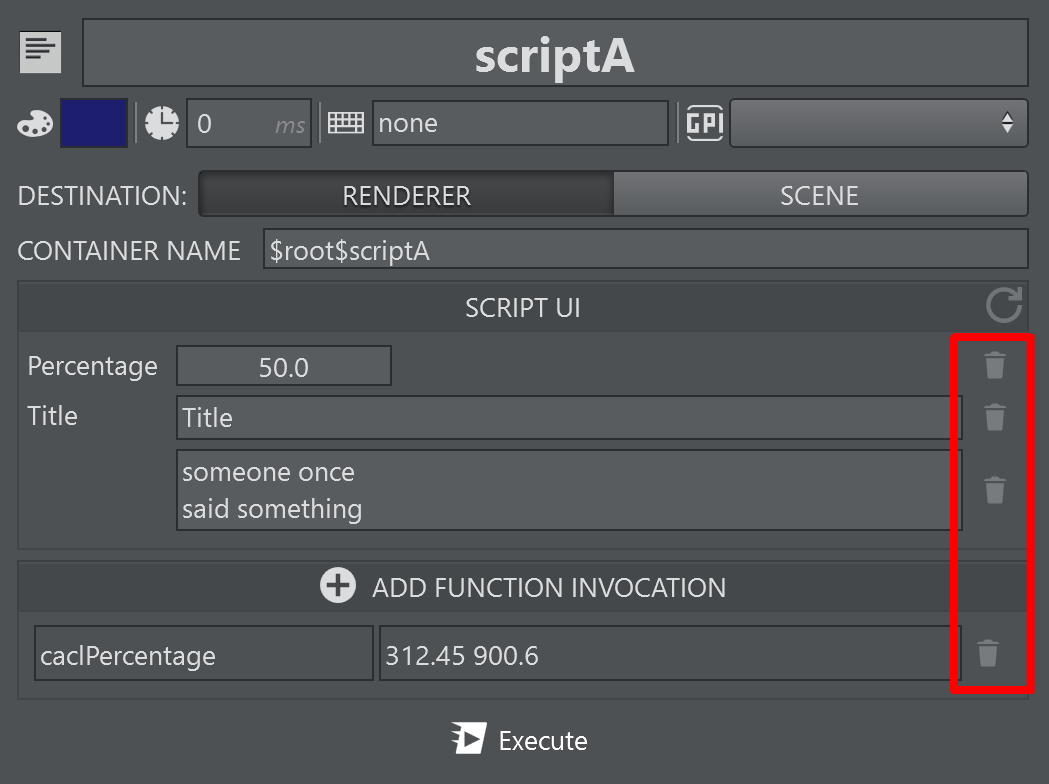
Use the small trash icons on the right hand side of each row to remove parameters that you don't want to send to the Viz Engine. Press the refresh icon to reload the script from the Viz Engine's scene. Make sure the scene is loaded on the Editing Engine.
Text
This menu lets you set text in the selected container. The action supports standard text geometry as well as Text introduced in Viz Engine 4.3.
Transformation
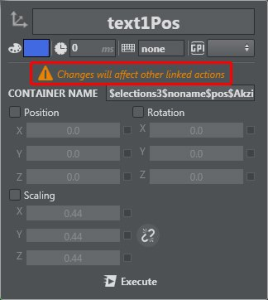
Transformation lets you set position, rotation and scaling of the selected container. You can also scale in proportion by clicking the Lock icon ![]() next to the scaling panel. Position, Rotation and Scaling can be disabled using the check boxes. When disabled, those parts are not being sent to the Engine on execution. For example, when selecting Rotation only, only the rotation of the target container is affected on execution.
next to the scaling panel. Position, Rotation and Scaling can be disabled using the check boxes. When disabled, those parts are not being sent to the Engine on execution. For example, when selecting Rotation only, only the rotation of the target container is affected on execution.
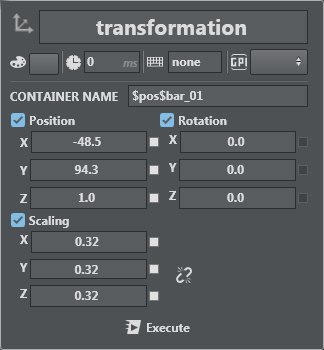
It's possible to create a linked action for TRANSFORMATION actions. This option is useful for controlling different scenes with the same tree structure, for example.
To Create a Linked Action
Linked actions are useful for controlling different scenes with the same tree structure, for example.
|
|
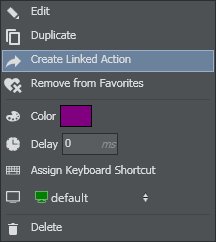
Right-click on the panel and select Create Linked Action (or ALT + drag on an action box). |
|
|
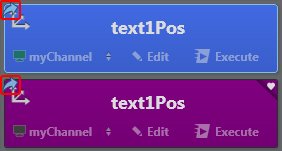
A new action box, cloned from the original one, is displayed. Both boxes have the linked icon at the top left corner. |
|
|
The linked icon also appears on the box saved in the favorite area, if applicable. |
|
|
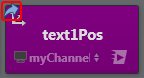
Any changes that are now made to one of the related boxes affects them all, until the clones are removed. |
Viewport
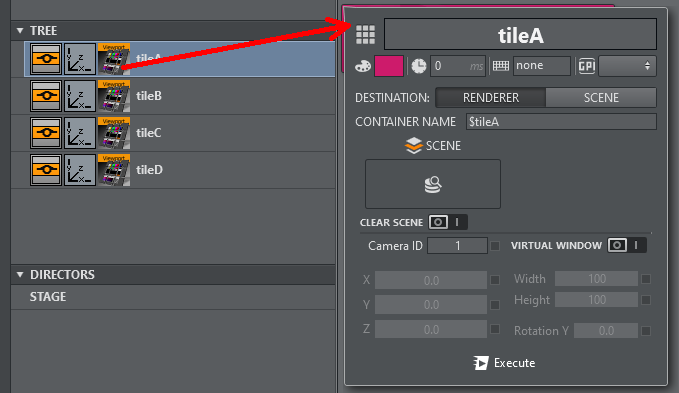
Drag and drop a Viewport container plug-in from the tree view into the action canvas to create a Viewport Action.
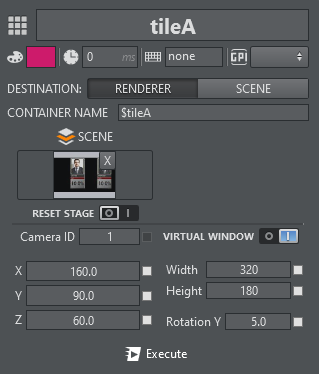
Specify the Scene to be loaded to be loaded into the viewport or Clear Scene to clear the currently loaded scene of the viewport. Select Reset Stage to reset the stage on scene load. Camera ID selects the camera to be used within the viewport scene.
When Virtual Window is checked the selected position, rotation and width and height are sent to the viewport plug-in.
Visibility
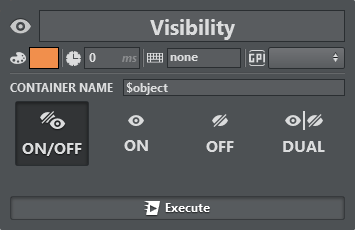
Use the visibility menu to toggle a container on or off. The container can be set to ON, OFF, DUAL or toggled (switched to the opposite of the current state).
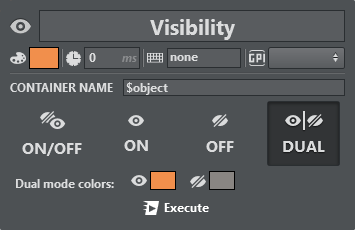
When DUAL mode is selected, left clicking Execute switches the container on and right clicking switches the container off. In the Dual mode colors section, two distinct colors can be defined for on and off states in order to make the state of the container more visible.
See Also
-
Viz Artist User Guide for more information about Scene types.