Viz Arc User Guide
Version 1.8 | Published October 13, 2023 ©
Supported Unreal Actions
Viz Arc recognizes the following types of Unreal actions:
Scene Loader
Read more about the Unreal Scene Loader.
Active
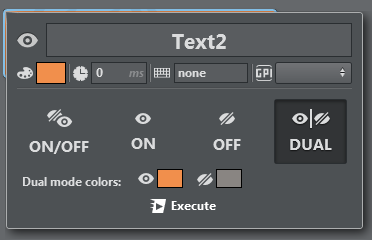
Active action lets you switch a container to visible or invisible. It’s possible to set the container to ON, OFF or TOGGLE between the two.
Position/Rotation/Scaling
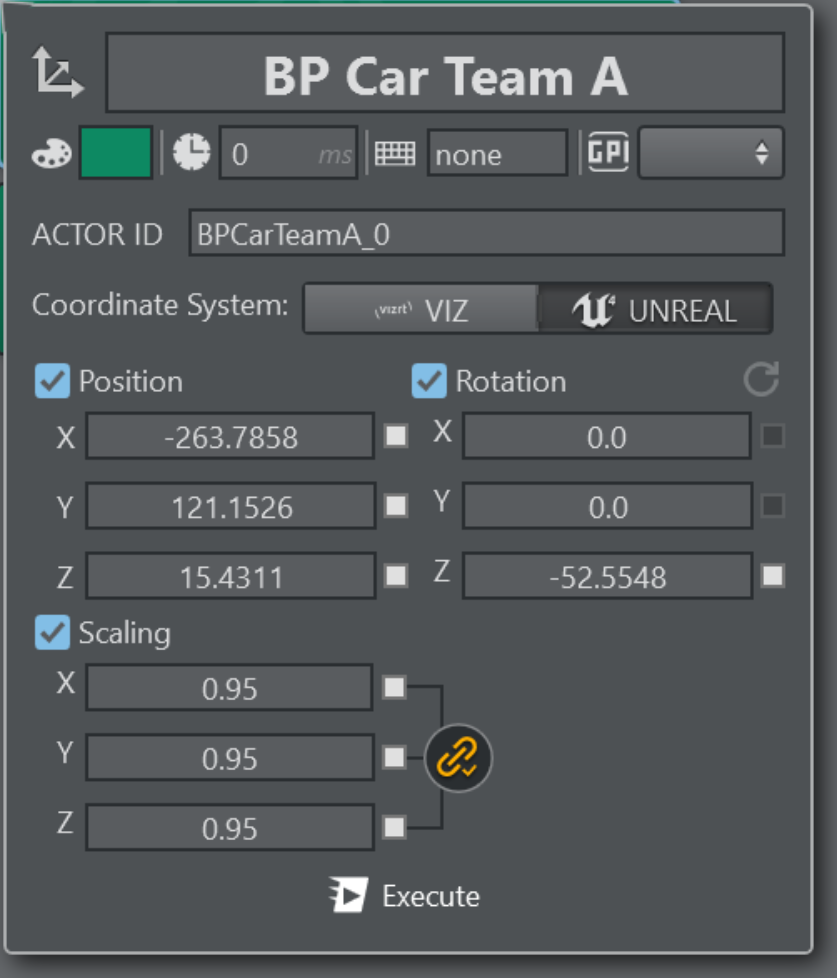
This action lets you set the position, rotation and scaling of the selected container. It’s also possible to scale proportionately by clicking the lock icon ![]() next to the scaling panel.
next to the scaling panel.
The coordinate system toggles the behavior of the positional XYZ axis, the default UNREAL is a Z-up left-hand system, while VIZ is Y-up right-hand system. It might come handy to use the Vizrt coordinate system when objects needs to be positioned relative to each other in the two engines.
Sequence
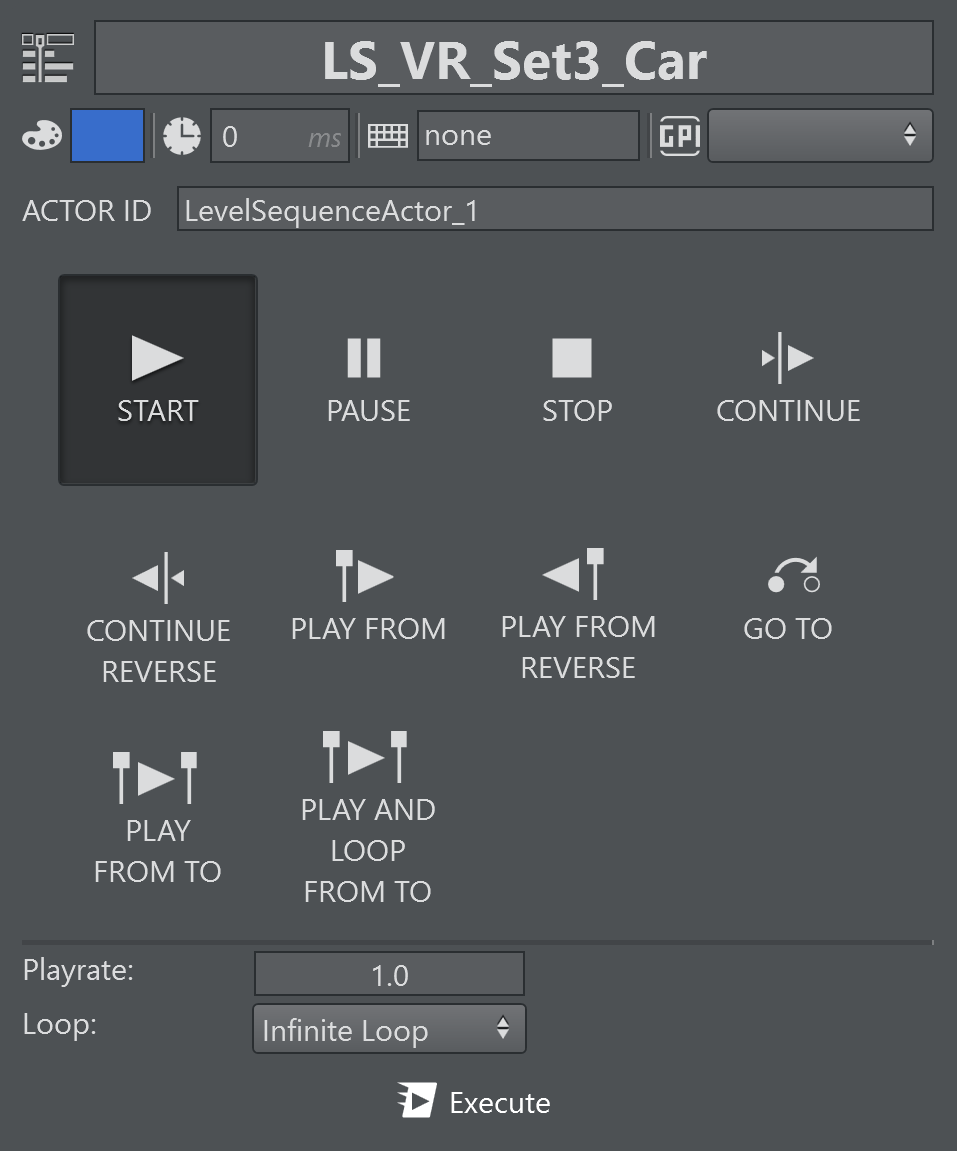
A Sequence action lets you control a sequence level created in Unreal Editor:
|
|
START animation. |
|
|
PAUSE an animated director. |
|
|
STOP an animated director. |
|
|
CONTINUE an animation to the next step. |
|
|
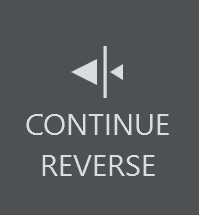
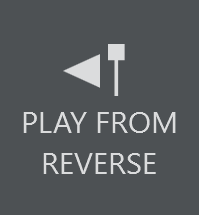
CONTINUE in REVERSE mode. |
|
|
PLAY from a specific KEYFRAME. |
|
|
PLAY from a specific keyframe in REVERSE mode. |
|
|
GO directly to a specific KEYFRAME. |
|
|
PLAY from a specific keyframe to a specific keyframe. |
|
|
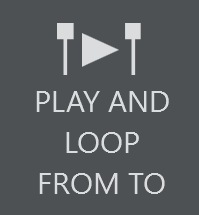
PLAY from a specific keyframe and then loop between two specific keyframes. |


The play-rate and the number of loops can be set on any play action selected.

A play-rate of 1.0 represents normal playback rate while a play-rate of 2.0 means double playback speed. Select as loop mode either Single Loop, Multiple Loops (specifying the number of loops) or Infinite Loop.
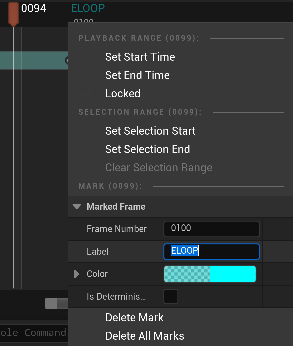
Clicking PLAY FROM, PLAY FROM REVERSE, GO TO, PLAY FROM TO or PLAY AND LOOP FROM TO makes a menu appear where you can set the position in frames, seconds or as a marker.
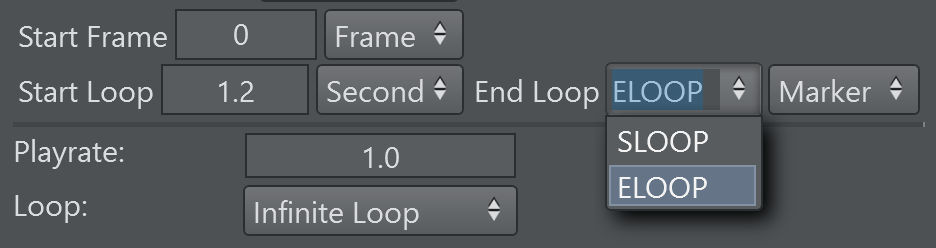
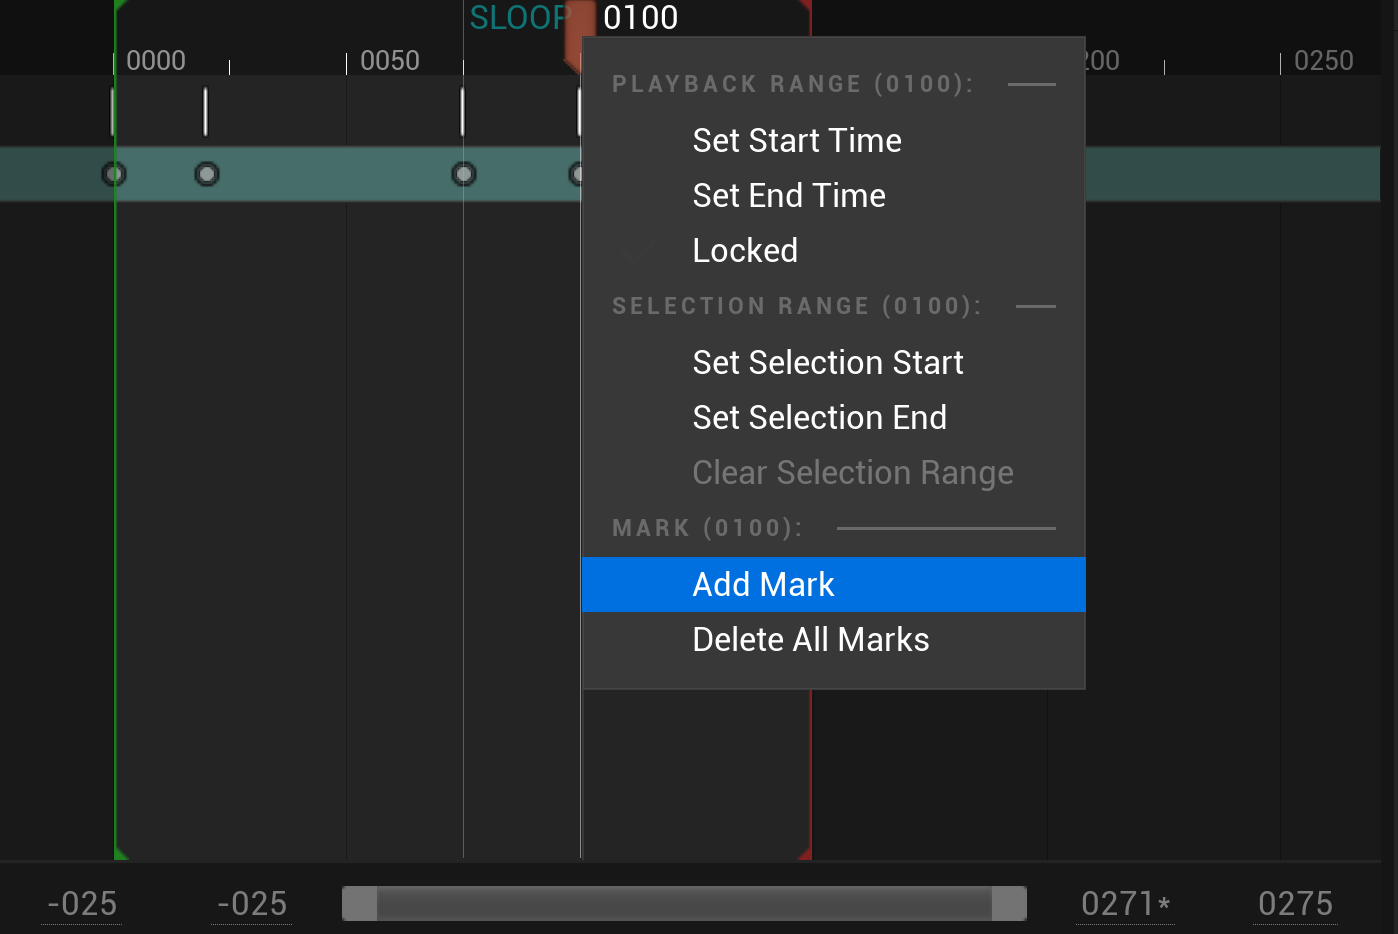
A Mark can be set on the unreal sequencer editor by right clicking the timeline and selecting Add Mark or in case a marker already exists, its label and position can be modified.
Animation
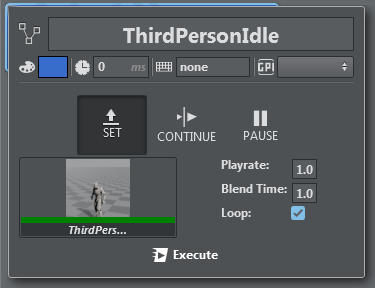
Animation action lets you assign an animation to the selected Unreal actor or browse a custom animation from those available by clicking the Animation icon. Animations can also be played, continued, stopped and/or looped.
Text

Text action lets you modify a text element in an Unreal level and set X and Y scaling.
Mesh
This action lets you change the static mesh and the material properties of a Static Mesh Actor.
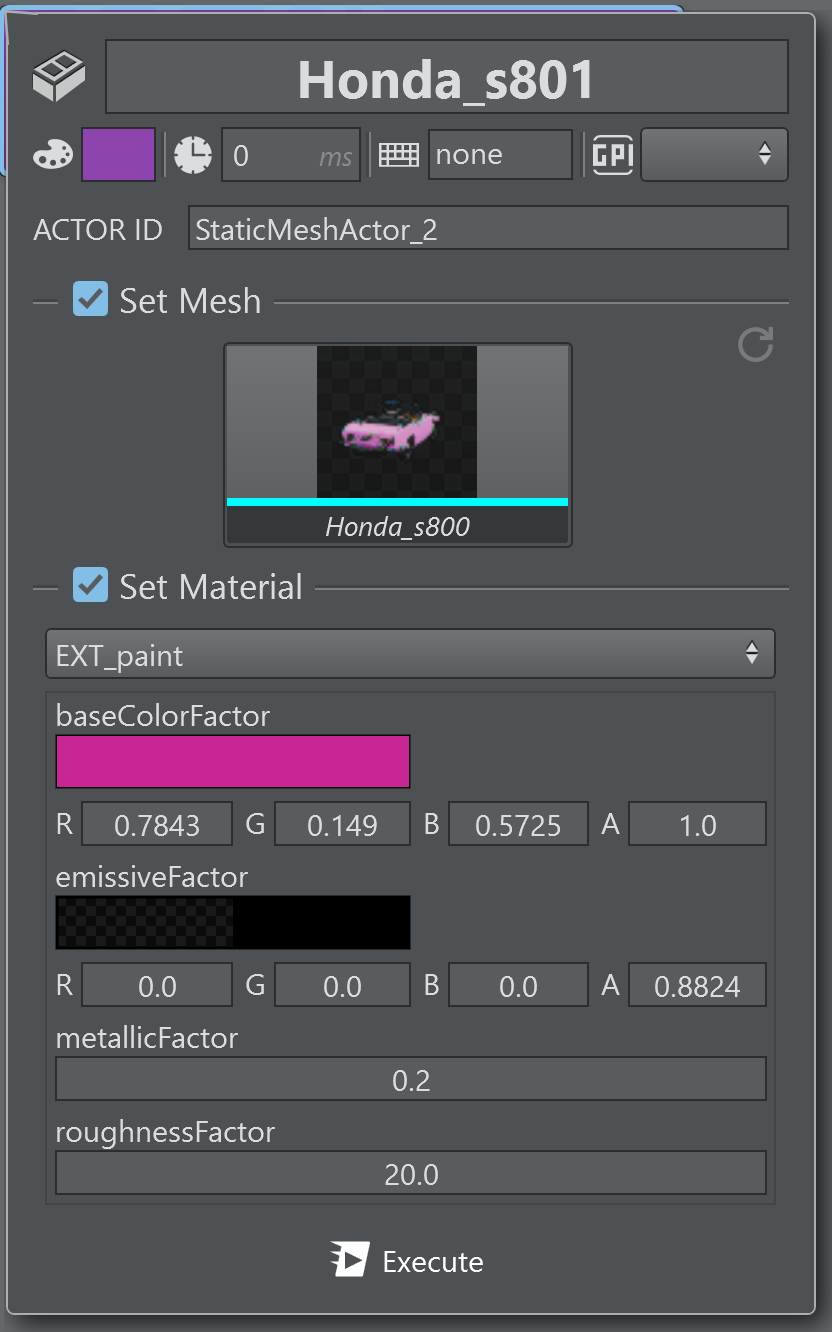
Use the checkbox Set Mesh when the action should set the static mesh and check the Set Material when the action should set any specific material property.
Mobility Property on Unreal Actor:  The mobility attribute on the unreal actor needs to be either Movable or Stationary to make the mesh editable.
Presets
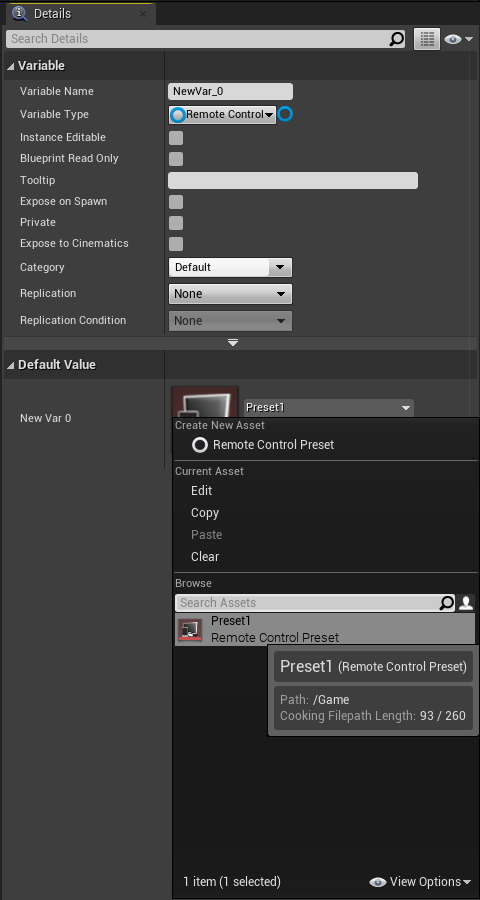
Unreal Engine Version 4.26 introduces Remote Control Presets . This allows the user to tag easily attributes on the outliner to be exposed to external control applications. Those presets can be set using a Preset Action.
A preset on the Unreal Engine might look like this, exposing transformations of object and a light color.
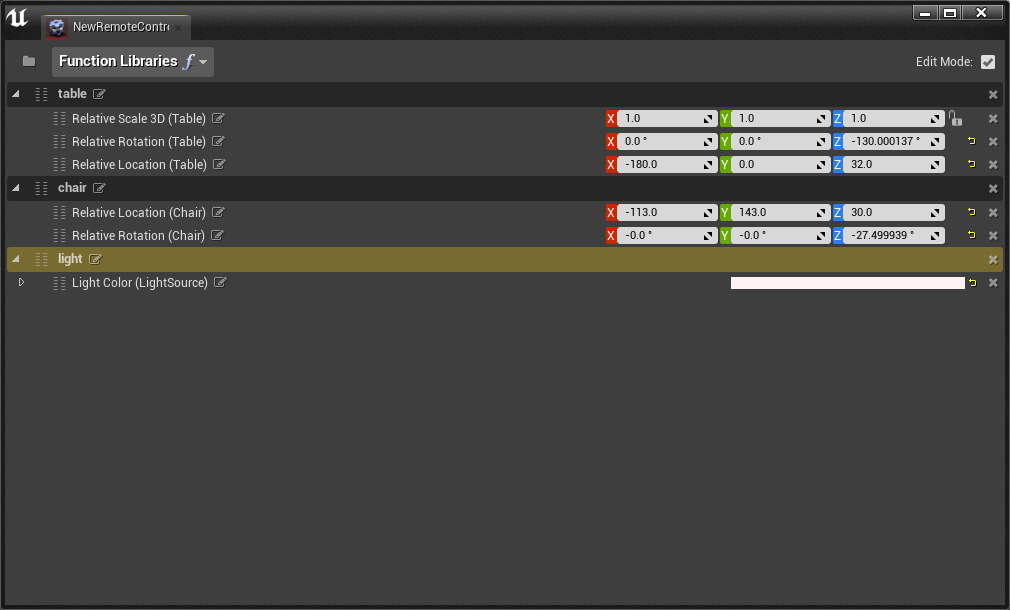
When loading a level into Viz Arc, additionally to the outliner, the presets are displayed below in the PRESETS panel.
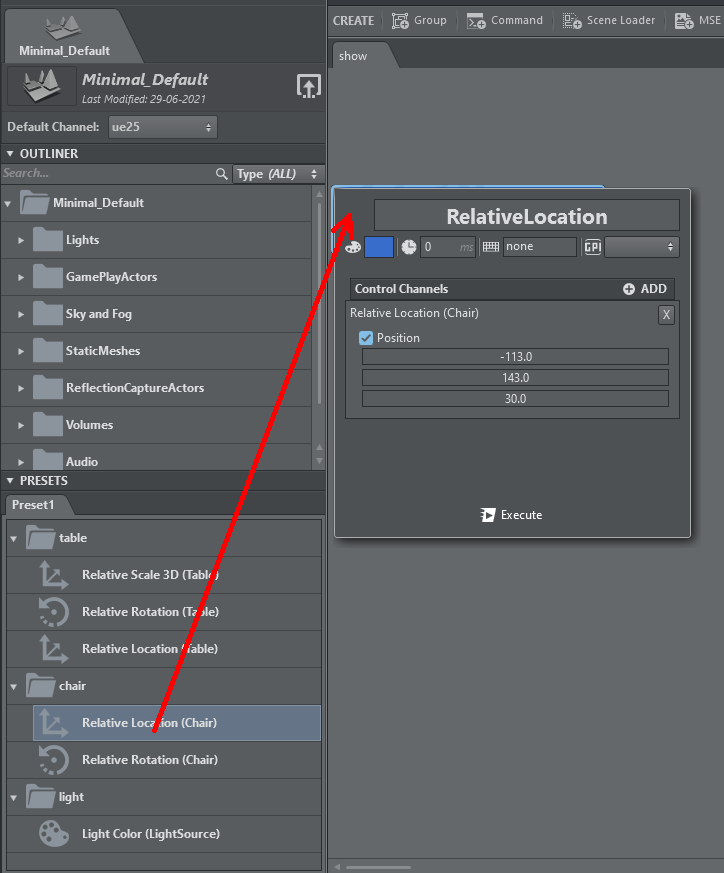
Drag any of the presets to the action canvas to create a Preset Action.
Presets do not work by default in game mode when not launched from the editor. Use the following steps to make sure presets are responsive and working when the Unreal Engine is launched in game mode only.
-
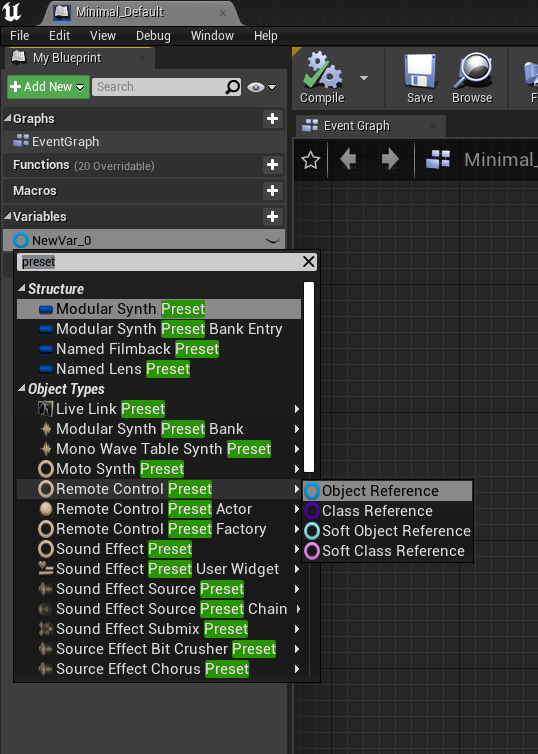
After creating a preset, open any Blueprint (for example, the level Blueprint) and add a Variable of type Remote Control Preset > Object Reference.
-
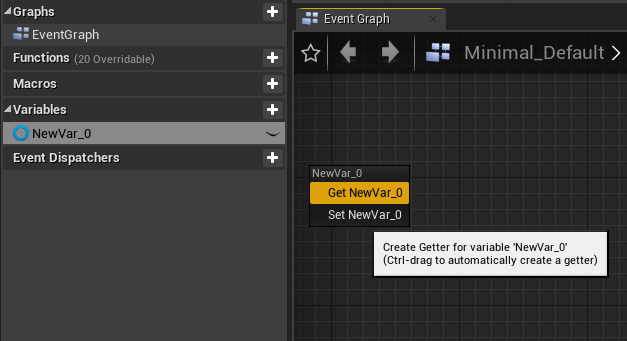
Drag the newly create variable into the Blueprint and select Get.
-
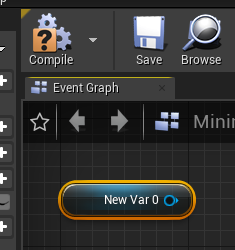
Compile the Blueprint.
-
Create the preset in the map as a default value and save the Blueprint and level.
The map now references the preset and loads it when the engine is launched in game mode. Make sure that -RCWebControlEnable -RCWebInterfaceEnable are added to the UELoaderCommandLine registry variable of the Unreal launcher.
Unreal Engine's Binding Address: By default, the Unreal Engine's web interface binds to the local network interface only, such that only 127.0.0.1 or localhost addresses work with the Preset Action. To start the web service on all available network interfaces add this section to the DefaultEngine.ini of your Unreal project:
[HTTPServer.Listeners]
DefaultBindAddress = 0.0.0.0
For more information, see the https://docs.unrealengine.com/5.0/en-US/remote-control-quick-start-for-unreal-engine/.
Blueprint
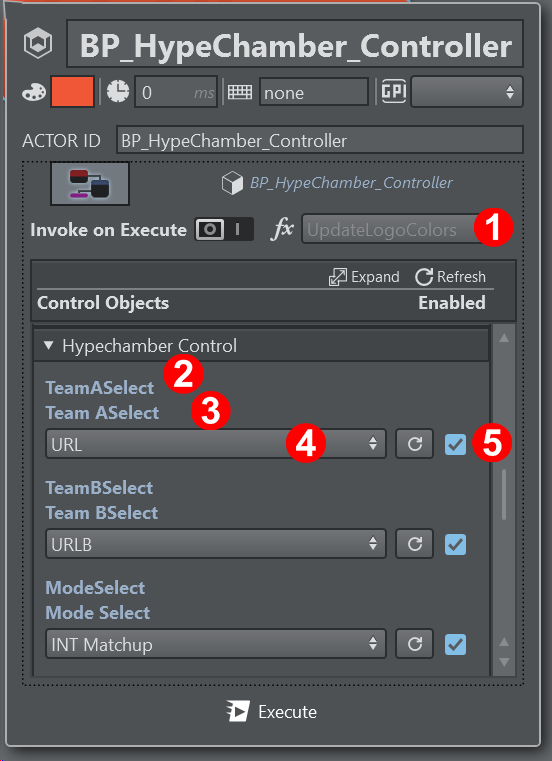
A Blueprint action can be used to set public Blueprint variables and invoke functions on it.
-
If enabled, the function to be called when executing this action
-
The variable name
-
The Tooltip of the variable
-
The actual value
-
Enable or disable setting this variable
A Blueprint Action can be created by dragging and dropping the blueprint icon from the outliner to the action canvas. The Level Blueprint can be found in the outliner view
under the Level Blueprint folder.
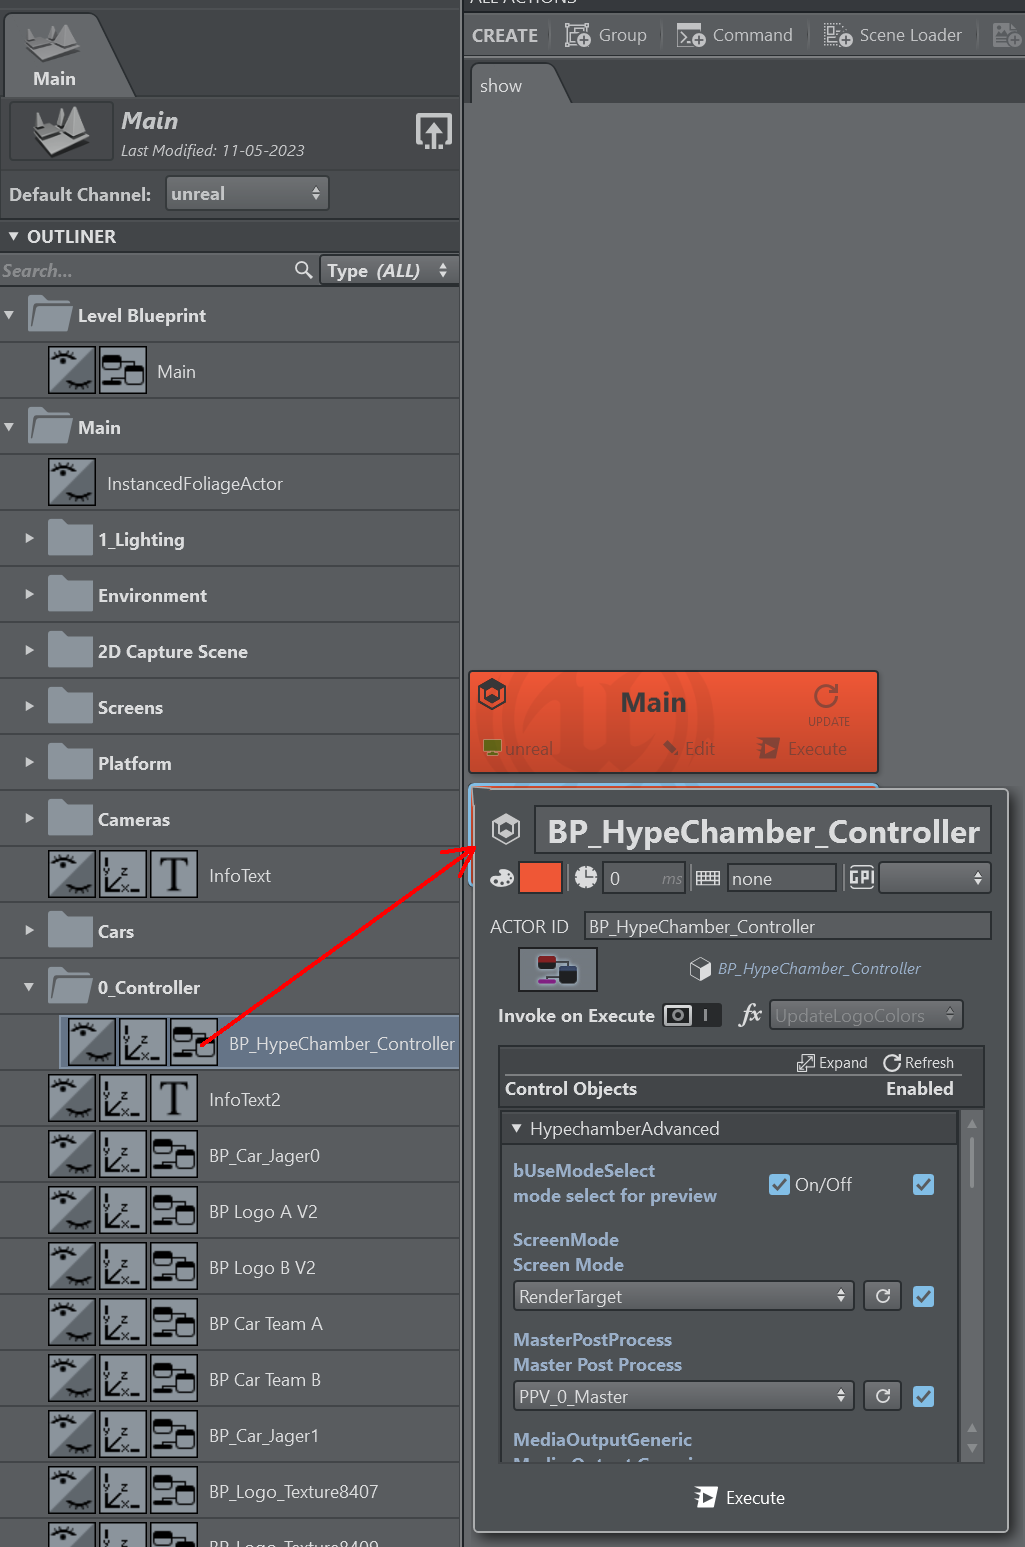
Blueprint action contains a list of visible values (set as public and editable in Unreal). To make these values visible and accessible to Viz Arc, you must activate them in the Blueprint window:
To Trigger Blueprint Values
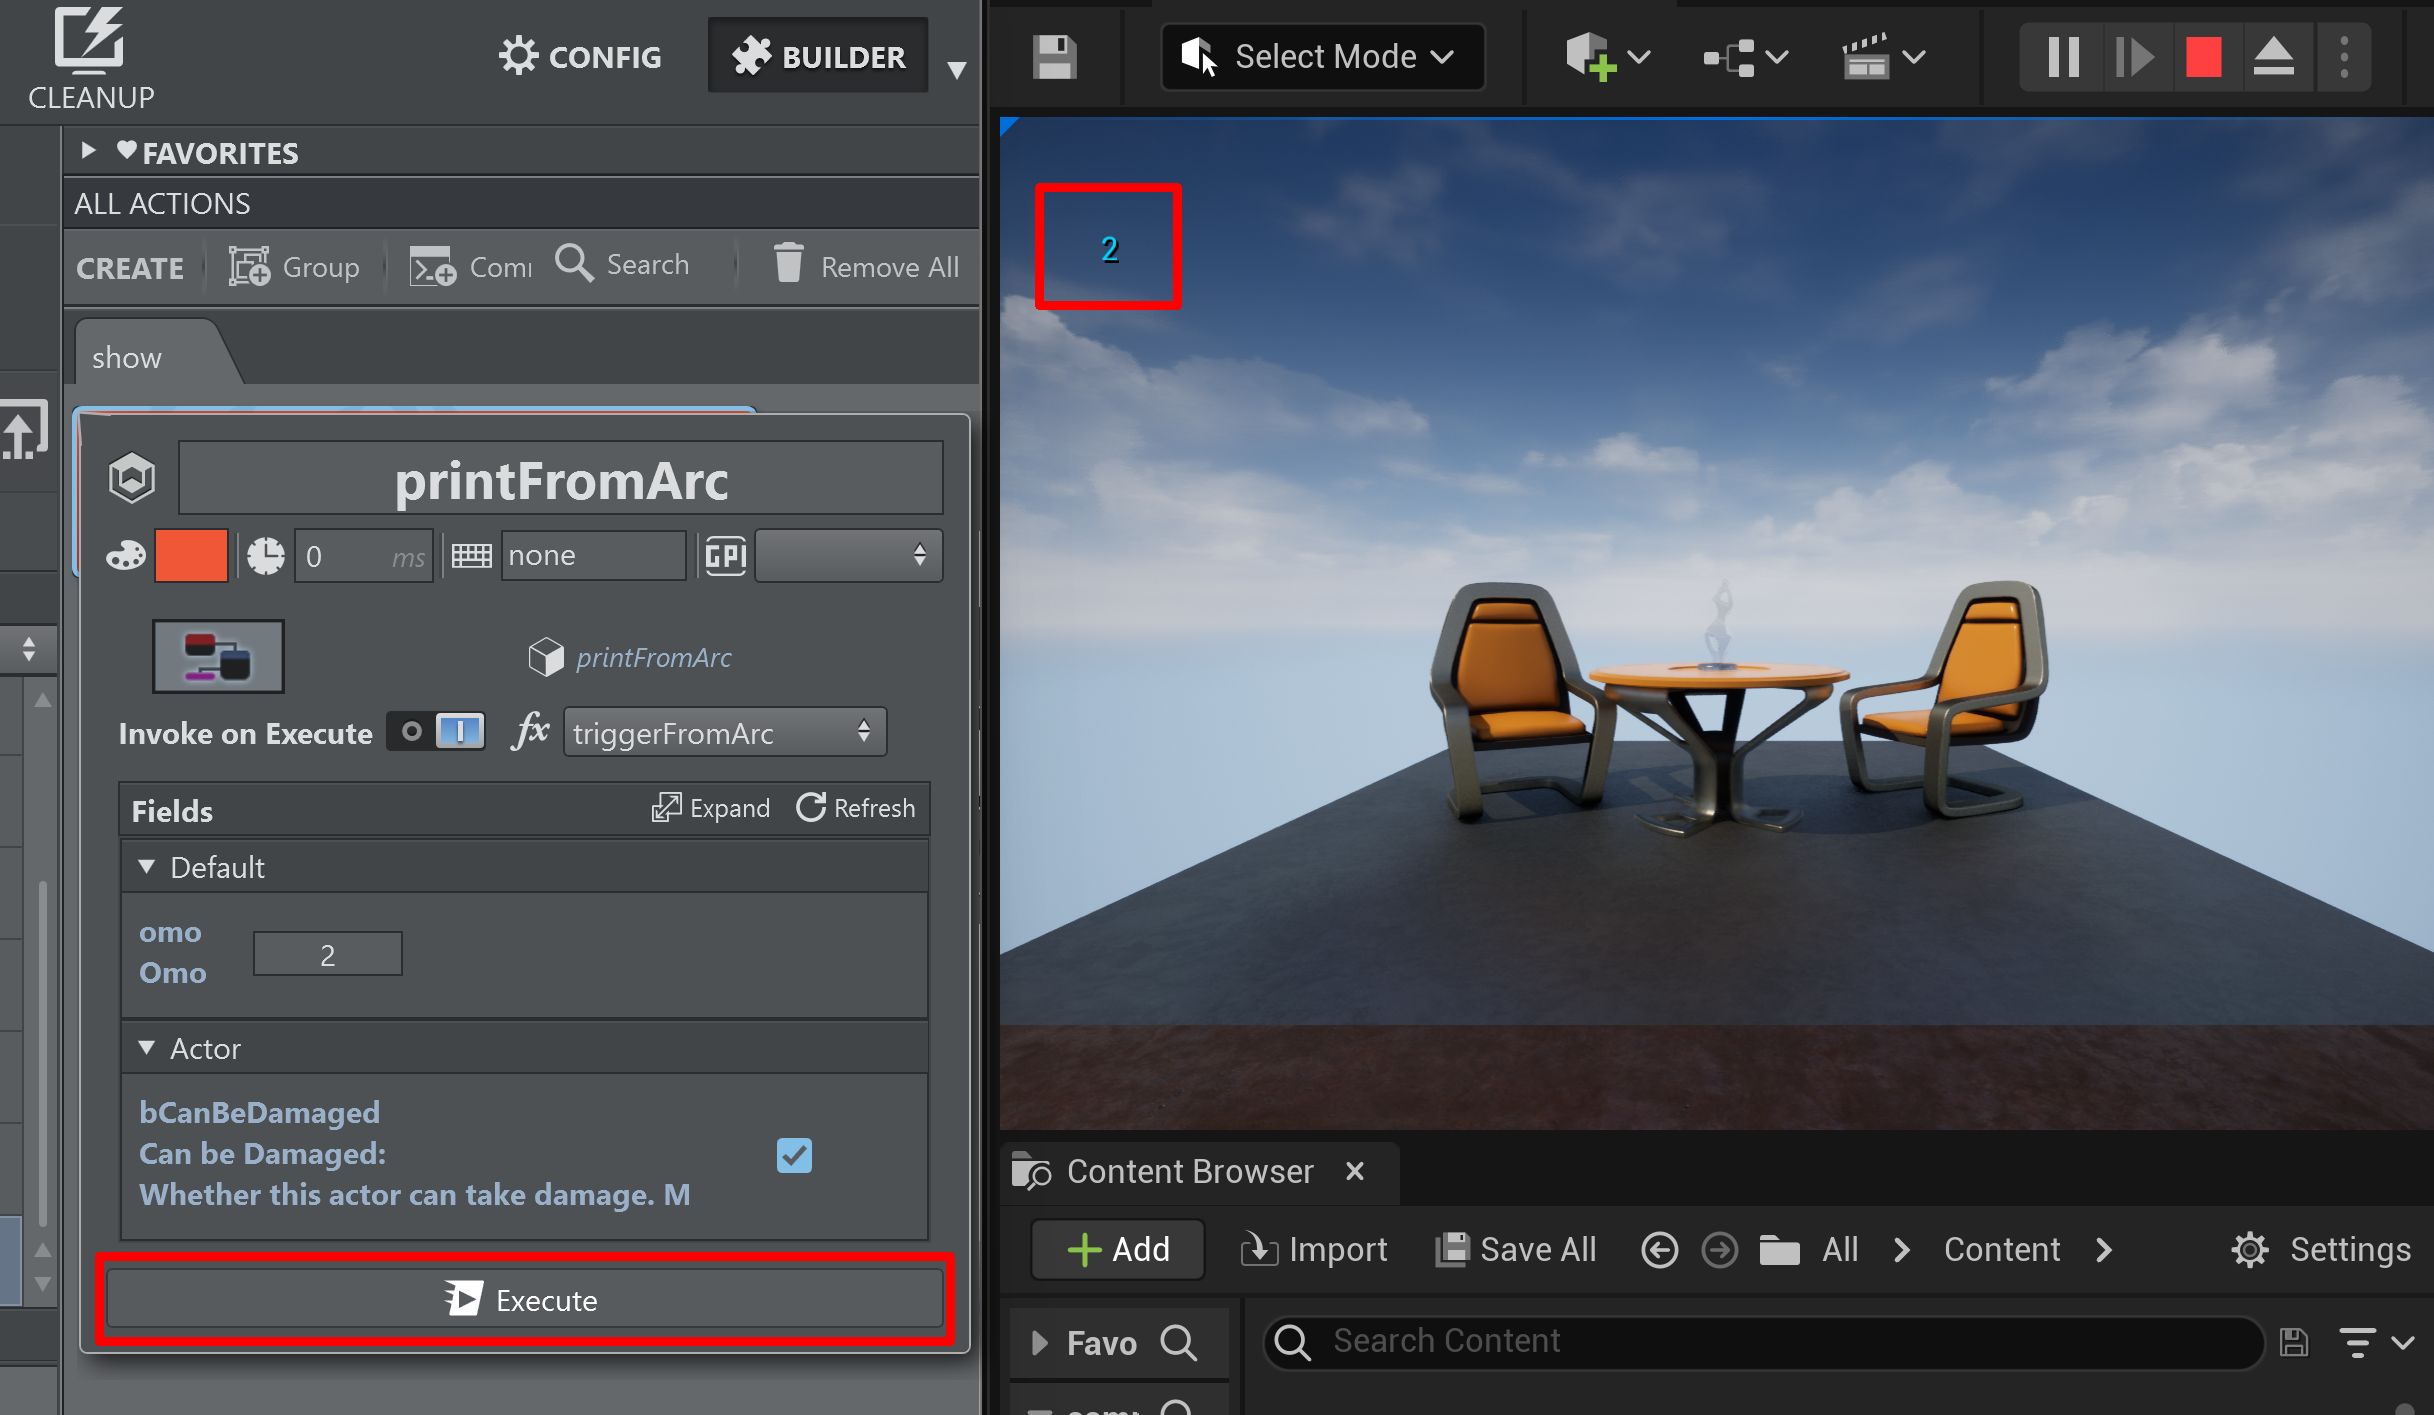
It's possible to trigger values from Viz Arc into Unreal’s Blueprint. This section describes the procedure step-by step. In this sample, an integer value is set from Viz Arc and displayed in the render output of the Unreal Engine.
-
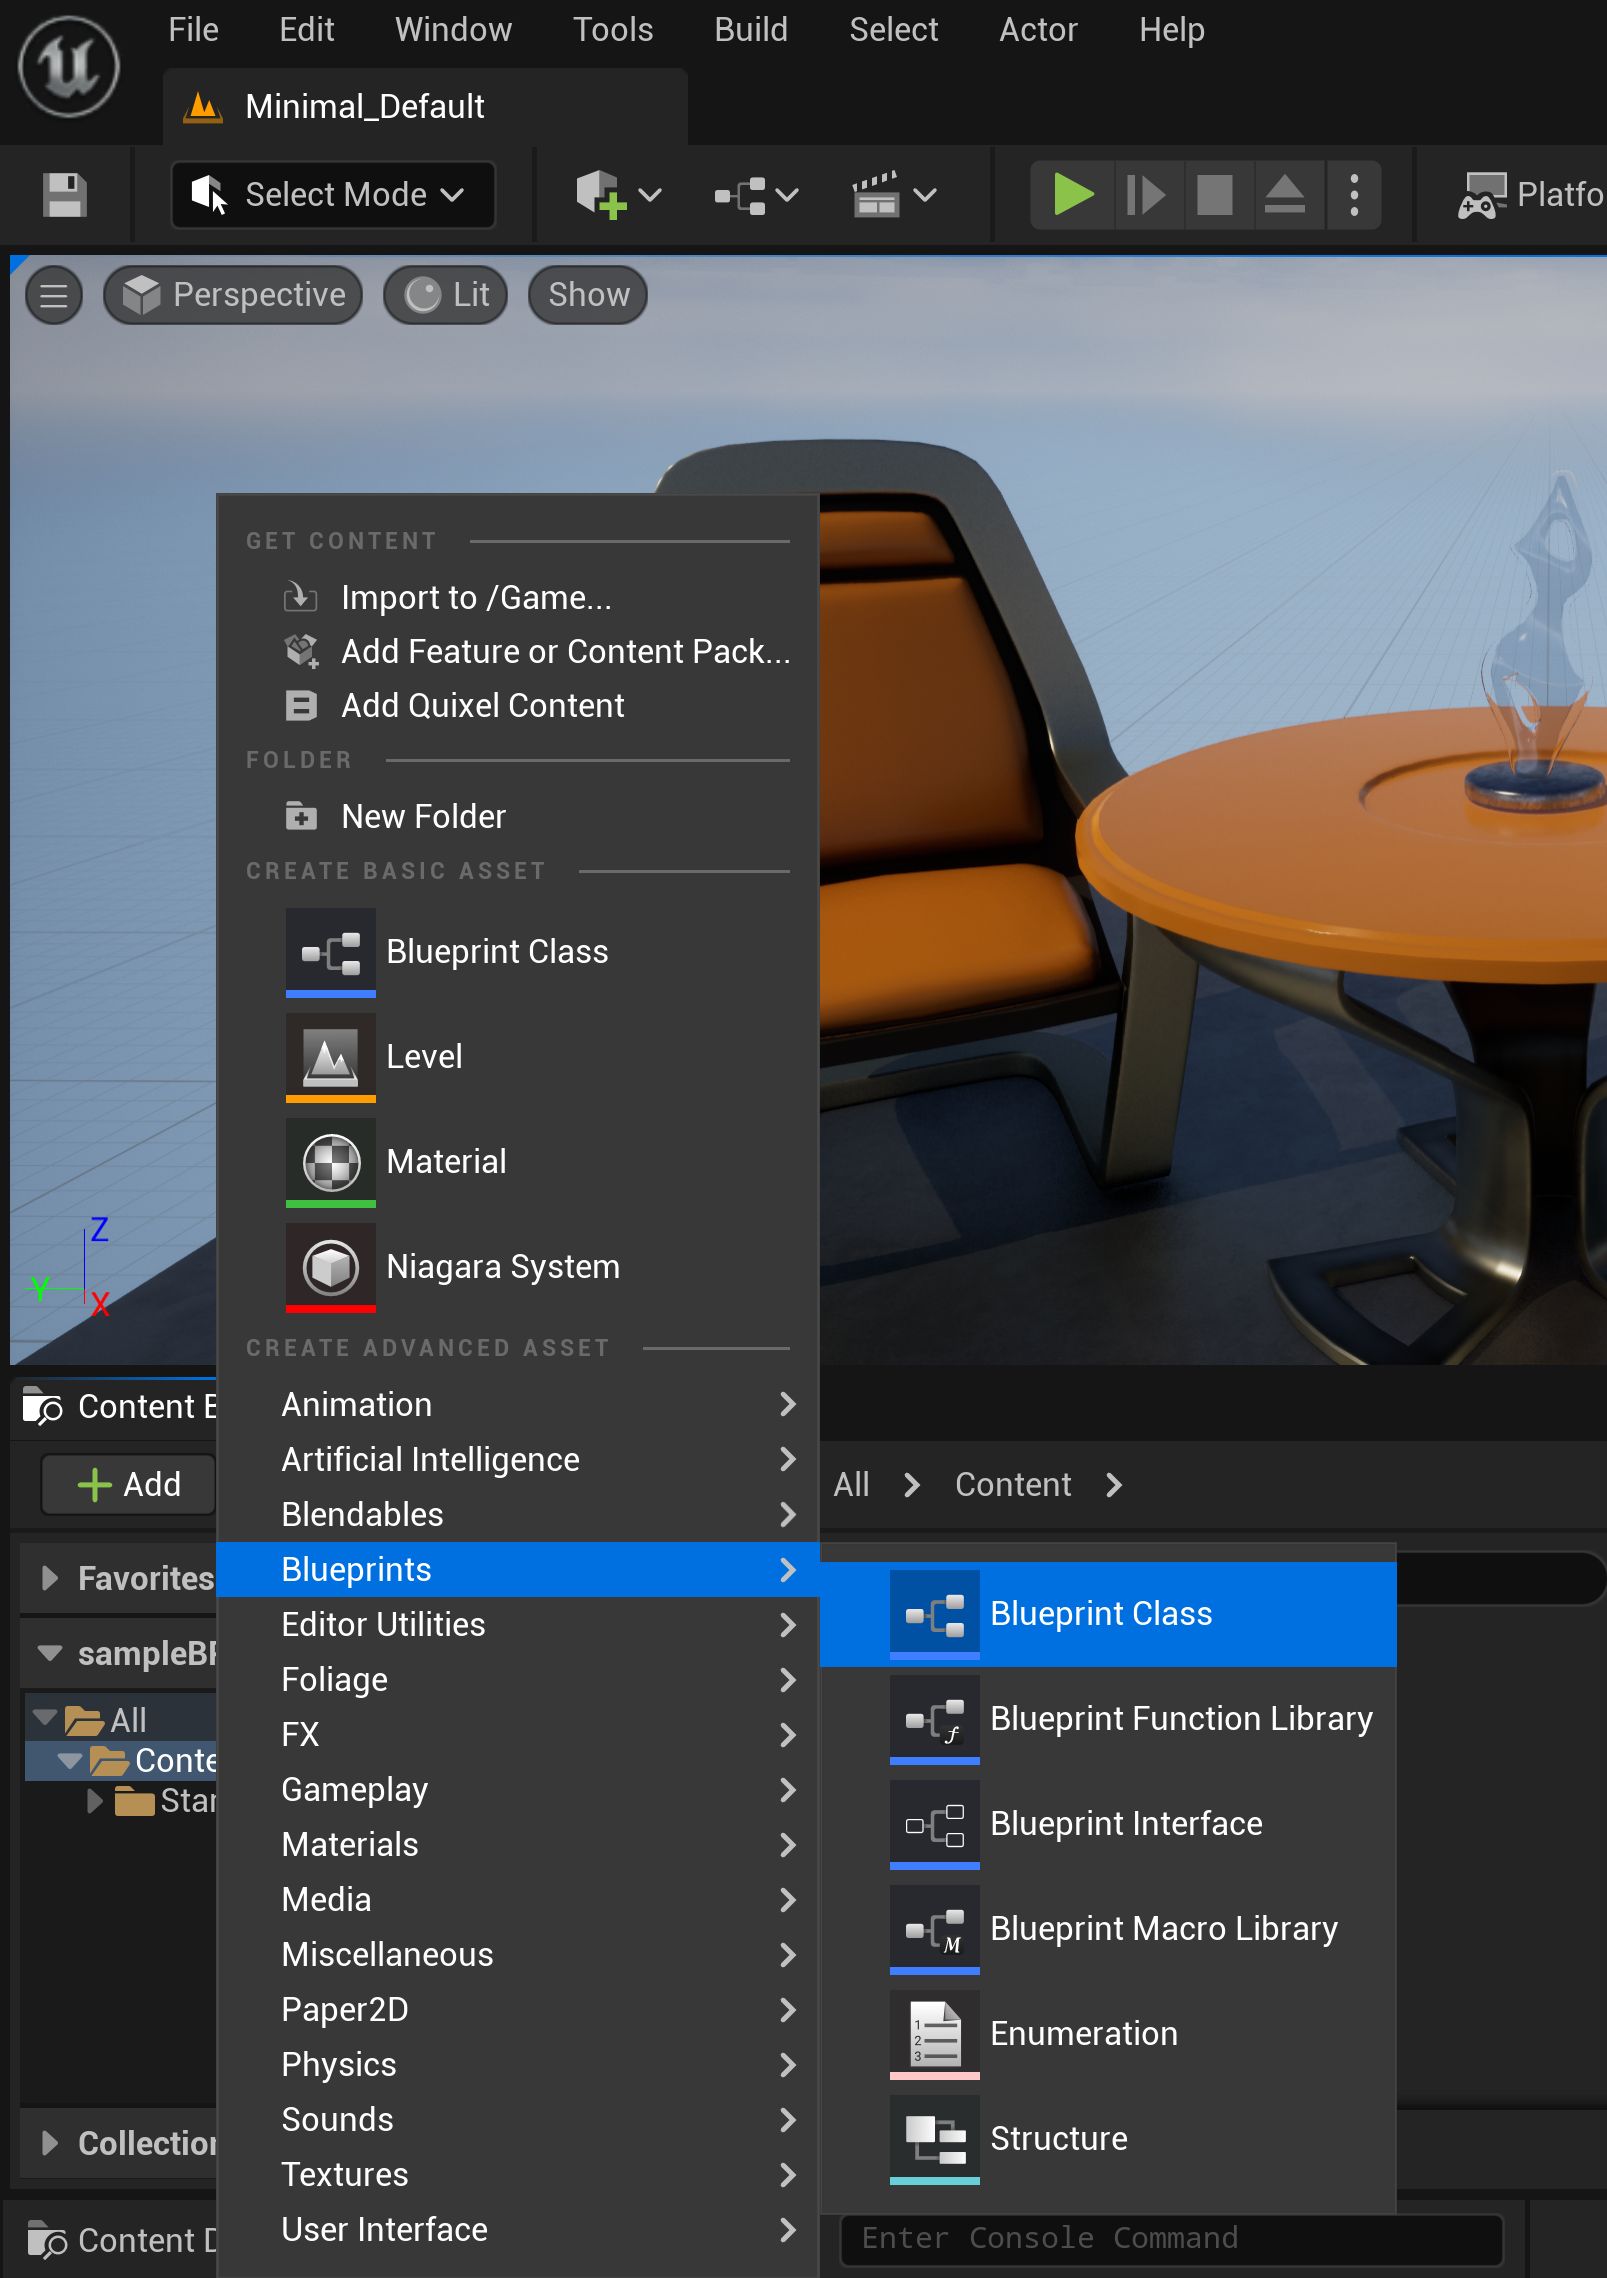
First, add a Blueprint Class to the project content by clicking the Add button in the Content Browser view, select Blueprints and then Blueprint Class.
-
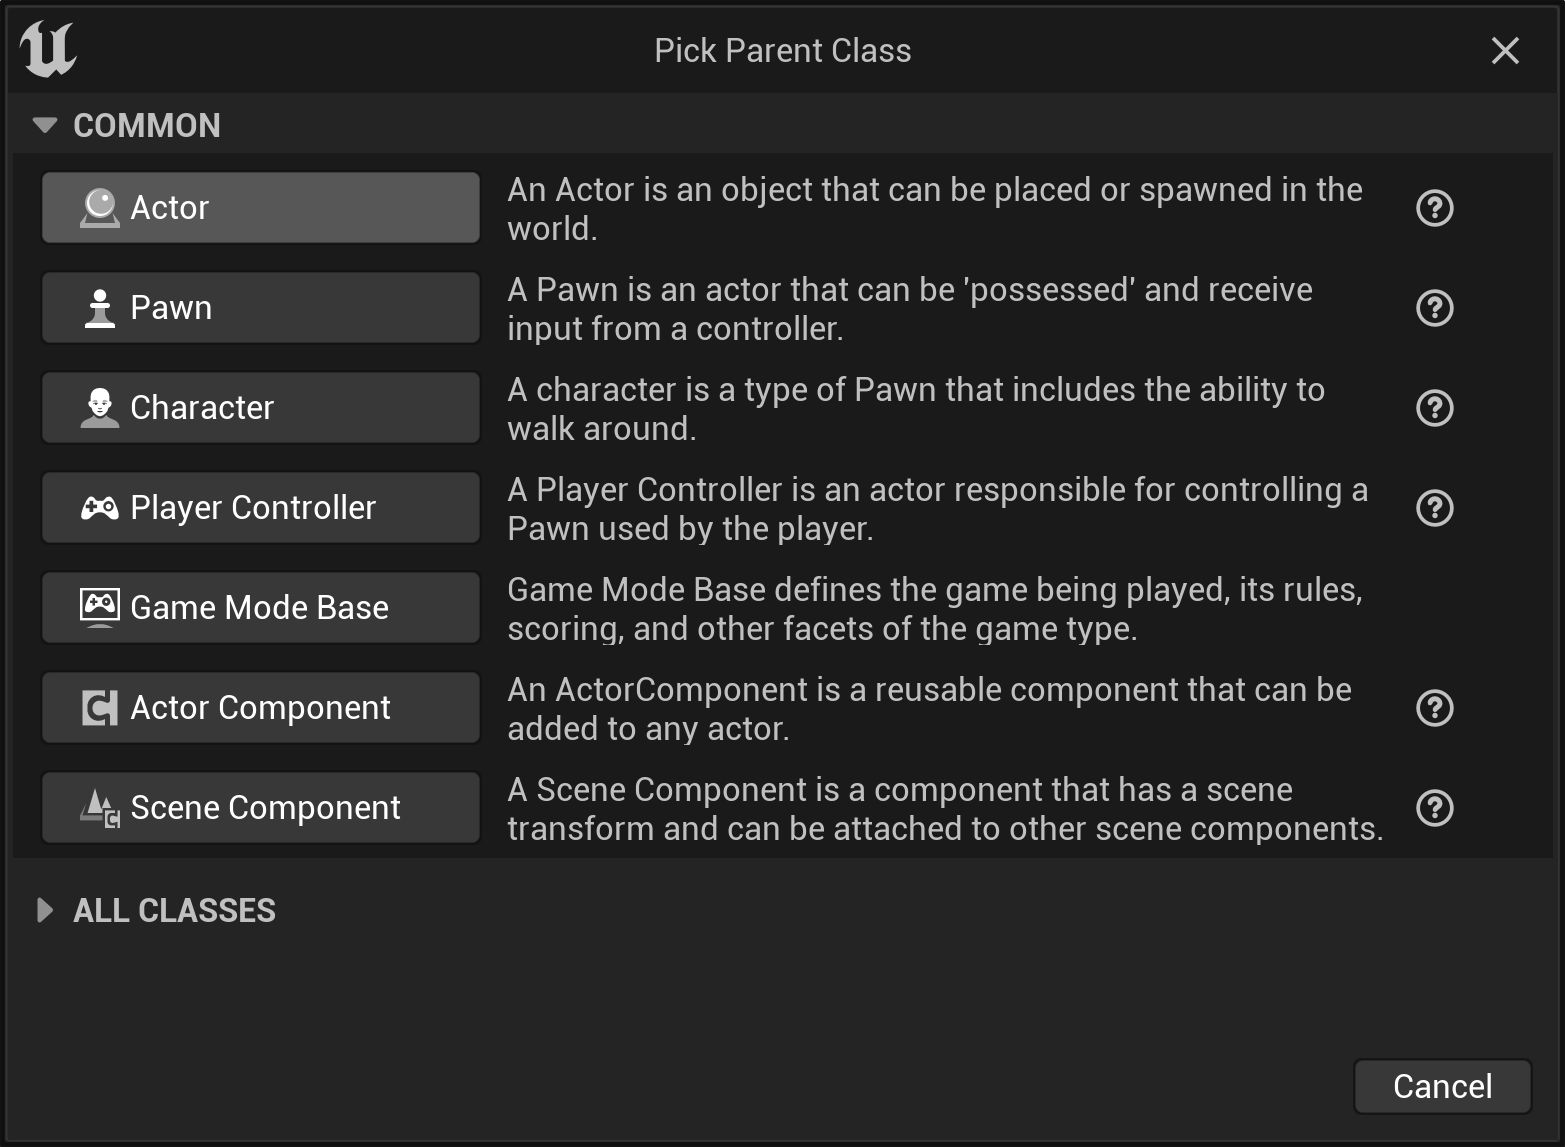
Select Actor.
-
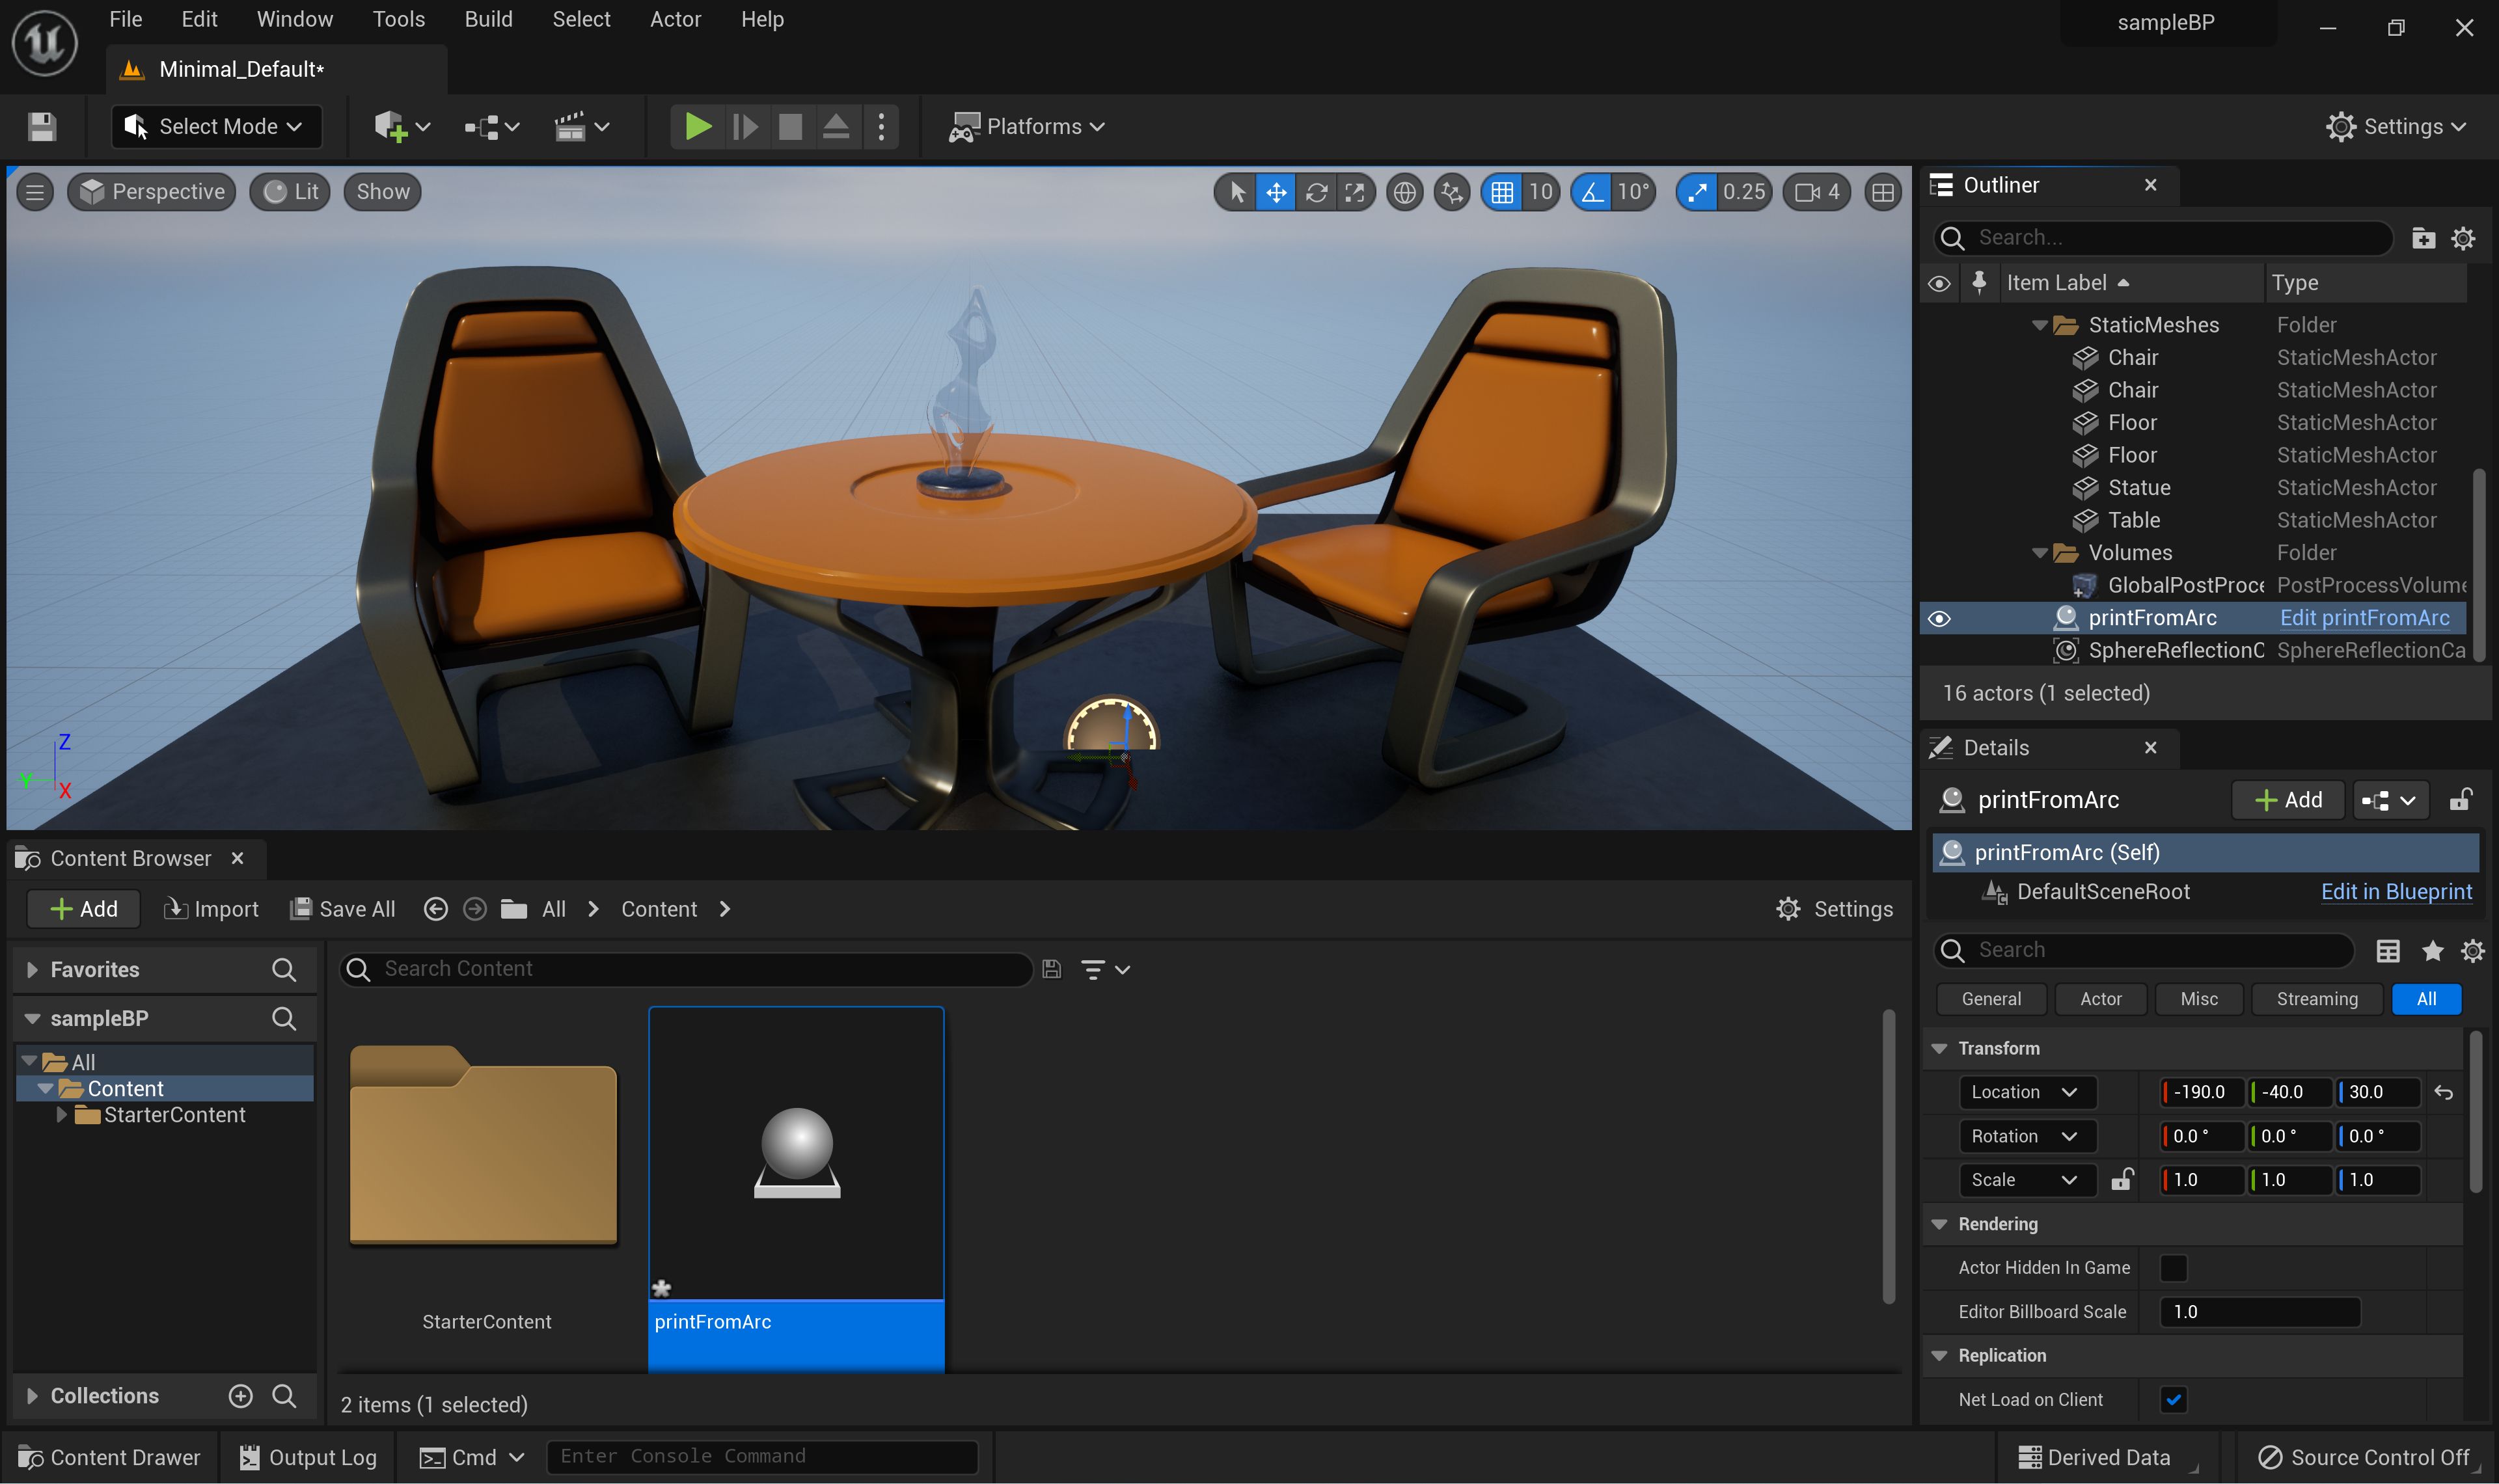
Rename the new Blueprint (for example, printFromArc), then drag and drop it to the render viewport.
-
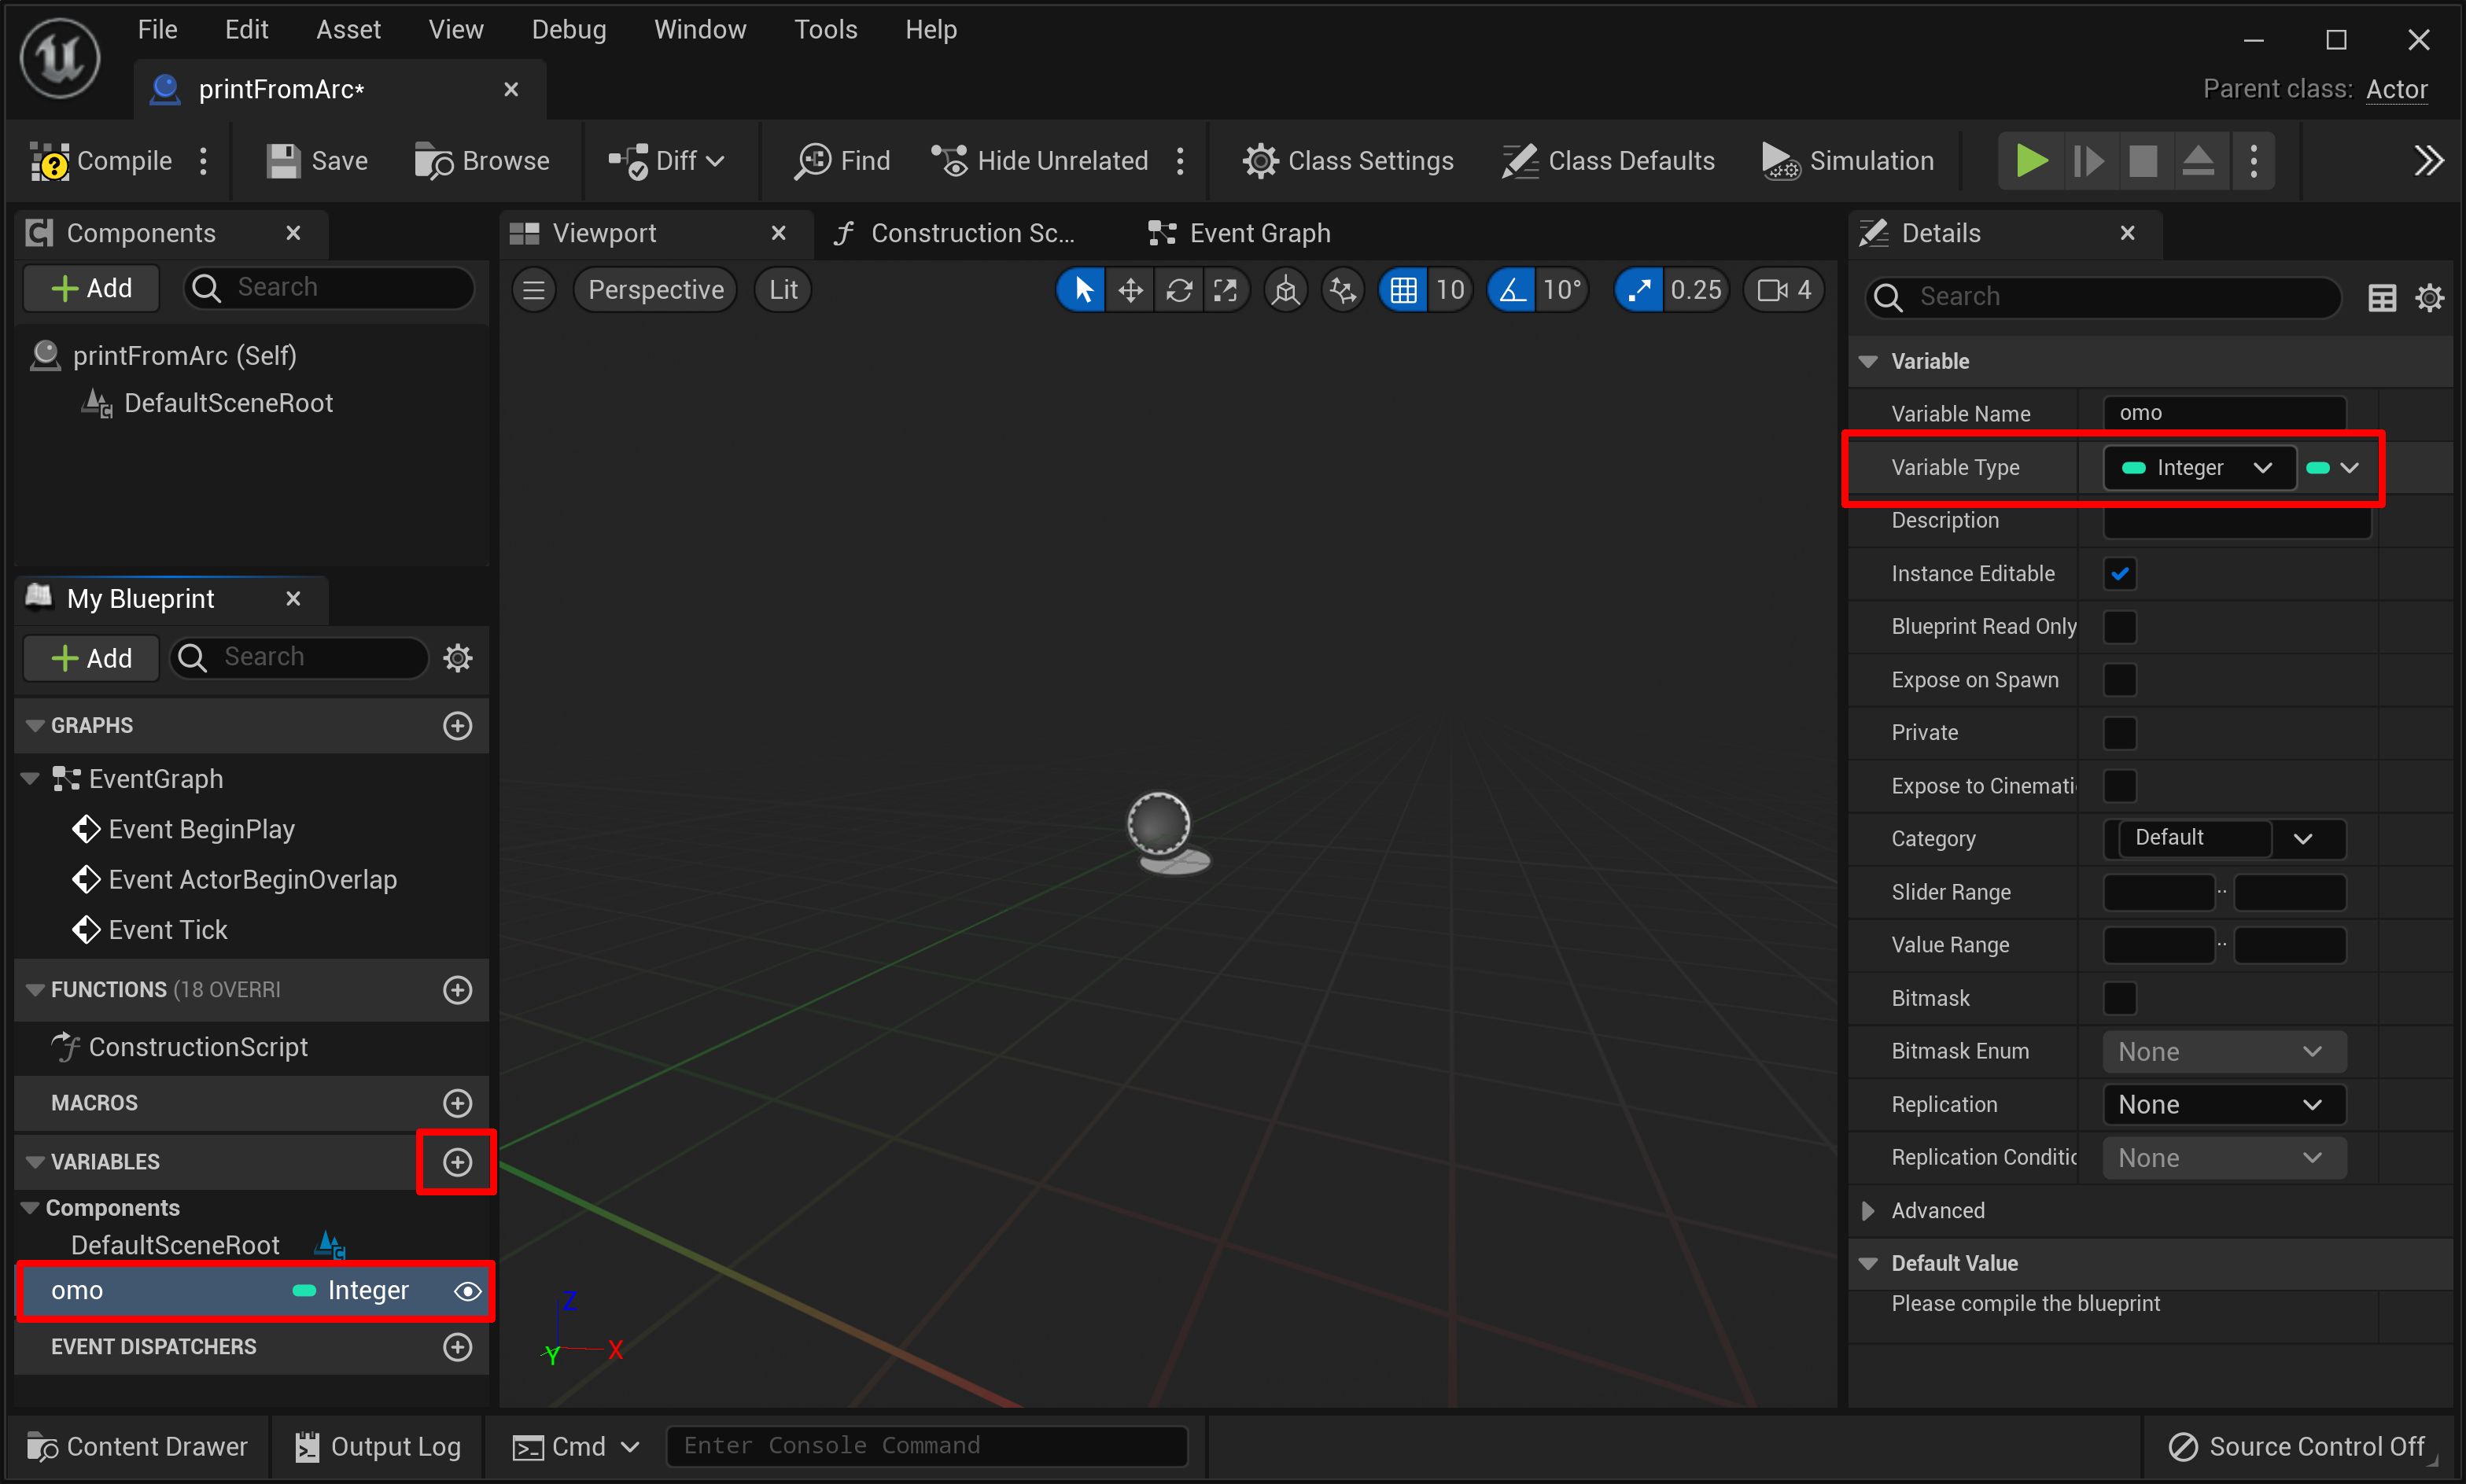
Open the Blueprint by clicking on the Edit printFromArc link in the Outliner view. Create a new variable and rename it to omo and set the type to Integer.
-
Select the Event Graph tab and right click on the blueprint canvas and create a new Custom Event.
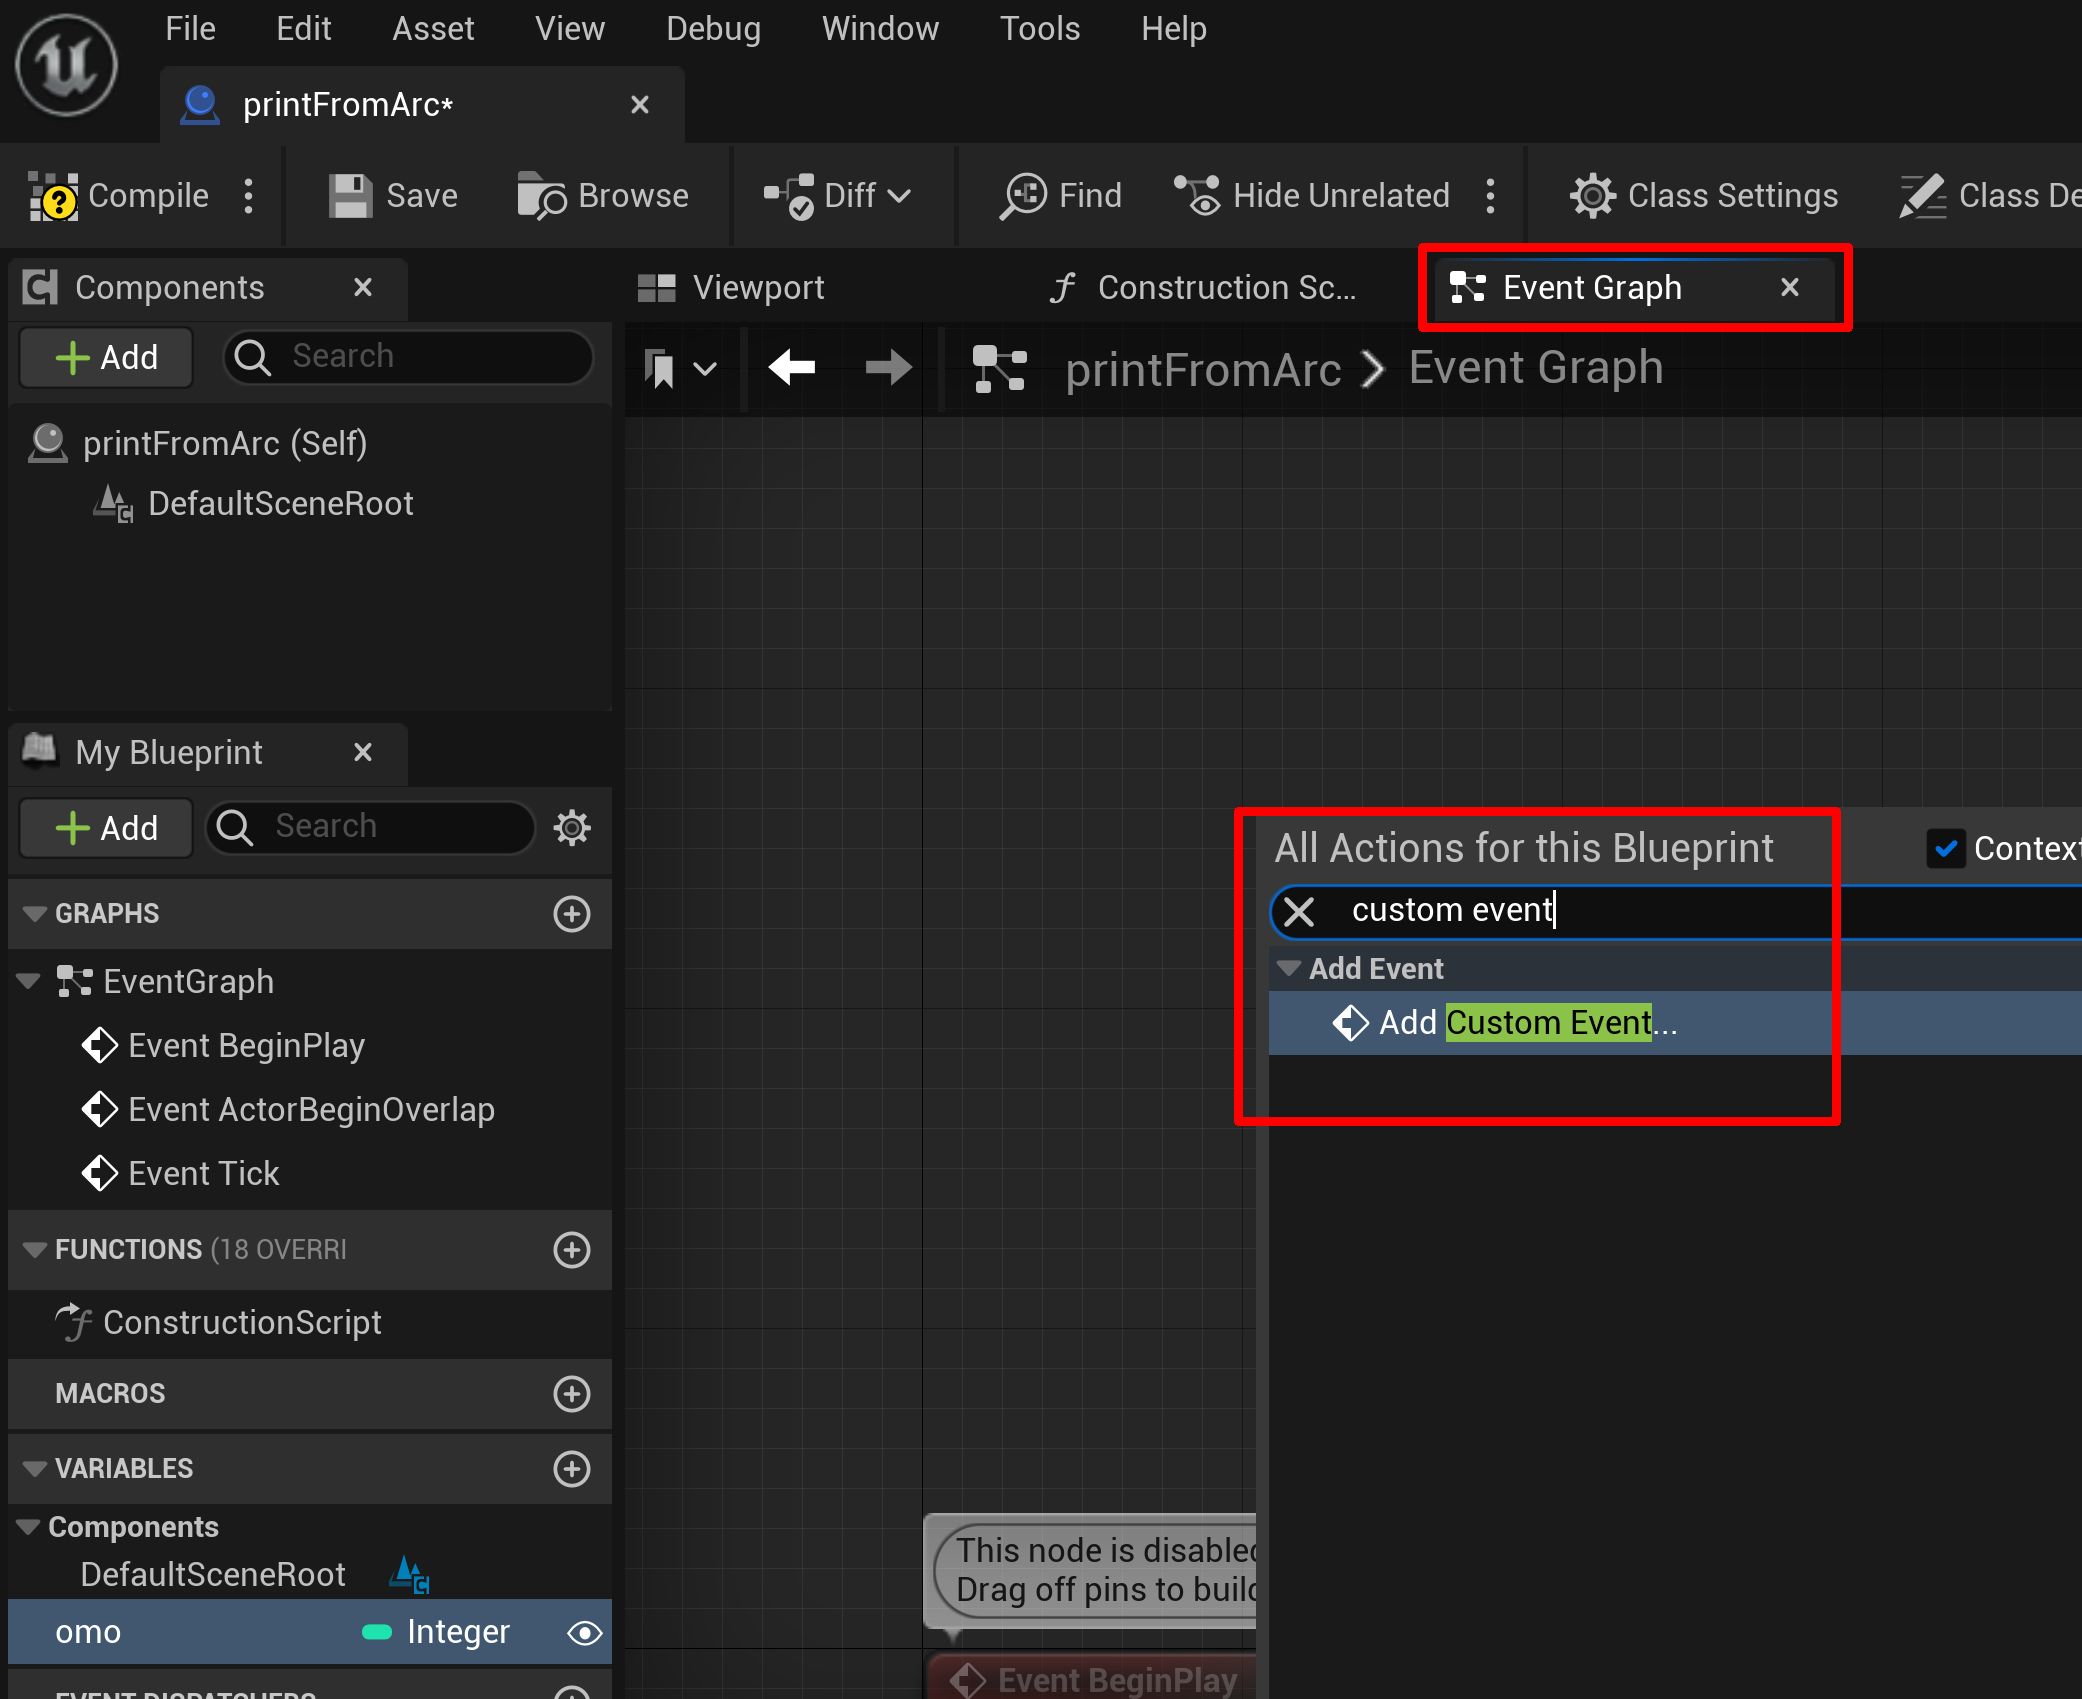
-
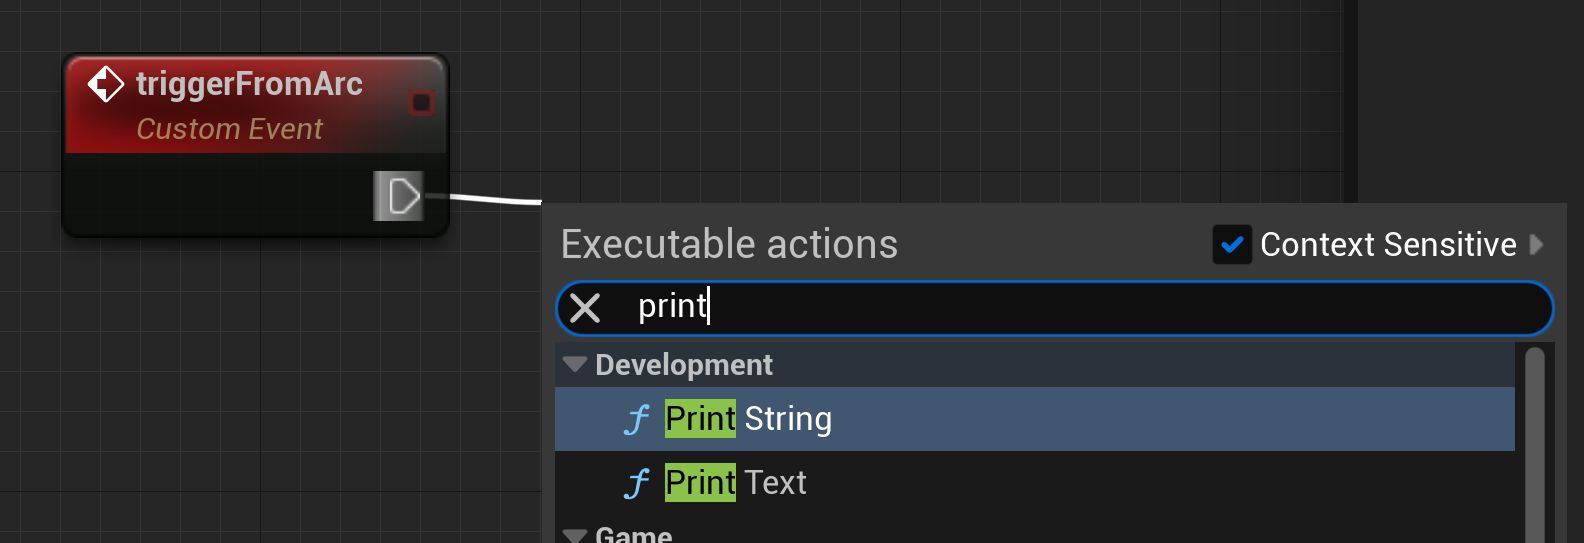
Rename the event to triggerFromArc and connect the Exec node to a Print String node.
-
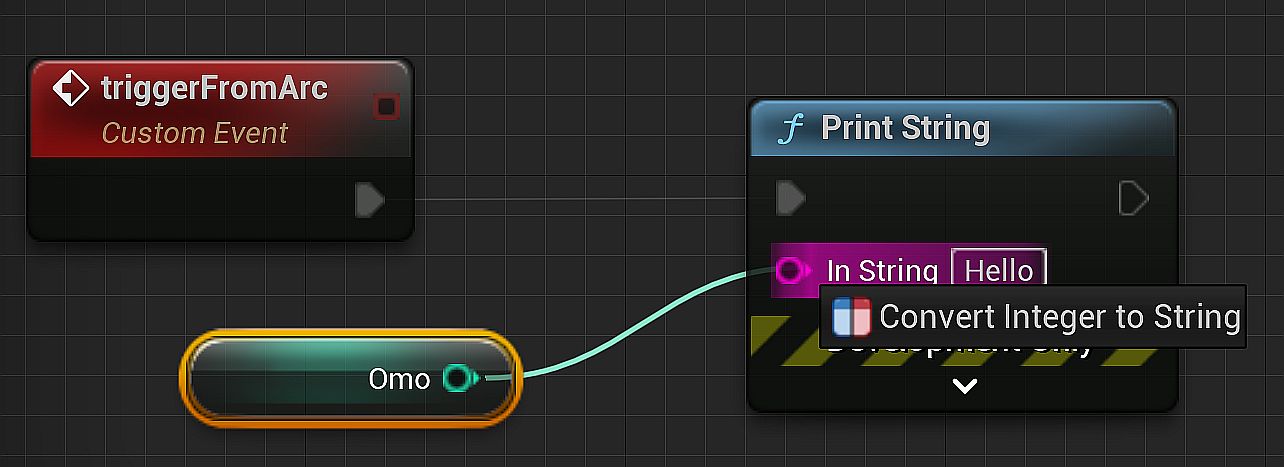
Drag and drop the omo variable to the blueprint canvas and select Get.

-
Connect the omo node to the Print String's In String connector.
-
Compile the Blueprint and close the window.
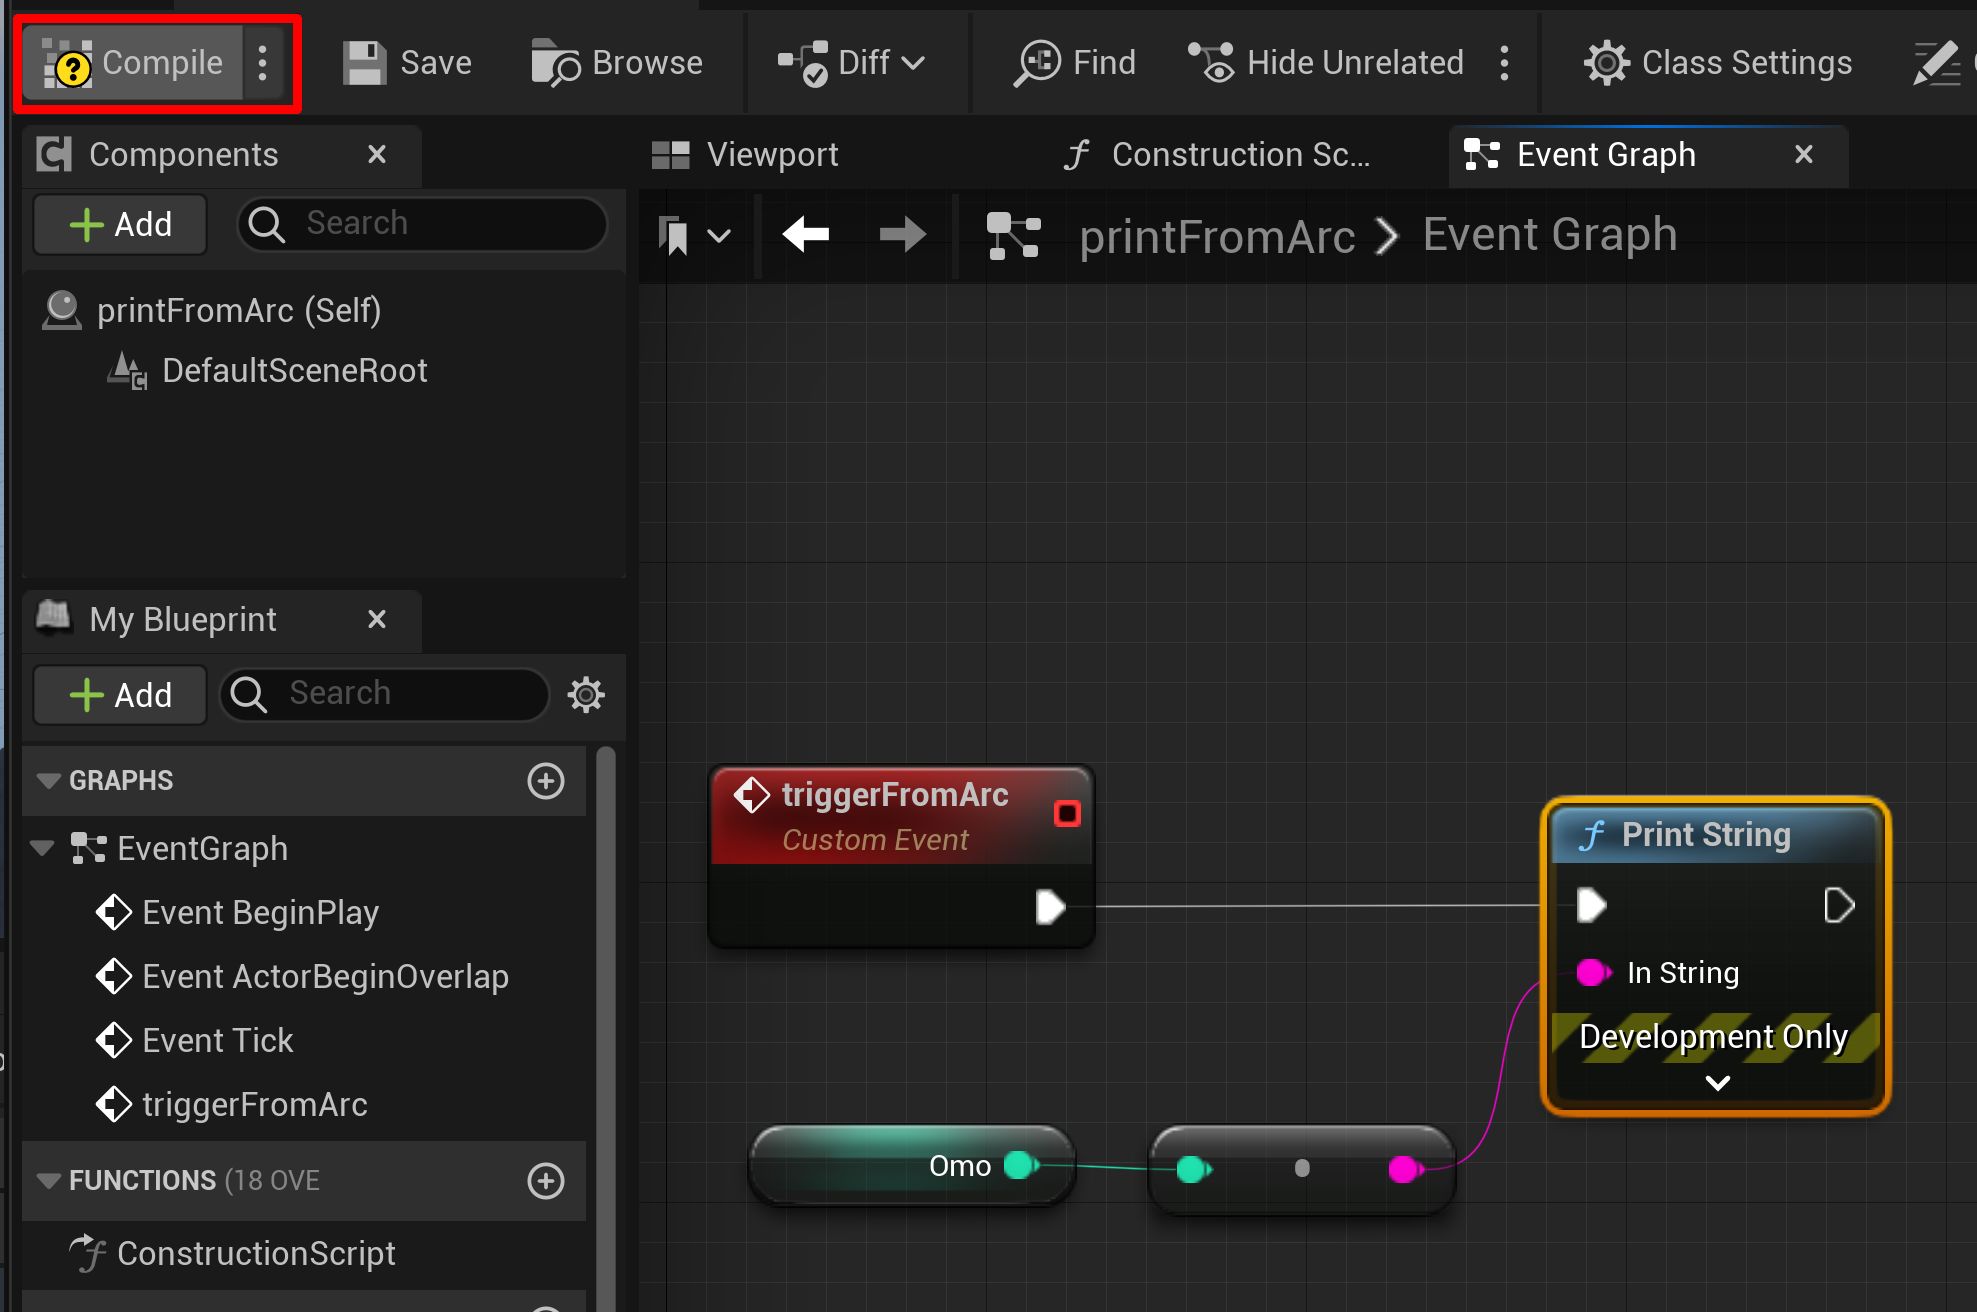
-
Save the level.

-
Put the Unreal Engine int game mode.
-
In Viz Arc, select saved level and load the level outliner.
-
Drag and drop the Blueprint icon from the outliner view into the action canvas.
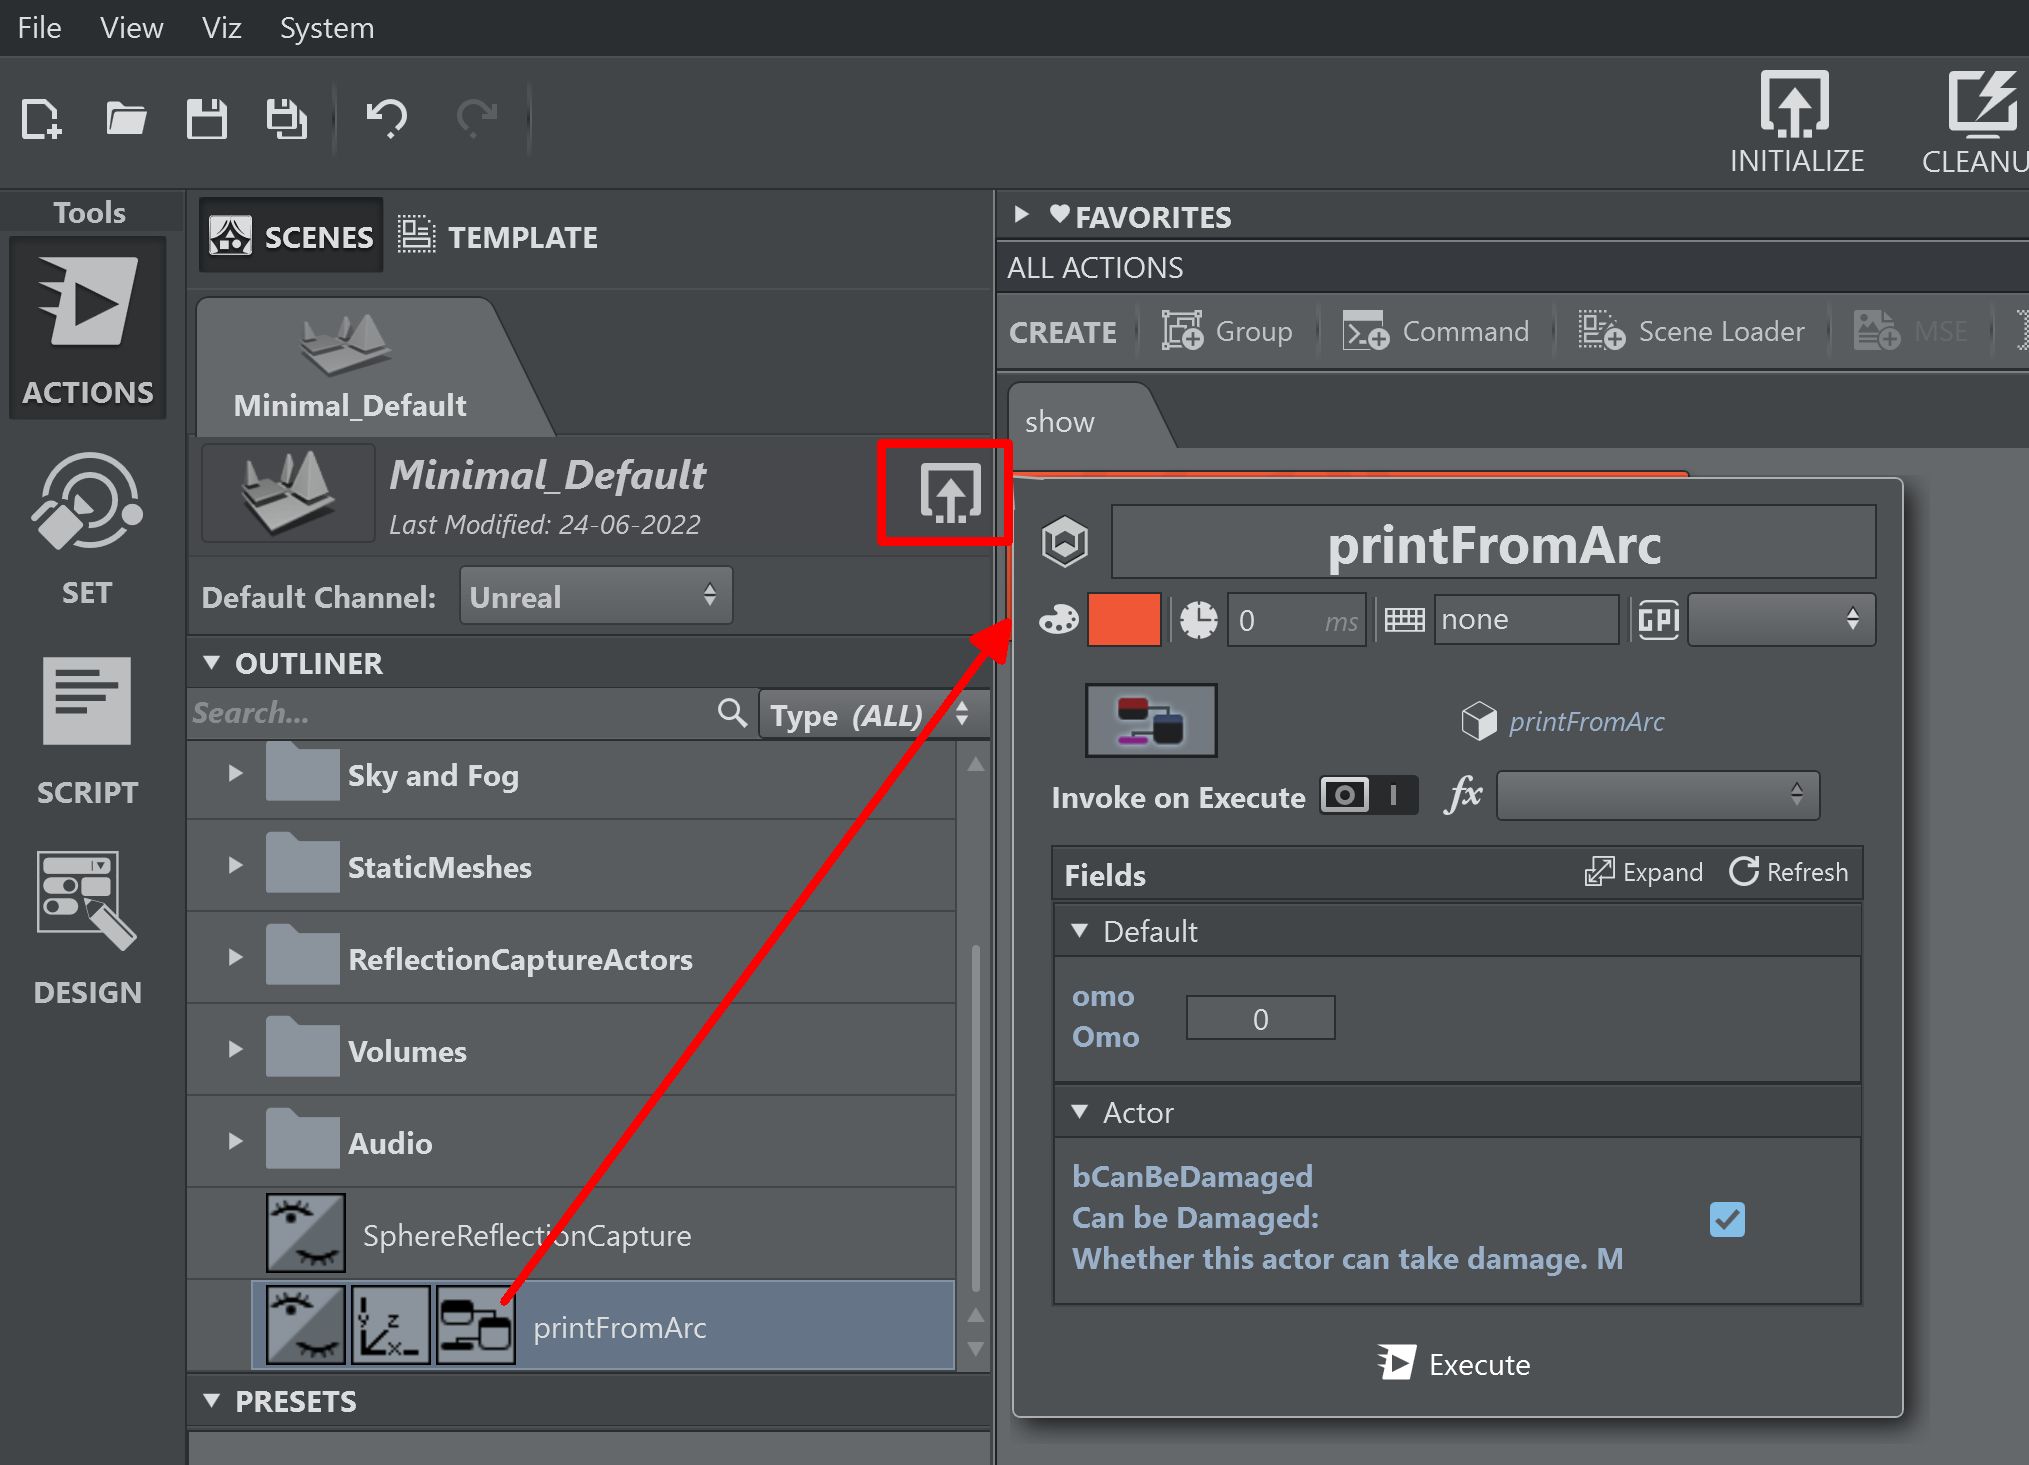
-
Check the Invoke on Execute checkbox and select the triggerFromAcr event from the dropdown.
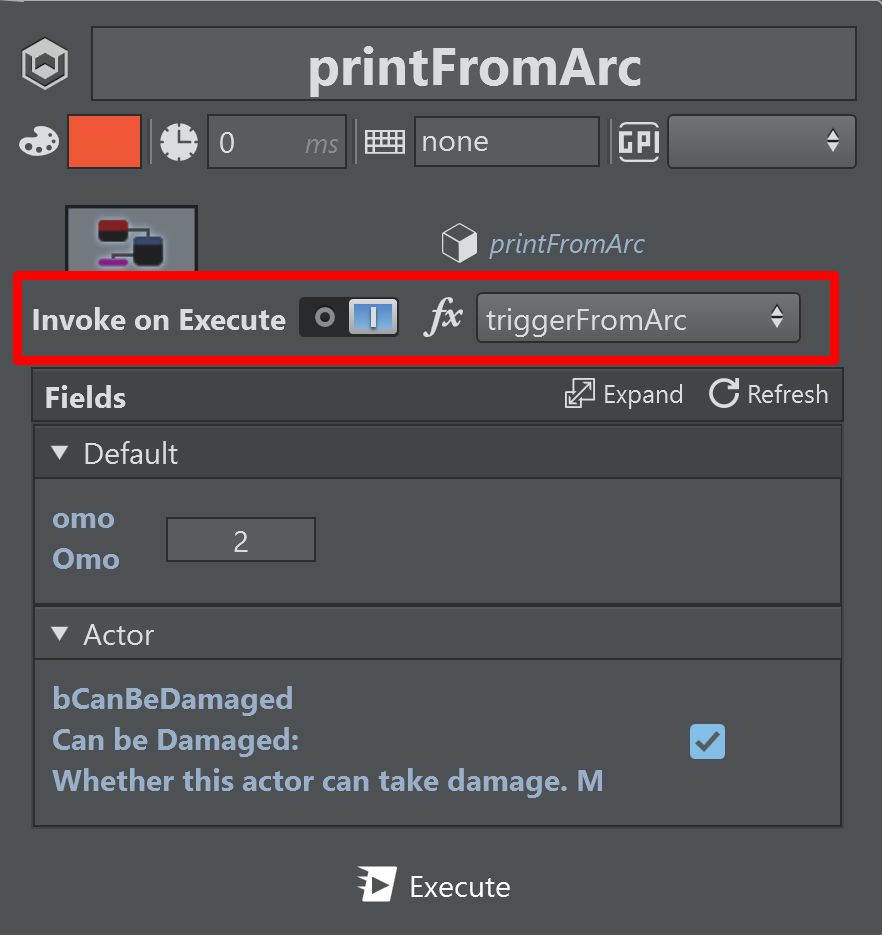
-
Change the omo value to some value and execute the action. The selected number is printed on the render view.
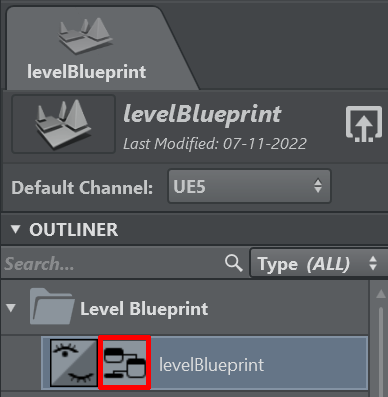
Level Blueprint
A Level Blueprint is always present on any Unreal level map. The Level Blueprint is visualized in the outliner tree view as the top element under the Level Blueprint folder.
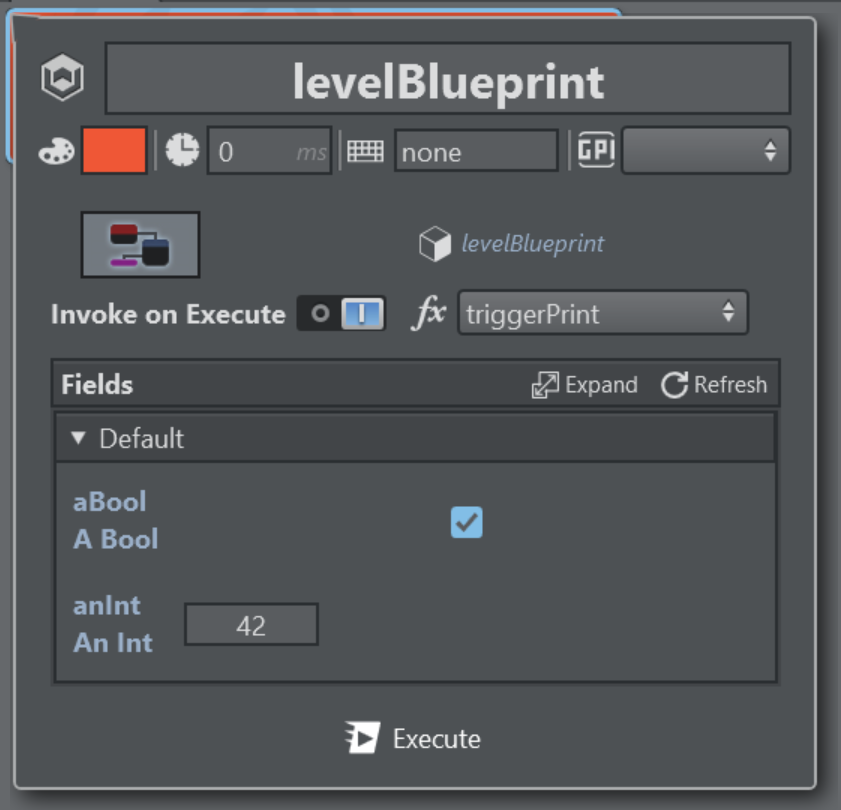
Drag the Blueprint to the action canvas to create a regular Blueprint action.
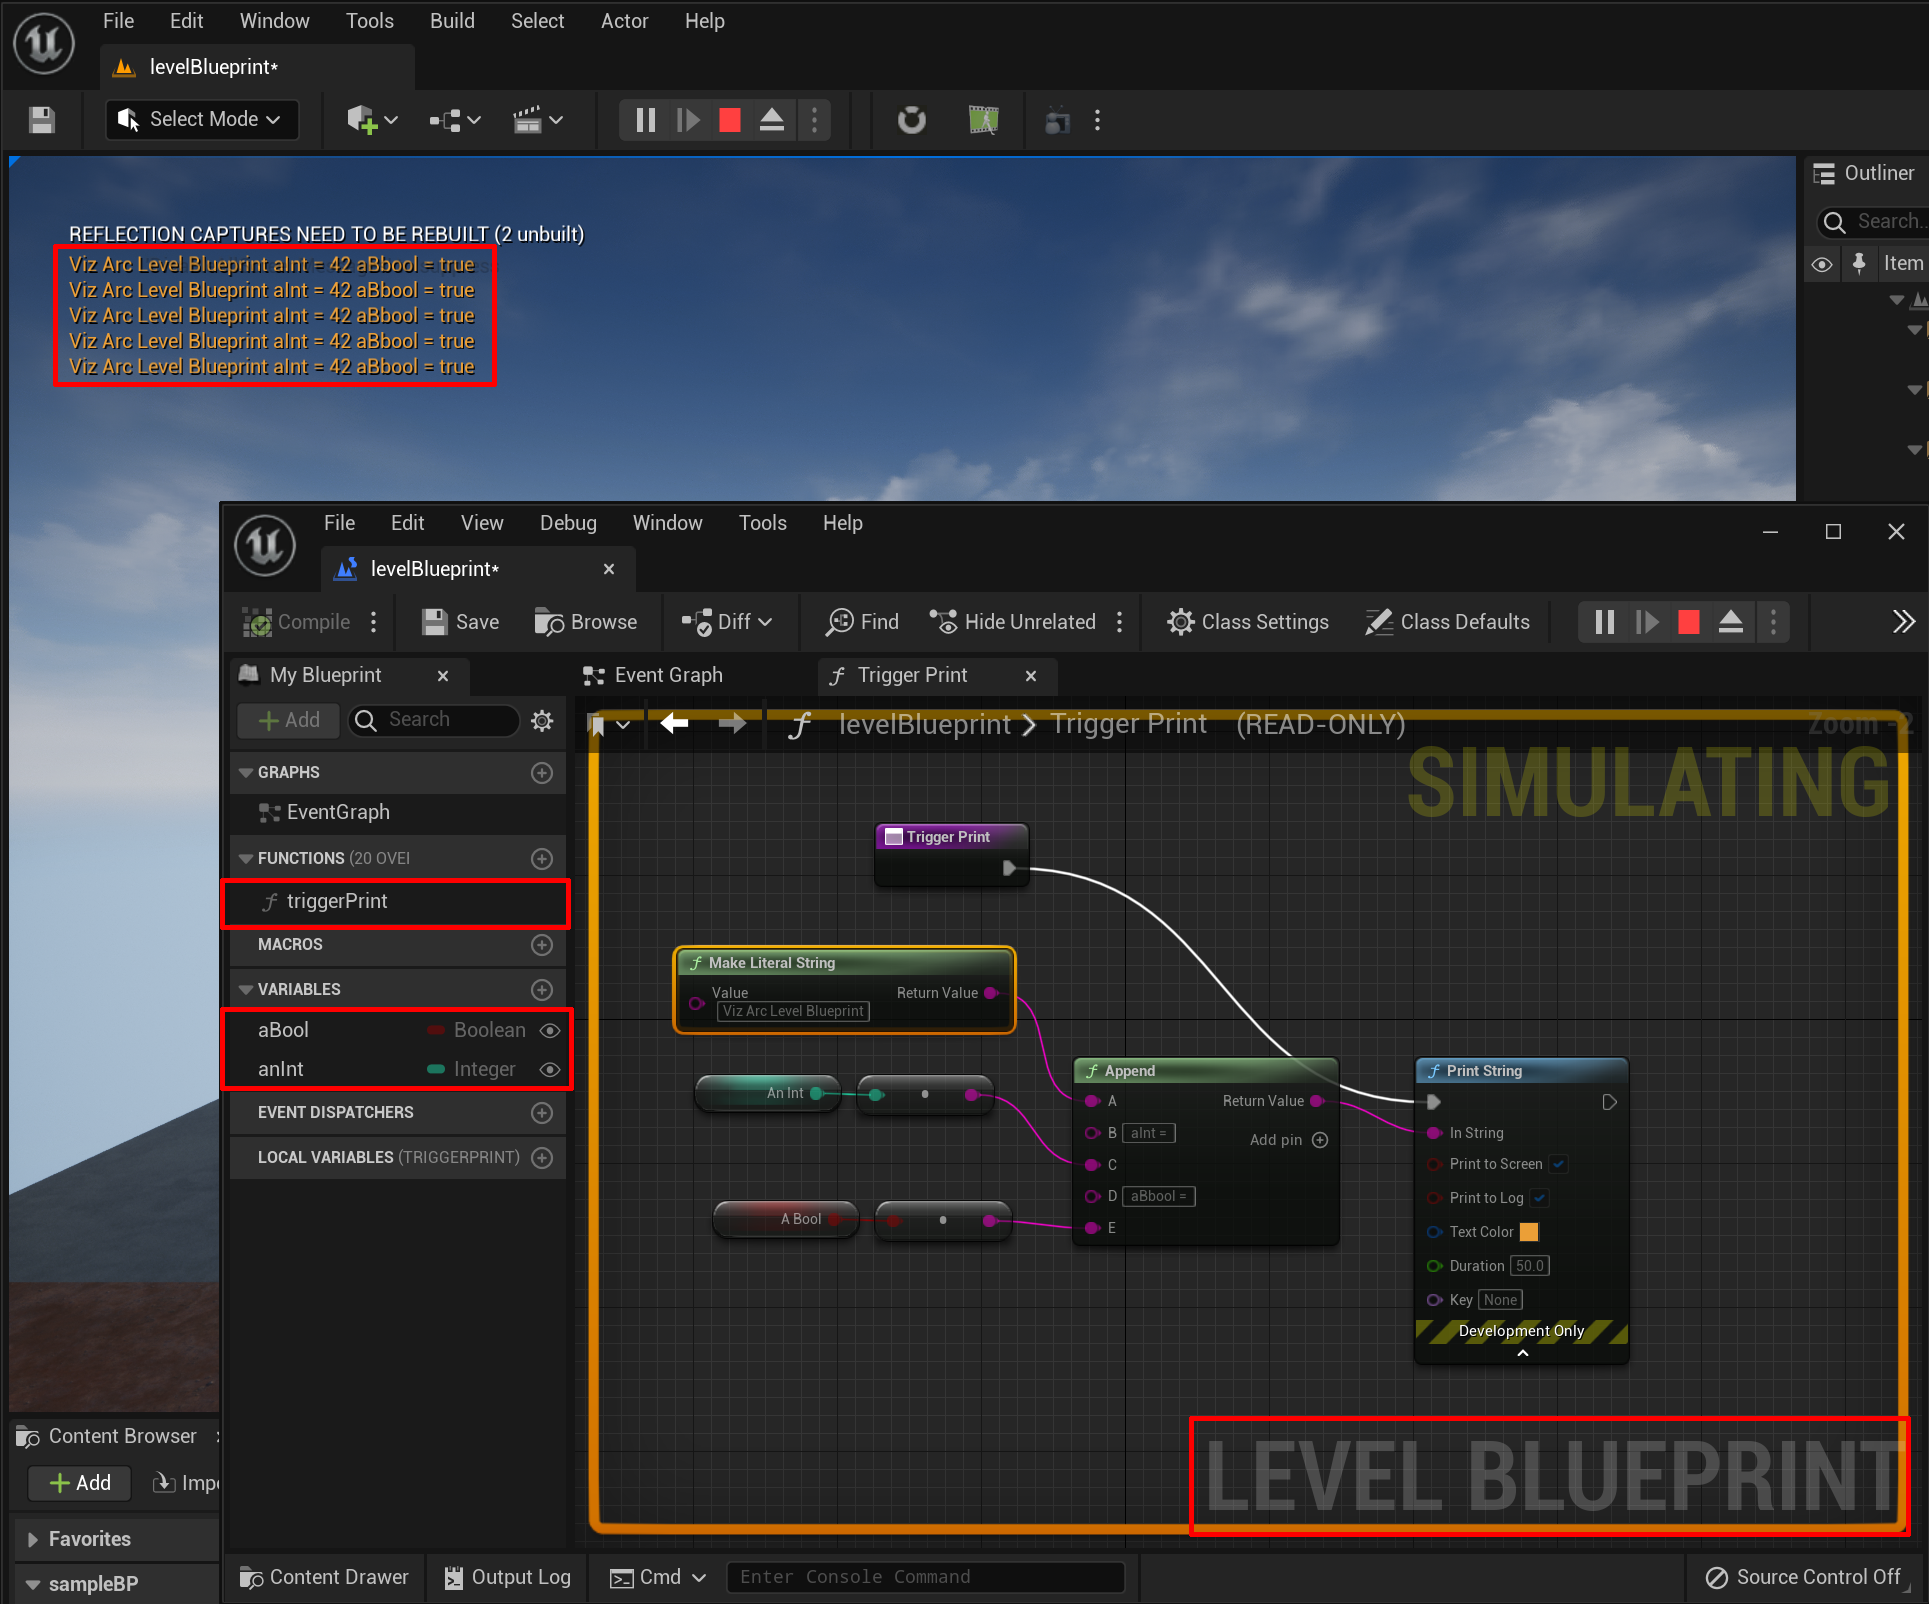
Select a function to be invoked by the Blueprint action and set some of the exposed values.
The same blueprint seen on the Unreal Engine which prints a composes string of the given values from Viz Arc.
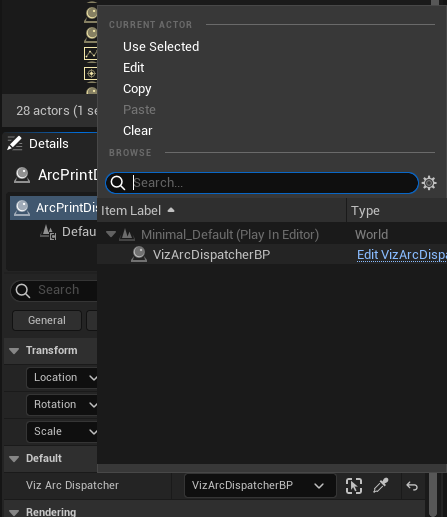
Dispatcher
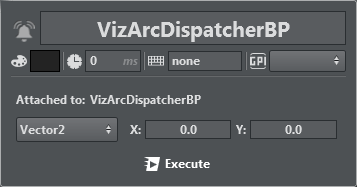
The Dispatcher action lets you create an interaction between Viz Arc and Unreal Engine by setting a value and its type to trigger from Viz Arc to Unreal Blueprint.
-
Enable the Viz Arc plugin (if not already enabled during installation).
-
Add Viz Arc Dispatcher BP to an Unreal level.
-
On the content browser, make sure that Show Engine Content and Show Plugin Content are checked (click on the Settings button to open the settings panel).
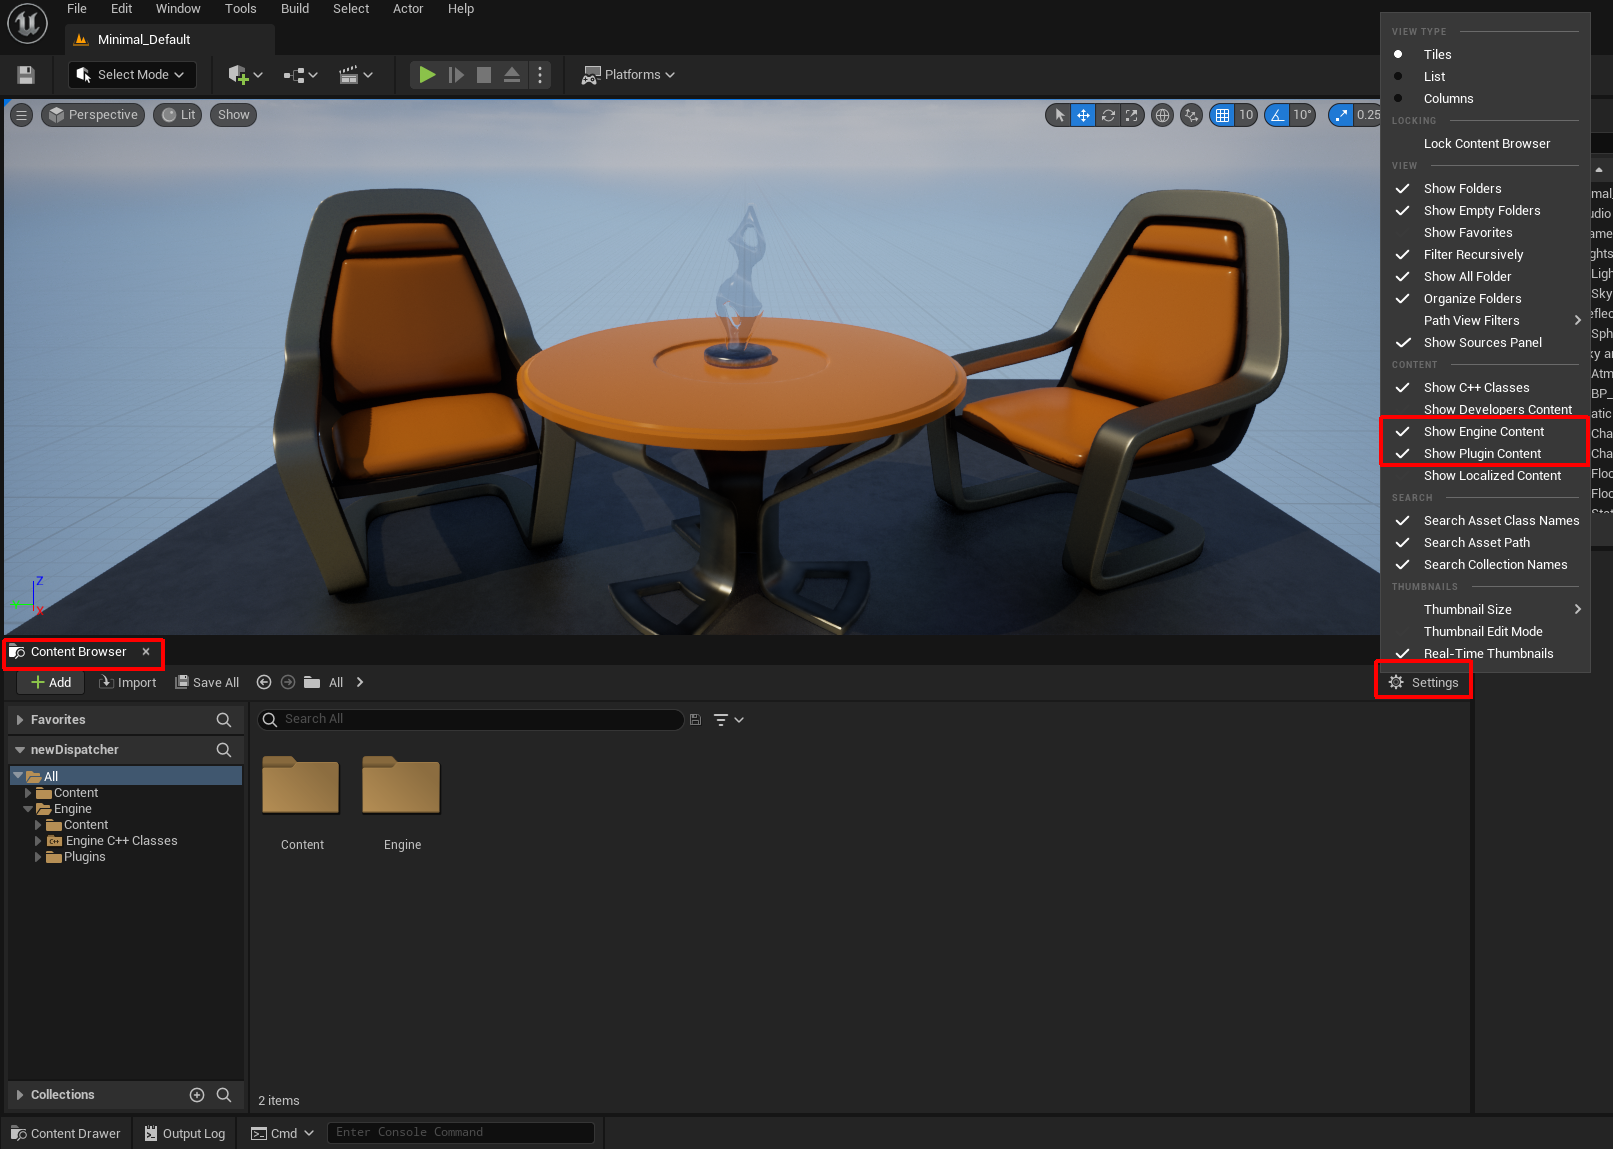
-
Scroll in the folder browser until you find VizArc Content.
-
Drag the Viz Arc Dispatcher BP to your level (create actor).
-
Subscribe to the dispatcher events (Viz Arc Dispatcher BP events).
-
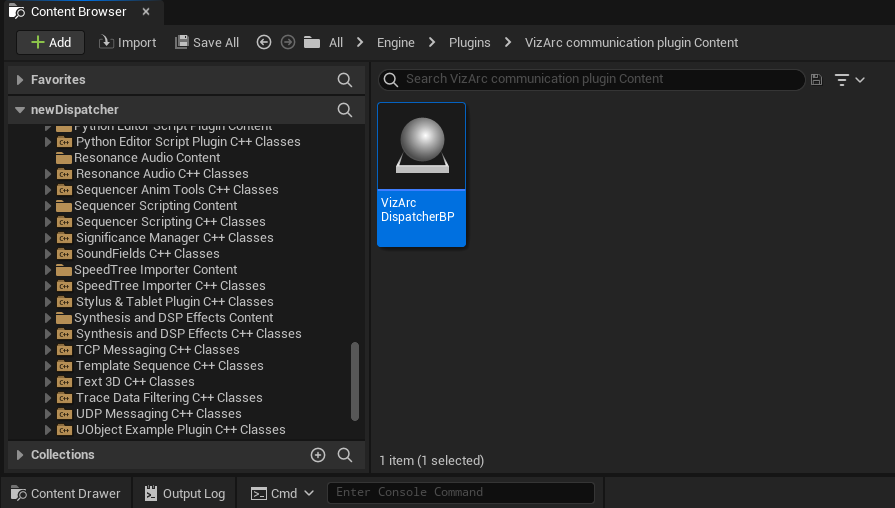
Open or create the Blueprint that is to subscribe to the Viz Arc dispatcher.
-
On the event graph, get the Event BeginPlay. This can be done by right-clicking on the canvas, entering BeginPlay in the search box and double-clicking on Event BeginPlay. This event is called when Unreal enters play mode.
-
-
Once the Begin Play event has been created, you must extend the execution line. Drag the white shape on the right side of the Event shown above. Once you release the left cursor button (stop dragging) the All possible options popup appears.
Note: To see all Viz Arc Dispatcher BP events, disable Context Sensitive in the popup.
-
Enter VizArcBroadcast in the search box to see all the functions of each available subscription type (void, bool, int, float, string). To subscribe to the Boolean version, double-click on Bind Event to VizArcBroadcastBool.

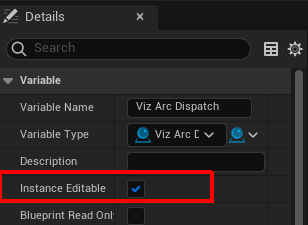
In order for Bind Event to VizArcBroadcastBool to work you need a reference to the Viz Arc Dispatcher BP that you created earlier. To do this, create a new variable of the type Object Reference to Viz Arc Dispatcher BP.
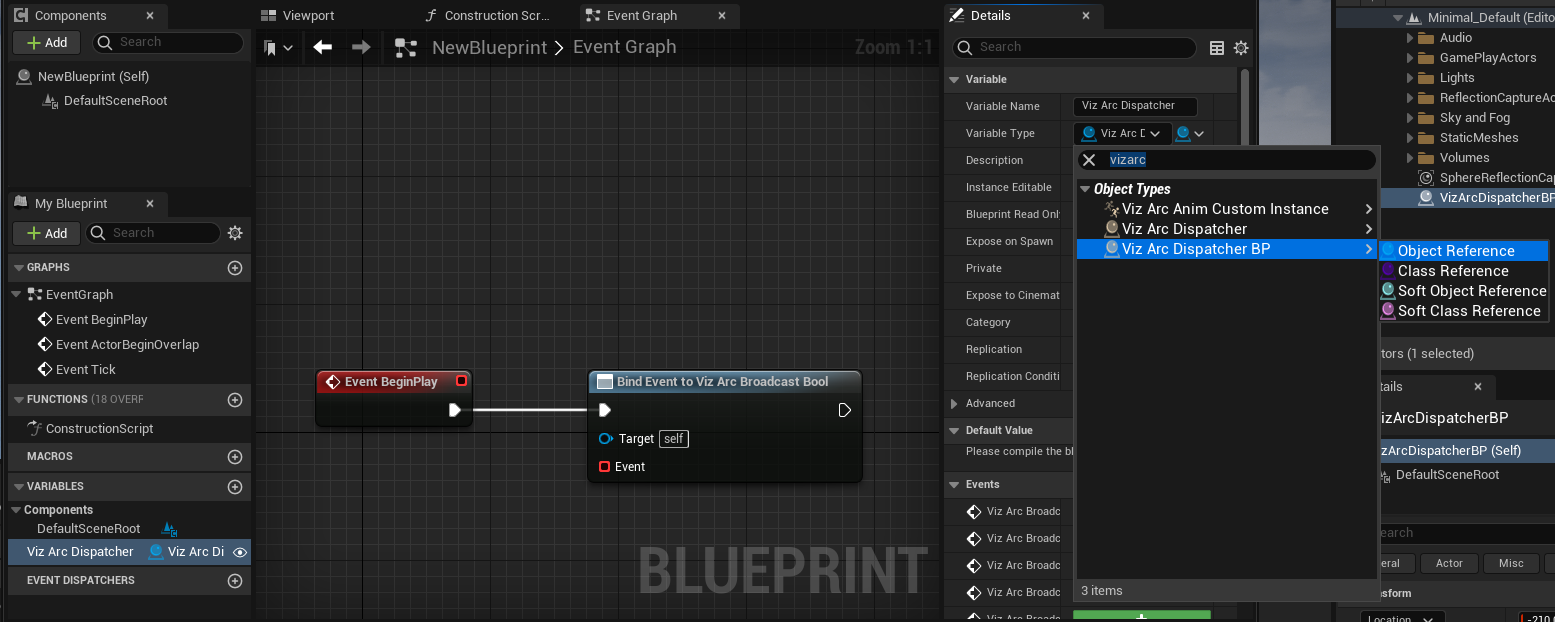
Make it Instance Editable :
-
With the variable created we can now attach it to Bind Event to VizArcBroadcastBool, so that Unreal knows which instance of the dispatcher to listen to. Drag the variable to the blueprint canvas and select Get. Connect the node to the Target Bind Event to VizArcBroadcastBool.
-
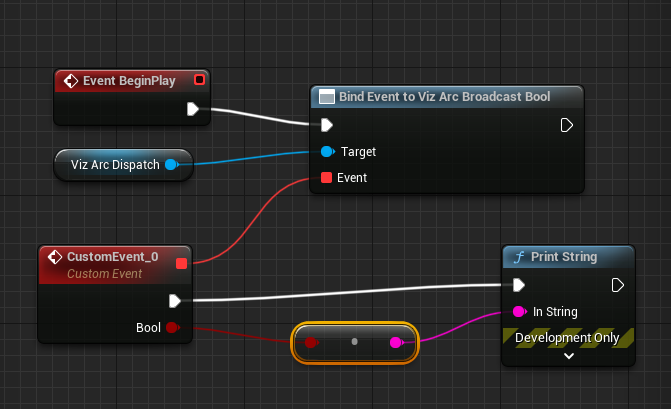
The only parameter missing is Event. To create it, drag the red square on Bind Event to VizArcBroadcastBool inside the canvas.
-
Release the left cursor button. Once the popup opens, enter Custom Event and select the only available option Add Custom Event.... This creates the event that is called whenever the dispatcher fires an event of type bool. The bool value and event trigger can be used elsewhere in the Blueprint, in this sample just print the bool value on the render output.
-
The last step is to set the Viz Arc Dispatcher Reference. To do this, go back to the editor, select the Blueprint that you were setting up, loop on the details tab for your newly created variable and select the one you want to listen to from the list of Viz Arc Dispatchers.
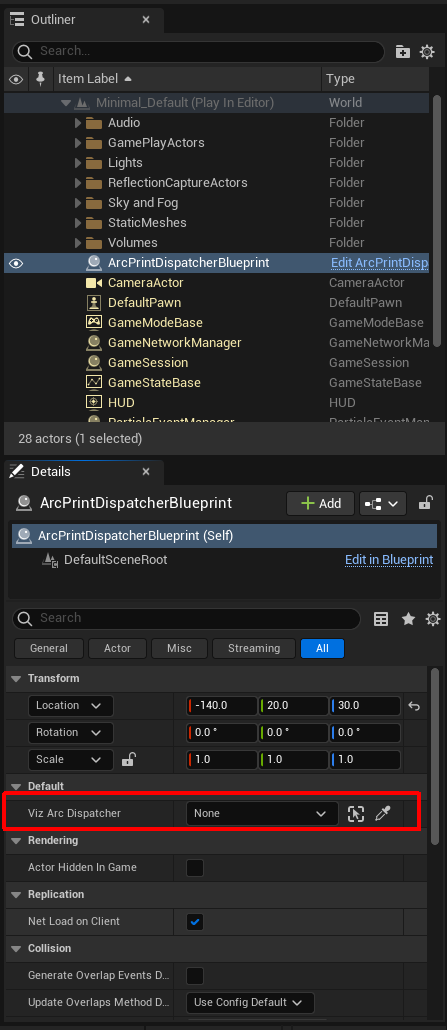
Select the Viz Arc Dispatcher.
-
You are now ready to control the variable from Viz Arc.
-
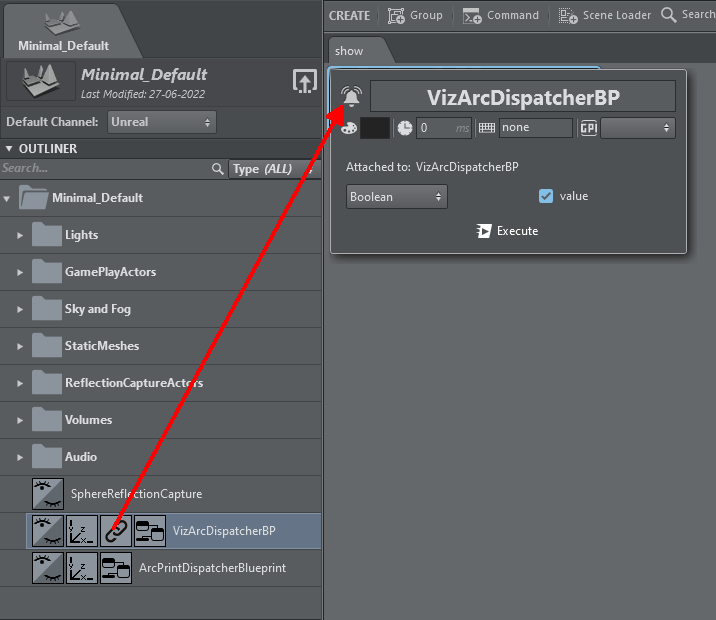
Load a level containing Viz Arc Dispatcher.
-
Create a Viz Arc Dispatcher Action by dragging the cursor from its icon onto the canvas.
-
-
Click the newly created action’s edit button. You can use the drop-down to select which type of event you want to fire (void , int, float, bool, string). Whenever the type changes, the view changes correspondingly so that you can define the value that is sent with the event.