Viz Arc User Guide
Version 1.8 | Published October 13, 2023 ©
Project Action Types

-
Action Group (1)
-
Command (2)
-
Tracking Hub (3)
-
MSE (4)
-
Shared Memory (5)
-
Chroma Key (6)
-
Virtual Studio (7)
-
Viz Camera (8)
Action Group

Action Group is useful for grouping several actions together, both scene and project, and executing them at the same time.
It’s possible to collapse a group or expand it and insert/edit/remove action children.
Pressing the Edit icon ![]() next to the group name opens the main tool, where you can edit the group name, box color, time delay in milliseconds, keyboard shortcut and GPI channel.
next to the group name opens the main tool, where you can edit the group name, box color, time delay in milliseconds, keyboard shortcut and GPI channel.
It’s also possible to execute all action boxes included in an action group on initialize group by pressing the Execute All icon ![]() at the top-right of the group box.
at the top-right of the group box.
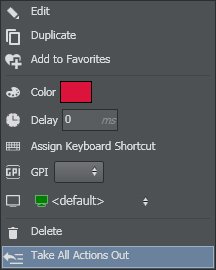
Remove all actions from the group by selecting Take All Actions Out in the Context Menu (right-click on group action).
Command
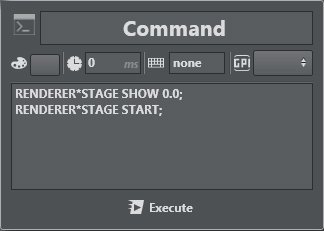
The Command action lets you write custom commands to talk with Viz Engines, for example to manage stage animations or start a specific director, as shown in the example above.
Tracking Hub
TH Command lets you write a custom command to interact with Tracking Hub.
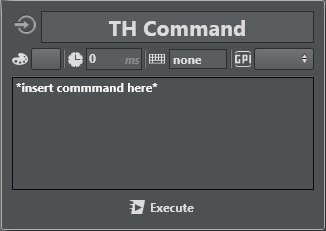
Note: Tracking Hub is a console program for Viz Virtual Studio that collects and stores data from tracking systems (cameras and objects). Viz Engine is provided with this tracking data at a configurable time or delay.
MSE
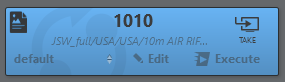
MSE lets you retrieve Viz Trio’s saved pages and import them directly into Viz Arc for execution.
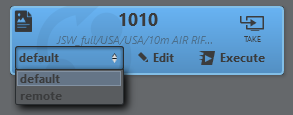
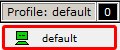
The profile used for the action is in the lower left corner of the MSE action. It contains a list of the profiles configured on your MSE.
To Import Trio Shows
This section shows you how to import Trio Saved Pages into Viz Arc:
|
|
Press the MSE icon |
|
|
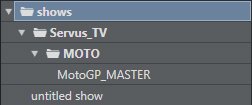
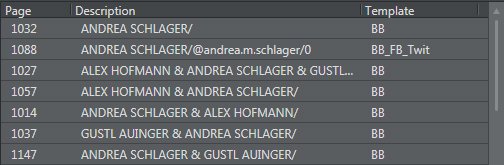
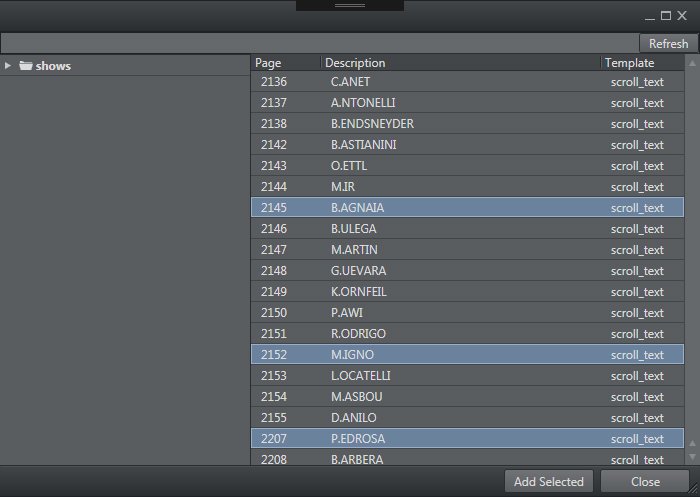
Select a show. A list of Trio pages is displayed. You can sort pages by page number, description and template by double-clicking on the header at the top of the list. |
|
|
Reload MSE pages by clicking Refresh. |
|
|
To import, select one or more pages and click Add Selected To abort an operation, close the window or press the Close |
|
|
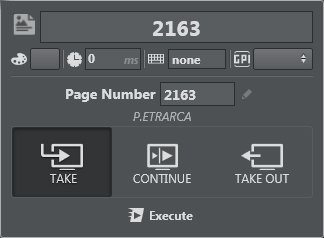
At the bottom of the MSE window, you can select Take, Continue, or Take Out , which creates a single action box for every operation. |

To Work with Page Animations

Once the pages are imported, you can work with Page animations:
|
|
TAKE: start animation. |
|
|
CONTINUE: continue animation from the previous stop point to the next. |
|
|
TAKE OUT: take out the graphic. |
|
|
Execute: perform the action selected above. |
Shared Memory
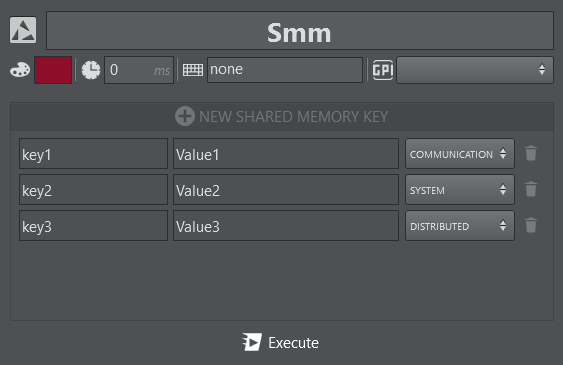
Set Shared Memory names and assign a value using Shared Memory. You can add multiple Shared Memory key/value pairs.
The value pairs can be sent to different shared memory destinations:
-
COMMUNICATION: The VizCommunication map of the destination Engines is updated. Only the Engine's selected profile is updated.
-
SYSTEM: The System map of the destination Engines is updated. Only the Engine's selected profile is updated.
-
DISTRIBUTED: The VizCommunication map of the destination Engines is updated and all Engines connected with the same user to the Graphic Hub are updated as well.
The action works only when the destination Engine(s) have either UDP or TCP ports configured for shared memory updates. It uses the UDP port if configured other than 0, else it uses the TCP if configured other than 0.
The Viz Engine configuration, configured to receive shared memory updates via UDP on port 3004 or via TCP on port 3003.

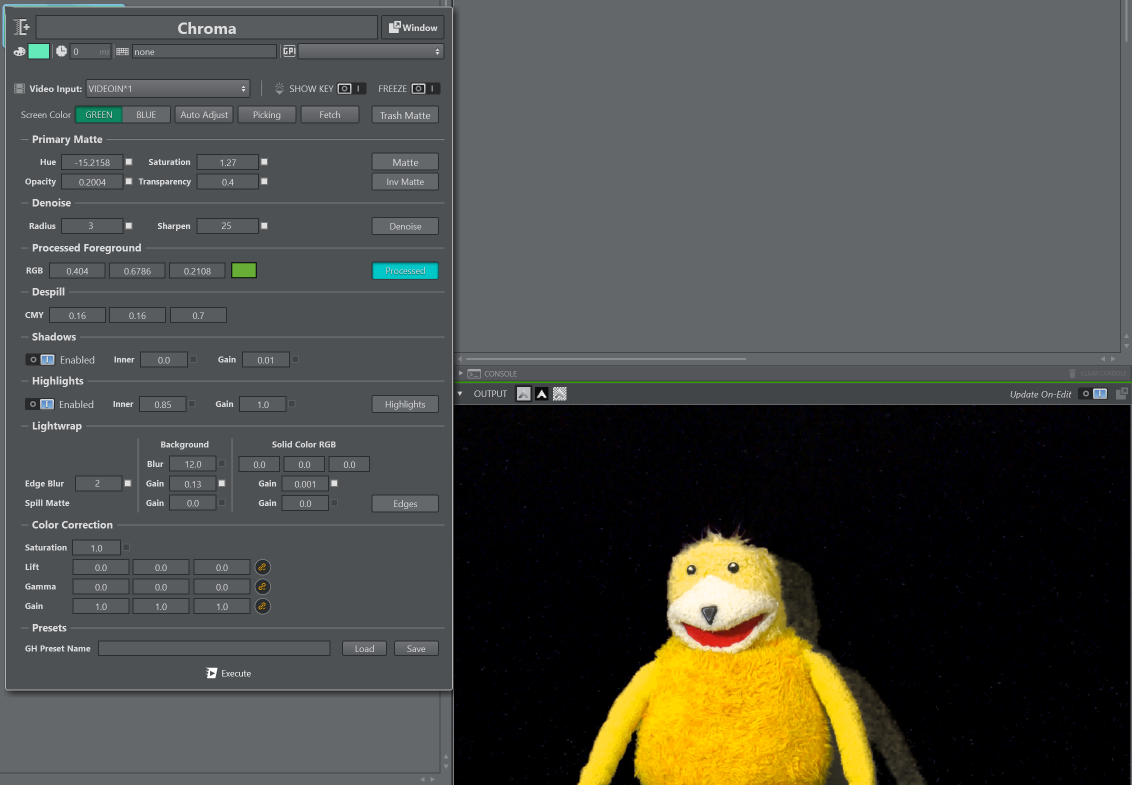
Precision Keyer
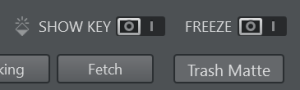
Setting up the Precision Keyer is a sequential process where each step creates an interim result. The suggested layout follows the sequence and places the show buttons next to the items which need to be inspected. The show buttons are check boxes and can be overwritten if another checkbox got selected. If no checkbox is active the final composition is shown.
|
No checkbox |
Shows the final and composed output of the Keyer. |
|
Trash Matte |
Shows the color coded trash matte on the output. |
|
Matte |
Shows the key output, white representing foreground and black the background. |
|
Matte Inverse |
Shows the inverse of the Matte output, foreground white, background black. |
|
Advanced |
Inks threshold values to ease setup when it is hard to distinguish between 0.9 and 1.0 (both appear "white" on monitors). Value 0.0 is mapped to green and 1.0 to red. |
|
Denoise |
Shows the output of the de-noising step. |
|
Processed |
Shows the processed output. |
|
Advanced |
Inks threshold values to ease setup when it is hard to distinguish between 0.9 and 1.0 (both appear "white" on monitors). Value 0.0 (fully processed) is mapped to red. |
|
Spill |
Shows the spill matte. |
|
Edges |
Shows the detected edges between foreground and background. |
|
Highlights |
Shows the highlights in the foreground. |
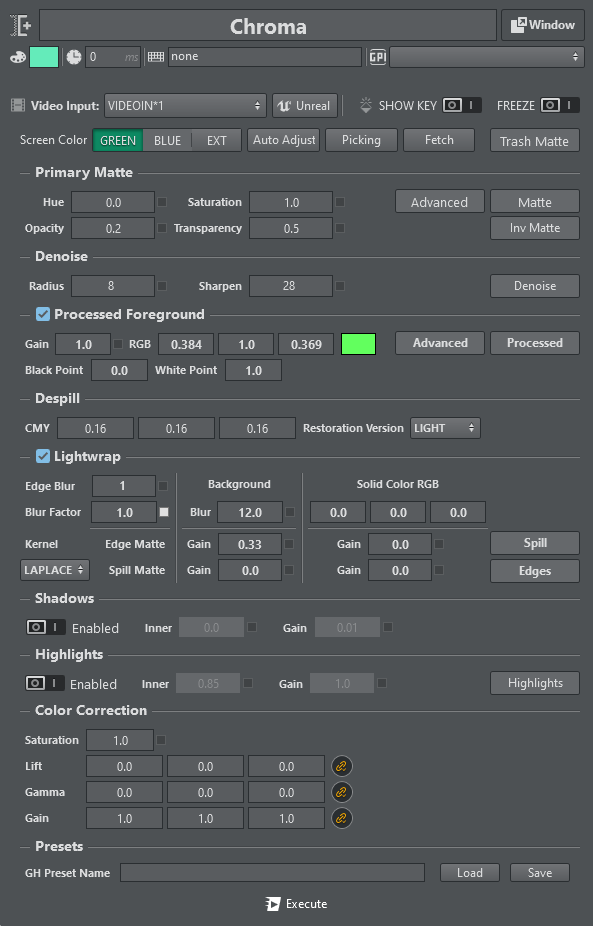
Primary Matte

-
Hue: Rotate the color space to move the color of the Cyclorama to the purest color chosen, green or blue. You can adjust this by looking at the matte and checking that the matte calculated on the Cyclorama approaches black.
-
Saturation: If the video is not highly saturated you may want to adjust this to ease setting of the opacity and transparency point.
-
Opacity: This is the point at which the primary matte value becomes 100% opaque. Equivalent to the black point on gray scale images.
-
Transparency: This is the point at the which the primary matte becomes 100% transparent. Equivalent to the white point in gray scale images.
Matte Denoise

-
Radius: The radius of the bi-linear filter used to blur the noisy parts of the image.
-
Sharpen: Pixels whose color differ more than this threshold from the main pixel are not included in the blurring process. This maintains detail, even if a large blur radius is applied.
Processed Foreground

-
Process Foreground: Enables or disables the foreground processing. When disabled, it falls back to a classic alpha blending.
-
Gain: Sets gain for the processed foreground color.
-
RGB: Uses this backing plate color to process the foreground. This value gets subtracted from the foreground color, and the result should be black.
-
Black Point: Scales the key value used when processing the foreground. Only affects areas where matte is > 0.0 and < 1.0. Can be used to enlarge the talent in semi-transparent regions, increases lightness around edges.
-
White Point: Scales the key used when processing the foreground. Only affects areas where matte is > 0.0 and < 1.0. Can be used to shrink the talent in semi-transparent regions, decreases lightness around edges.
The Black Point can be used to enlarge talent, the White Point to shrink it. It only affects foreground processing and transition regions. Shrunken talent introduces darkened edges, enlarged talent enlightens edges.
How to setup RGB values manually:
-
Enabled Advanced mode, it highlights areas which are fully processed in RED (when processed - color is less than 0).
-
Turn all values to 1.0, background should be fully red now, increase gain if it's not.
-
Tune in B: Reduce value until the red areas start to vanish. Go back a little bit.
-
Tune in G: Reduce value until the red areas start to vanish. Go back a little bit.
-
Tune in R: Reduce value until the red areas start to vanish. Go back a little bit.
-
Switch back to normal mode.
-
Check result around edges, fine tune as necessary.
Despill

-
CMY: Cyan, Magenta and Yellow despill gain.
-
Restoration Version: Restores more lightness during despilling when LIGHT is selected.
Lightwrap
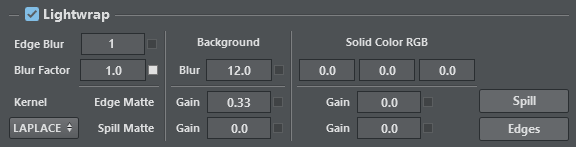
Light wrapping: Light wrapping is a compositing technique designed to blend keyed out green screen footage with a background plate. Light wrapping is used to simulate ambient light that casts light onto your subject in the scene. Although in some circumstances (like mixed lighting) it can be better to use a different layer than your background layer for the light wrap, this all depends on your scene.
-
Lightwrap: Enables or disables lightwrapping.
-
Edge Blur: If this value is greater than zero, edge detection is performed and edges found are blurred by the amount set in this field. The blurred edges serve as input to brighten up the edges to overcome overshooting when going from a dark color to the Cyclorama. These edges are used for lightwrapping.
-
Edge Blur Factor: Determines how much of the background blur is used for the edge lightwrapping. 1.0 = same blur as for spill lightwrapping, 0.0 = use unblurred background.
-
Kernel: Choose between LAPLACE and SOBEL. LAPLACE is more fine-grained and keeps more details.
-
Blur: The blurred background is used for lightwrapping onto the foreground together with the spill matte or the edge matte. See also Edge Blur Factor.
-
Edge Gain - Background: Defines how strongly the lightwrap is applied to the background when using the edge matte.
-
Spill Gain - Background: Defines how strongly the lightwrap is applied to the background when using the spill matte.
-
Solid Color RGB: A constant color that is applied as a lightwrap on the foreground.
-
Edge Gain - Solid Color RGB: Defines how strongly the lightwrap is applied to the foreground when using the edge matte.
-
Spill Gain - Solid Color RGB: Defines how strongly the lightwrap is applied to the foreground when using the spill matte.
Spill: Carefully use Spill Gain - Background to create an ambient light effect, and increase Edge Gain - Background to improve edge quality. Blur level should be high to prevent transparency effects when using Spill Gain, while Edge Blur Factor can be low to reduce blur used for edge lightwrapping.
Edge Matte: Edge detection is performed on the primary matte, resulting in a grayscale image that in most cases needs to be blurred for a smoother transition.
Shadows

-
Enabled: Toggles background shadows.
-
Inner: Sets threshold under which shadows or dark colors are brought to the background. This feature is disabled if the value is zero.
-
Gain: Strengthens the effect of bringing dark colors back.
Highlights

-
Enabled: Toggles foreground highlights.
-
Inner: Luminescence from which highlights are added to the background.
-
Gain: Highlight gain.
Color Correction
Primary color correction is applied on the already keyed foreground pixels.

-
Saturation: Value for the overall saturation.
-
Lift: RGB values for lift.
-
Gamma: RGB values for gamma.
-
Gain: RGB values for gain.
Video Input
Select the asset source to apply the keying on. Toggle the Unreal button to specify that keying takes place in the Unreal Engine.

Screen Color
Select between GREEN and BLUE screen color, or EXT in order use key and processed foreground from external input, skips internal matte calculation and despiller.
![]()
Auto Adjust
For an initial keying setup, point the camera into the green/blue box and hit the Auto Adjust button to get an initial key.
![]()
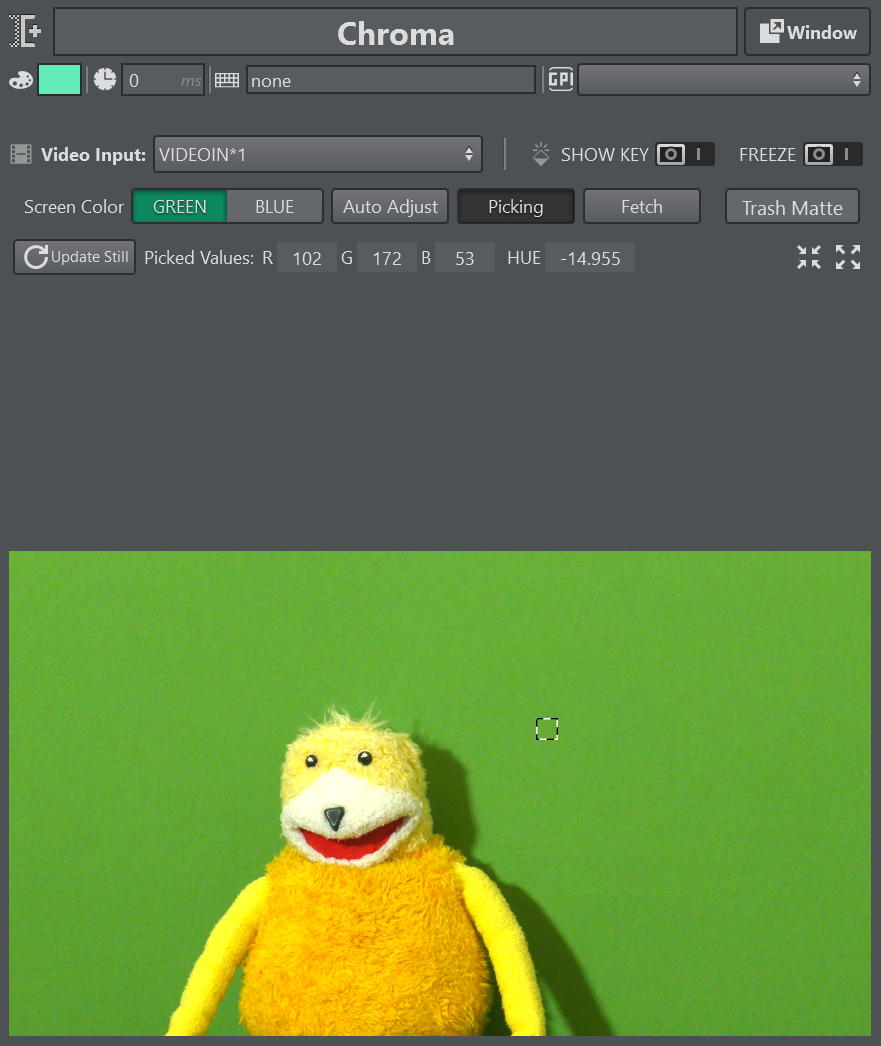
Picking
Picking lets you get a good first estimate of your Chroma/Precision Keyer. Press the Picking button to enter picking mode:
![]()
An attempt is automatically made to fetch a still frame from Viz Engine configured in the current channel selected in the chroma action.
You'll now be able to scroll horizontally and vertically within the snapshot and pick an area of green. The picking area can be resized using the mouse wheel.
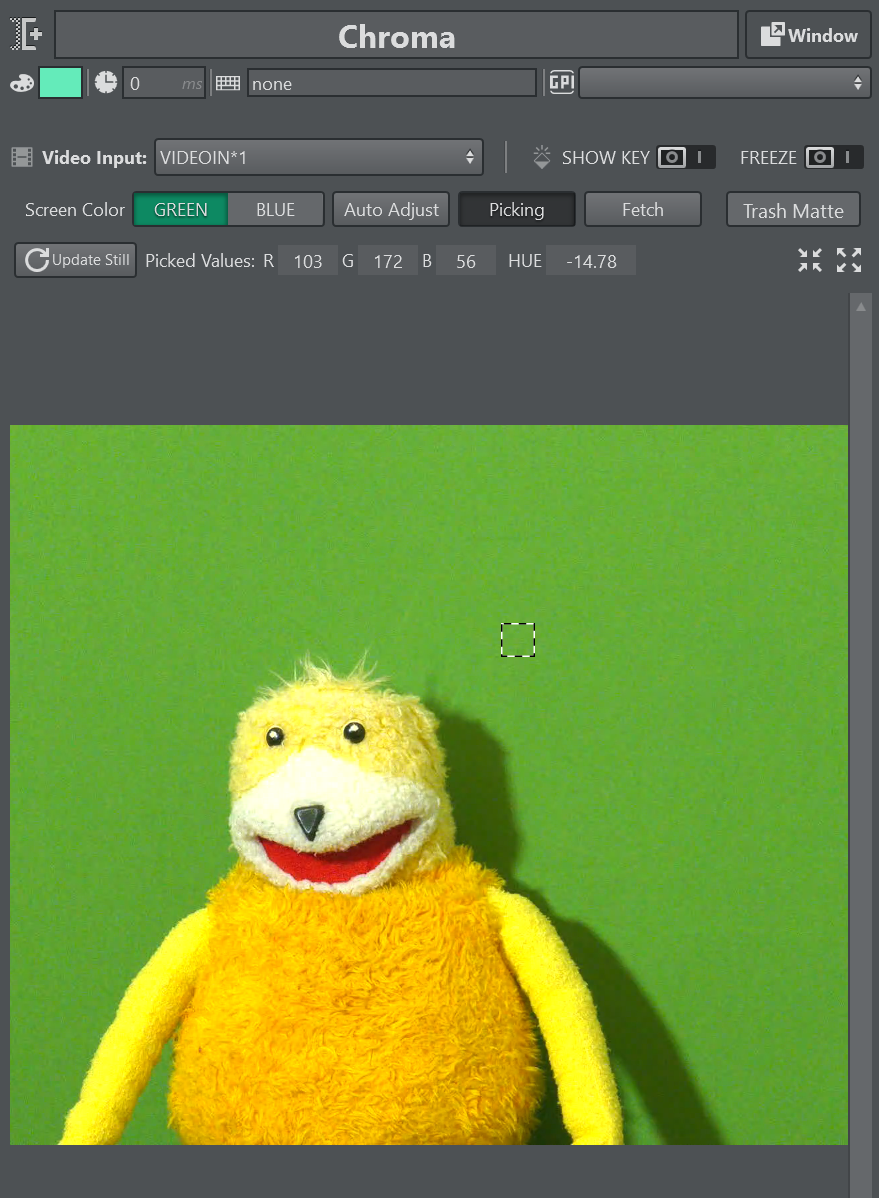
Once an area is picked, the calculated RGB values are displayed above the snapshot. The HUE value is only relevant if the Precision Keyer is selected. The picked values are directly applied to the Engine if Update On-Edit is enabled.

You can use the Fit and Scroll to view the snapshot either scaled into the view or in it's original size for more accurate picking.
![]()
To fetch a new still frame from Viz Engine for picking, press Update Still.
-
The Fetch button retrieves the current keying settings from the Viz Engine. This is useful when creating a new Chroma Action that needs to be initialized with the current settings of Viz Engine.
-
FREEZE freezes the selected video input on the Engine. Don't forget to unfreeze when you are finished adjusting the key.
-
SHOW KEY forces the Viz Engine to output the key channel on the fill output. Deselect this when you are finished adjusting the key.
Adjusting the Keyer
To get to a good keying result, the following steps should be followed in the described order, since the different steps depend on each other.
-
Start by hitting the Auto Adjust key button in the Keyer control. This sets the values of the hue and saturation and ensures that the rest of the keying parameters are set to a value to optimize their influence on previous settings.
-
The obtained result after hitting the Auto Adjust key button is the primary matte which results from the difference between the pixel colors and the primary color. The ideal hue can be found by viewing the matte and rotating the hue until the key strength is at a maximum. The brightness of the key represents the strength of the key. The saturation can be used to increase the key strength in case the signal coming from the camera is not very saturated. To adjust the limits for transparency and opacity the user can switch between the key and inverse key view. Clicking on the same button again disables the view.
-
Denoising can be viewed either on the key signal or on the denoised frame which is used to calculate the key. A large radius has a performance cost. Denoising should eliminate the noise on homogenous areas, while keeping details like hair intact.
-
The processed foreground is the next step. The background should be replaced by solid black. When reducing the gain, the user can check if too much or not enough red or blue is still in the processed foreground. Subtracting the wrong color results in red or blue tint in areas with semi-transparent key.
-
Despilling serves two purposes: It removes the green or blue spill from the people and objects in the studio and generates a matte which can be used for light wrapping with either a solid color or blurred background. The shadows and highlights sections allow to bring back dark and bright colors. This happens after the processed foreground has been applied to the background. This should be done after adjusting the primary key and processed foreground.
-
Lightwrapping helps to blend foreground and background better and should be the last step in the process of keying/compositing.
-
A color correction can be applied to the processed foreground. It has no effect on any of the keying and blending methods.
Precision Keyer Stages
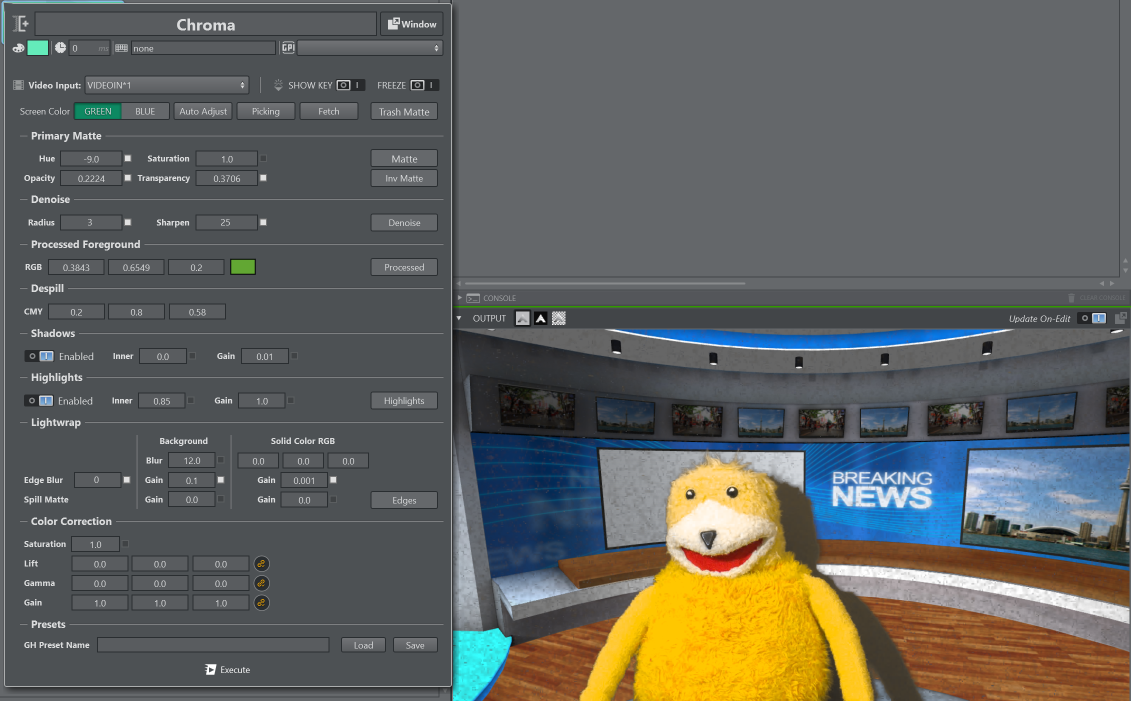
The final composited output after Auto Adjust has been pressed is shown above.
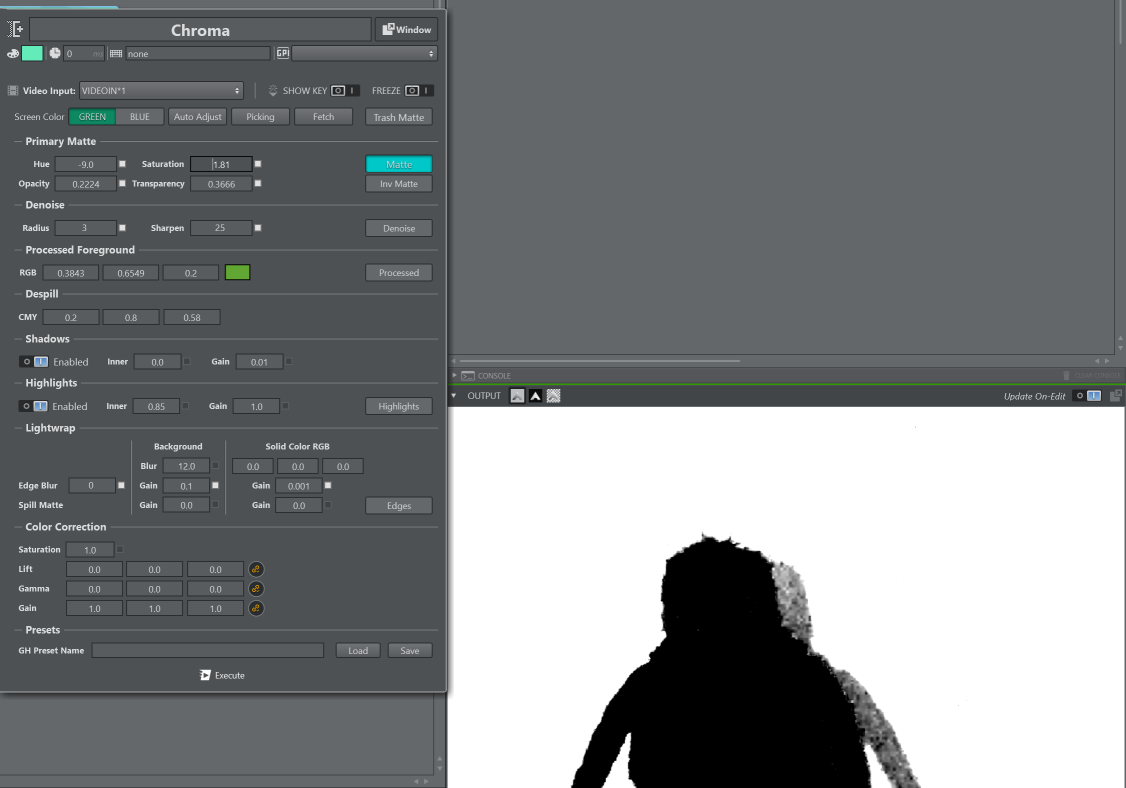
Output of the matte only, black representing foreground and white background, is shown above.
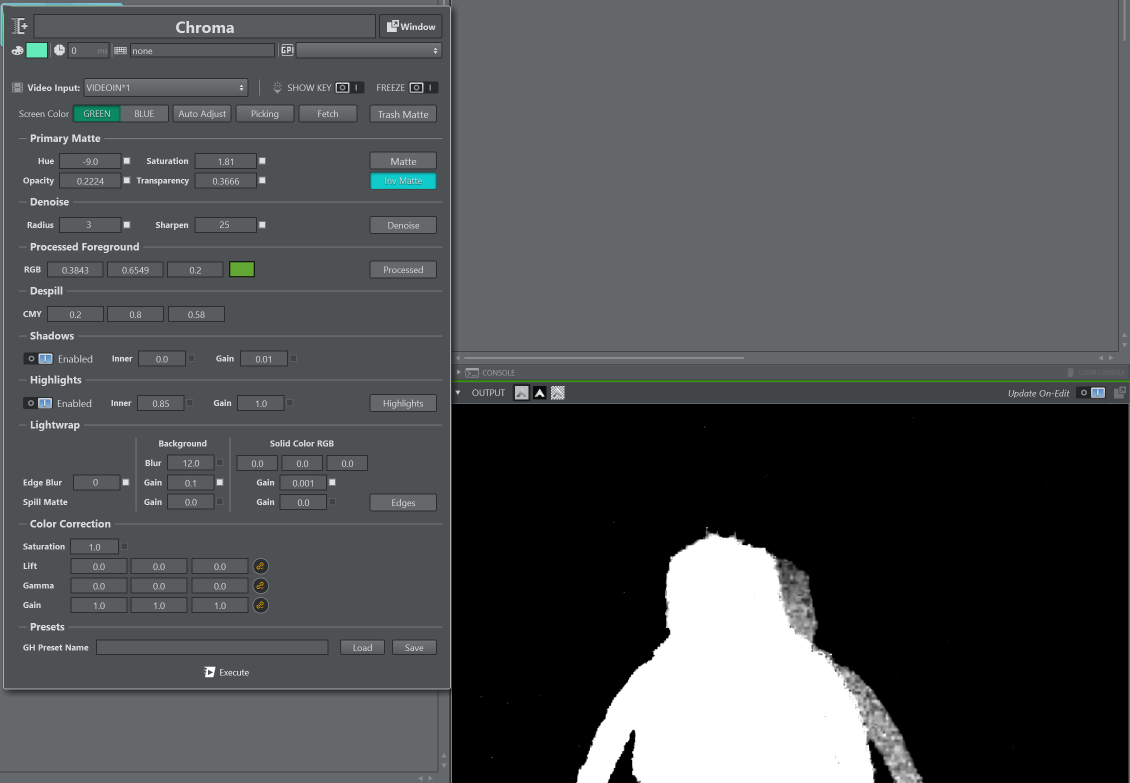
Output of the inverse matte only, black representing background and white the foreground, is shown above; helpful for seeing details such as hair.

Output showing the detected and blurred edge is shown above.
Output of the processed foreground that also shows the light wrap around the talent is shown above.
Unreal Command
The Unreal Command action lets you write custom commands to talk to the Unreal Engine, for example to trigger a sequence. Multiple commands can be sent separating them by ; and a newline.
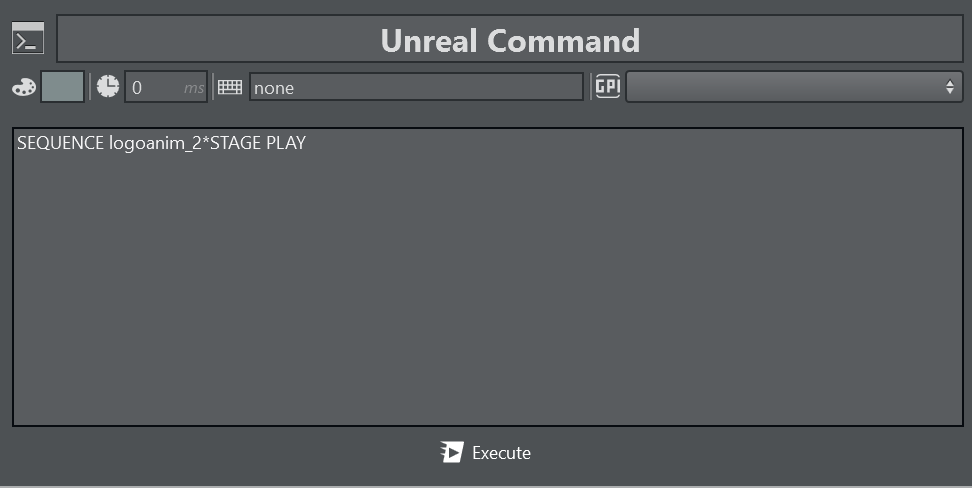
Native Unreal commands are also allowed such as for example:
-
disableallscreenmessages: Disables all screen messages.
-
enableallscreenmessages: Enables all screen messages.
-
scalability 2: Sets the render quality to High.
-
stat FPS: Shows some FPS information on screen.
-
stat unit: Shows some useful performance information on screen.
-
r.ScreenPercentage 50: Sets the Screen Percentage scaling resolution to 50.
-
sg.ShadowQuality 0: Reduces the Shadow Quality to 0.
Virtual Studio
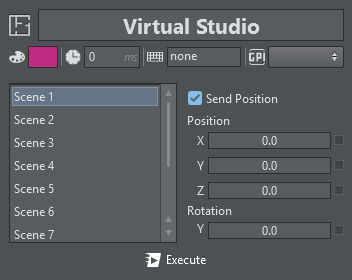
Virtual Studio lets you set up X/Y/Z positions and Y rotations of every scene listed at the left of the panel. When Send Position is unchecked, it only sends the scene index to be selected on the Engine(s) and uses the position and rotation stored in the current scene.
Viz Camera
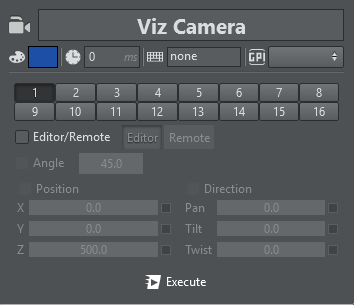
In Viz Camera, you can select between every camera in Viz Engine (from 1 – main to 16). The default behavior once a Camera Action is created is to simply switch the active camera.
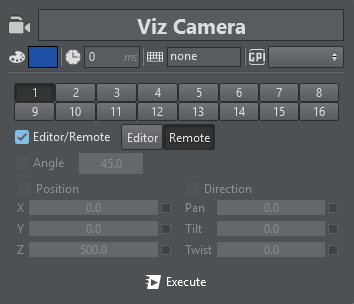
If the toggle Editor/Remote is activated you can force a camera to be in Remote or in Editor mode, for example.
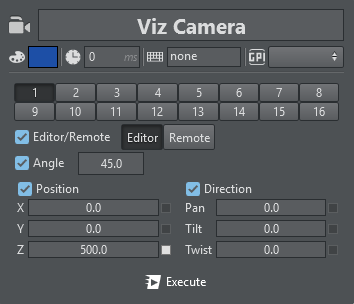
When Editor mode is selected, you can enable all aspects of the camera such as Angle, Position and Direction and force the displayed values.