Viz World Plug-ins Guide
Version 17.0 | Published January 10, 2019 ©
Region To Texture
![]()
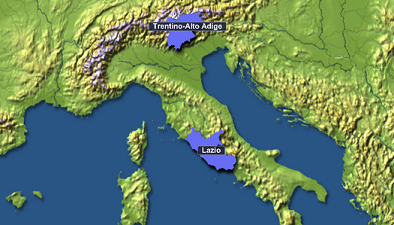
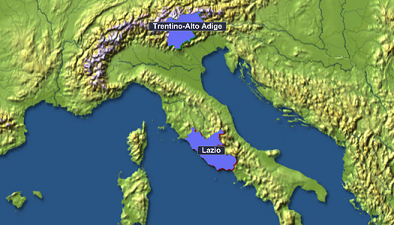
The Region To Texture plug-in simulates shadow effects for 3D Regions. This is achieved by creating a texture of a region’s contour. The plug-in works in two modes: By creating a single texture that applies to all regions in the scene or by creating multiple textures that applies to each individual region.
To work with a single texture, the plug-in must be placed on the Region Holder container.
To work with multiple textures, the plug-in must be placed on a container above the 3D Region container.
Note: This plug-in is located in: Built Ins -> Container plug-ins -> Maps
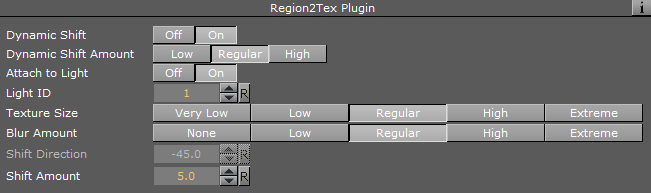
Region To Texture Properties
-
Dynamic Shift: Shifts shadow texture more when Navigator is farther away. This could be used to better see the shadow from farther distances.
-
Dynamic Shift Amount: Sets the extent of the Dynamic Shift.
-
Attach to Light: Considers light direction according to the positioning of the shadow texture when set to On. When set to Off, Shift Direction allows you to manually set the direction of the shadow.
-
Light ID: Sets the ID of the light to be considered.
-
Texture Size: Sets the size of the shadow texture. The larger the texture, the better is the visible quality; however, it also requires more rendering time.
-
Blur Amount: Determines the extent to which the texture is blurred to resemble the appearance of a shadow.
-
Shift Direction: Sets the shift direction of the shadow manually and according to the region. This setting can only be used if the Attach To Light setting is disabled (Off).
-
Shift Amount: Sets the amount of shift.
Working with Region to Texture
To Create a Simple Region to Texture Scene
-
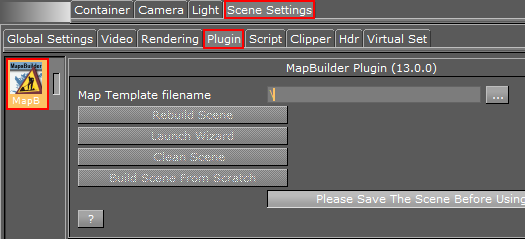
Add the Map Builder plug-in to the Scene Settings.
-
Save the scene.
-
Open the Map Builder editor and click Launch Wizard. This opens the Map Builder. Note that it may open behind Viz Artist.
-
From the Choose Scene Type dialog box select Navigator.
-
Click the Base Map. This opens the Viz World Maps Editor.
-
Select a stylesheet for your map and click OK.
-
Click the map for Destination 01. This opens the Viz World Maps Editor.
-
Click the Browse Map button (see Map Tool Bar) and select two regions (e.g. Trentino-Alto Adige and Lombardia in Italy) and click OK.
-
Click Build.
-
Save the map template file to your desired location (e.g. C:\Temp\Maps). Once saved, the map scene is generated.
-
For creating a single texture do the following:
-
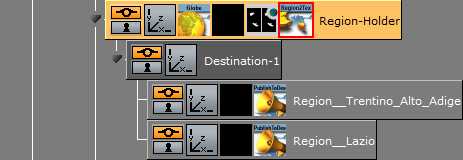
Navigate the scene tree to the Region-Holder container found under Object > MapAndHops > GeoReferenceMap > Holders.
-
Add the Region to Texture plug-in to the Region-Holder container.
-
-
For creating multiple textures do the following:
-
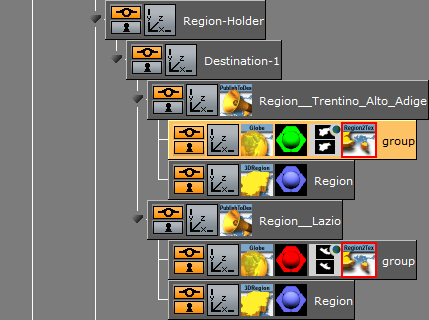
Navigate the scene tree and split the Region__<name> container found under Object > MapAndHops > GeoReferenceMap > Holders > Region-Holder > Destination-n.
-
Add a new group as a sub-container of the Region__<name> container.
-
Add the Region to Texture plug-in to the new group container.
-
-
Open the Publish To Design editor and click the Publish and Refresh button.
-
To adjust the textures, split the merged region containers and adjust the settings available in the Region to Texture editor.