
Viz Artist User Guide
Version 3.12 | Published October 17, 2019 ©
Import Files
Use File Import to import these items:
-
Fonts
-
Images
-
Geometries
-
Scenes
-
Audio clips
Path Alias
Use a path alias to help streamline the import process. Path Aliases, defined in Viz Configuration, create shortcuts to frequently used file paths for import operations.
Browse for Files to Import
Use the import file list, on the left side of the Import Window, to browse the directories on a disk:
-
Double-click a directory to show its sub directories
-
Click a directory to show the contents in the right window
-
Click a path alias to quickly jump to this directory
-
Hold down the Ctrl key and click all required files to select multiple files.
To Import Selected Files
-
Select the target folder in the Server panel.
-
Click Import.
-
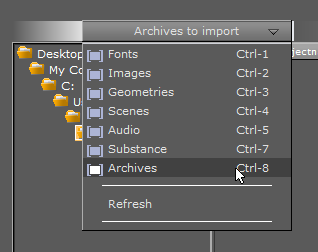
Select the type of file to import: Click the Import Menu and select the type of file to import, or press the keyboard shortcut.
-
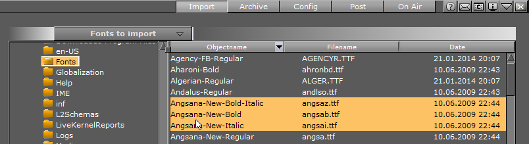
In the Import directory tree, search for the files to import.
-
Select the required file or files.
-
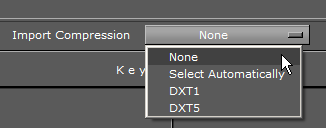
Images only: Select the import compression for the image or images. Click on Import Compression. Options are:
-
None
-
Select automatically: If the source image has an alpha channel, DXT5 is used. If the source image does not have an alpha channel, DXT1 is used.
-
DXT1: Works best on images without an alpha channel.
-
DXT5: Works best on images with an alpha channel.
-
-
Import the selected file or files:
-
Drag the file or files to the target folder, in the Server Panel (1), or
-
Double-click a single file (the file is added to the target folder)

-
-
If a reference to a file, which is to be imported, already exists in the Graphic Hub, this dialog shows:

Select from:
-
 : Overwrites the file in Viz Artist.
 -
 : Renames the file and imports (new file). Opens a new dialog, type and new name and press OK.
 -
 : Stops the file import of the file shown in dialog window. The import procedure continues with the next file.
 -
 : Overwrites all files if there are multiple files.
 -
 : Stops the import of all files.
-
-
Adobe After Effects projects only: If image or clip files already exist in Viz Artist, import and overwrite them (Active) or do not import files which already exist (Inactive).
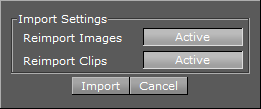
Tip: If there are no changes in the image or clips files, select Inactive. The import is much faster, because no output from the Adobe After Effects Renderer is required.
Shape layer in After Effects can be imported to the scene as two types of objects, video and geometry plug-ins, depends on its complexities.
-
Rectangle created by Rectangle or Rounded Rectangle tools are imported as a Noggi object.
-
Ellipse created by Ellipse tool are imported as Eclipse object.
-
Star and Polygon are imported as Star object if both of the following are true:
-
Inner and Outer roundness is 0.
-
Star point is integer number.
-
-
Shape created by Pen tool are imported into Polygon object.
-
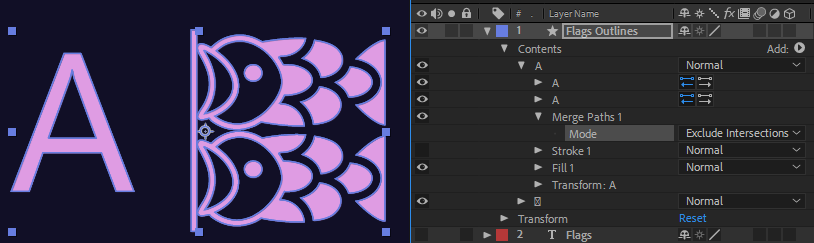
Converted shape from text, each character of it contains multiple paths.
Shape of each character merge all paths in a special mode (be decided by After Effects among Add, Subtract, Intersect and Exclude Intersections depends on the overlapping and direction of each path) that we not support it even most of character works with our simple merging method Exclude Intersections, manually change Merge Paths mode of all characters to "Exclude Intersections" can make this layer be import into Polygon object instead of video.-
Use Horizontal or Vertical Type Tool to create a text layer.
-
Right click on the text layer and select Create Shapes from Text.
-
Expand Merge Path and change Mode to Exclude Intersections.
-
-
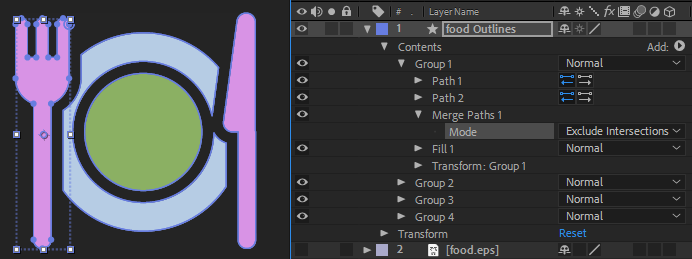
Convert shape from imported external vector graphic file such as .eps. This is similar to the converted text but it might have many groups of paths.
To import .eps file to After Effects and make it be able to imported as as Polygon object in Viz Artist.-
Press CTRL+I and select a vector files.
-
Right click on the vector layer of automatically created composition and select Create Shapes from Vector Layer.
-
Expand Contents and every groups inside, each group is the same as character of converted text.
-
Expand Merge Path and change Mode to Exclude Intersections.
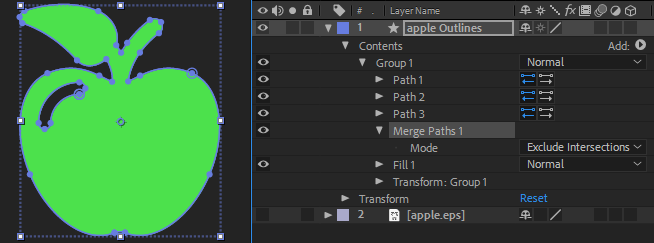
Some converted vector shape have multiple group of merged paths and not work with Exclude Intersections merging and mostly one group with single path is used as boundary.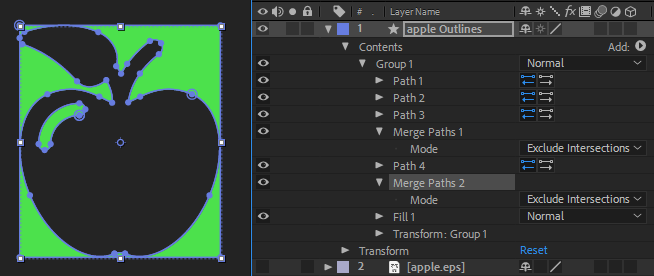
In this case, that group (Merge Paths and its above Path) can be deleted and other groups can use Exclude Intersections creates correct result.
-
We support layer animation but not object animation inside, the layer is imported as video if any properties of them have a key-frame.
-