
Viz Artist User Guide
Version 3.12 | Published October 17, 2019 ©
Modify Container Properties
When a Container is selected in the Scene Tree, the selected Container property, for example the transformation properties, can be modified in the Properties panel.
Items stored in the Graphic Hub database can be added to Scenes:
-
Geometry or Fontstyle items create a new Container using the item as geometry.
-
Materials and Audio clips can only be applied to existing Containers.
-
Images can be added as a geometry of a Container, or applied on an existing Container as a Texture.
-
Geometry plug-ins can also be added to the Scene.
See Container and Scene Properties for details on how to add properties to Containers.
This section contains information on the following topics:
Multiple Selection Container Properties
When multiple Containers are selected in the Scene tree, properties can be applied to all the selected items. This multiple selection feature is global. Select the required Containers then apply the appropriate property.
To Add Properties to Multiple Containers
-
Multi select the required Containers.
-
Add an item or plug-in:
-
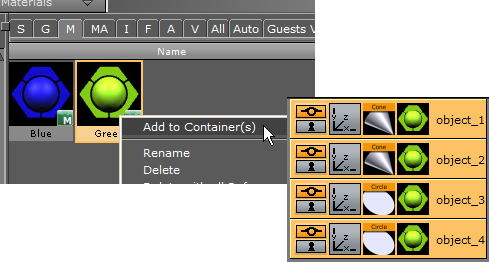
Right-click on an item or plug-in the Server panel.
-
Select Add to Container(s) (if available).
or
-
Drag an item or plug-in to one of the selected Containers
Example:
-
-
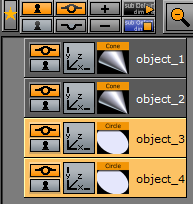
Create four Containers, named object_1 to object_4.
-
Multi select two Containers.
-
Right-click on the Cone Geometry, and select Add to Container(s).
-
Multi select two Containers.
-
Right-click on the Circle Geometry, and select Add to Container(s).
-
Multi select all four containers.
-
Right-click on a Material, and select Add to Container(s).
To Change Specific Properties on Multiple Containers
-
Multi select the required Containers.
Note: If several or all, of the Containers in a Scene are selected and contain the property to be modified, then all selected Container properties of this type are changed.
-
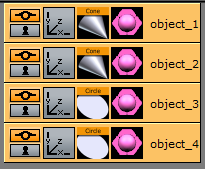
Change a parameter of the Circle Geometry. The modified parameter applies to both selected Containers, which contain the Circle Geometry (object_3 and object_4)
If, in the example above, the Material property is modified, the change shows on all selected Containers in the Scene.
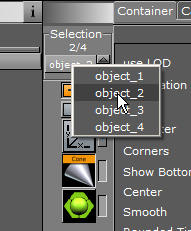
To Select a Container in a Selection
Select a different Container in the selection without loosing the multi selection.
-
In the Selection panel select another Container. Either:
-
Use the up and down arrows, or
-
Click on the Container, as shown in the image below
Tip: Visit www.vizrt.com to see a short video illustrating the Viz Artist Multi-selection Features feature.
-
Edit Properties in the Scene Editor
Some transformation parameters can be changed directly in the Scene Editor through the manipulation of handles.
Plug-in Editor
When a Geometry, Container or Shader plug-in is added to a Container its properties are available in the Properties panel. Each plug-in may or may not have properties that can be modified.
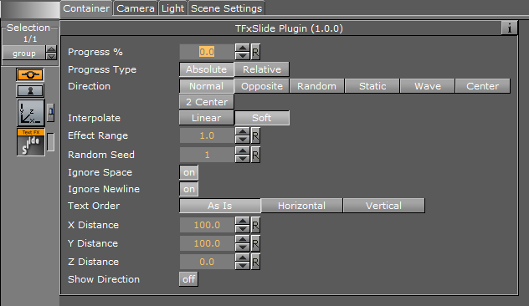
Click on the information icon ( ![]() ) to show details about the selected plug-in, if available. Additional information may also be available in the Plug-in section of this User Guide, see these sections for more information:
) to show details about the selected plug-in, if available. Additional information may also be available in the Plug-in section of this User Guide, see these sections for more information:
Material Editor
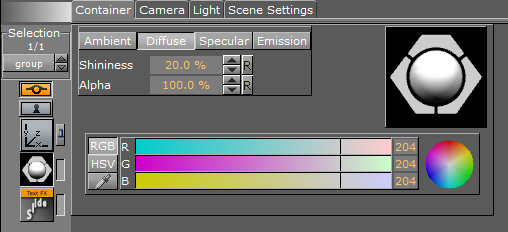
When a Material has been added to a Container, the Container-specific Material can be modified in the Material Editor that opens in the Properties panel. Only the Container-specific Material is modified, the original Material in the Graphic Hub database is not affected. See Working with Material and Material Advanced Items.
To Modify a Scene Specific Material
-
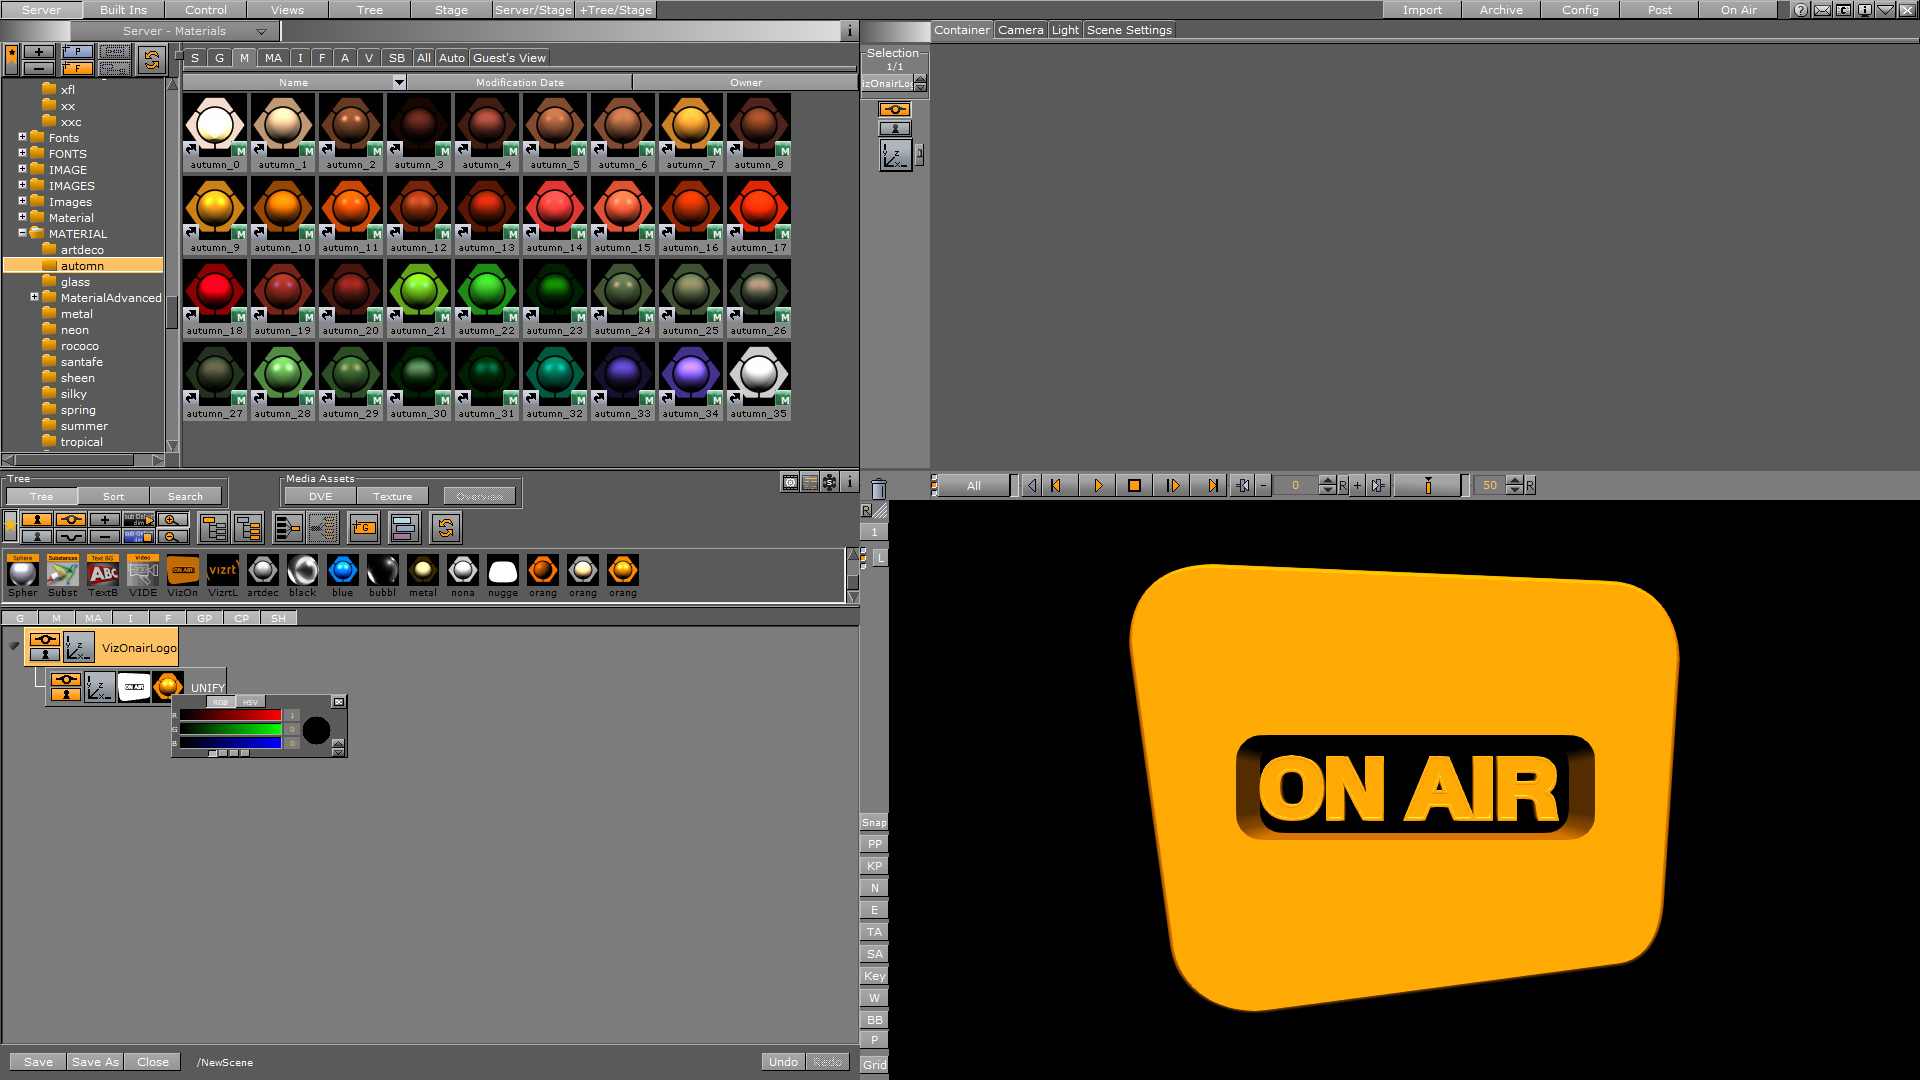
Click the Material icon in the Container (1) or Properties panel (2).
In this example, the Properties panel Material Editor (3) is shown.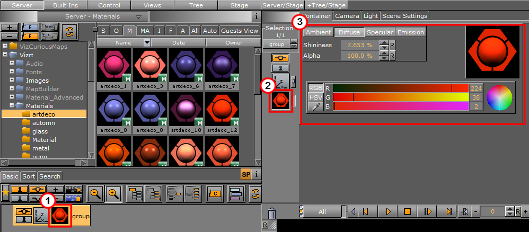
-
Adjust the color properties and schemes as necessary.
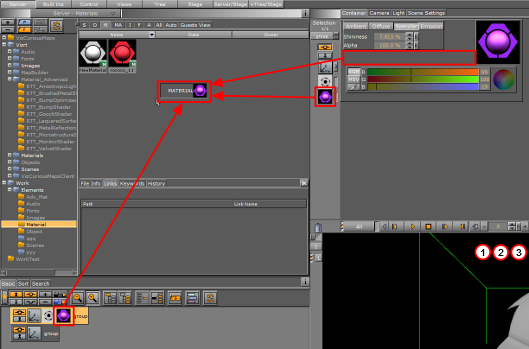
To Save the Container Material
-
Move the modified Material to the Server panel:
-
Drag the material icon from the Container to the Server panel, or
-
Drag the material icon from the Properties area to the Server panel, or
-
Click in the Material properties panel and drag the material icon to the Server panel.
-
-
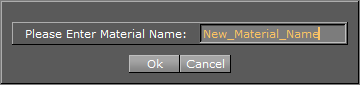
Enter a name for the material.
-
Click OK.
Quick Edit a Material in the Scene Editor
To quick edit a material in the scene tree, click with the middle mouse button over the container material. This opens a quick editor for colors directly inside the scene tree, enabling immediate color changes.
-
Pressing the TAB button switches between the R, G and B values.
-
Pressing CTRL+TAB switches between the Ambient, Diffuse, Specular and Emission colors.