Viz World Classic User Guide
Version 23.0 | Published December 12, 2023 ©
Adding Graphics to Images
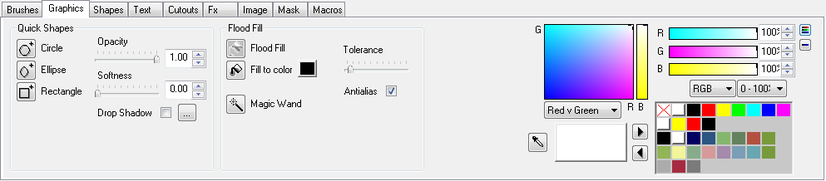
The Graphics panel allows you to draw simple geometric shapes directly onto an image, or a frame of a movie. These tools provide a convenient way of creating a solid area of color in an image or a simple mask, where you do not need the flexibility and editability provided by the options on the Shapes panel.
Like the tools on the Brushes panel, the tools on the Graphics panel affect the image immediately, without needing to be stuck to the image. If you want to create editable shape overlays use the options on the Shapes panel instead.
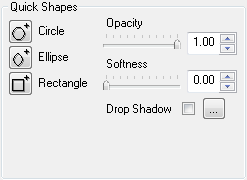
To Draw a Quick Shape
-
Use the paint controls to specify whether the shape is drawn into the image and/or mask, and whether it is protected by the mask.
-
Use the Color Chooser to specify the shape color.
-
Select the Circle, Ellipse, or Rectangle tool in the Quick Shapes section:
-
Drag to draw the shape. You can hold down CTRL to constrain the shape to a circle or square respectively.
-
Release the mouse button to draw the shape.
To Define the Drop Shadow
-
Click the ellipse (...) button to the right of the Drop Shadow checkbox. The following dialog box allows you to define the drop shadow:
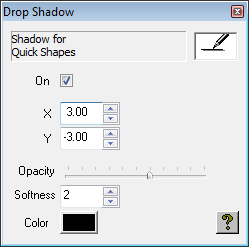
Note: This only affects shapes you subsequently draw.
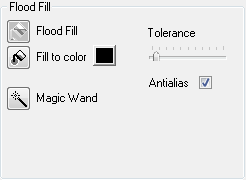
To Flood Fill Areas of the Image or Mask
The Flood Fill tools allow you to fill a contiguous area of pixels with the current color:
-
Use the Color Chooser to specify the color to fill with.
The tools are described as follows:-
Flood Fill: Flood fills areas of uniform color in the image.
-
Fill to Color: Flood fills the image up to the color specified by the Fill to Color box.
-
Magic Wand: Flood fills the paint mask based on areas of uniform color in the image.
-
-
After selecting the appropriate tool: click on a color to start filling from that color.
-
Move the Tolerance slider to the right to flood a larger range of colors around the color you first clicked on.
-
Select Antialias to blur the edges of the filled area.
With the Magic Wand tool you can click additional areas to add to the mask, or click with SHIFT to remove areas from the mask. The Magic Wand tool is particularly useful for making cutouts; see Creating Cutouts.
Transforming Images
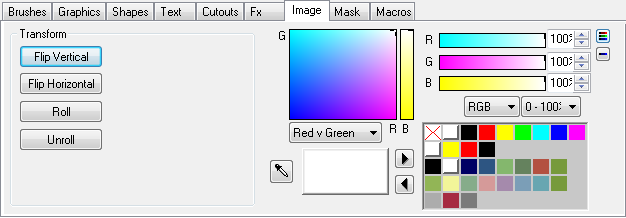
The options on the Image panel on the Paint panel allow you to transform an image or movie. The Roll operation is designed to assist in creating textures that tile seamlessly.
To Flip the Image about a Vertical or Horizontal Axis
Click the Flip Vertical or Flip Horizontal button.
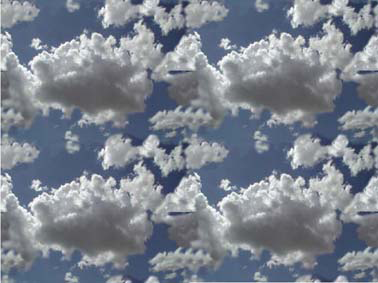
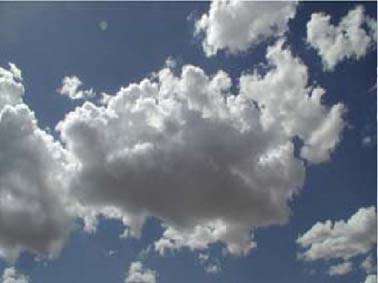
To Create a Seamlessly Tiling Image
The following example shows how to create a seamlessly tiling texture from an image.
-
Load the image into a new layer:
-
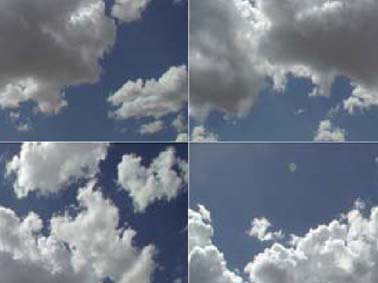
Click the Roll button. This exchanges opposite quadrants of the image:

-
Use the painting tools, such as Blur and Clone, to make the joins look invisible:
-
Click the Roll button again to create the image:
-
This image can then be used to tile seamlessly, without any visible joins: